
Installation Instructions.


How Many Serpent Inflatable Flood Control Tubes Do I Need?
Serpent inflatable flood control tubes come in 30ft and 15ft long sections. If you have a 100ft run, you would want to purchase 3 of the 30ft Serpent Tubes and one of the 15ft Serpent Tubes, providing you with 105ft of coverage.
In most scenarios, there is some level of flexibility on the length of protection, particularly for perimeter protection and water redirection needs. However, if you are limited in space (i.e. the opening you are protecting is exactly 100ft), you may want to angle the tubes in an arc shape, to fit your opening site while still providing edge-to-edge coverage.
The other option is to utilize other Garrison products, such as Mayim or Beluga barriers, to fill the 10 ft gap left if only 3 of the 30ft Serpent tubes are purchased.

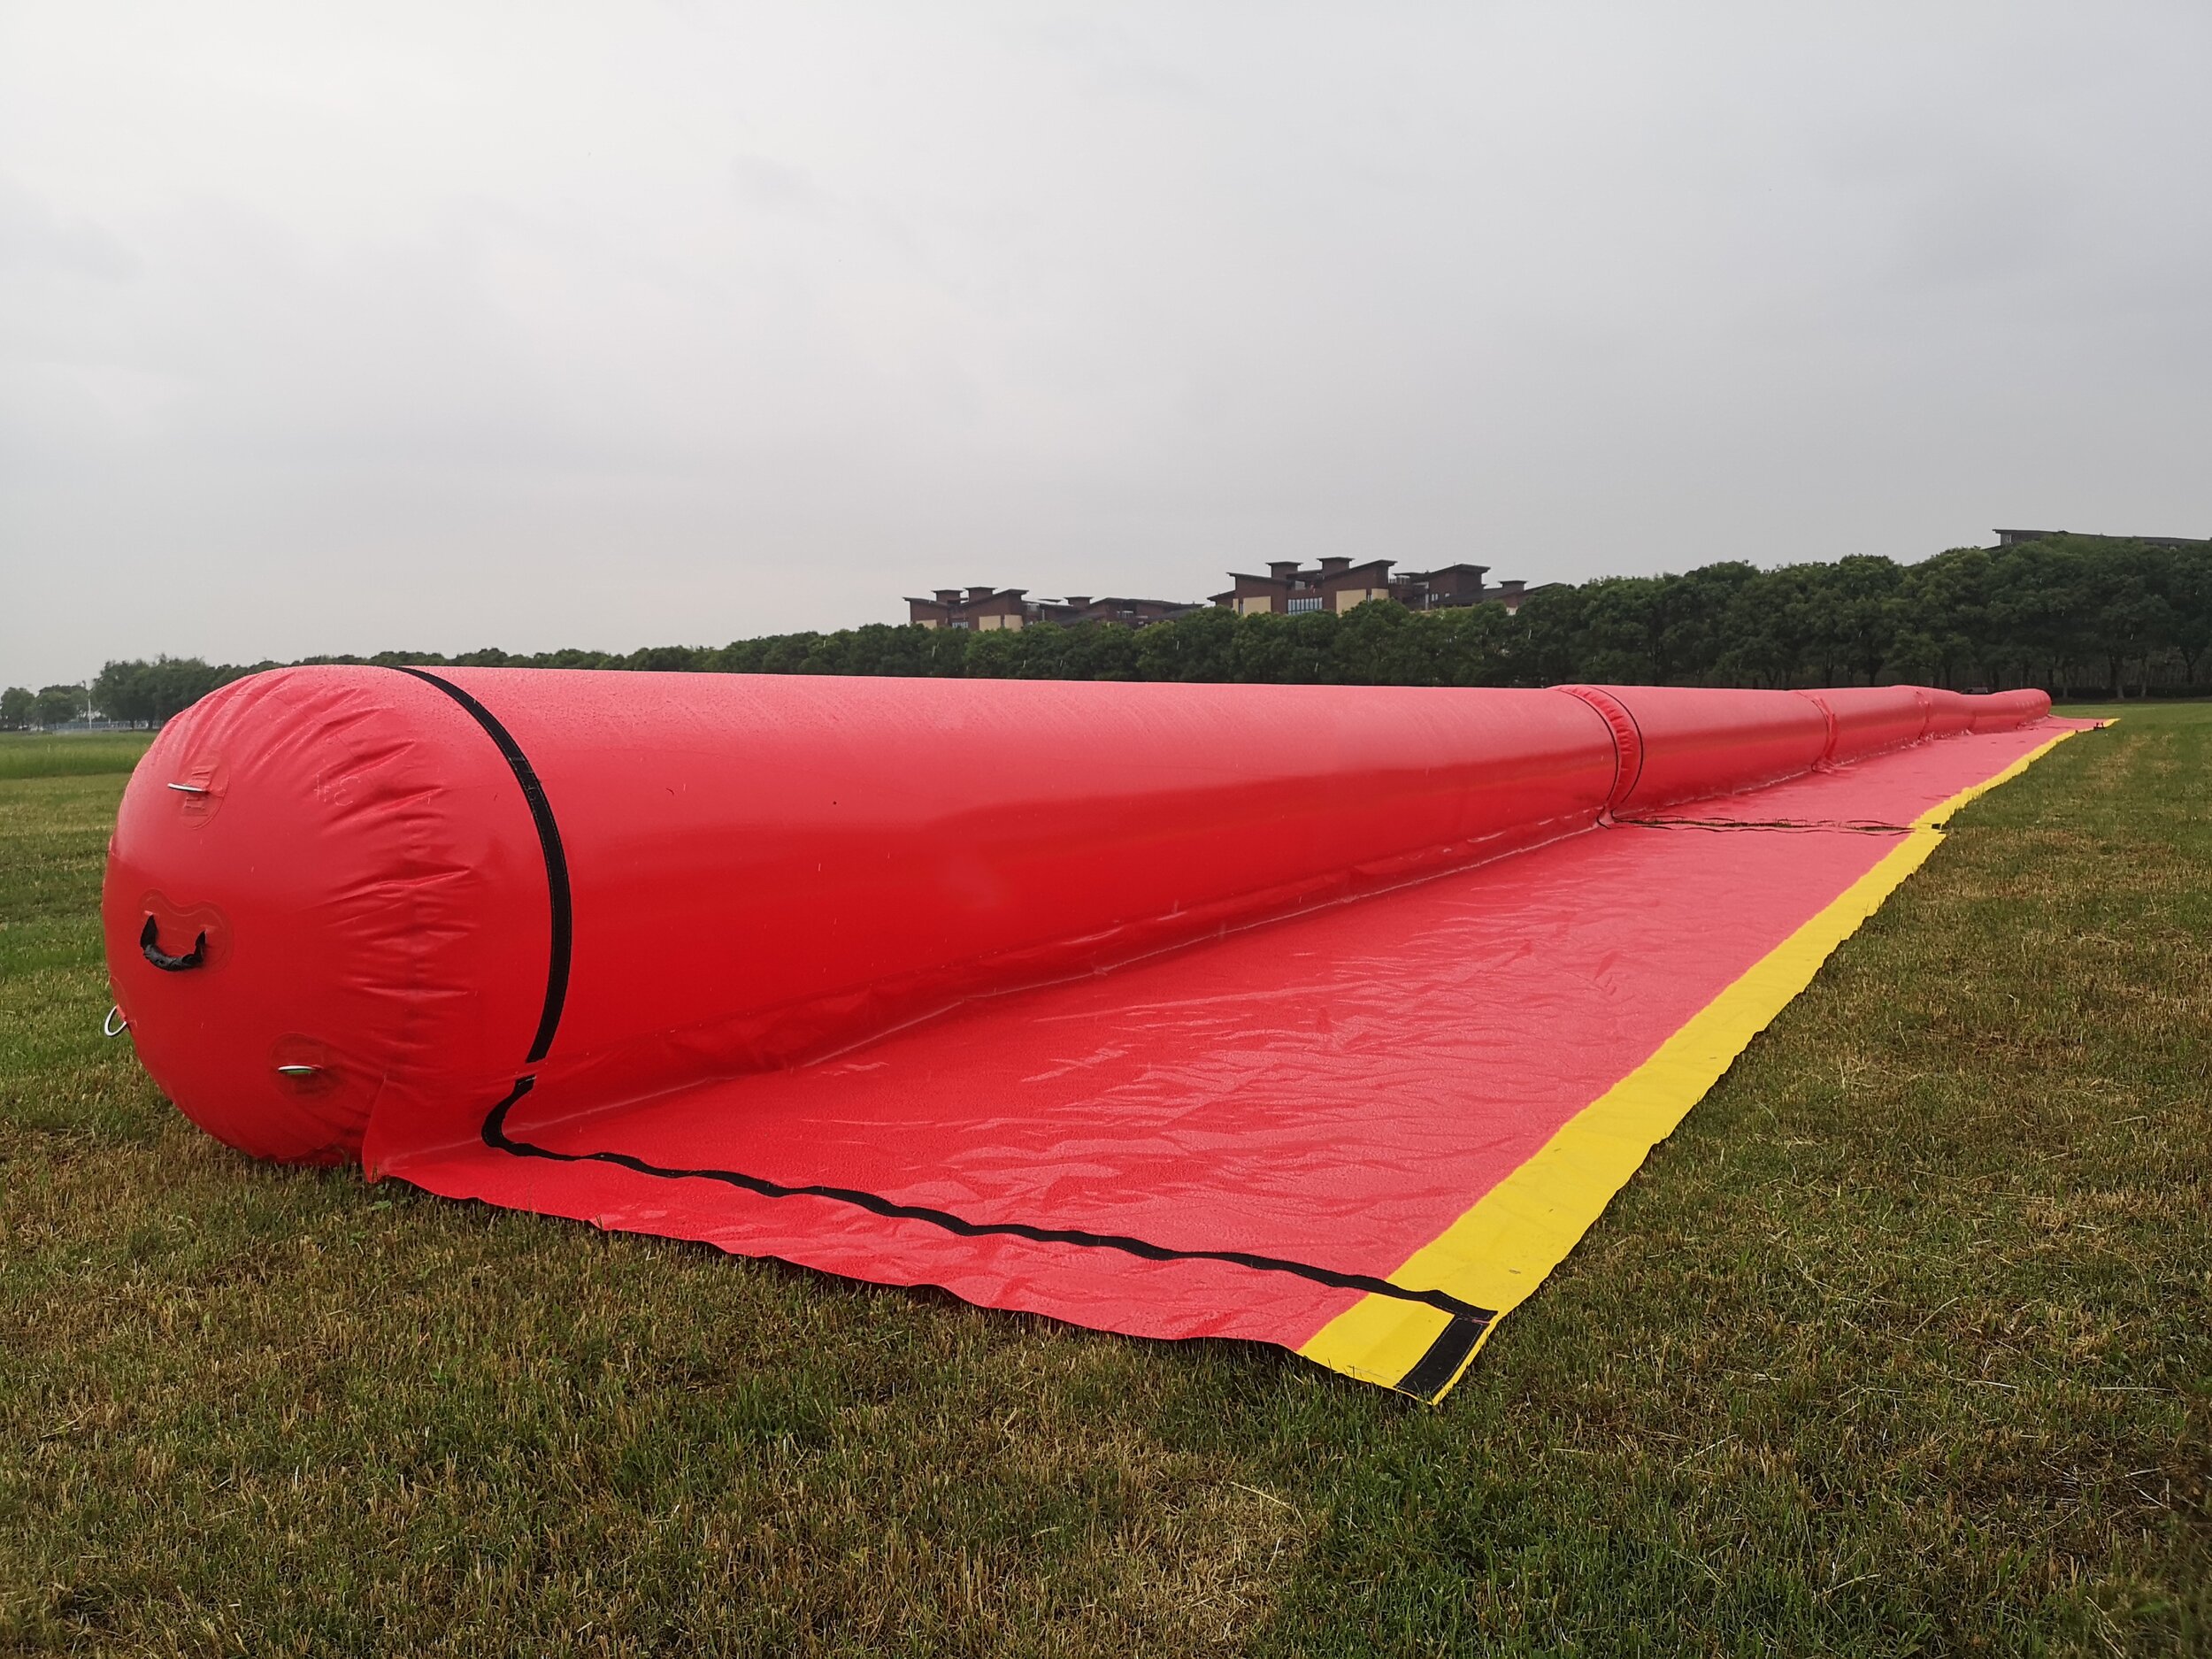
Unroll Serpent Barrier.
Remove Serpent inflatable tubes from storage and move to the site. Remove the Serpent from the storage bag and unroll the first tube at the desired place and in the direction flood control is needed. Unfurl the folder tube, so that the tube is open and ready for inflation and the skirting (yellow warning line at the end) is extended to the water facing side. Repeat as needed with additional tubes.
We suggest placing Serpent barriers at the highest point possible above rising floodwaters, such as on the top of a berm or hill. This method allows you to use natural topography features to provide additional flood protection.
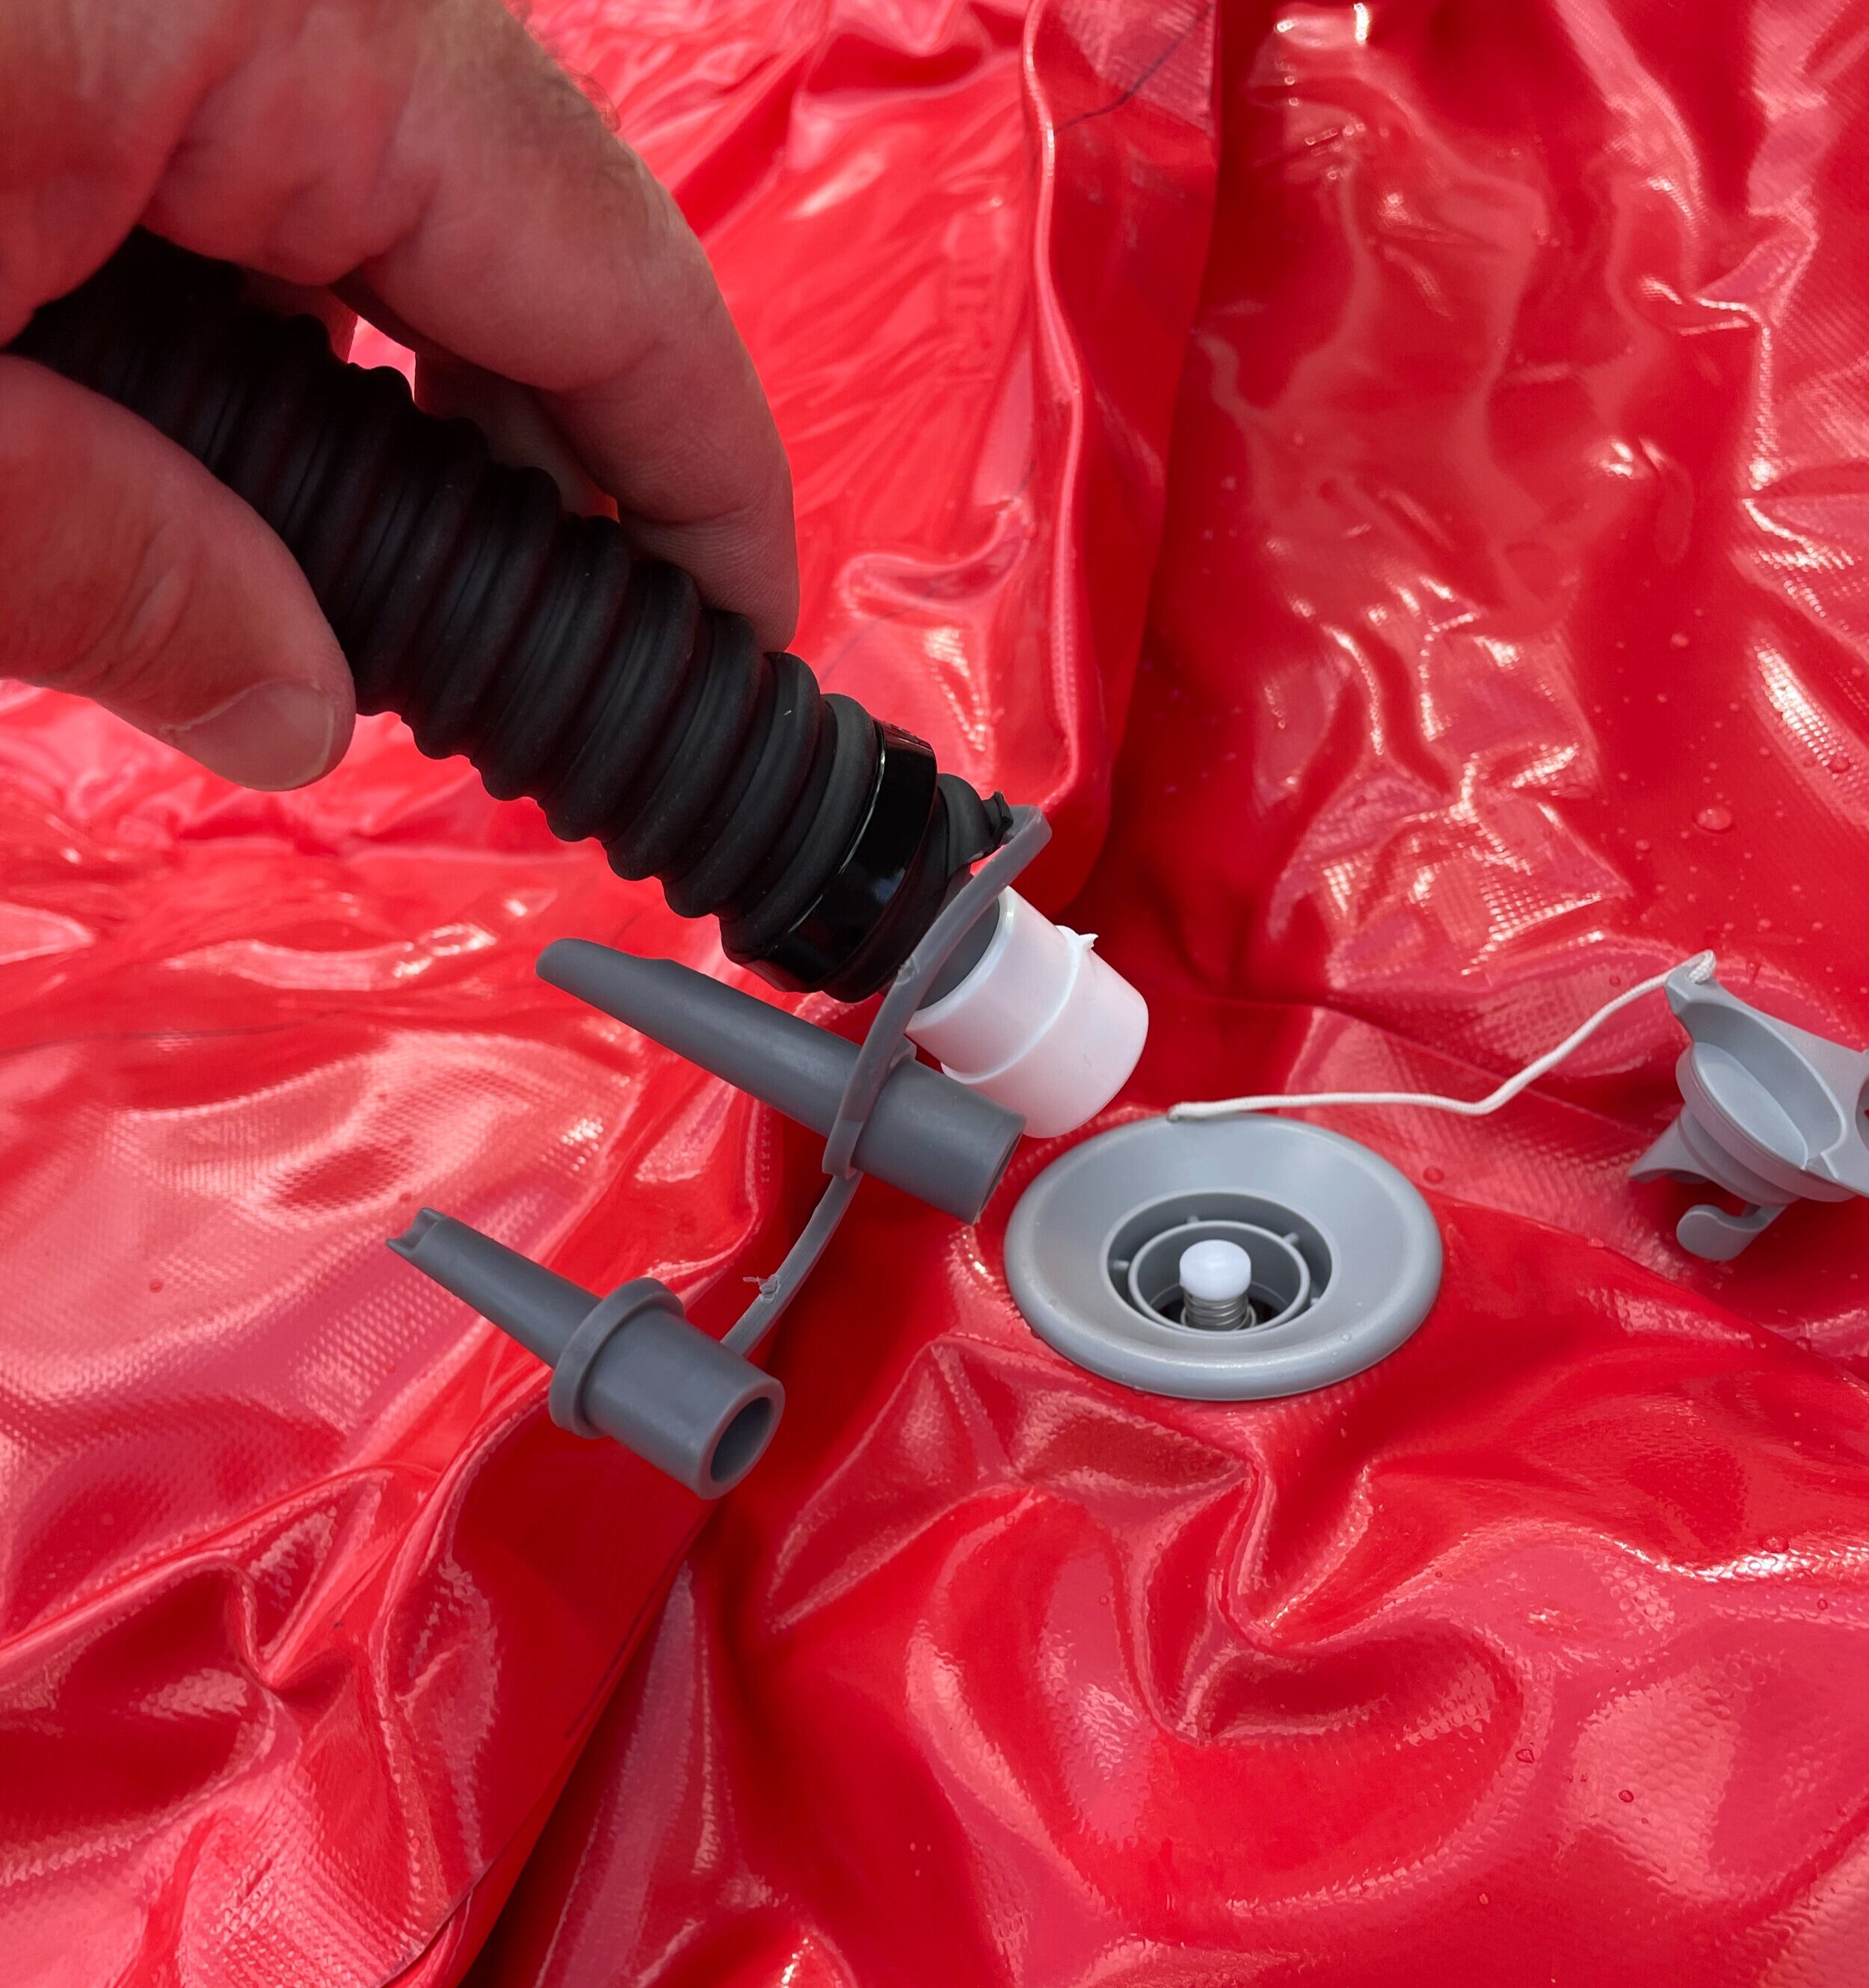
Inflate Flood Tube.
Unscrew the valve cap to expose the inflation valve. Use a standard electric pump (electric (AC), or car lighter powered (DC)) to inflate each tube to capacity. Usually this takes about 12-18 minutes at 6 psi. Once inflated, replace the valve cap to prevent air leakage. Make small adjustments to tube positioning as needed.
Note: Many cars no longer have DC (lighter style) plugs, but many pick up trucks do have AC connectors. We suggest reviewing your pump power options prior to a flood event.

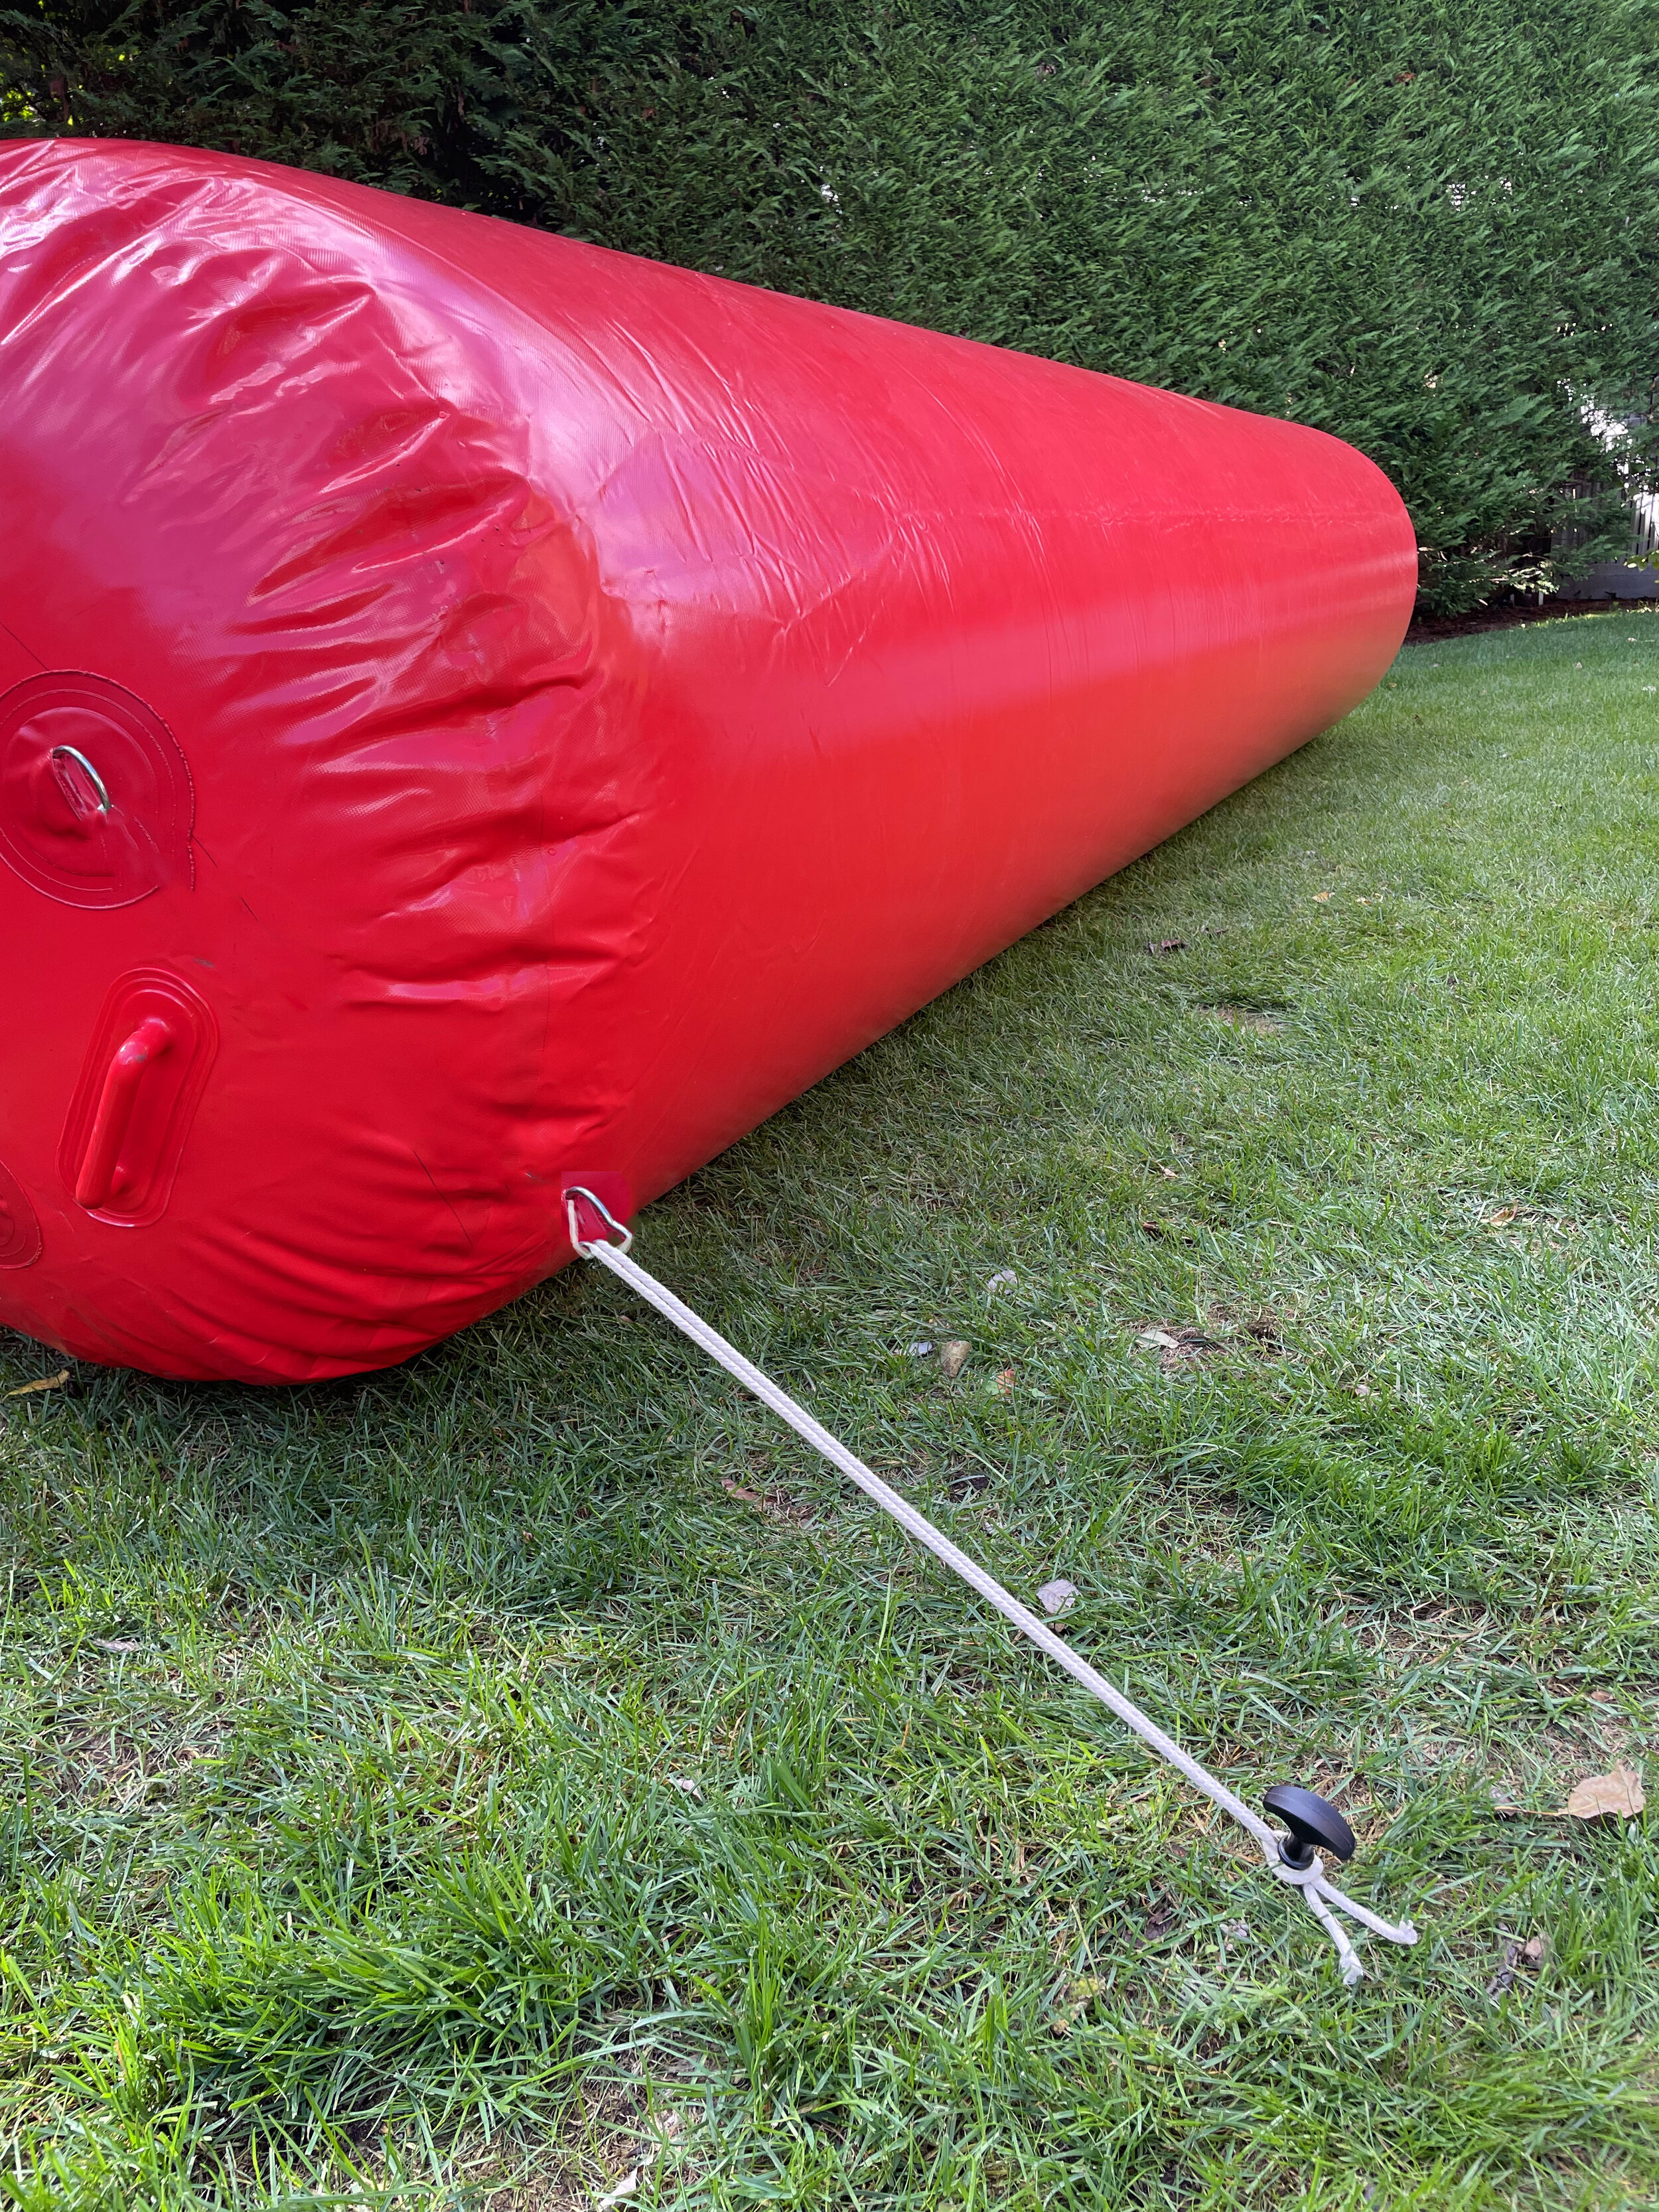
Attaching optional staking ropes.
String rope through the buckles attached to the body of each Serpent tube and tie a knot at the end, through which a ground stake can be placed. Insert the ground stake through the knot loop, tighten the line, and pound the stake into the ground (if/when possible depending on ground surface).

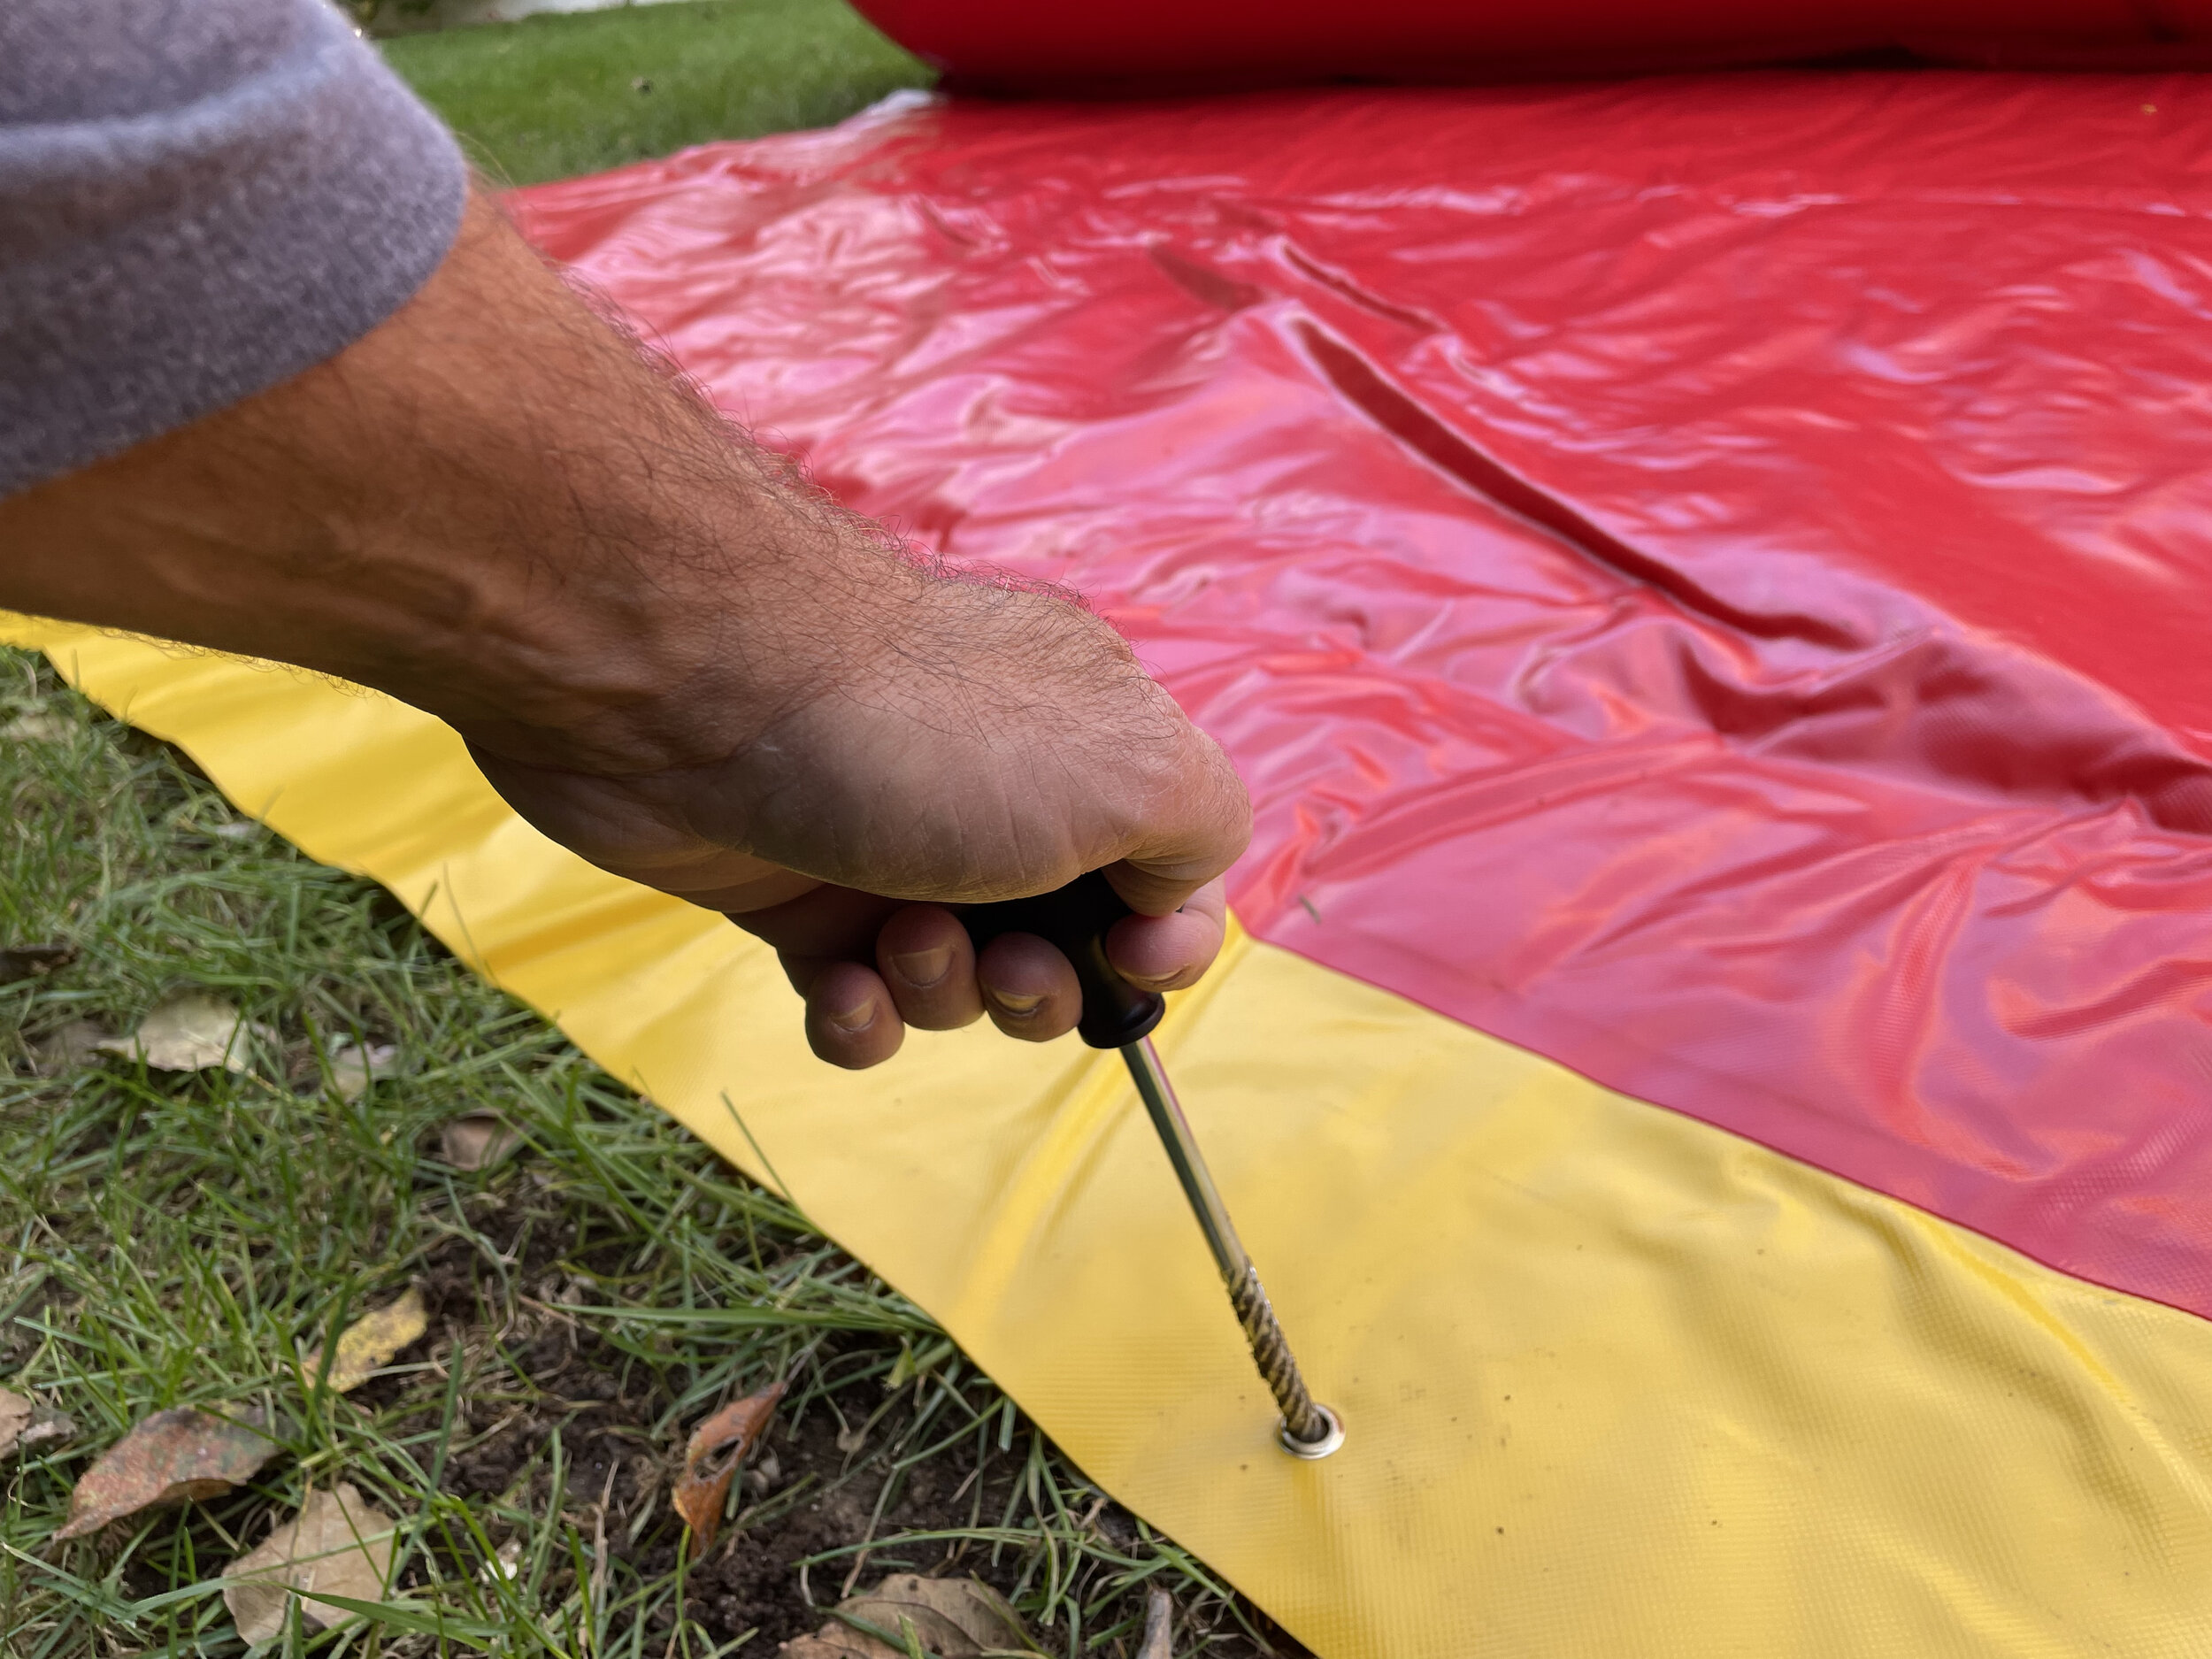
Staking Down The Skirting.
Make sure that the skirting is unfurled and laid flat alongside the inflated tube. Skirting should face the water side of the tube. This skirting is used to provide ballast once water flows towards the Serpent tube and rises. Insert stakes into the reinforced holes through the pre-placed grommets.
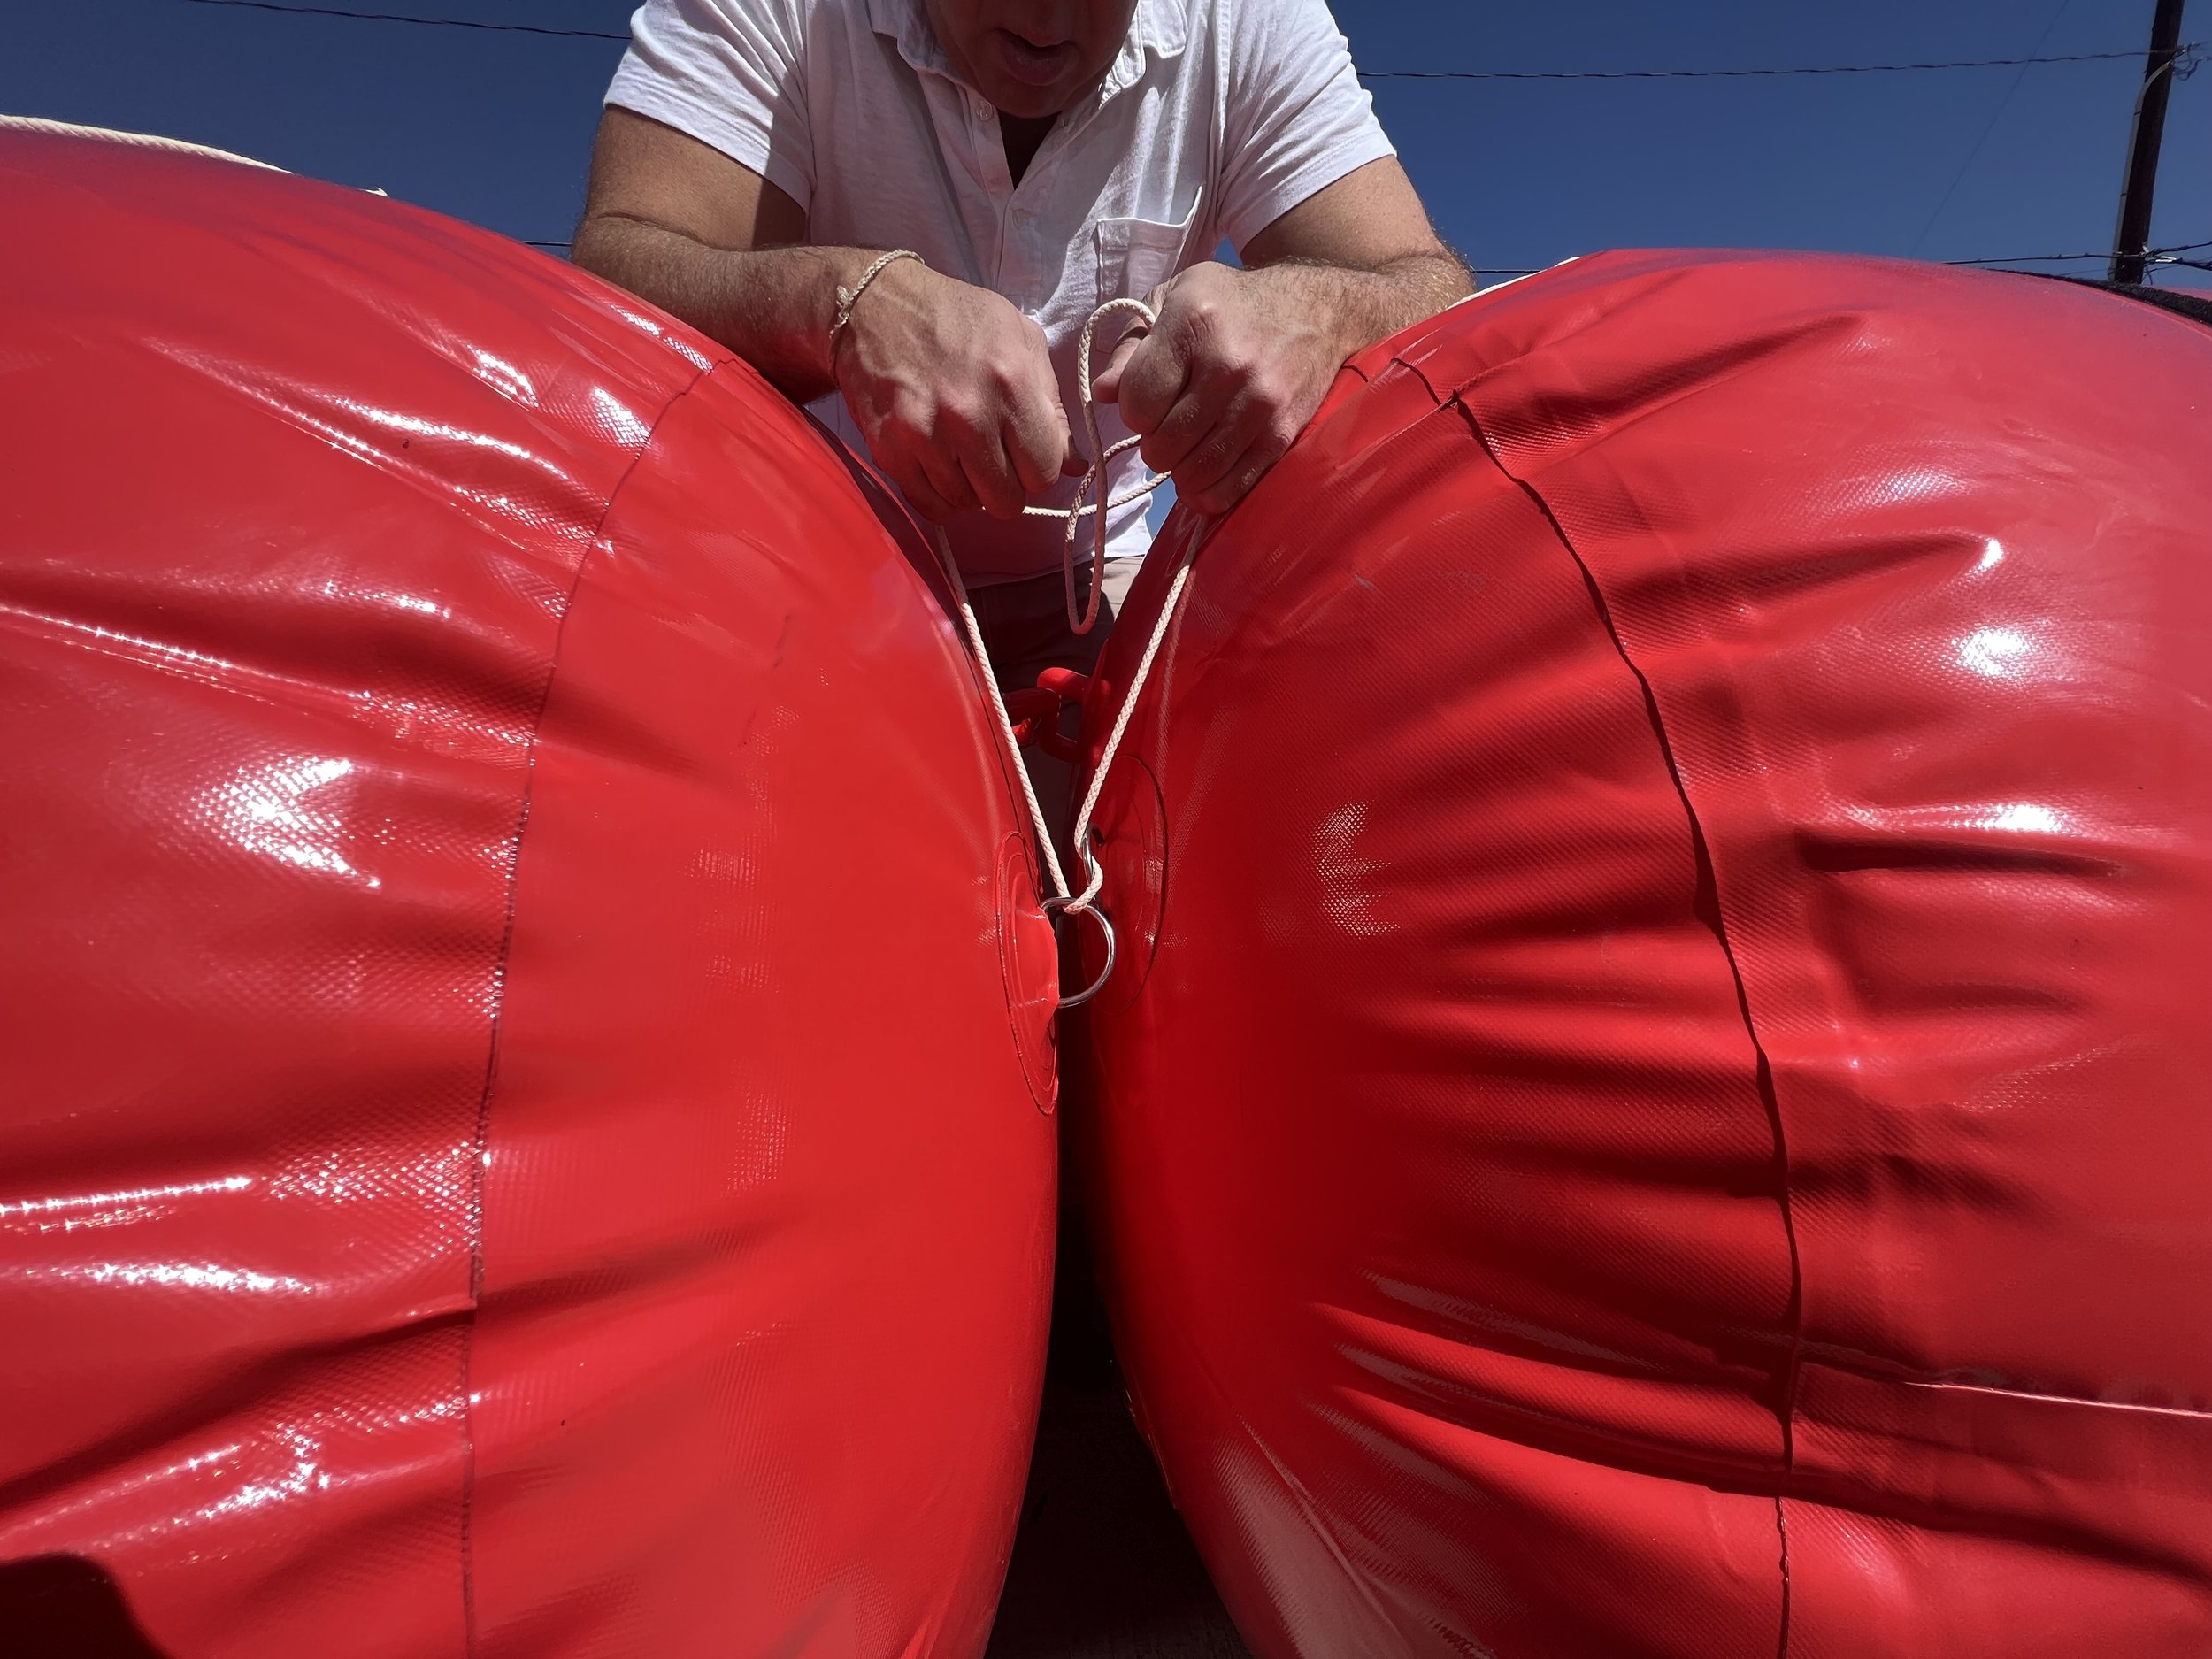
Securing Tubes to Each Other.
Insert rope through the metal loops on the ends of adjacent tubes and tighten the tubes to each other, closing the gap between the tubes.

Attaching the Tube Connector Sheets To Prevent Leakage.
Velcro tube connector sheets are placed between Serpent tubes to seal the gap between tubes and to prevent leakage of water. Unroll and place the tube connector sheets evenly between two adjacent tubes, such that the Velcro from each sheet meets the Velcro strips on the ends of the tubes. Follow the Velcro to connect the sheets to both tubes and the skirting on each module.


