
Hammerhead™ Installation Instructions

Choose Inside or Outside Mounting Of Posts
Depending on your specific scenario, choose in advance between inside mounting of posts and outside mounting of posts. We typically recommend inside mounting, if possible, however note that this mounting method will narrow the opening slightly (about 4 inches on either side). Choose the best option for your opening or email us at sales@garrisonflood.com with an image of your opening and we can offer our suggestions.


*It is important to confirm that your structure can withstand the hydrostatic pressure of a flood for dry floodproofing standards.
Consult with local PE (Professional Engineer).
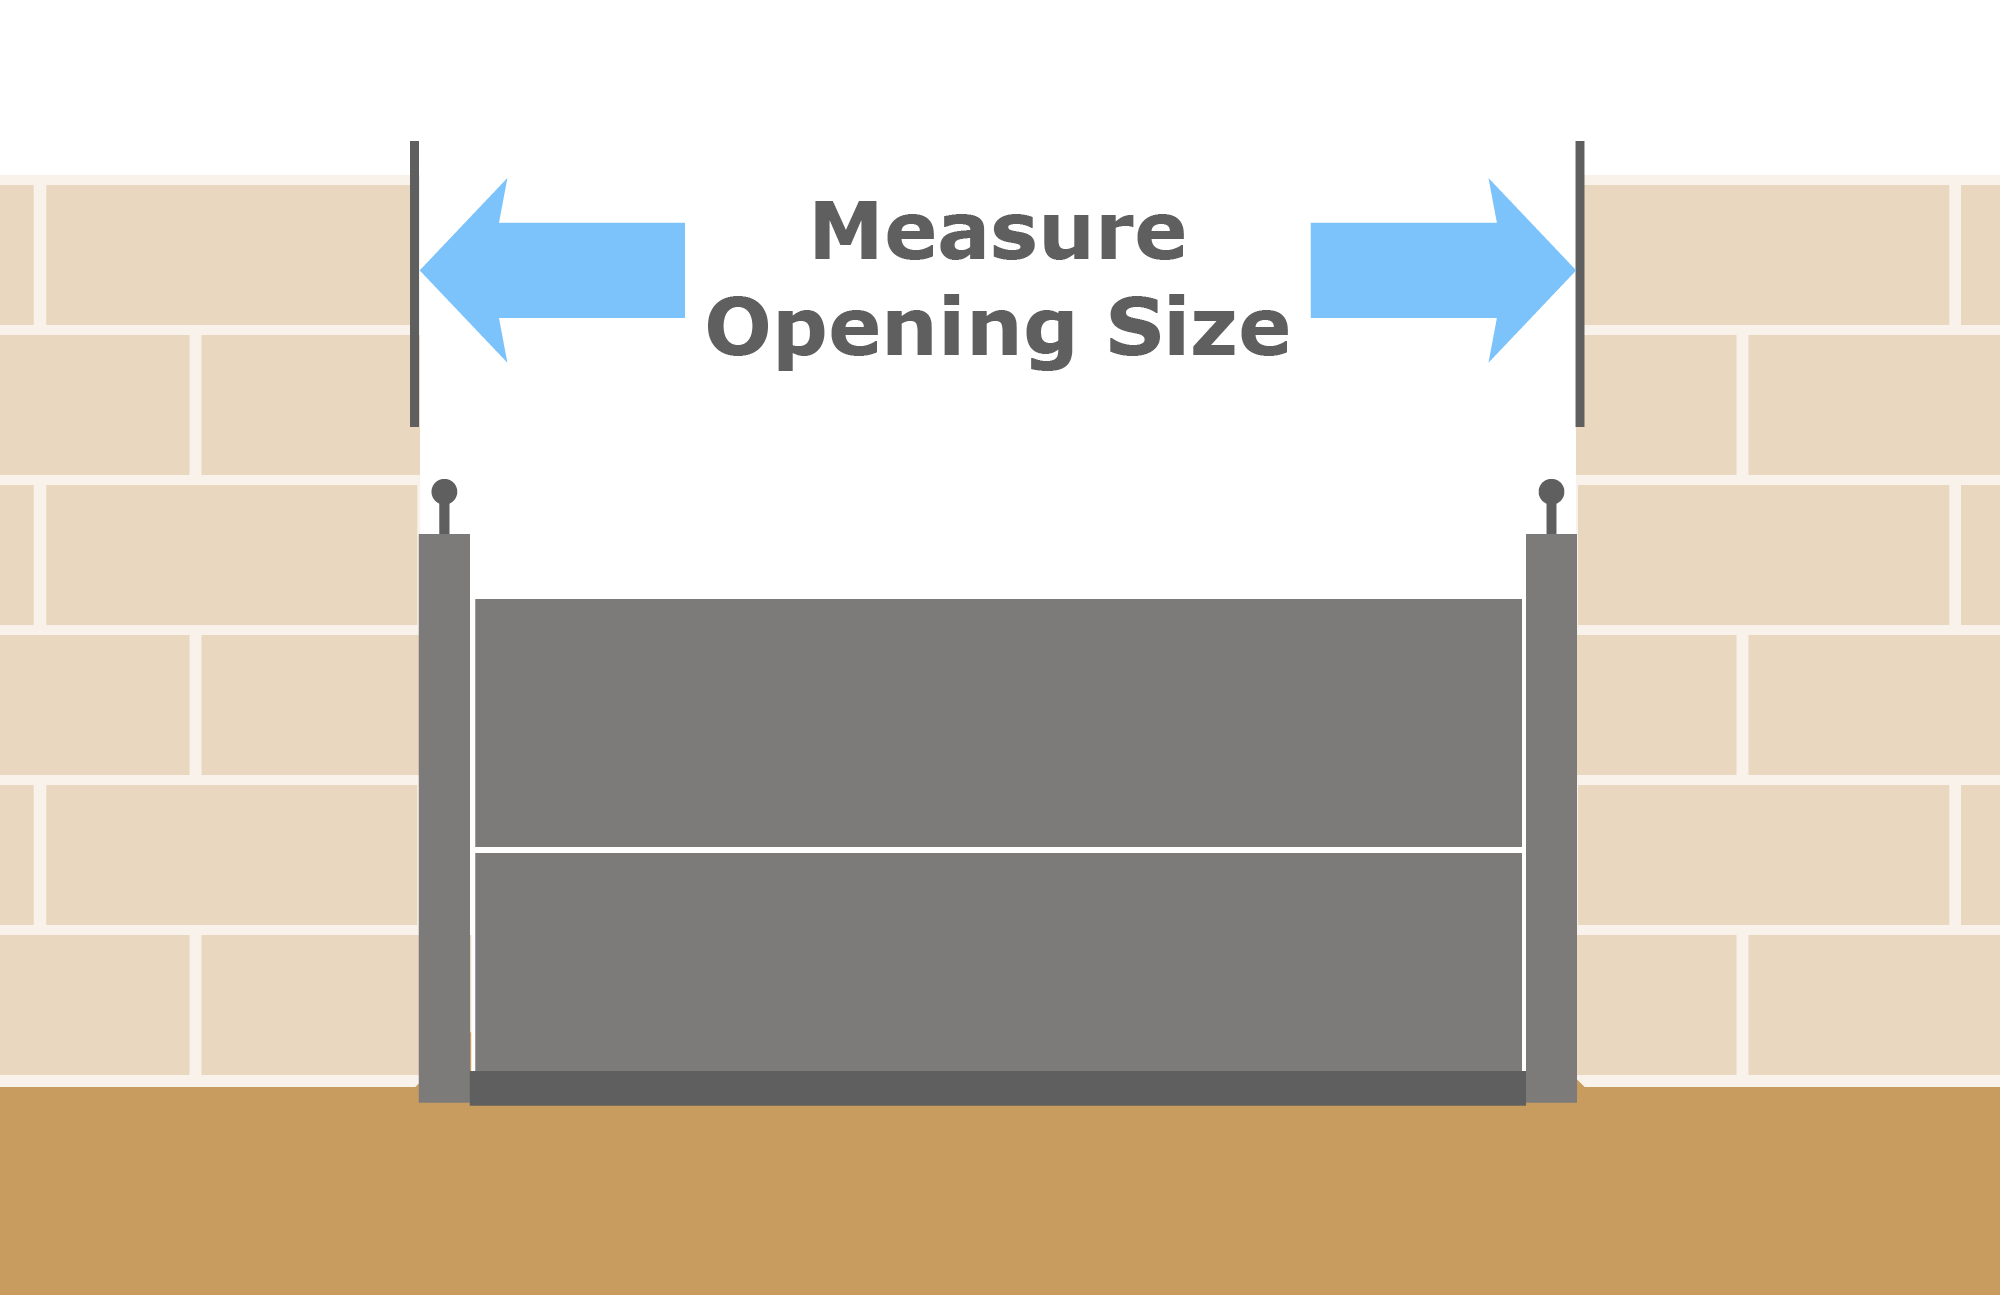
Measuring Your Opening
Measuring for Inside Mount
Measurement for Inside Mount
When measuring your opening for inside mounting of posts, measure the exact opening size, to the nearest 1/8”. Remember that you need enough room on either side of the opening to accommodate the posts both depth-wise and widthwise on your threshold or adjacent brick. For outward swing doors, you need to allow enough room for the door to clear the permanently installed posts.
Note: We will calculate the necessary plank size for each opening, considering insertion of planks in the posts, so we just need measurement of the ACTUAL opening size.

Measuring For Outside Mount
Measurement for Outside Mount
When measuring the opening for outside mounted posts, measure the ACTUAL opening size. Posts will be positioned outside of the opening.
Note: We typically add a few inches of plank span on either side of the opening, but if this is not desired due to space constraints and you wish posts to be mounted just on either side of the opening (no extra space), please let us know.

Measuring for Placement of Barrier Outside Door Frame But Inside Opening
Measuring For Mounting Posts Outside of a Door Frame
When door frames are not large enough to support Posts, consider mounting posts using the outside mounting method. Measurement should be taken brick to brick, outside of the door frame.
If the door frame is protruding beyond the wall surface, it is important that the planks can clear the doorframe. You need just over 19mm of clearance for the planks to be able to be slotted into the posts and tightened down. The planks will span post-to-post over the protruding door frame.
Note: For outward swing doors, consider mounting the posts on the inside of your door, if the side walls adjacent to the door are concrete, cinderblock or brick. This will allow you to both have protection and be able to swing open your door from the inside.
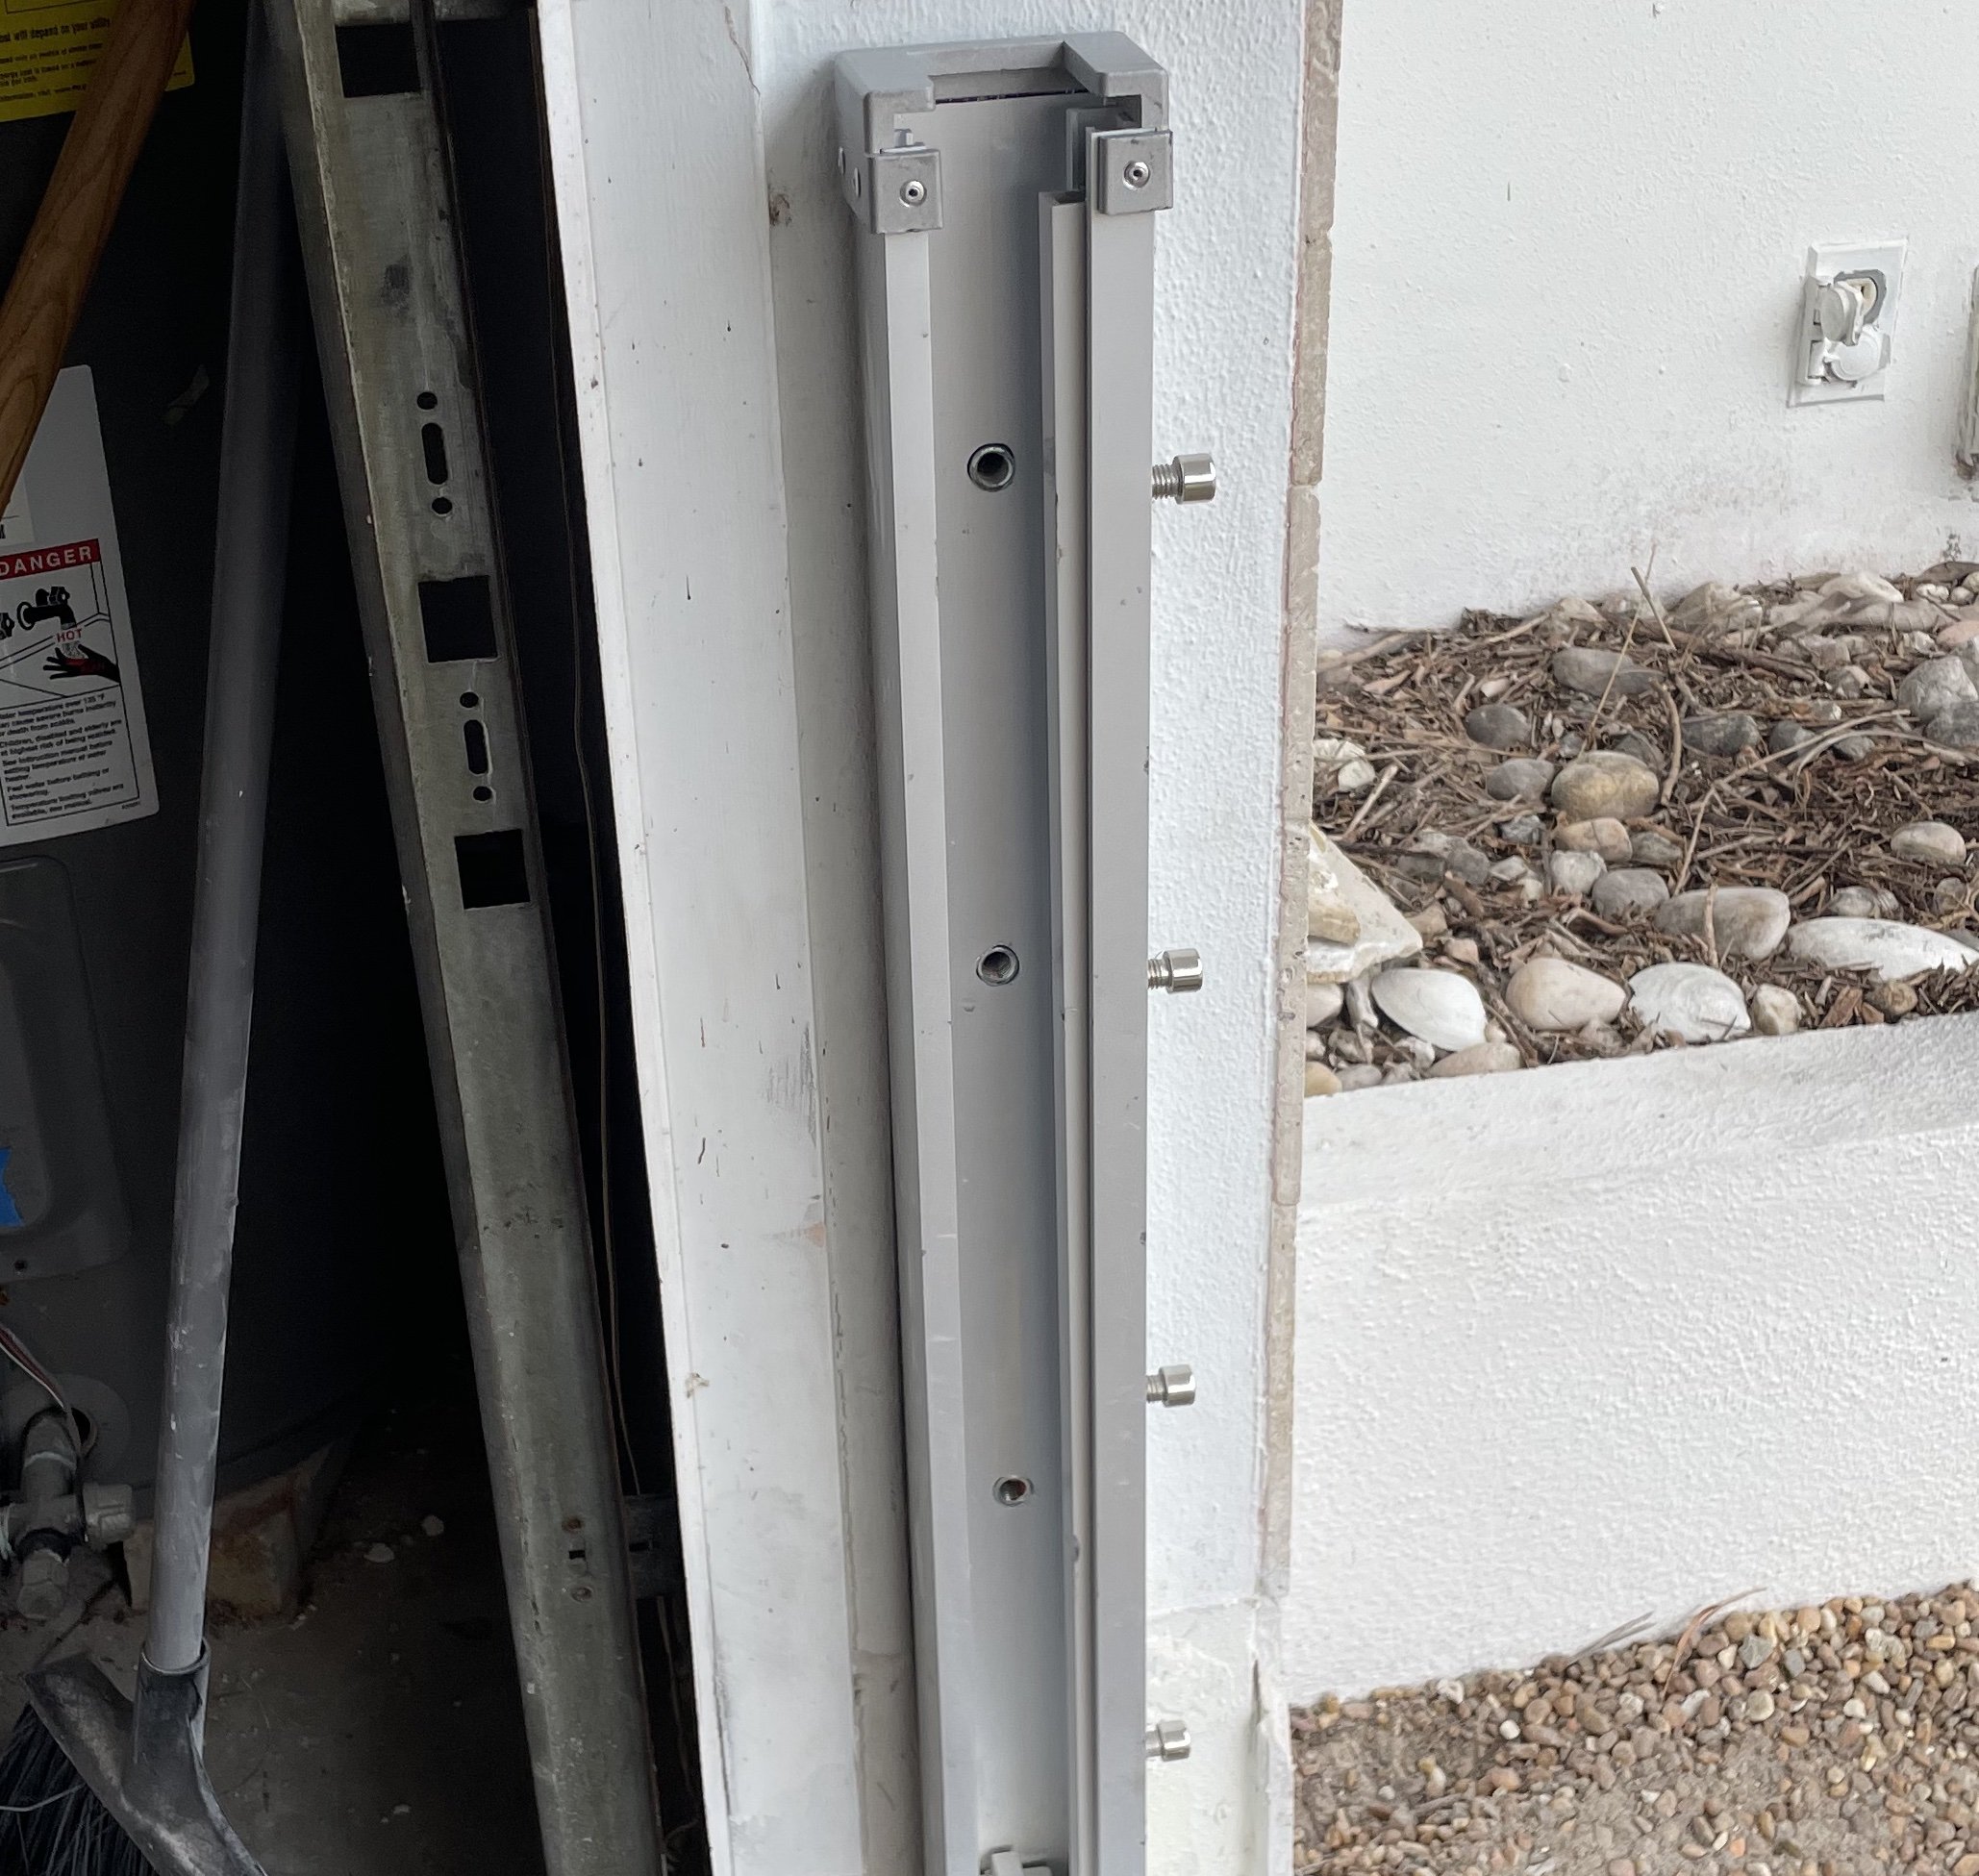
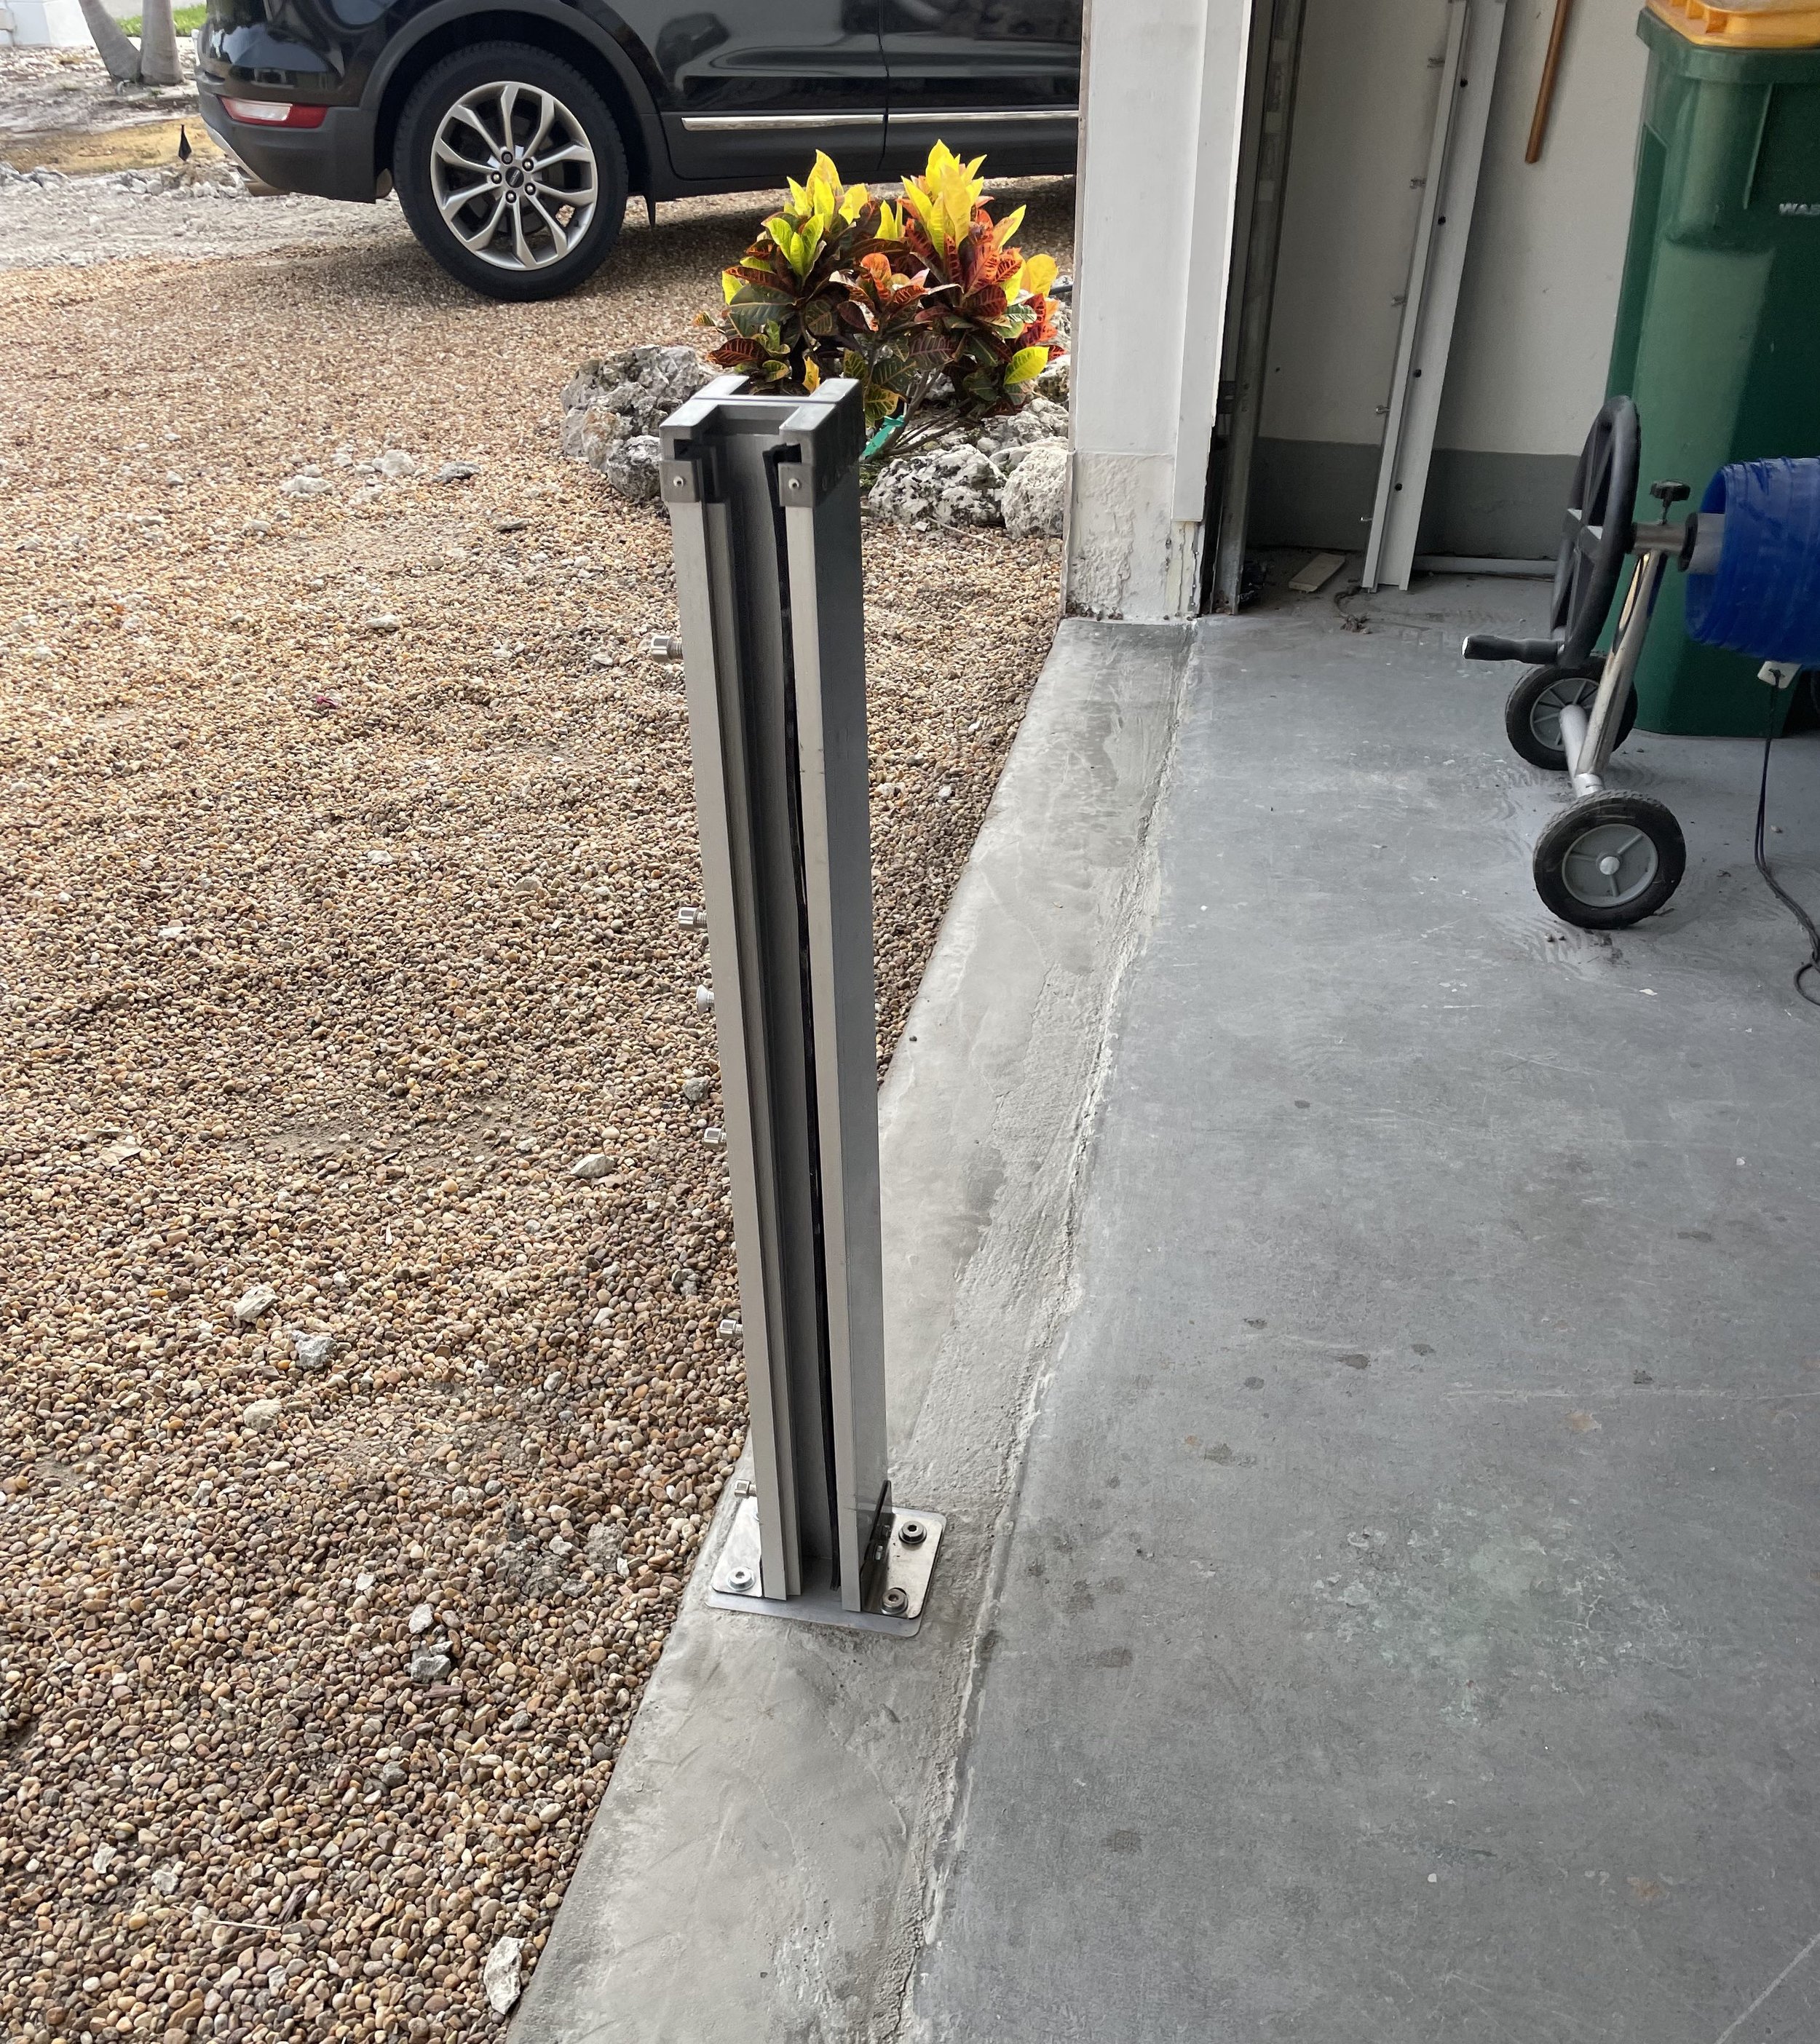
Support Post Installation
Installing Inside Mount Posts


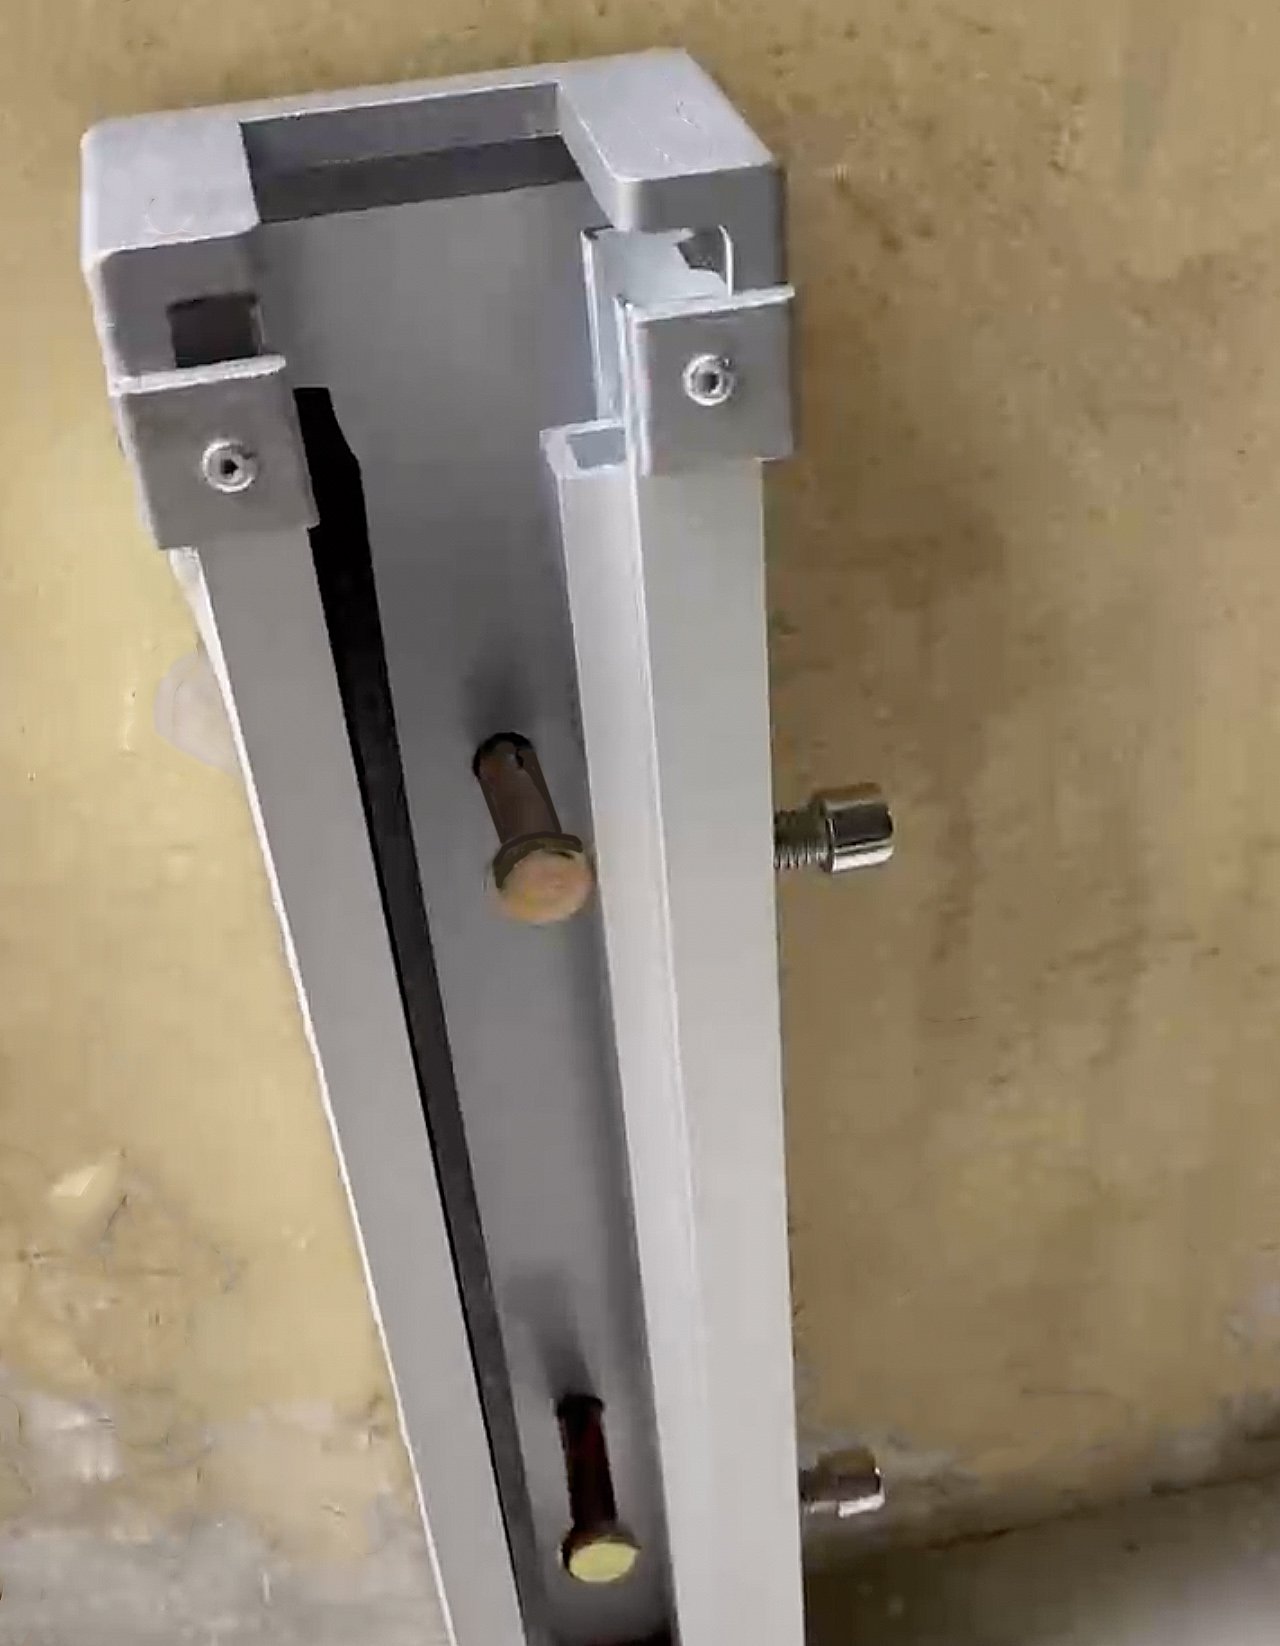
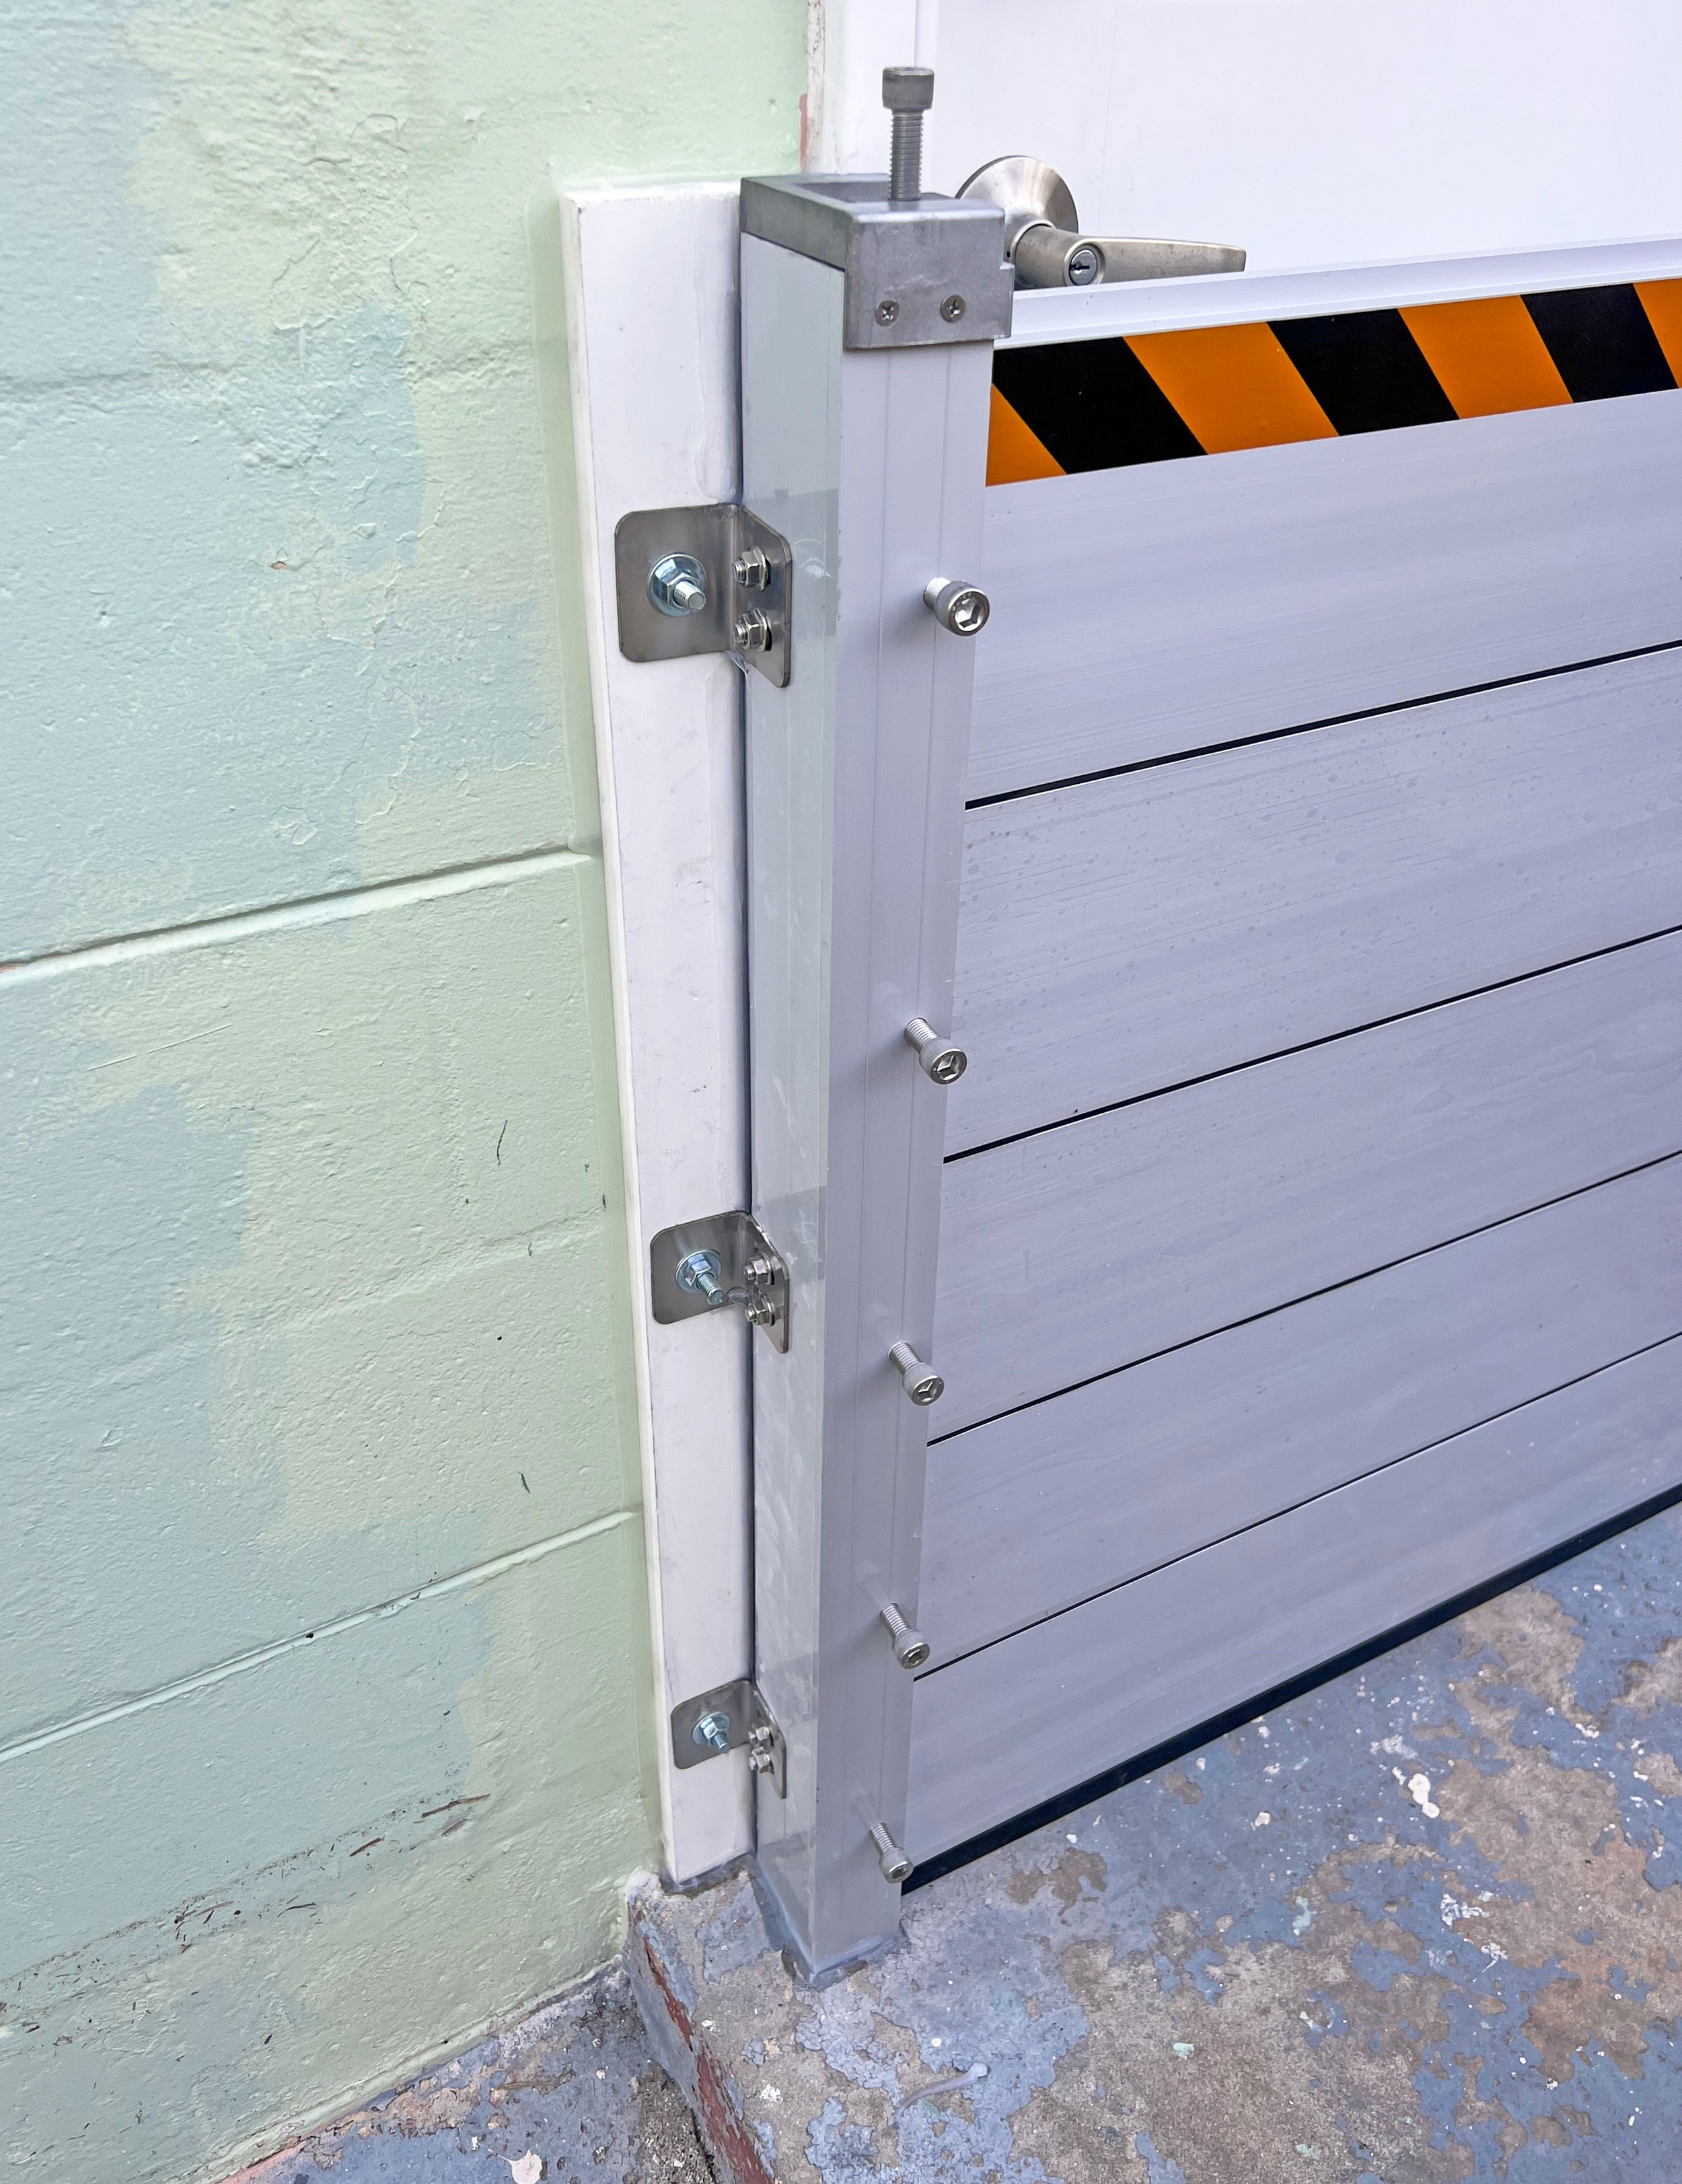
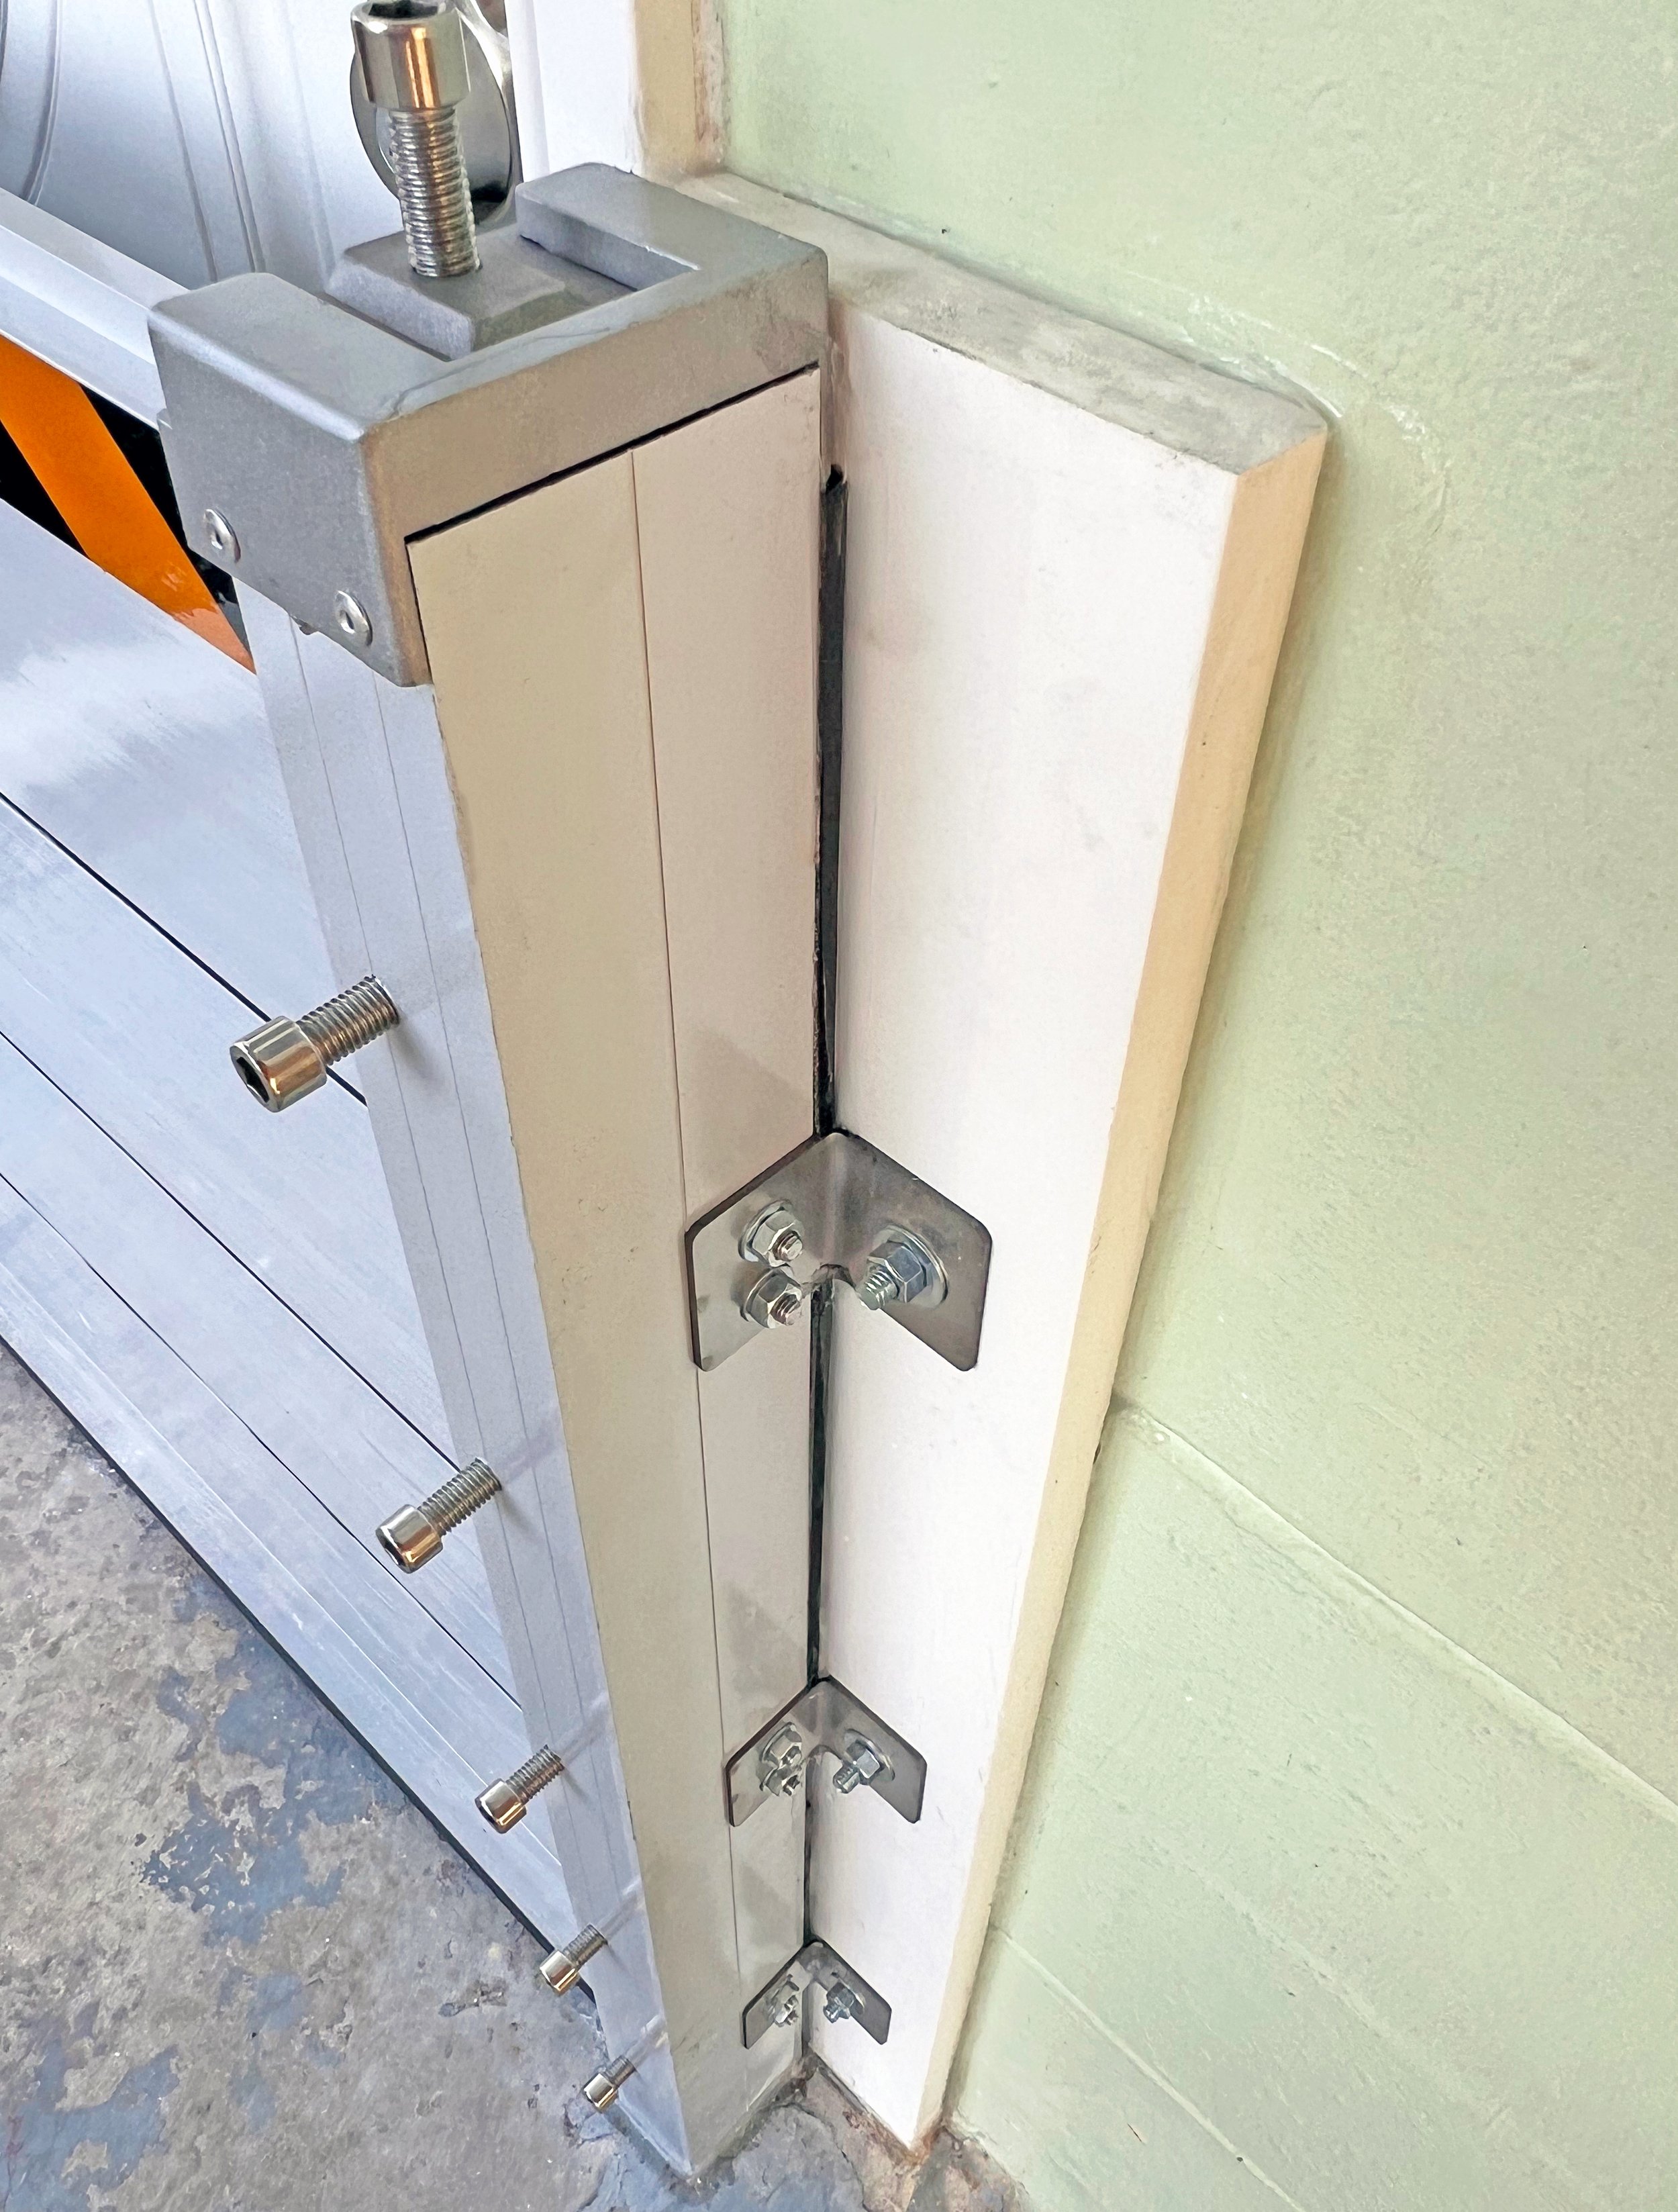
Align posts, so that the outside neoprene seal is positioned between the aluminum post and the opening frame.
The posts should be positioned such that the plank tightening bolts are facing outwards, towards the water.
It is also possible to install the posts with the tightening bolts facing towards the inside of the opening (dry side), as long as you ensure that there is enough clearance to screw down the plank tightening bolts from the inside.
Drilling Mounting Holes
Use a hammer drill to drill holes through the pre-drilled guide hole in the post and into the wall or frame to which is will be mounted. The expansion bolts provided are M12 bolt size (0.472"), so we recommend using a 12mm drill bit for hole drilling.
Expansion Bolts
We supply expansion bolts with every order and if you decide to use the included bolts, you will need an 12mm drill bit to drill the hole for the expansion bolt. Insert the masonry expansion sleeve and mounting bolts into newly drilled receiver holes and tighten down the bolts using a ratchet to secure in place.
If your wall is of questionable quality, such as cinderblock or old bricks, you may want to purchase double expansion anchors to use in place of the included expansion bolts. You may also wish to initially drill a smaller receiver hole, into which you place the bolt, to ensure a snug fit.
When installing posts on hollow walls, you will need to purchase butterfly bolts that will expand in the opening and provide a more secure hold.
Urethane Silicone
For added leak protection, we recommend adding urethane silicone on the water side, at the base of the post and along the seam lines between the flood barrier post and the wall. Add silicone along the neoprene on the post in advance of placement on the wall, then pressing the post onto the wall to help ensure a good seal.
You can also insert silicone to fill any holes or gaps in the brick, mortar or concrete.


Applying Silicone to the Post’s Neoprene Backing to Enhance the Seal
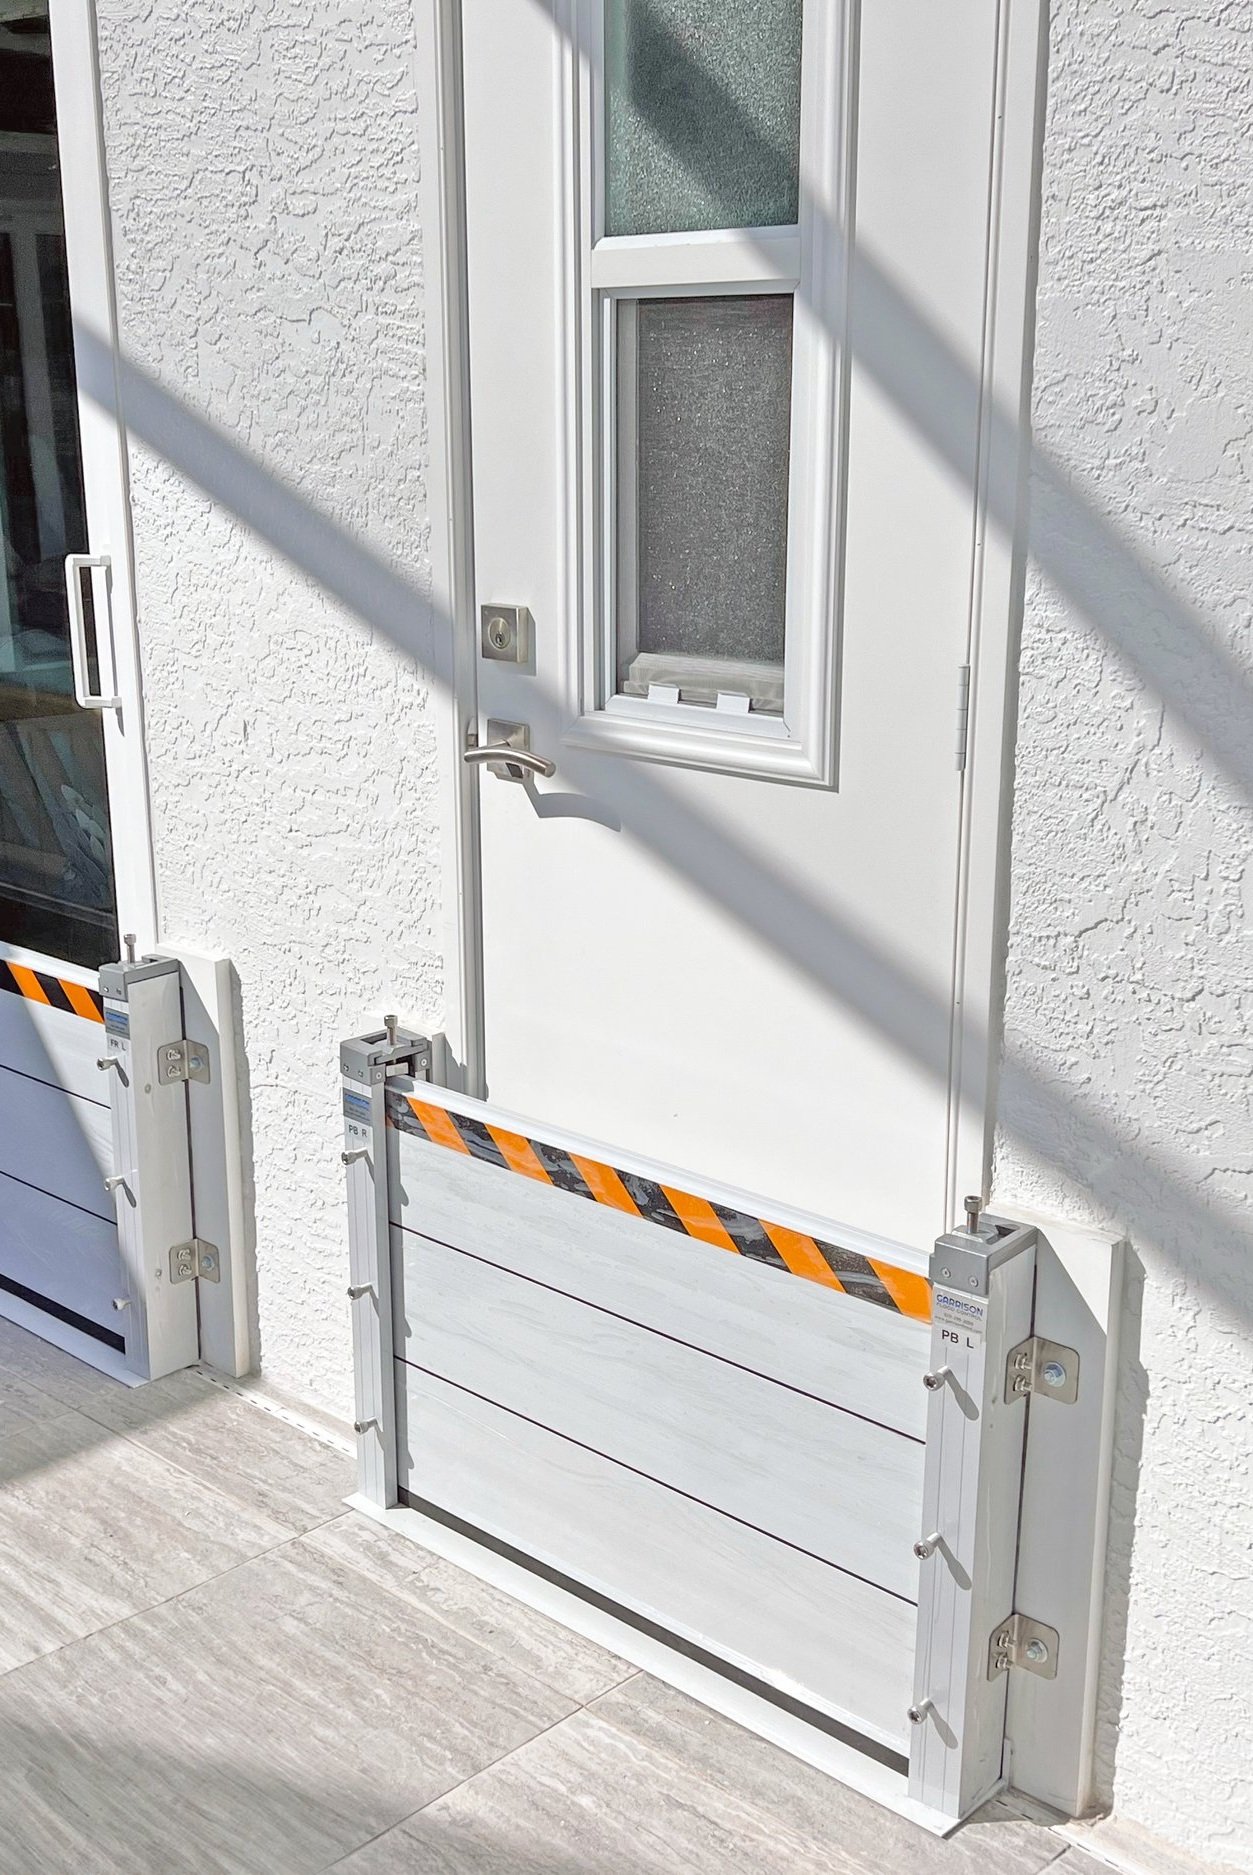
Installing Outside Mount Post
Outside Mounting Post
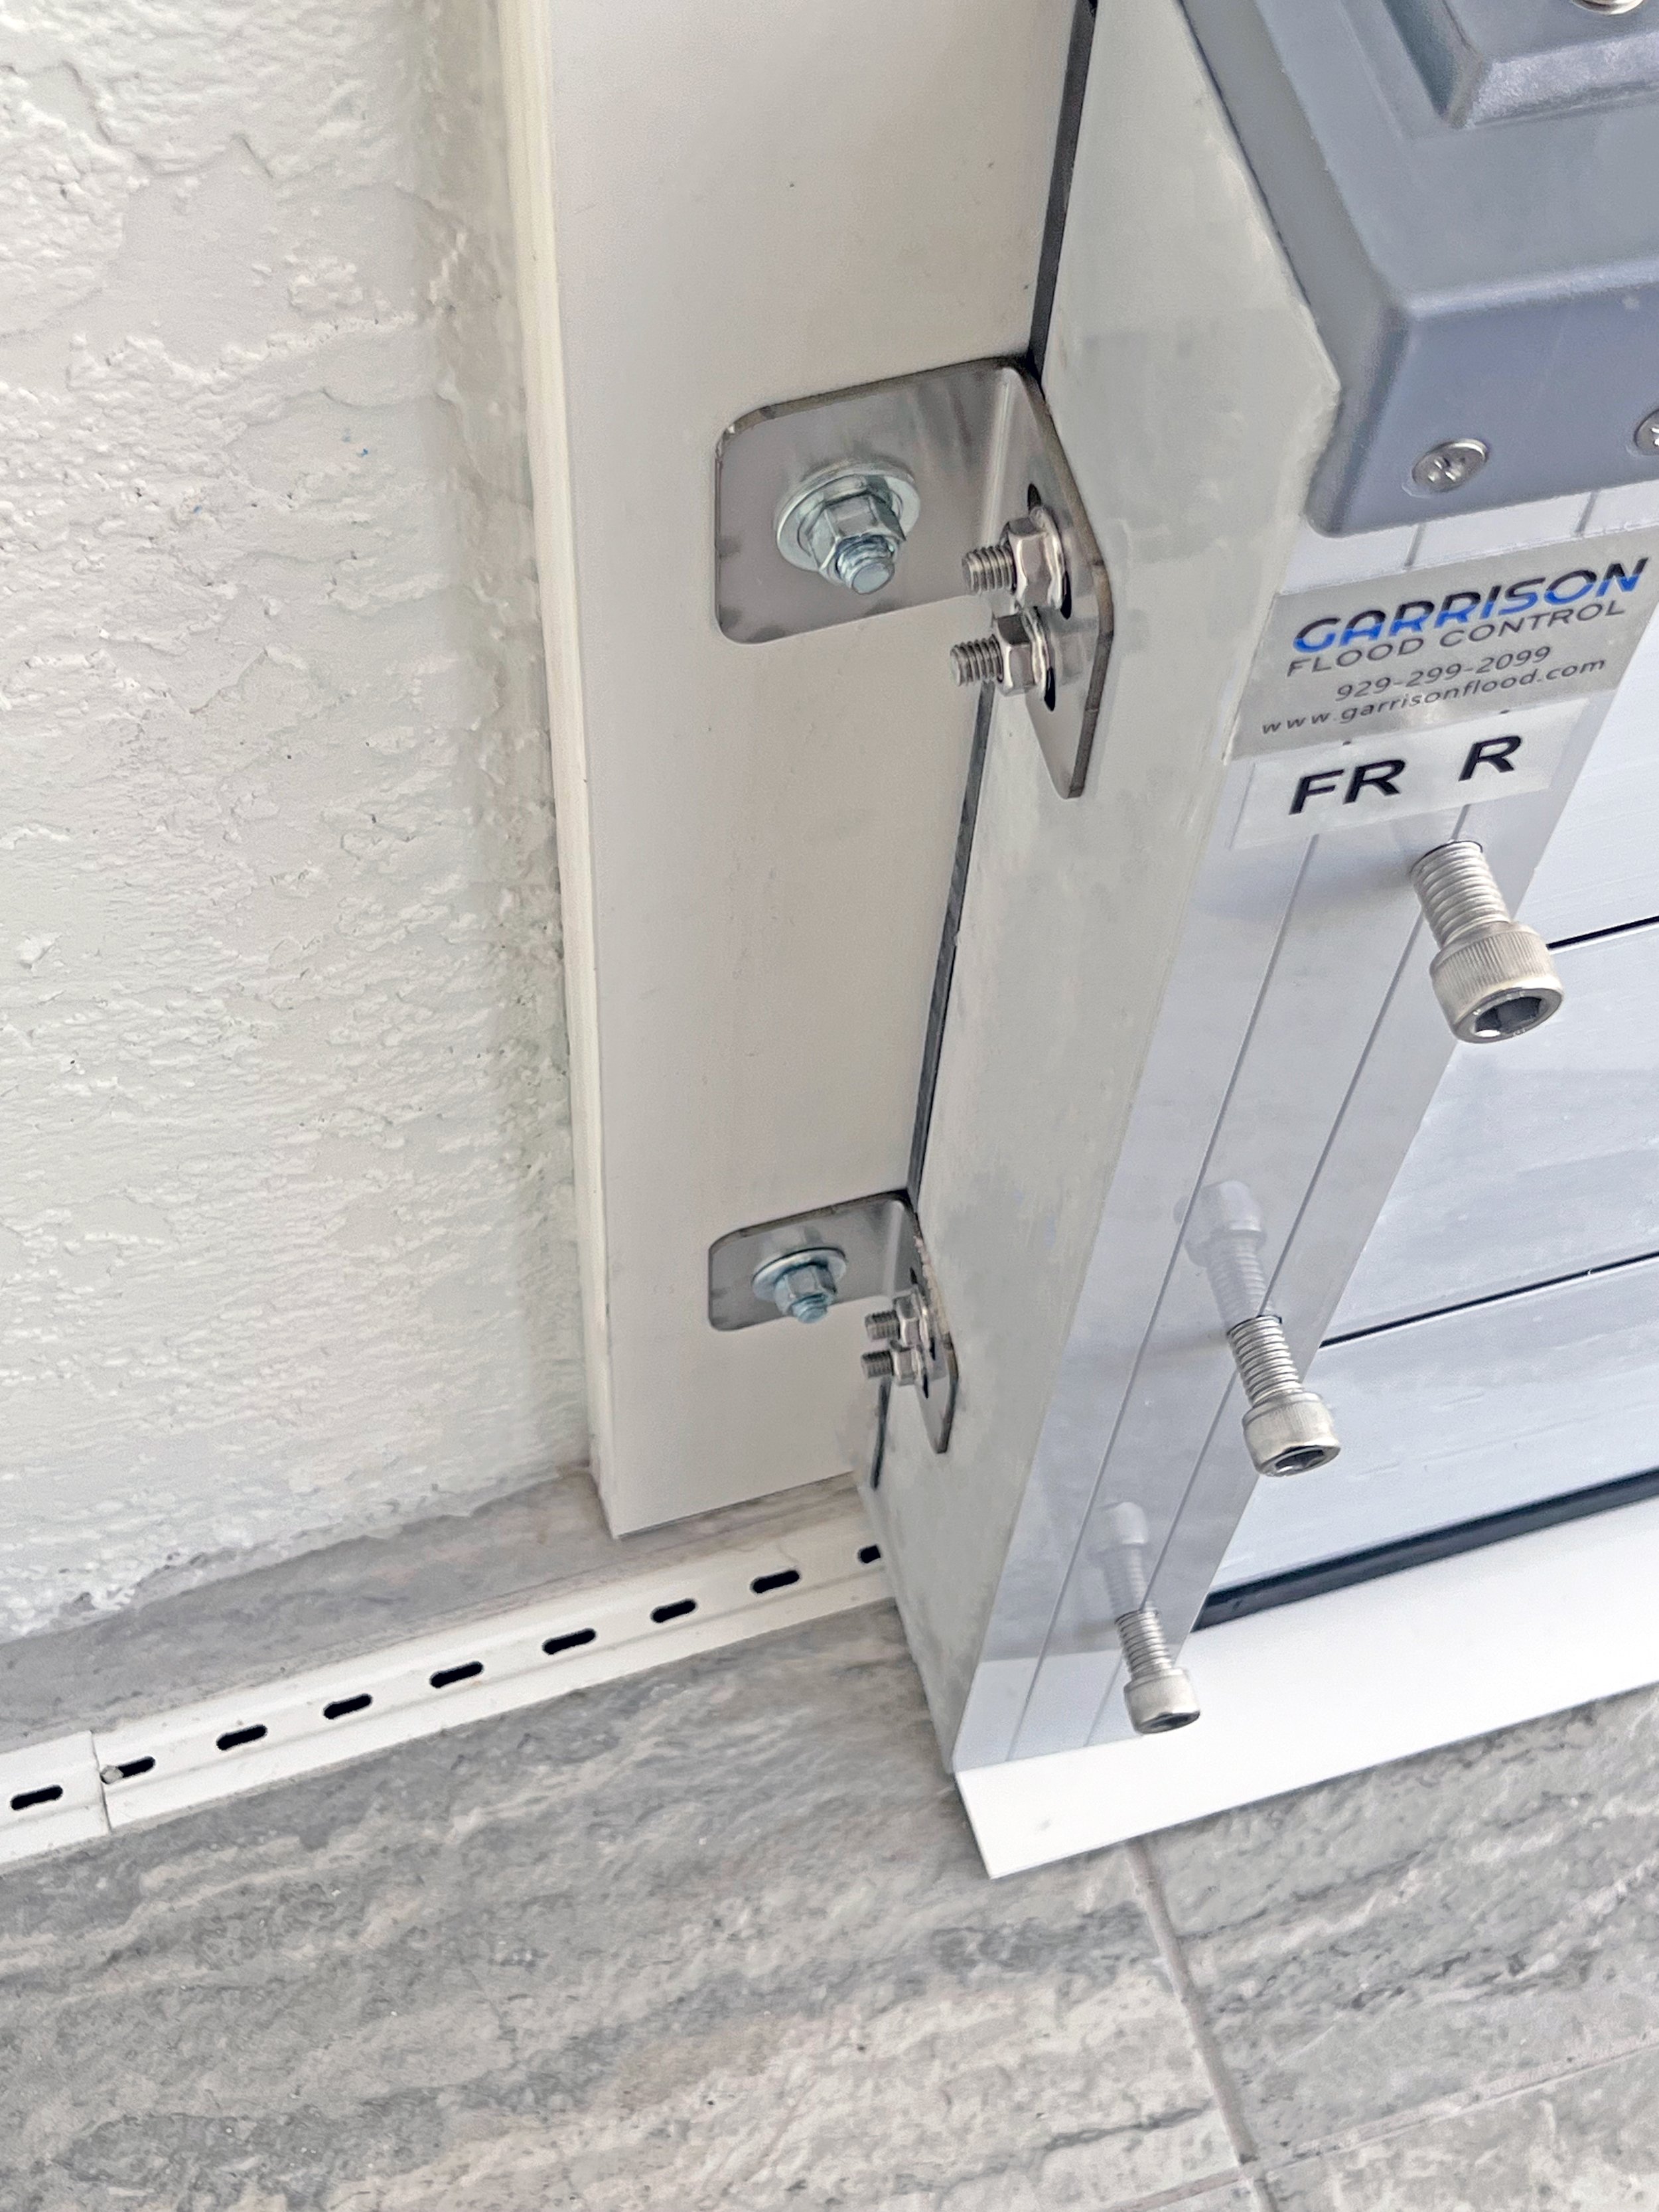
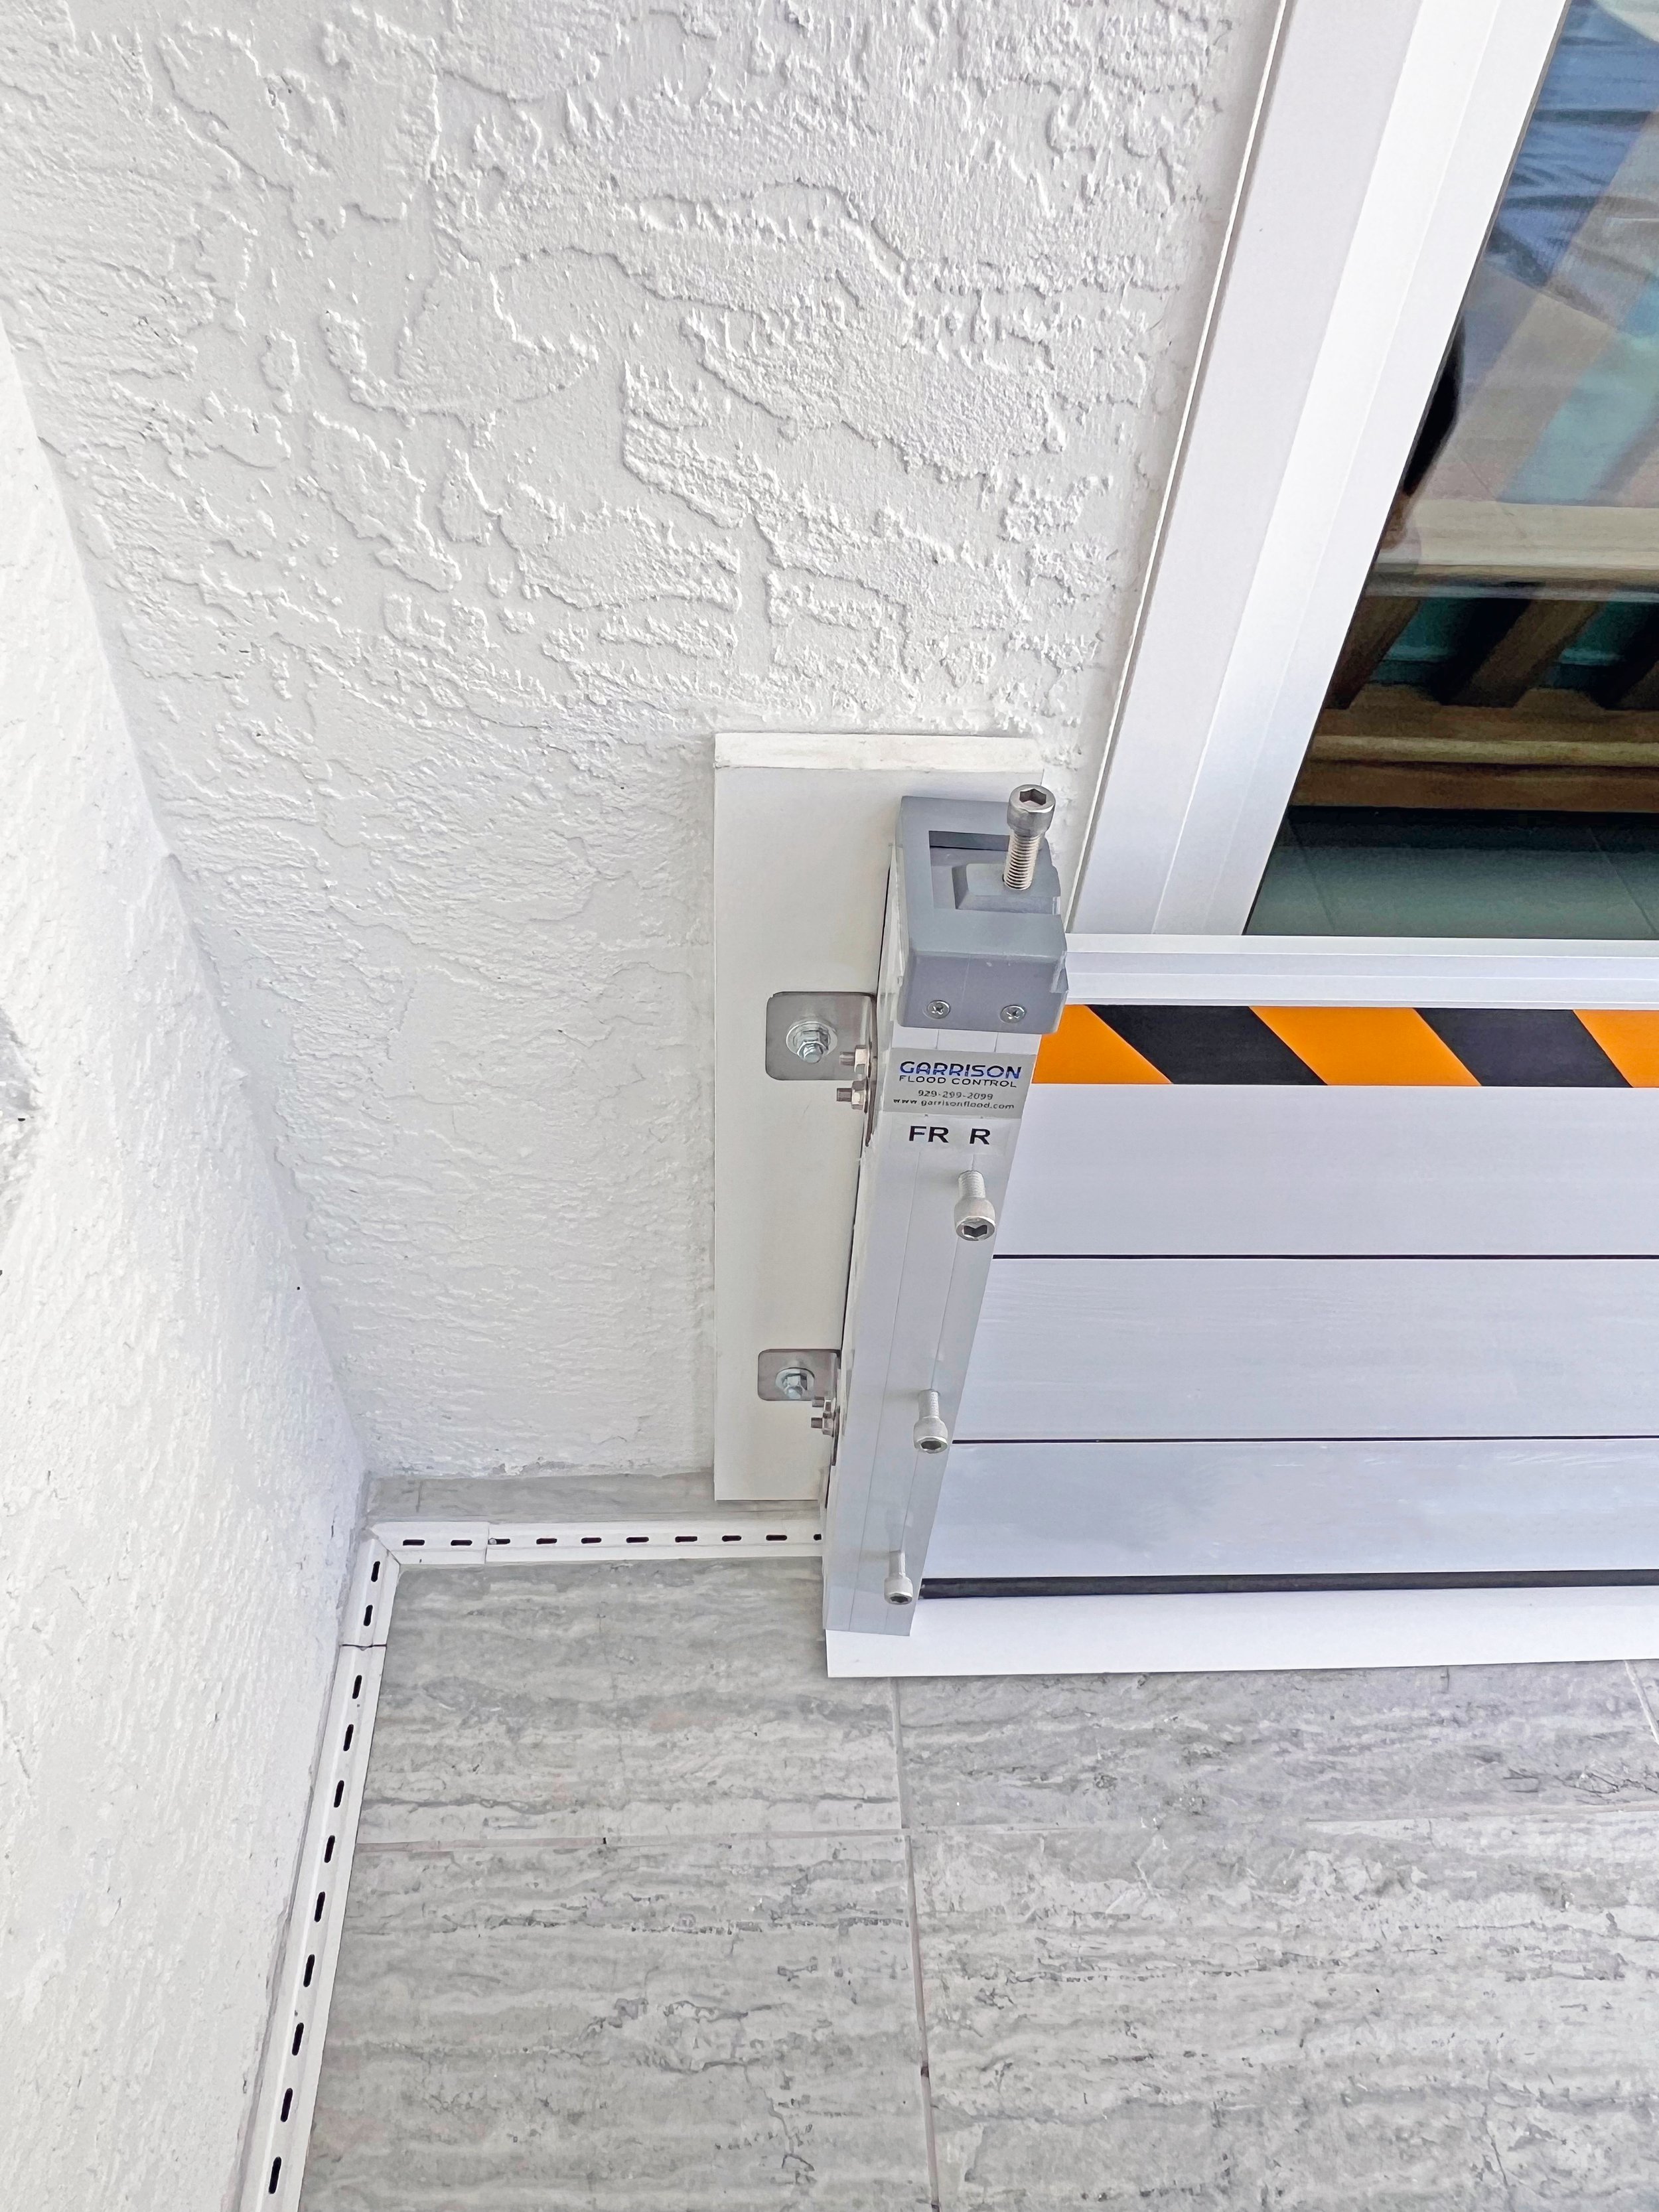
When mounting posts on the outside of your doorway, position posts so that the neoprene seal is between the post and the wall and the mounting tabs are up against the wall. Tabs should be positioned on the side of the post away from the opening, such that when looking from the water side, the left post has mounting tabs on the left and the right post has tabs on the right.
Drilling Mounting Holes
Use a hammer drill to drill holes through the pre-drilled guide hole in the post and into the wall or frame to which is will be mounted. The expansion bolts provided are M12 bolt size (0.472"), so we recommend using a 12mm drill bit for hole drilling.
Expansion Bolts / Wall Anchors

Outside Mounting of Posts
We supply expansion bolts with every order and if you decide to use the included bolts, you will need an 12mm drill bit to drill the hole for the expansion bolt. Insert the masonry expansion sleeve and mounting bolts into newly drilled receiver holes and tighten down the bolts using a ratchet to secure in place.
If your wall is of questionable quality, such as cinderblock or old bricks, you may want to purchase double expansion anchors to use in place of the included expansion bolts. You may also wish to initially drill a smaller receiver hole, into which you place the bolt, to ensure a snug fit.
When installing posts on hollow walls, you will need to purchase butterfly bolts that will expand in the opening and provide a more secure hold.
Making Hammerhead Posts Removable
It is possible to make posts removable, using drop-in anchor bolts. The threaded sleeves are left in the wall and the flood barrier posts are able to be removed and reinstalled in advance of a flood event. It is important to confirm a good seal between the post, neoprene, and wall during each installation.

Applying Silicone to Edge of a Post
Urethane Silicone
For added security, we recommend applying some silicone on the water side, at the base of the post and along the seam line between the post and the wall. It is also possible to place silicone on the neoprene seal on the post and then pressing the post on to the wall, allowing the silicone to enhance the seal.


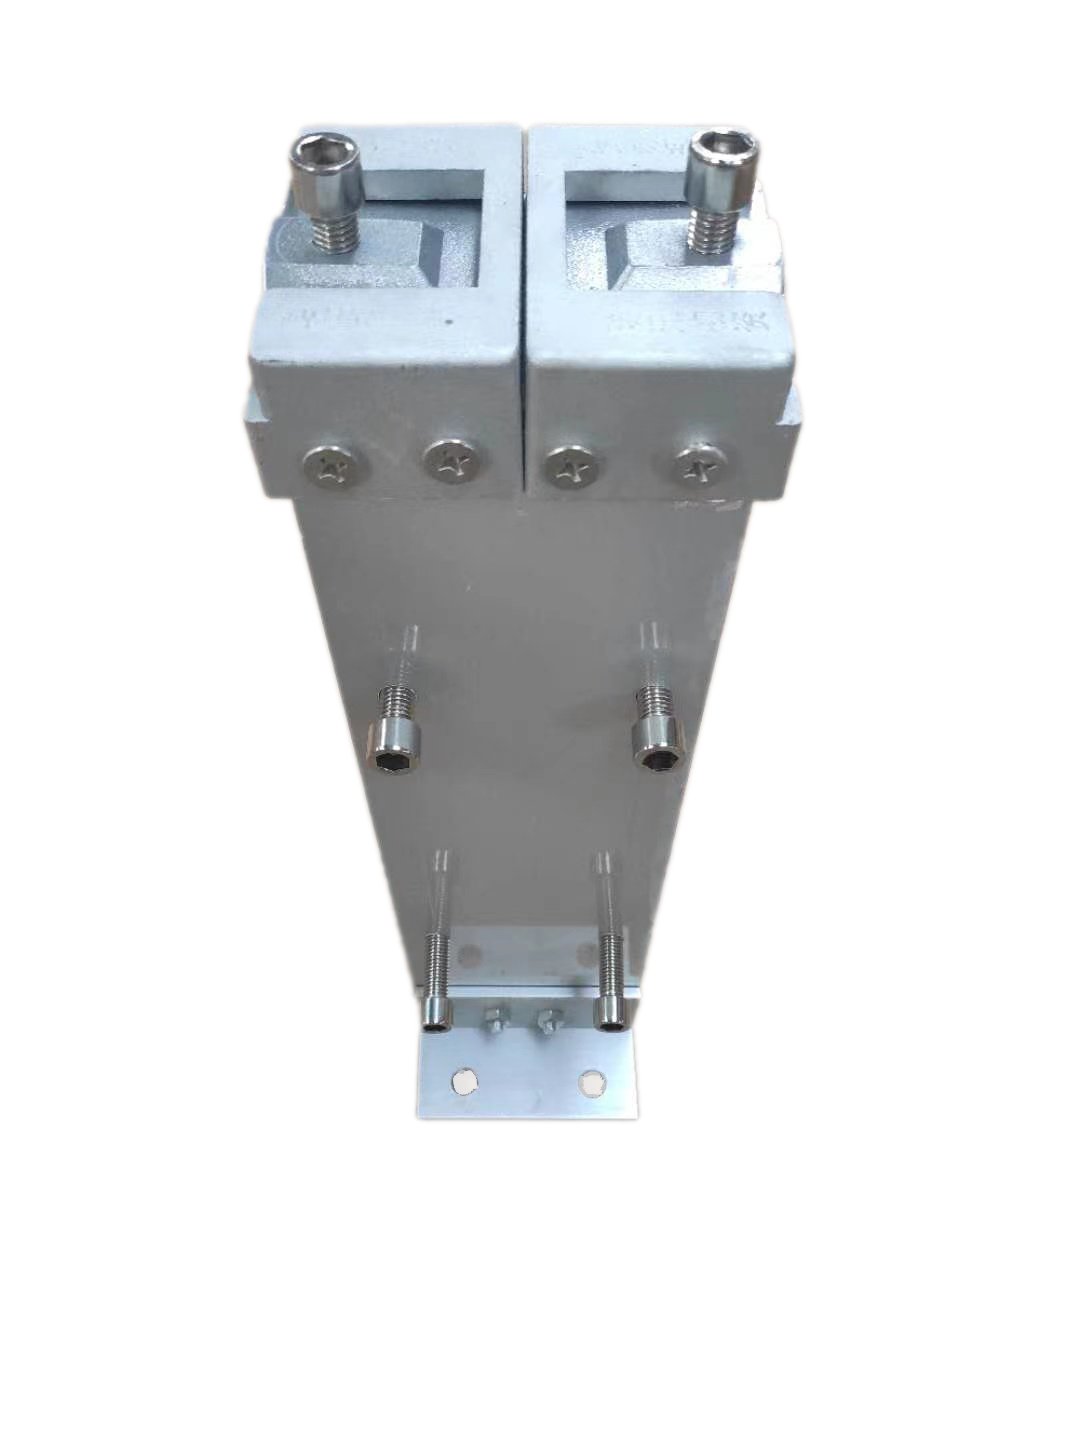
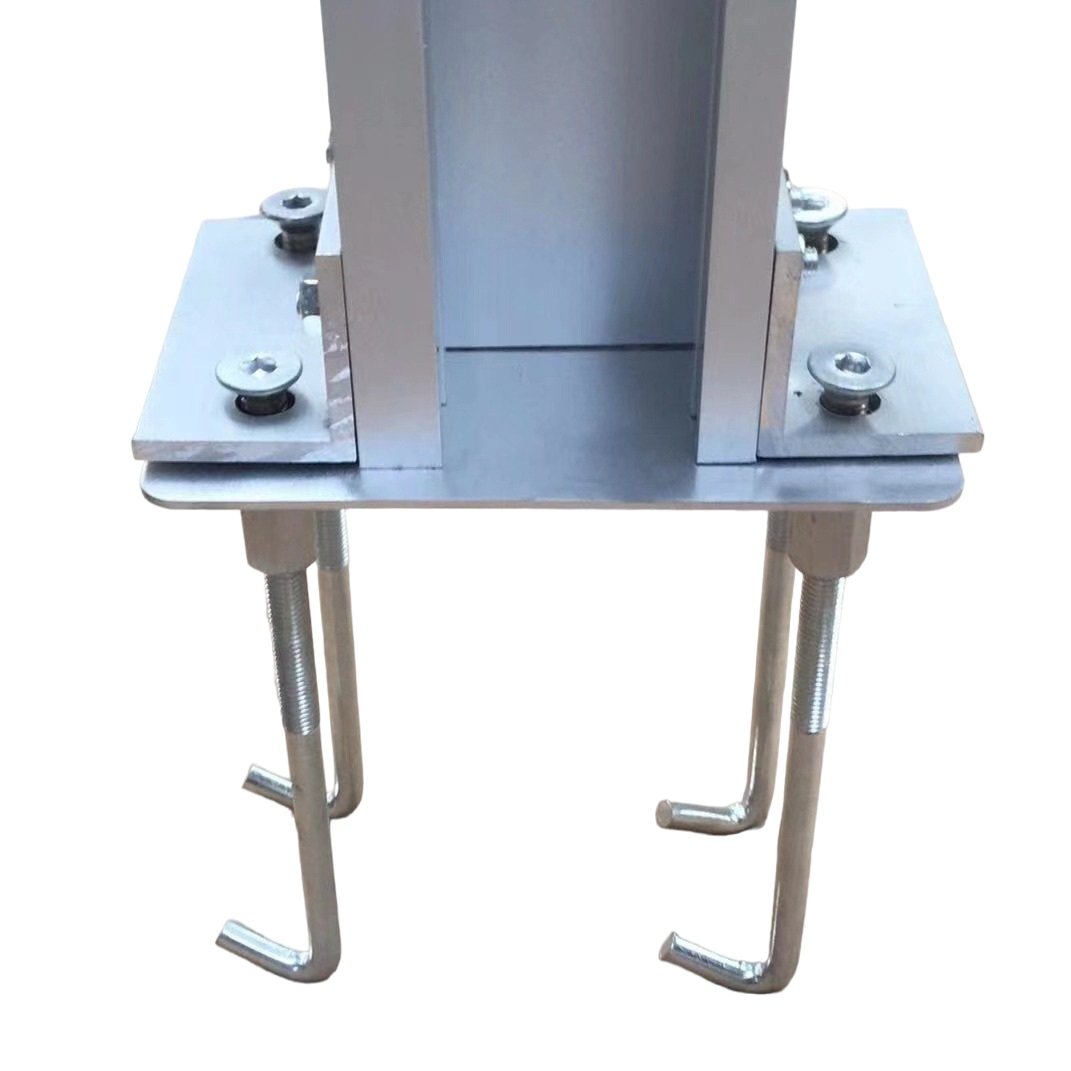
Installing Center or Corner Posts
Center posts are used for longer spans, where you exceed the recommend maximum plank length (openings wider than 13ft) and require additional support. Corner posts are used to make a turn and can be used for perimeter protection applications. These posts are essentially two standard posts, fastened together so that planks may be inserted from both sides or at a 90 degree angle in the case of the corner post.
Center Posts come with a buttress support bracket, which provides additional resistance to hydrostatic pressure from flooding.
Center posts are drilled into the ground below and can be installed permanently or installed to be removable when not in use.
Use the pre-drilled holes in the base of each post (and kicker if used) to mark where holes are to be drilled. Then, using a hammer drill, drill the necessary holes in the concrete. Vacuum and clean out the hole to remove any debris.
Note: When kickers are added to the center post, the kickers face out to the water side. Kickers are recommended for taller barriers (greater than 4ft).


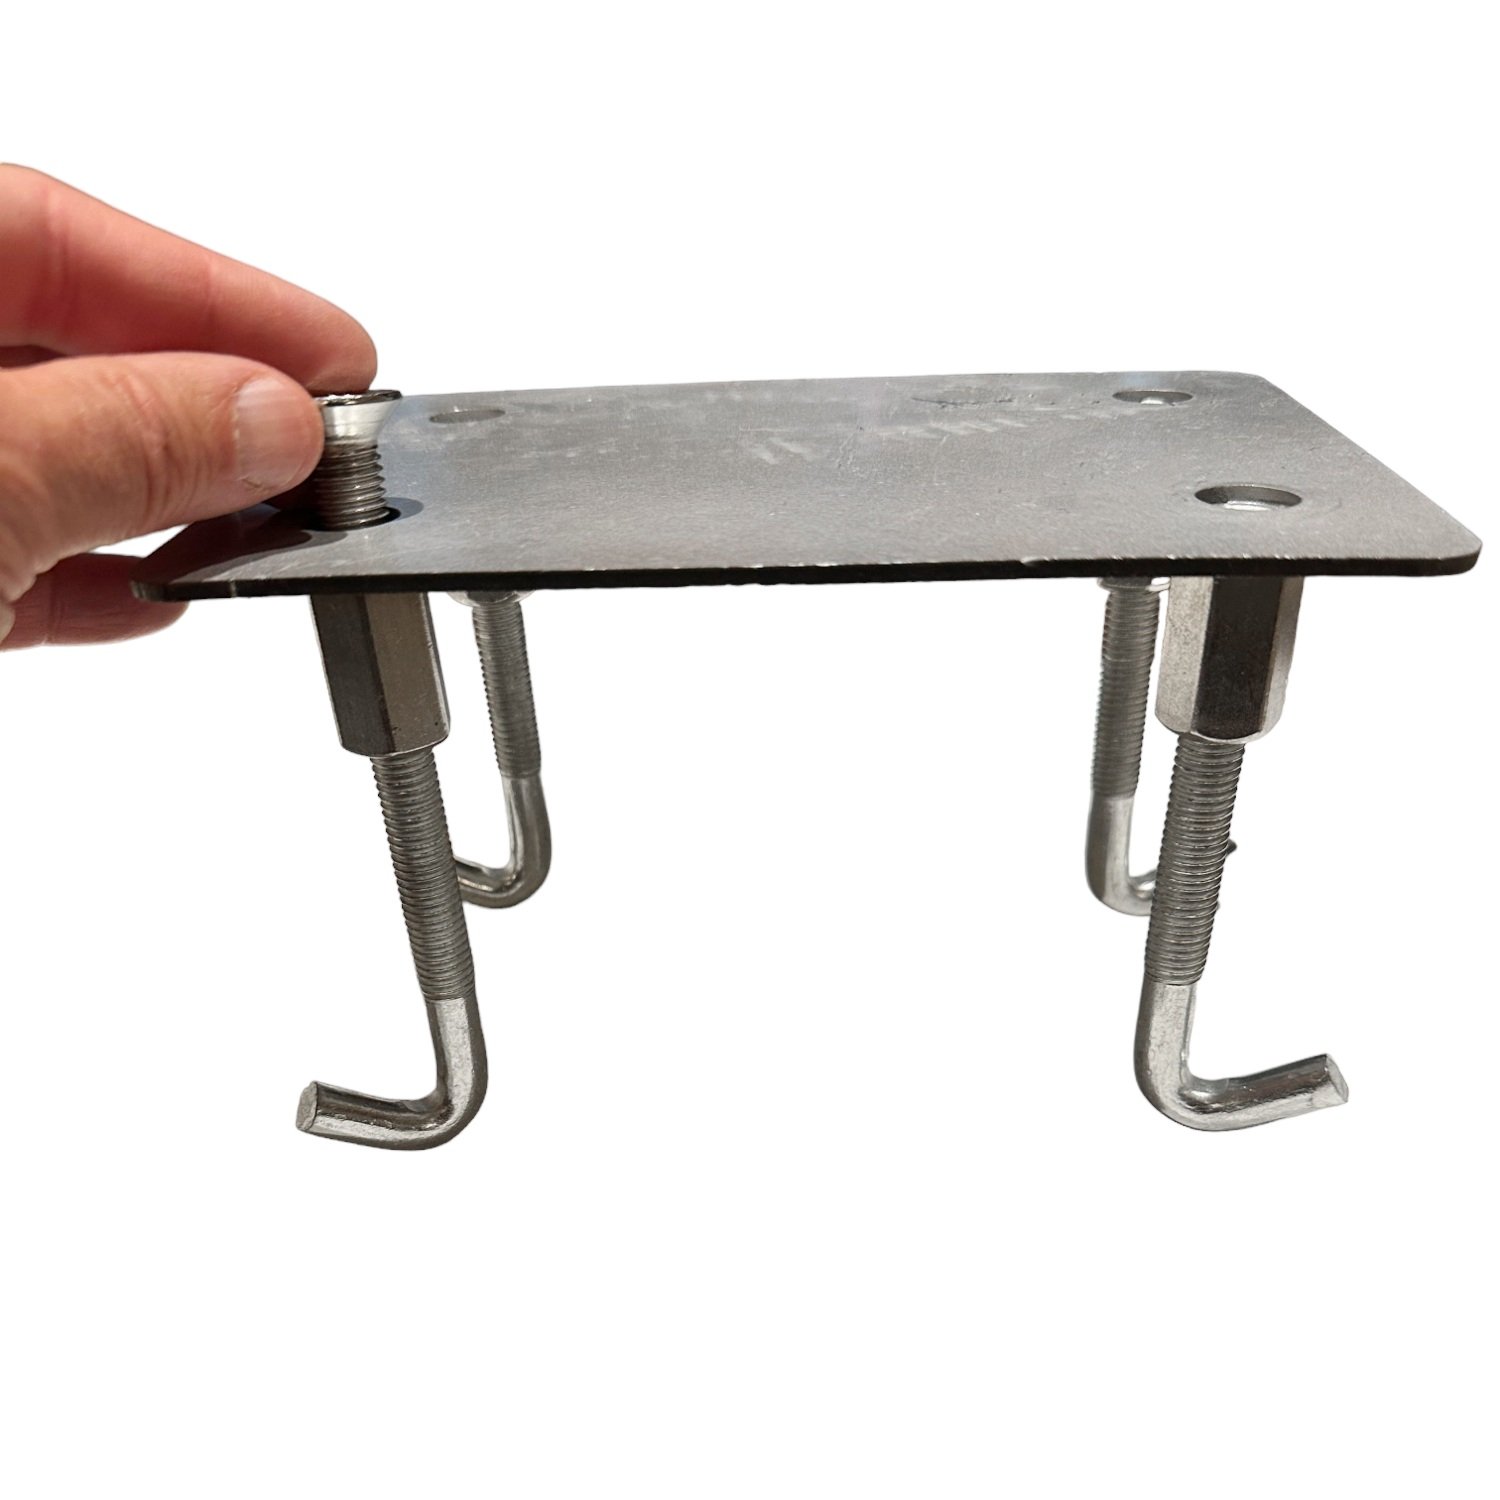
Making Posts Removable
To make post removable there are two method you may use
Method 1
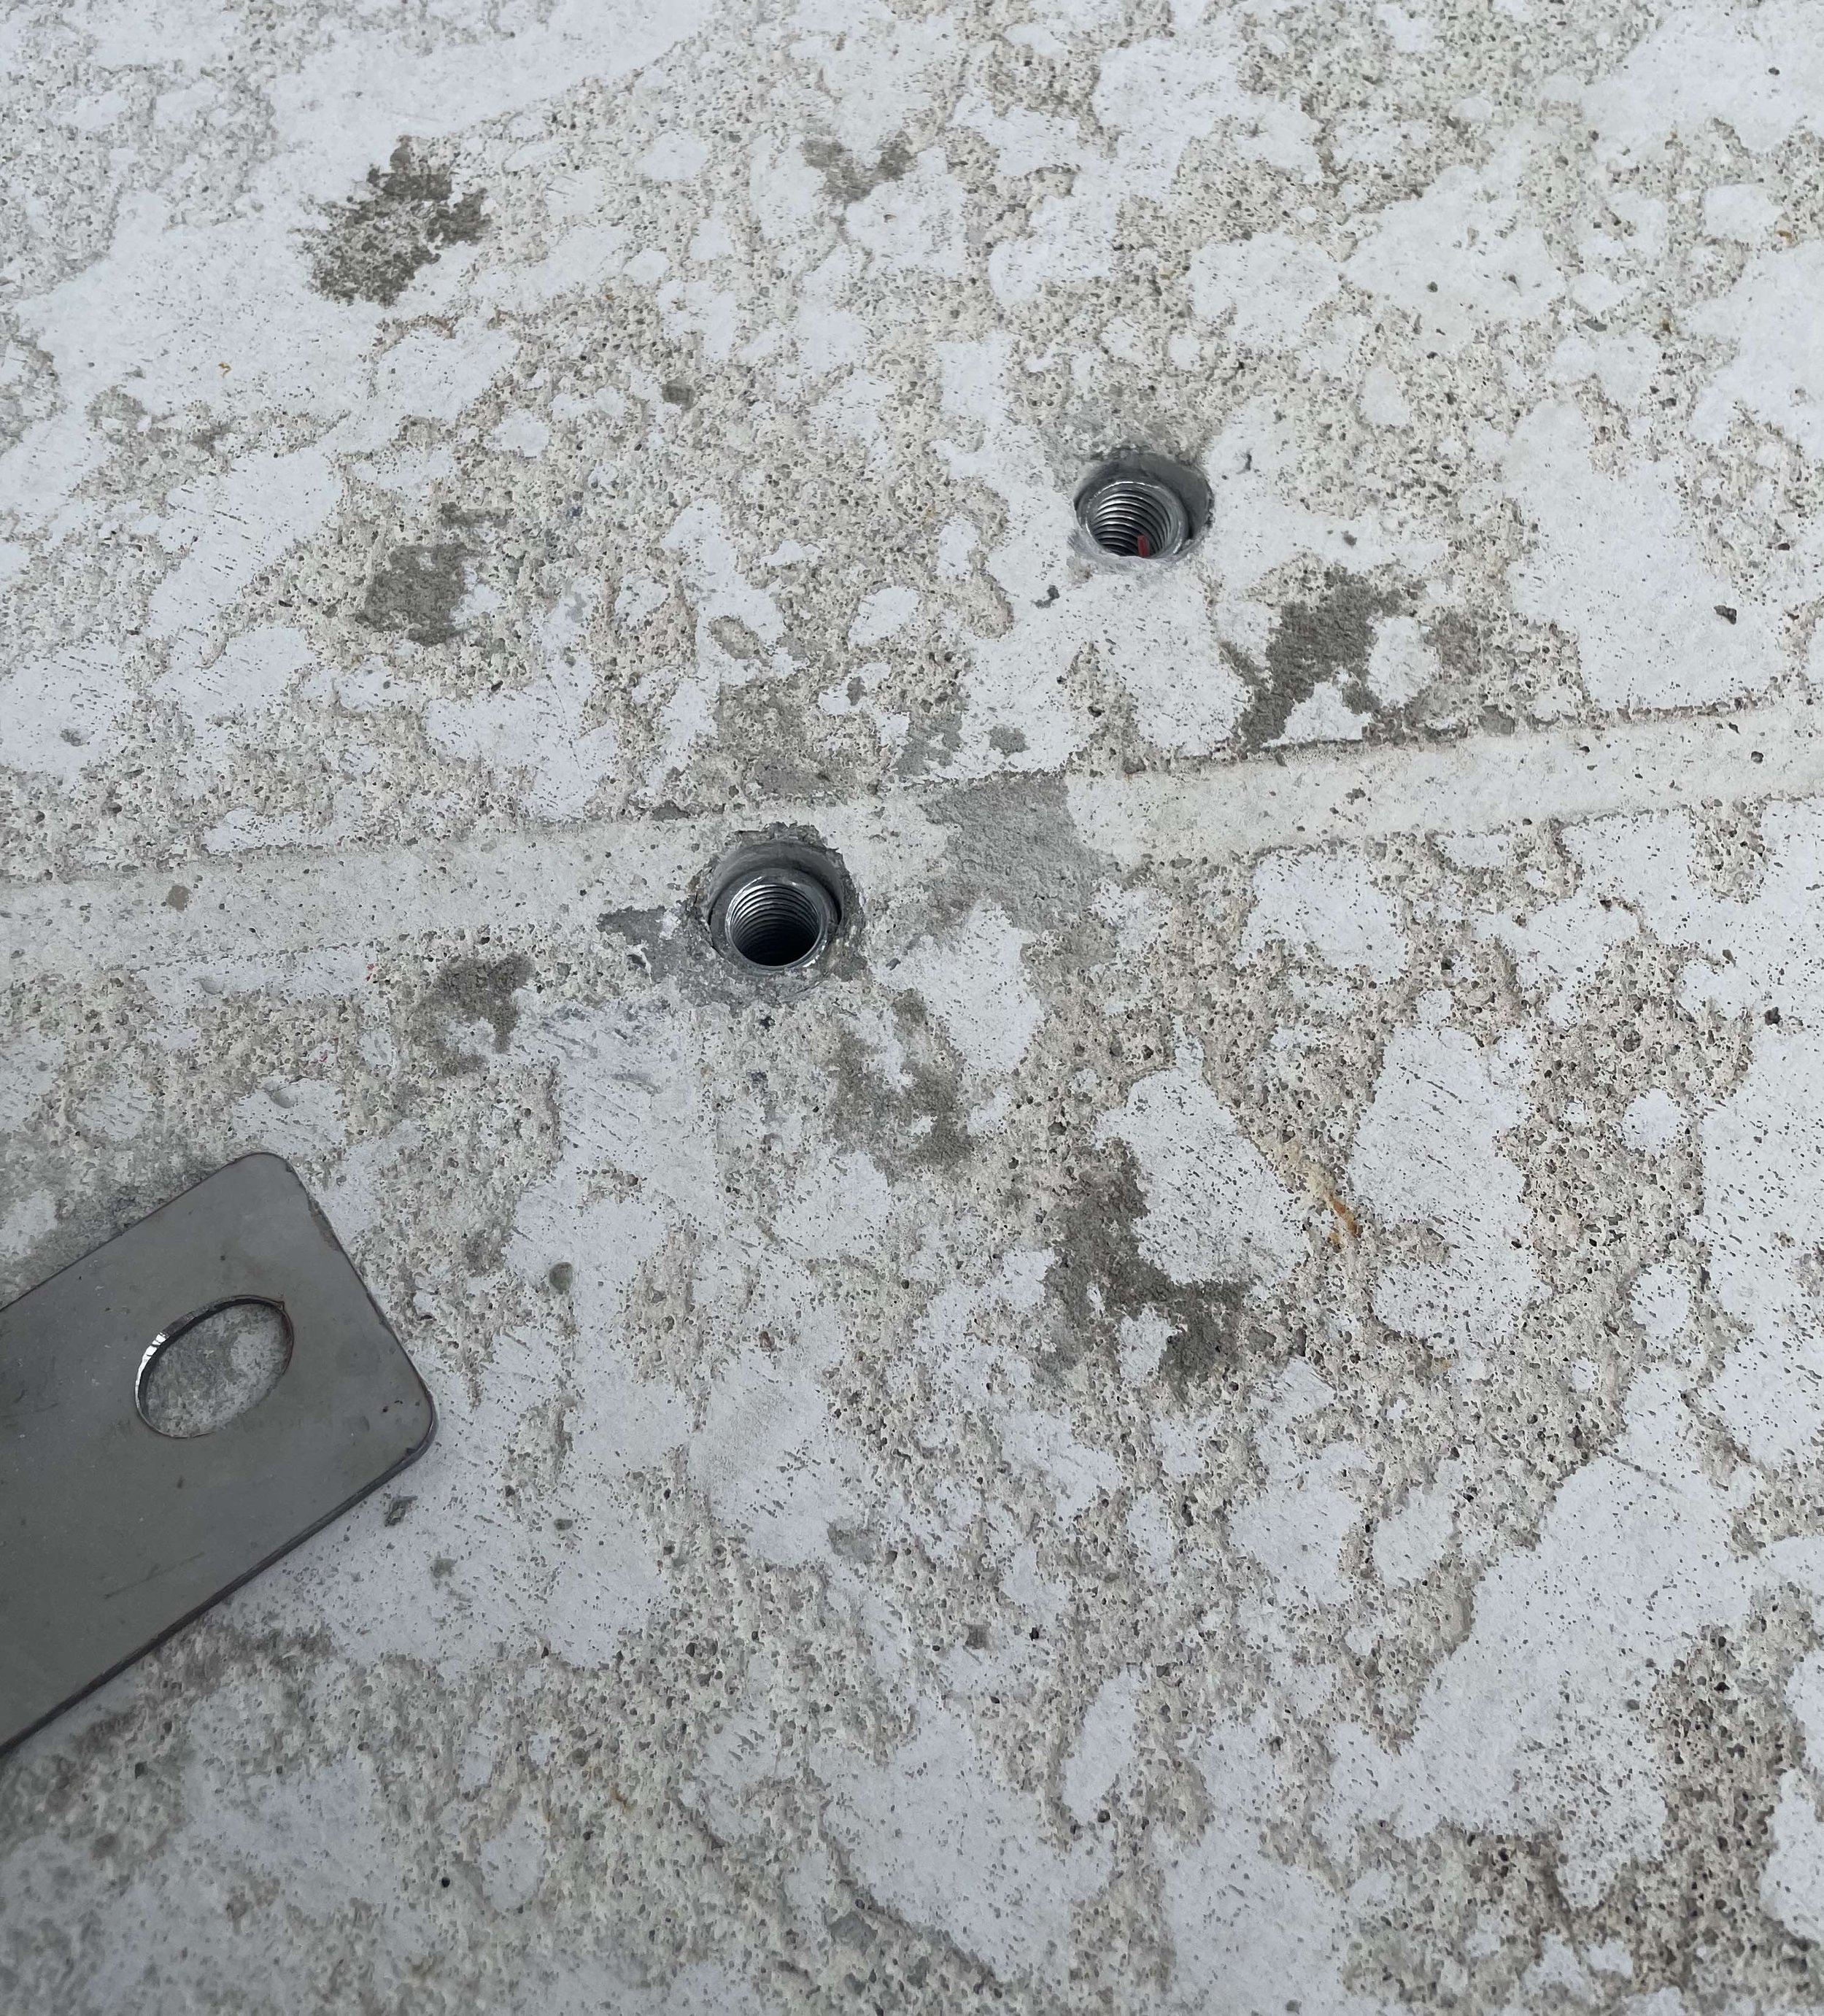
Use standard drop in masonry anchors. Insert the drop in anchor into the drilled holes with the open side facing up. Use a setting tool to lock the drop-in anchor into place. Place the setting tool into the anchor and strike the top of the setting tool with a hammer, until the lip of the tool touches the rim of the anchor. This will lock the threaded receiver sleeve in place permanently.
Remove the tool and the anchor should remain firmly in place, ready to receive a bolt. Place machine threaded bolts through each hole in the post base and into the anchor bolt. Tighten down to secure the post to the floor below.
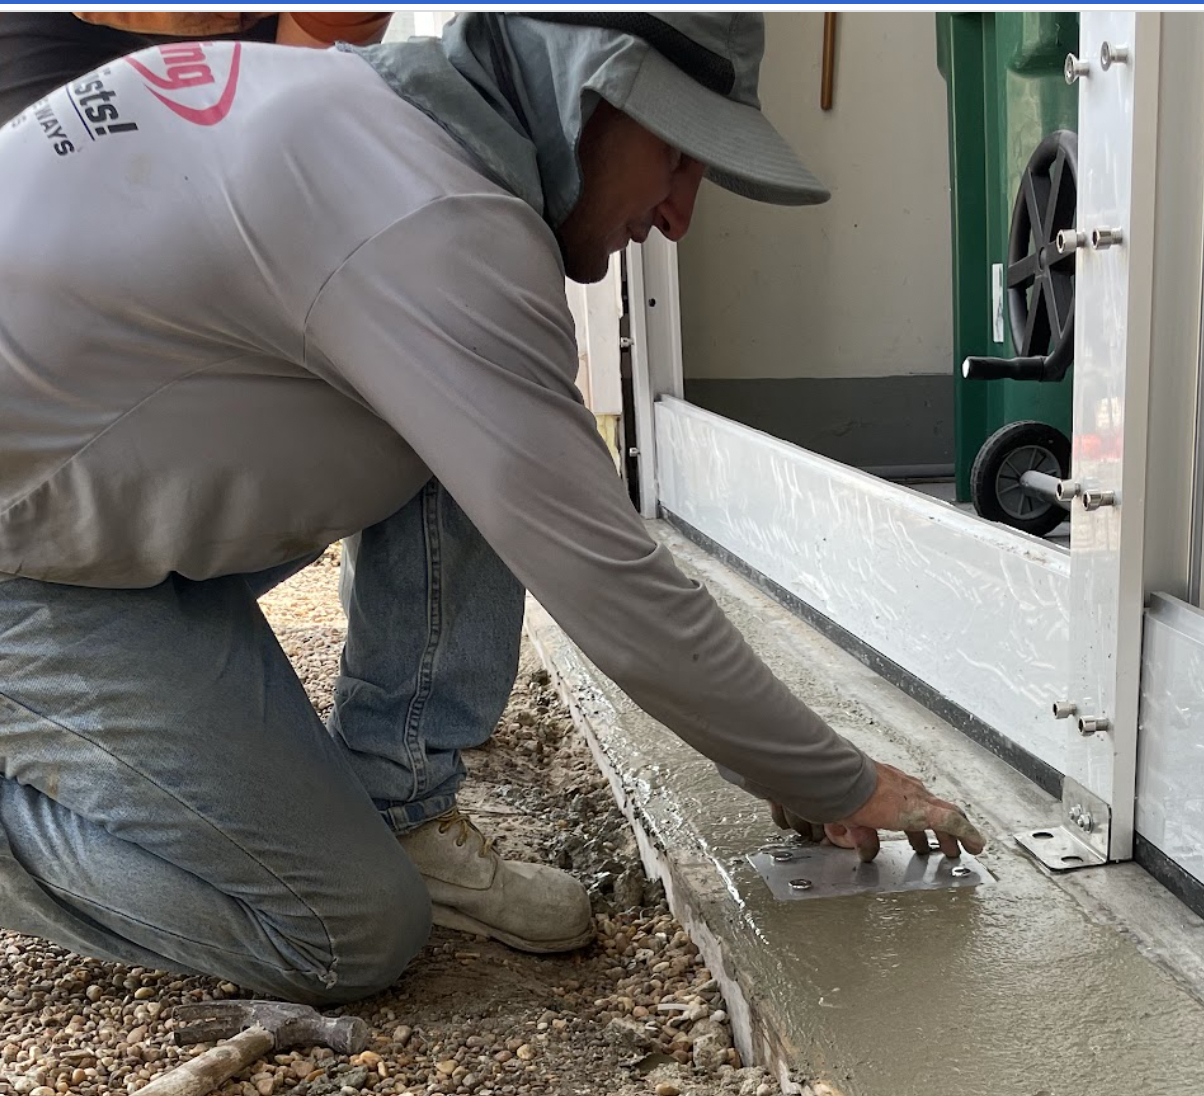
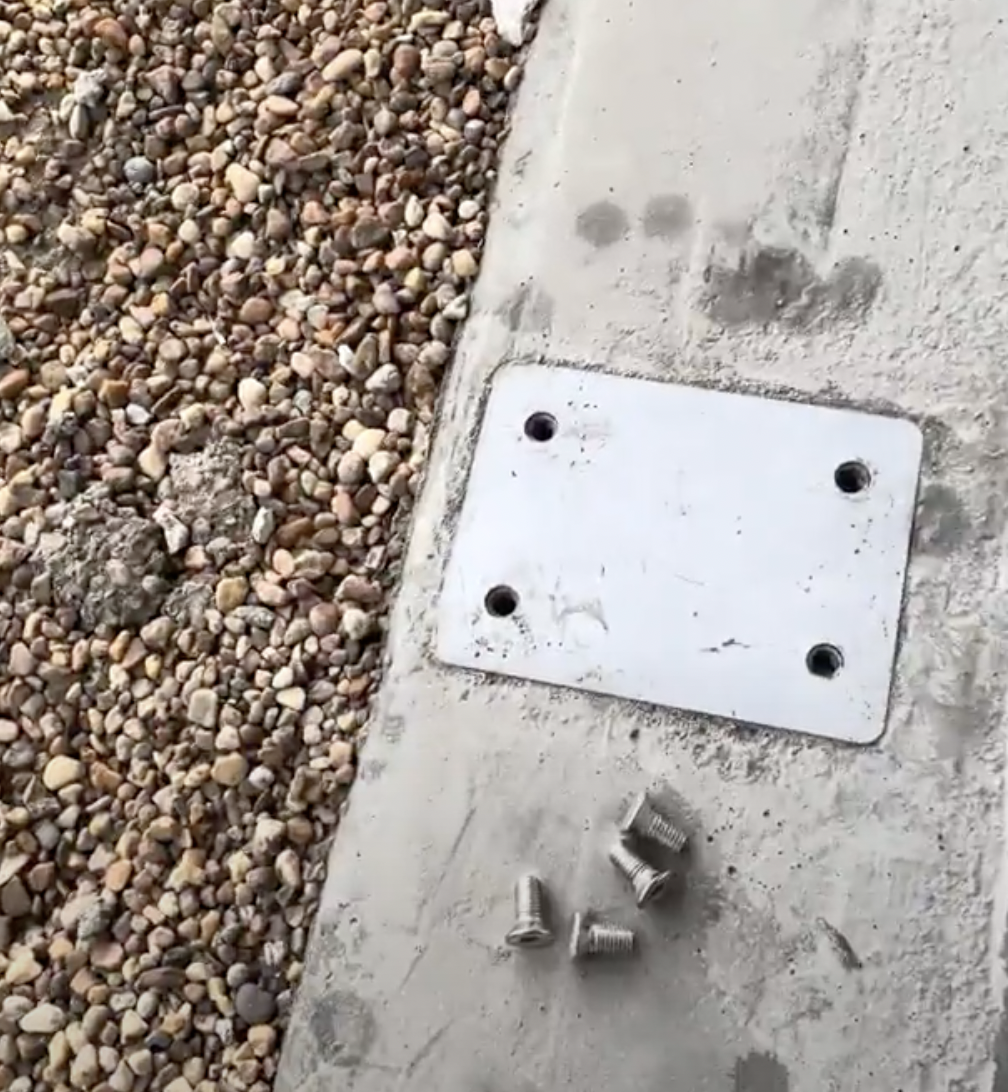
Method 2
Utilize our in-ground base plate, which is poured into the concrete. To place the baseplate, cut into existing concrete to a depth and size sufficient to accommodate the baseplate, the bolt receivers welded to the bottom of the baseplate, and the additional bolt protrusions which screw into the underside of the receivers (designed to give greater support depth into the concrete). Pour concrete around the baseplate, fully enclosing the plate, bolt receivers and bolt protrusions.
In-Ground Mount

Loose Base Plates

Installed Base Plates
Adding Wall Spacer Columns
If you need to move the posts out further than the wall, say to clear door hardware or a door frame, then you can use spacers to move the posts further away from the wall.
These can be recycled wood lumber, treated lumber, or steel extrusions.
Recycled wood spacers come in various sizes and can be purchased at most home improvement stores.
To install post spacers, simply bolt the spacers to your wall using standard anchors. Caulk around the edges to seal the connection point and ensure that it is waterproof.
Once spacers are installed, mount Hammerhead posts onto the spacer, as you would to a standard wall. Simply bolt these into position using the same methodology indicated in our instructions.
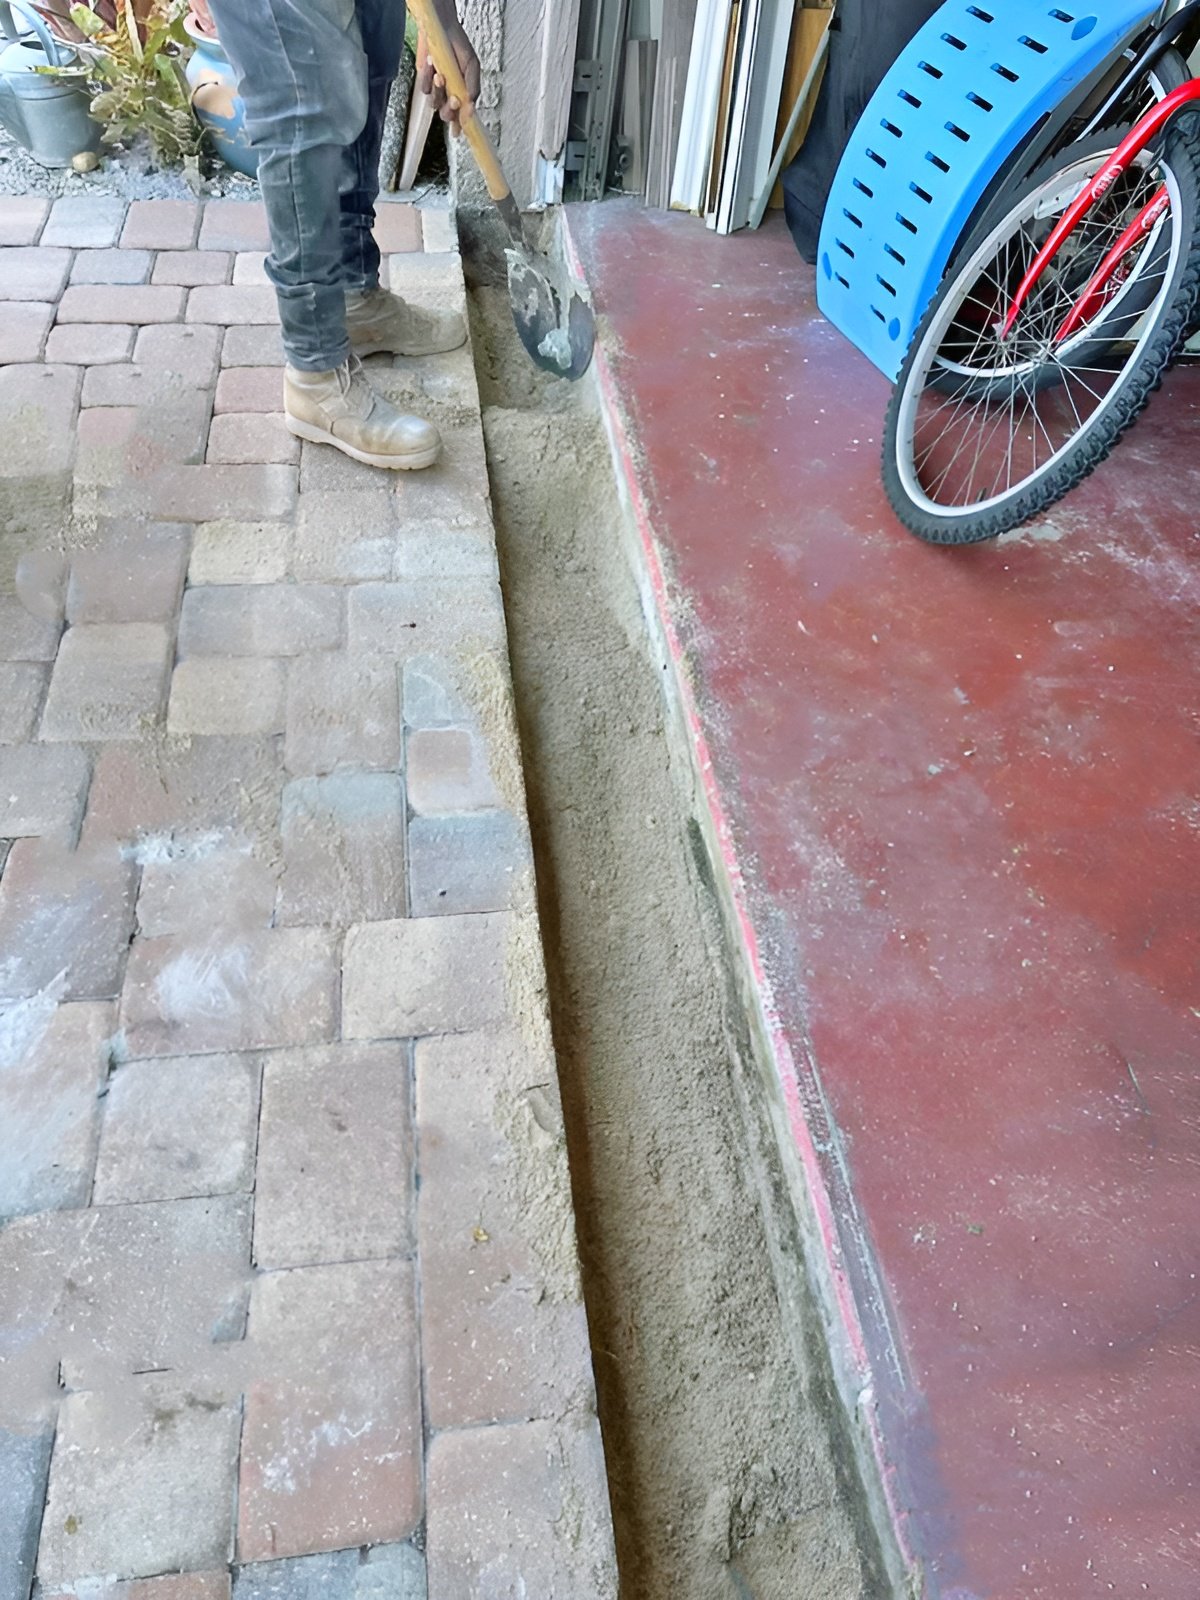
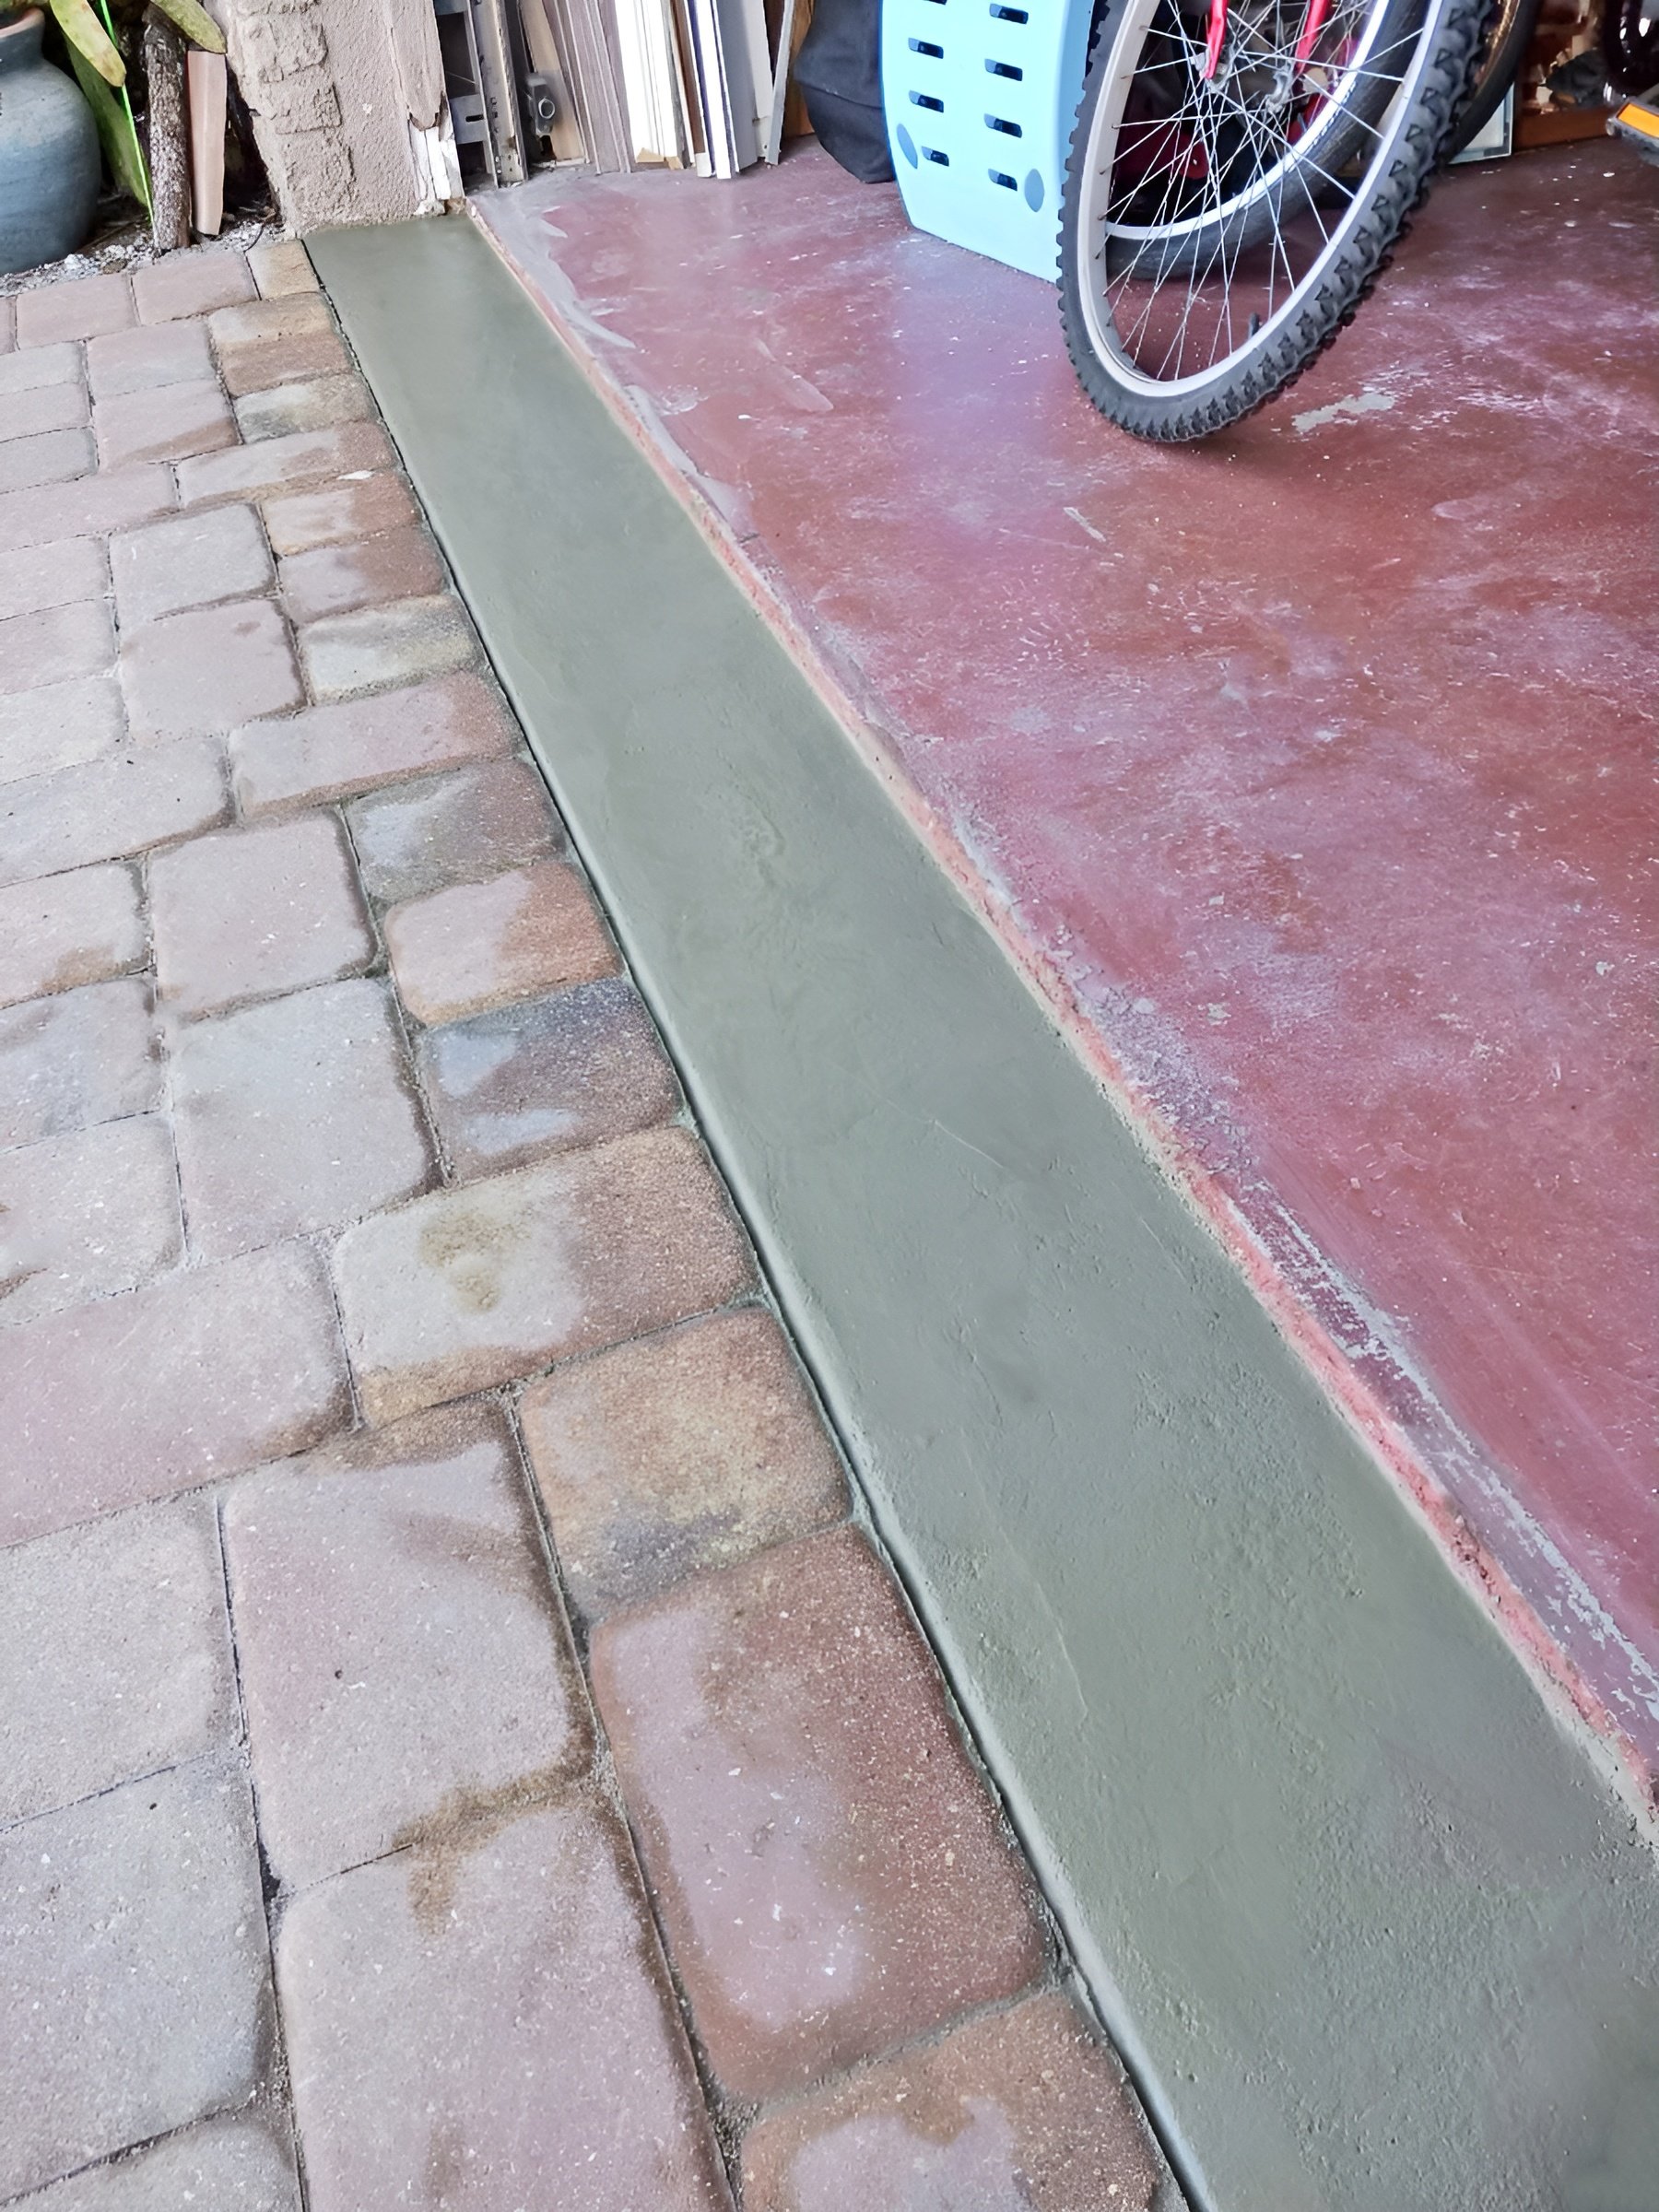
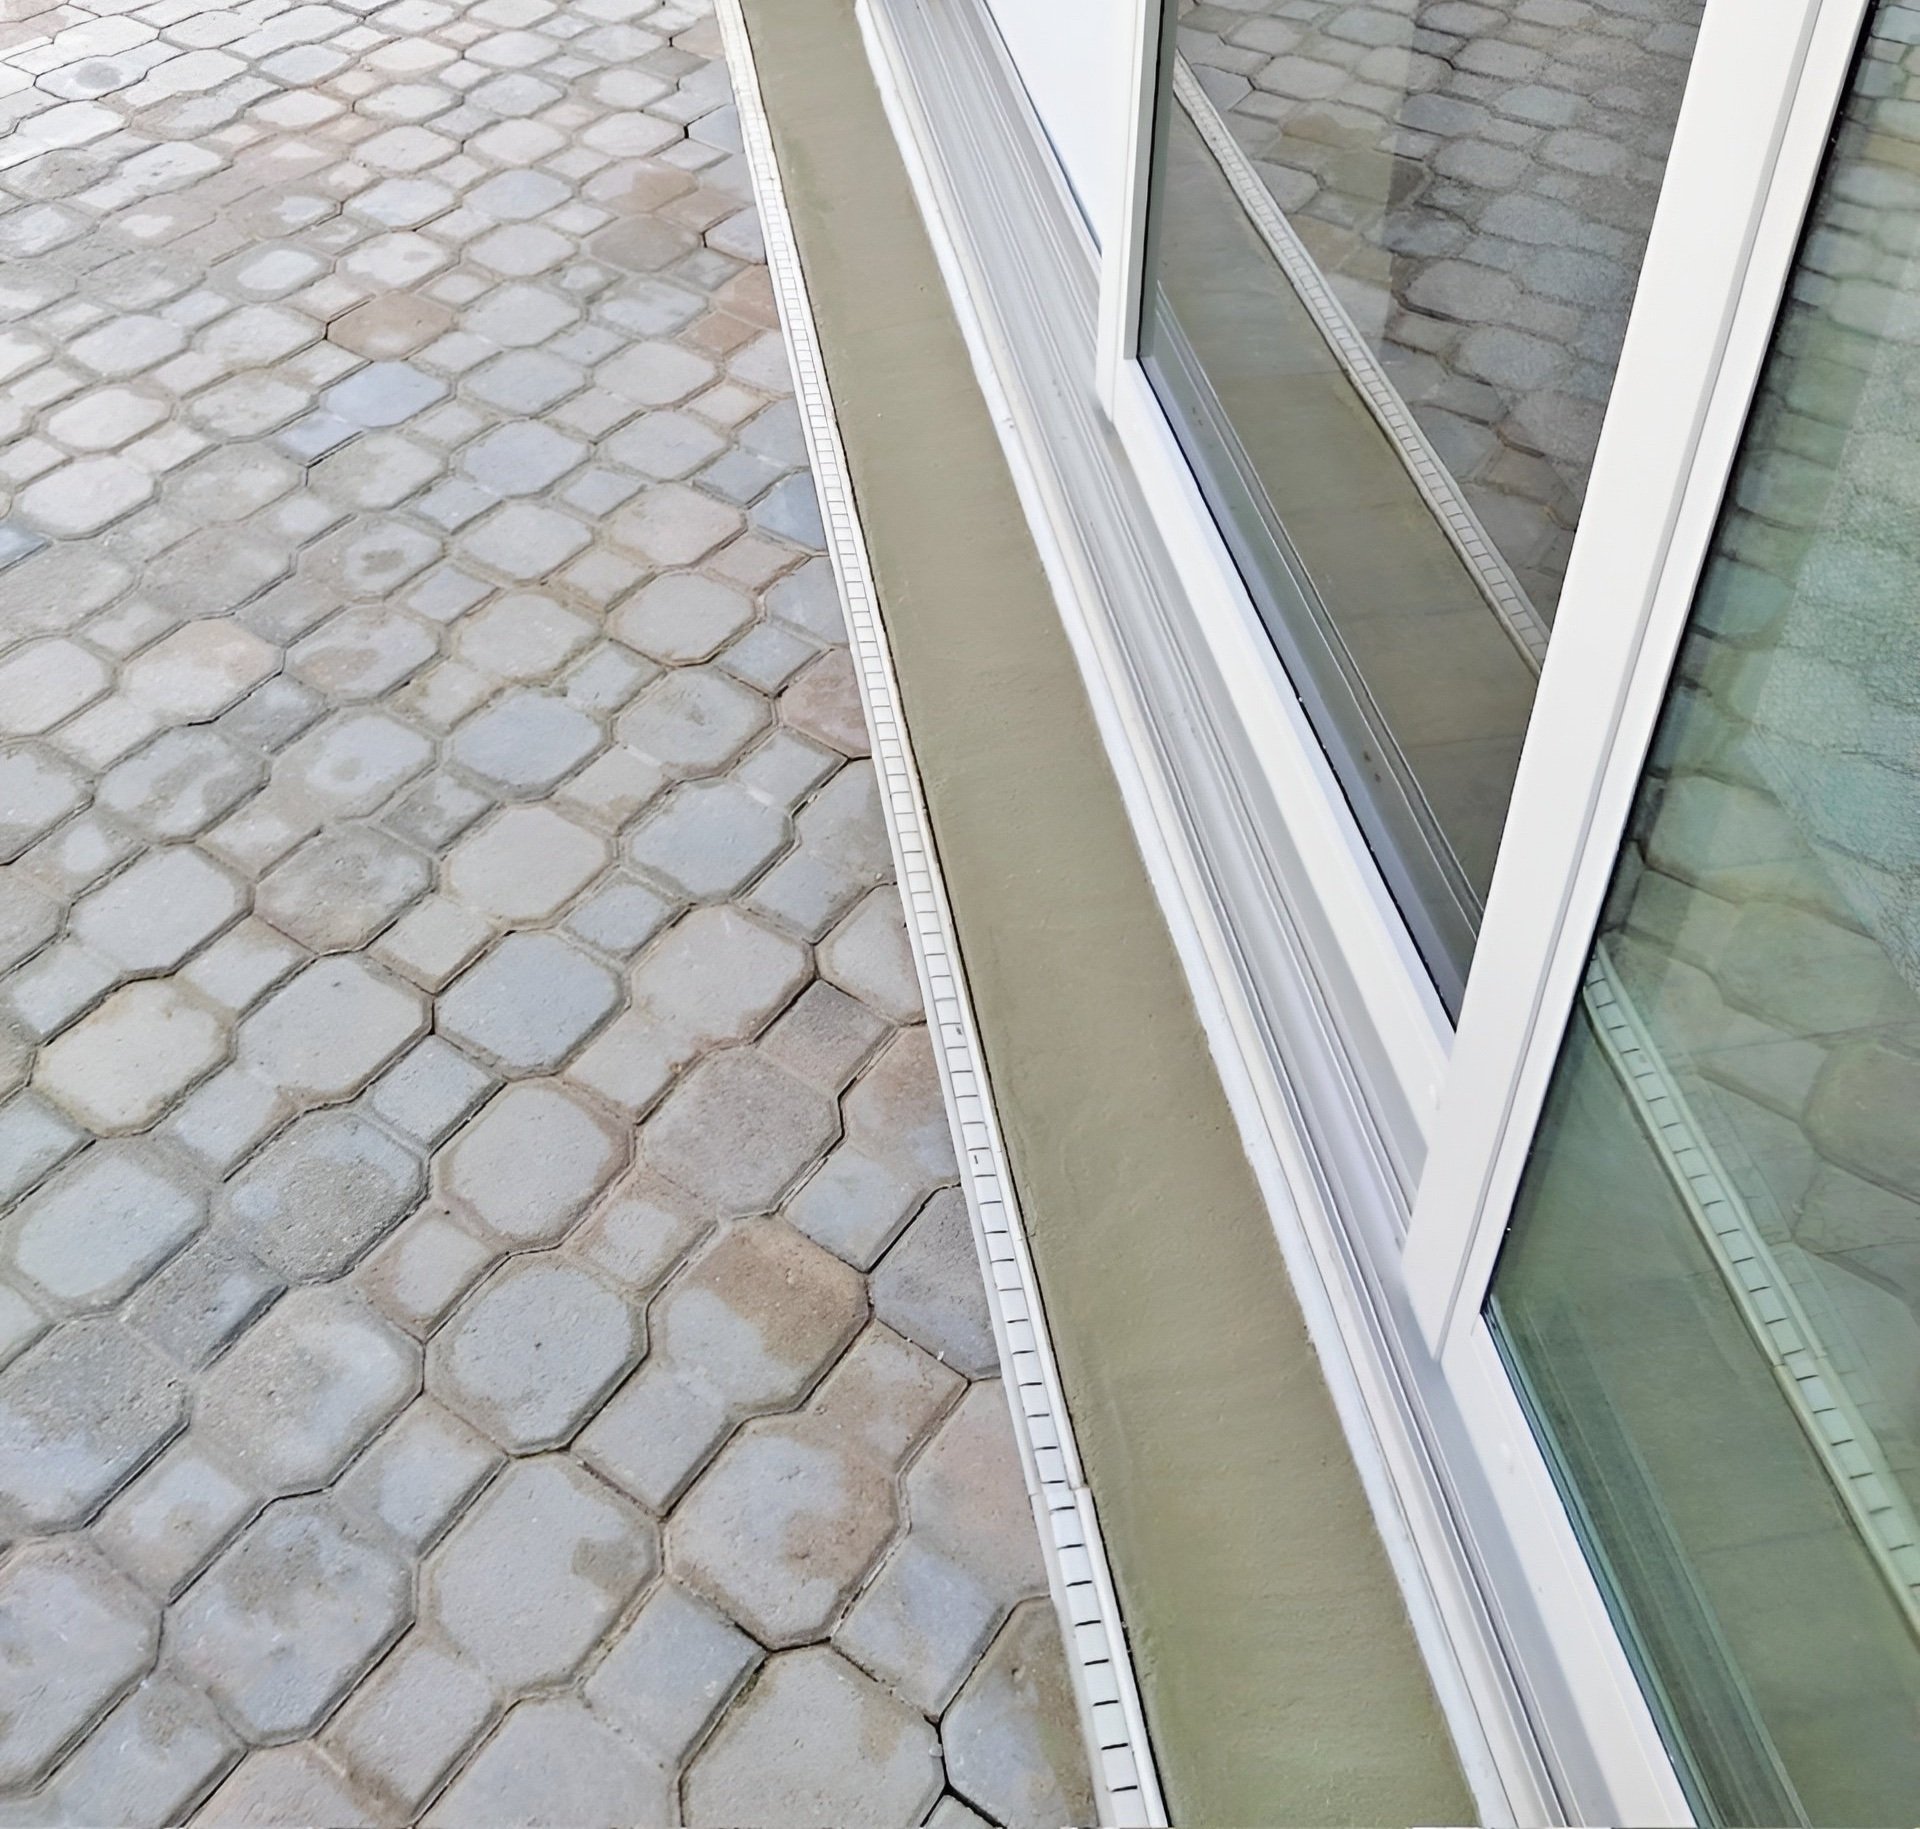
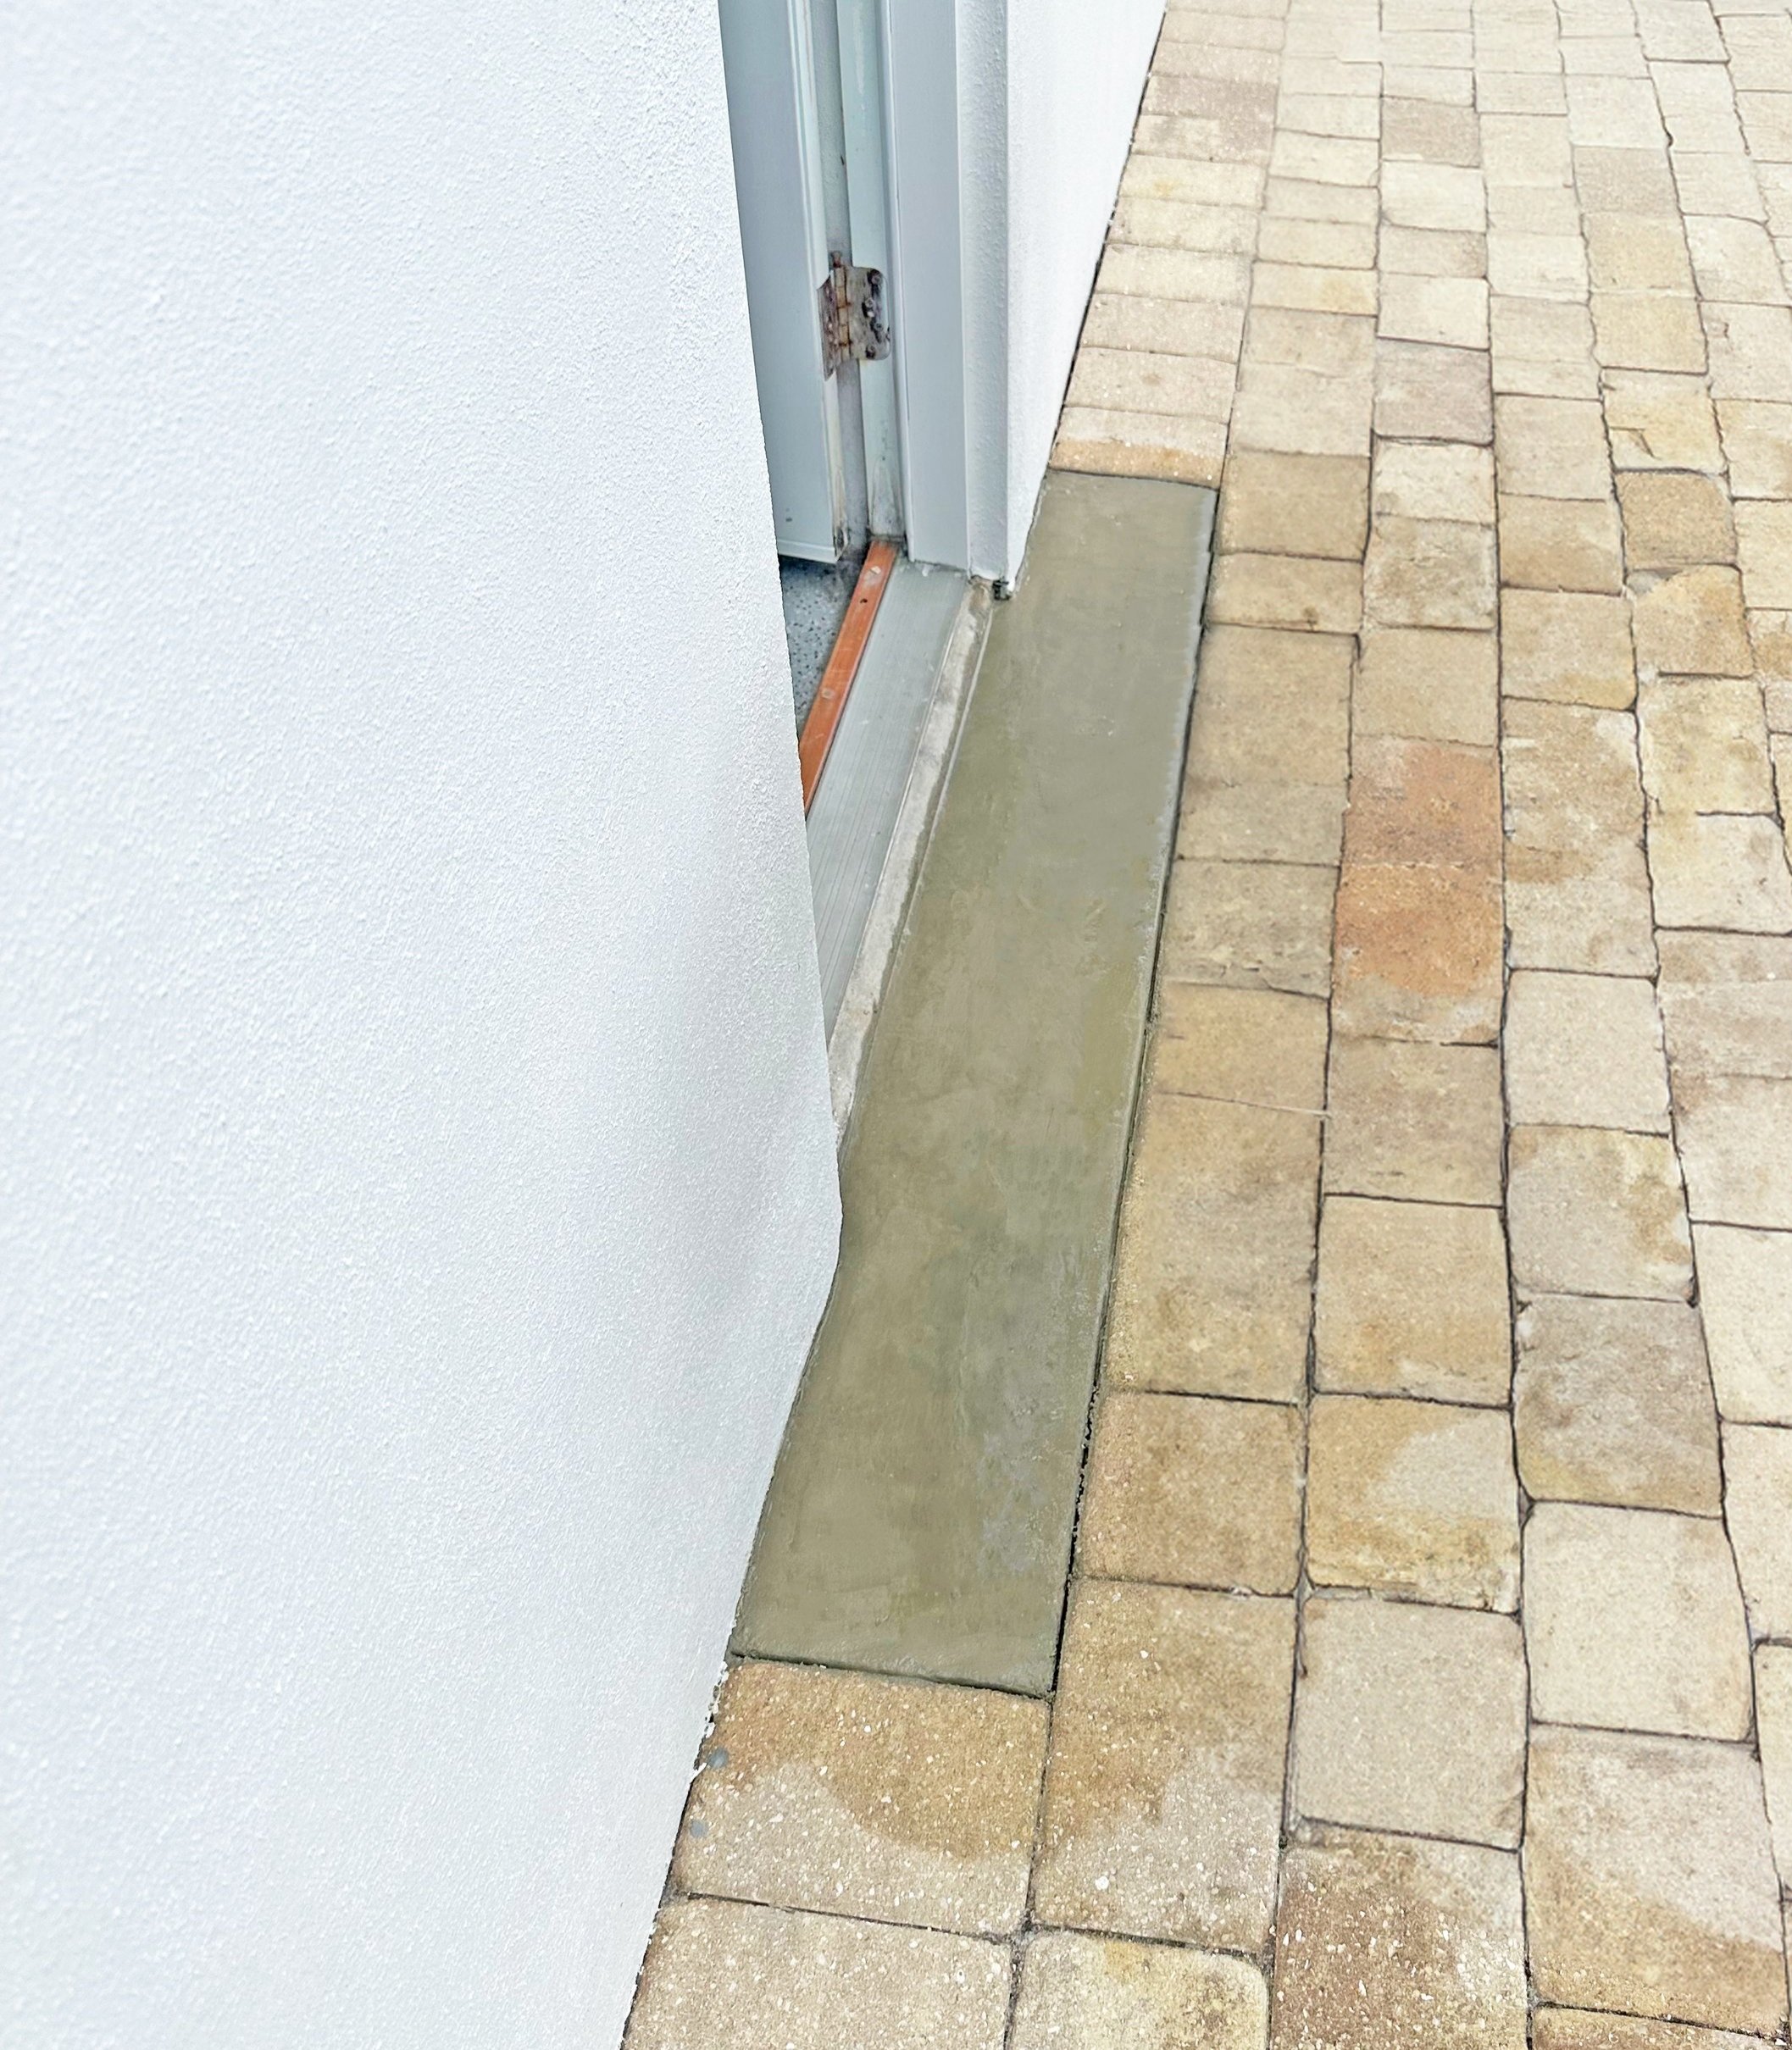
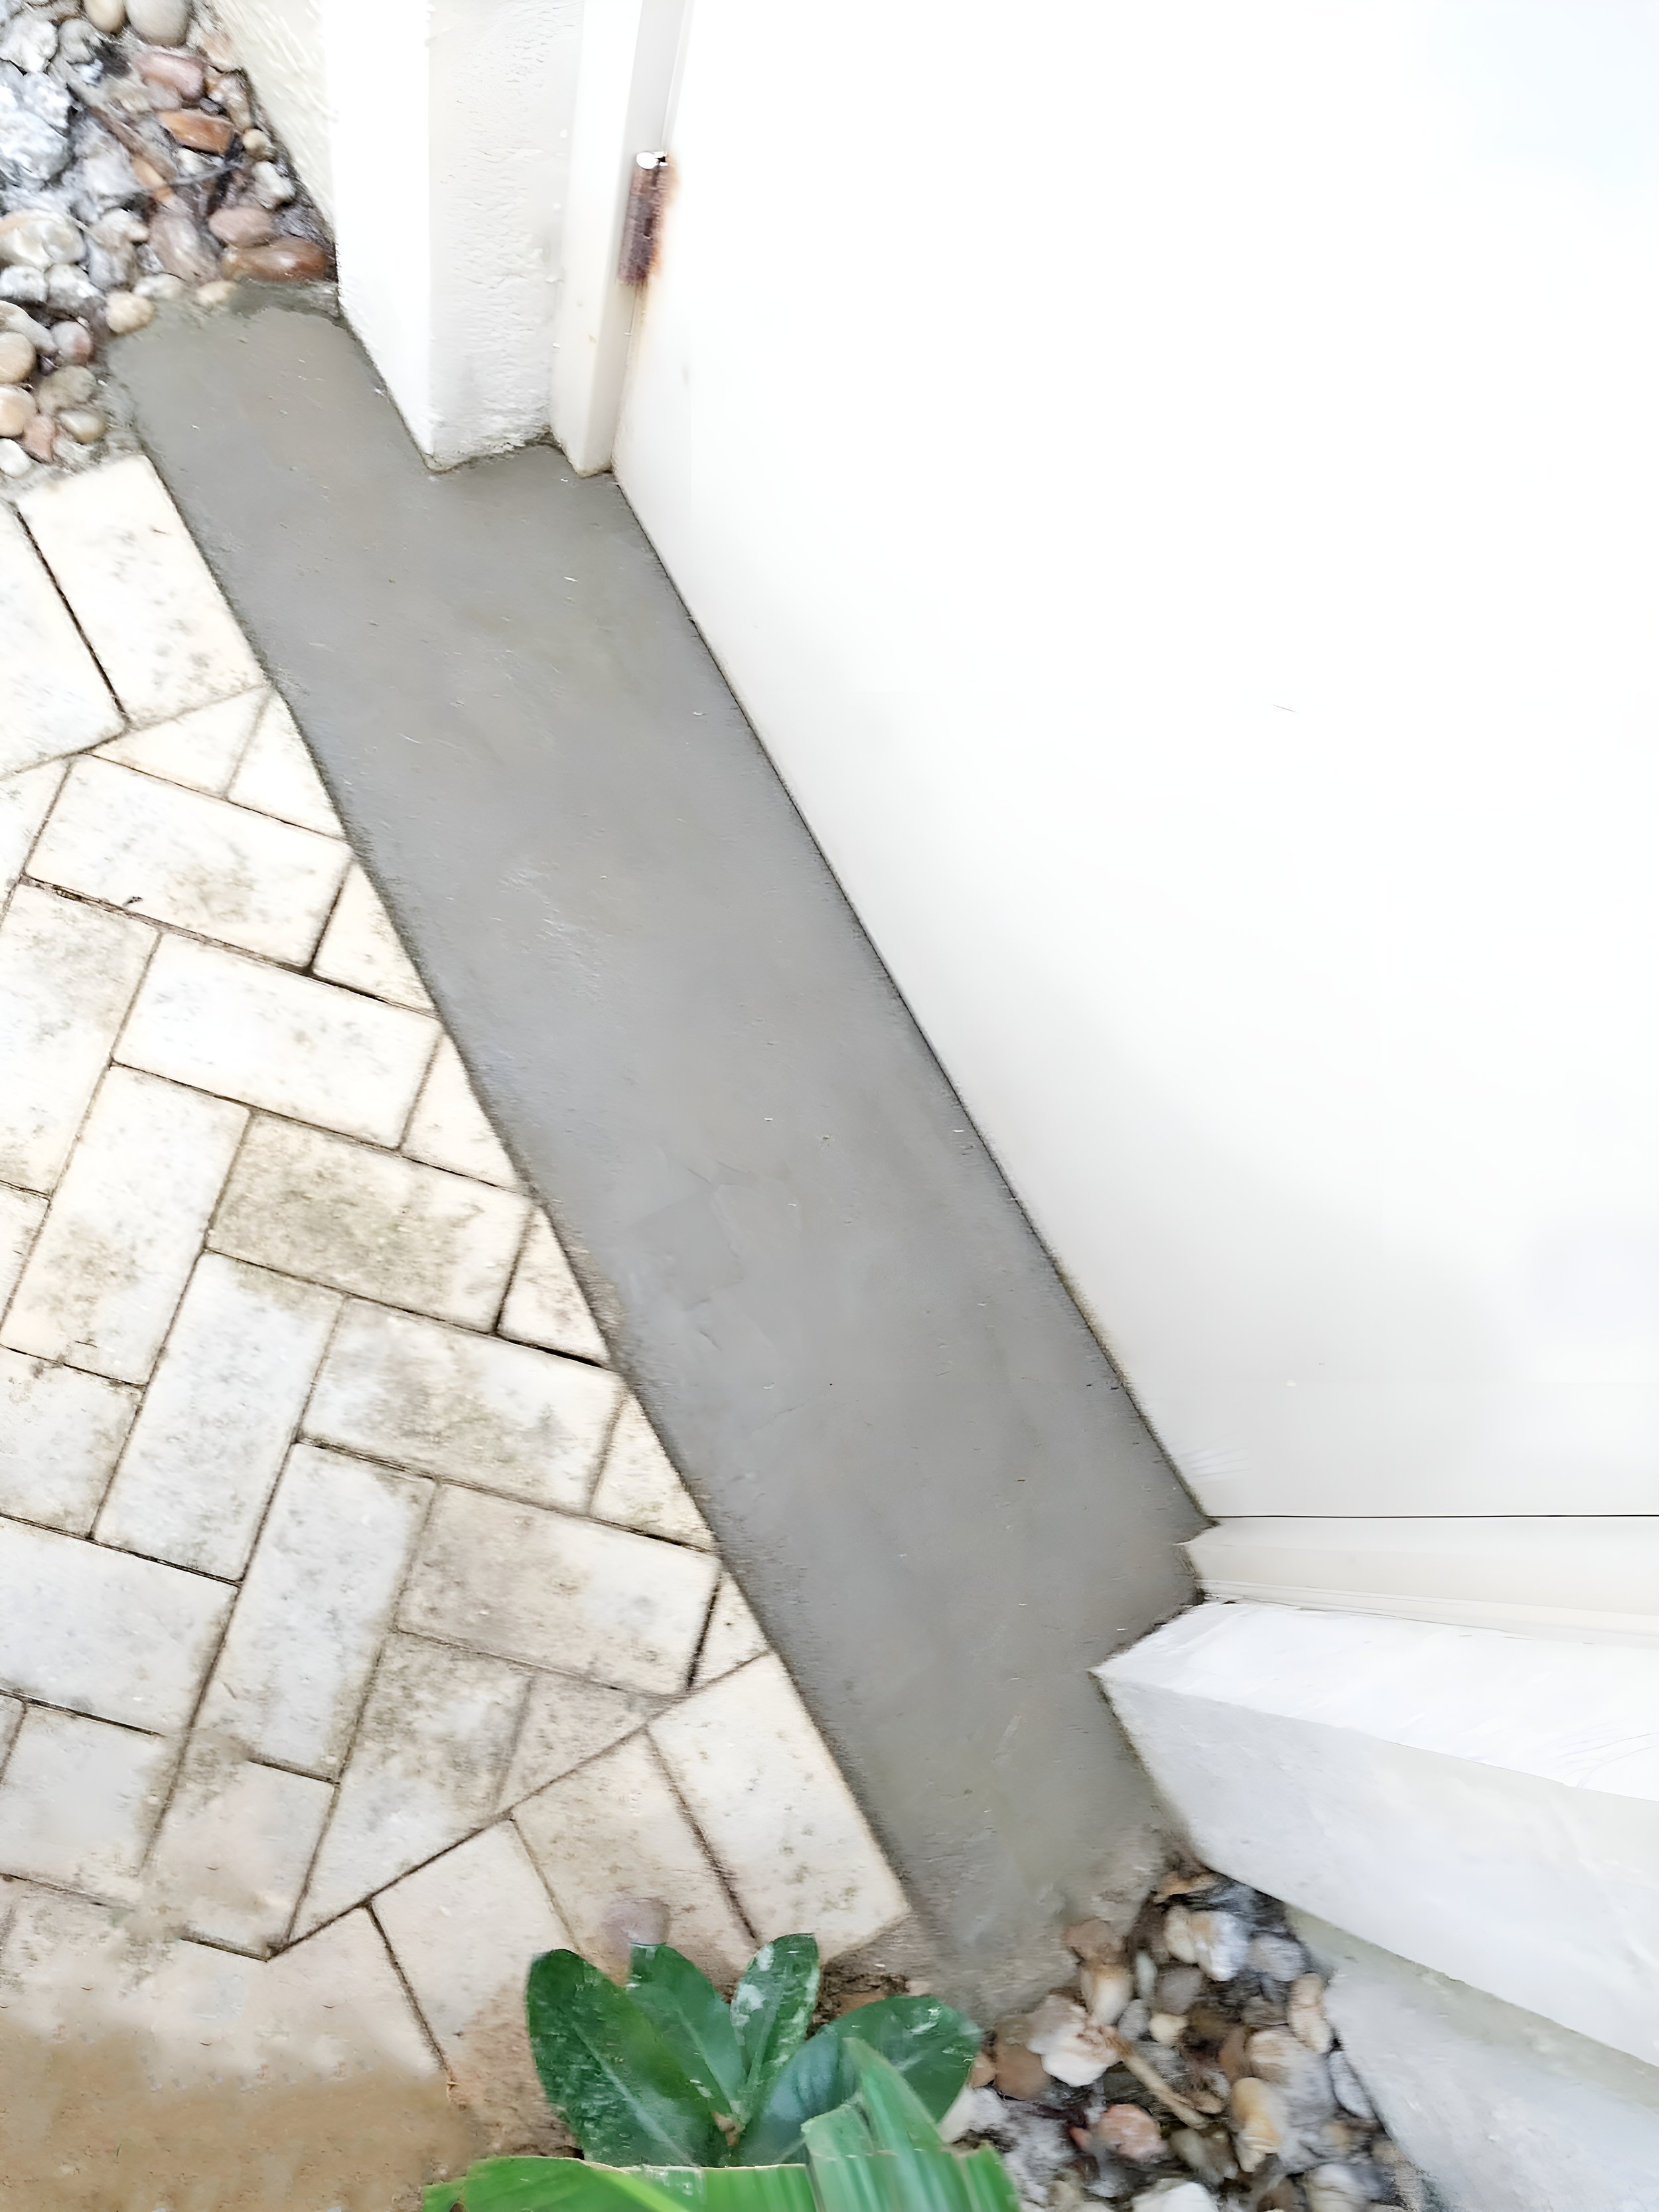
Adding a Concrete Footer to Enhance The Watertight Seal
To improve the seal between the Hammerhead and the ground below, it is important to have a level and smooth surface.
In situations where there are pavers in sand, gravel, or dirt as a subsurface, it is important to add a concrete footer underneath the Hammerhead bottom rail to ensure a good seal.
This footer should extend across the entire width of the barrier, including the U-Channel Posts.
The footer should be positioned right up against your structure, to ensure a good connection and seal off. If the footer is being placed between two property walls, make sure that it is positioned to abut these walls to create a secure seal.
Installation of the Footer:
Cut into the existing ground to a depth and size that can accommodate the Posts (and Baseplates in some instances) prior to installation. Frame out the area to receive concrete.
Pouring and Smoothing:
Once leveled, pour concrete into the hole and smooth out the top to create a level surface. This enhances the watertight seal against the Hammerhead Bottom Plank's thick neoprene gasket.
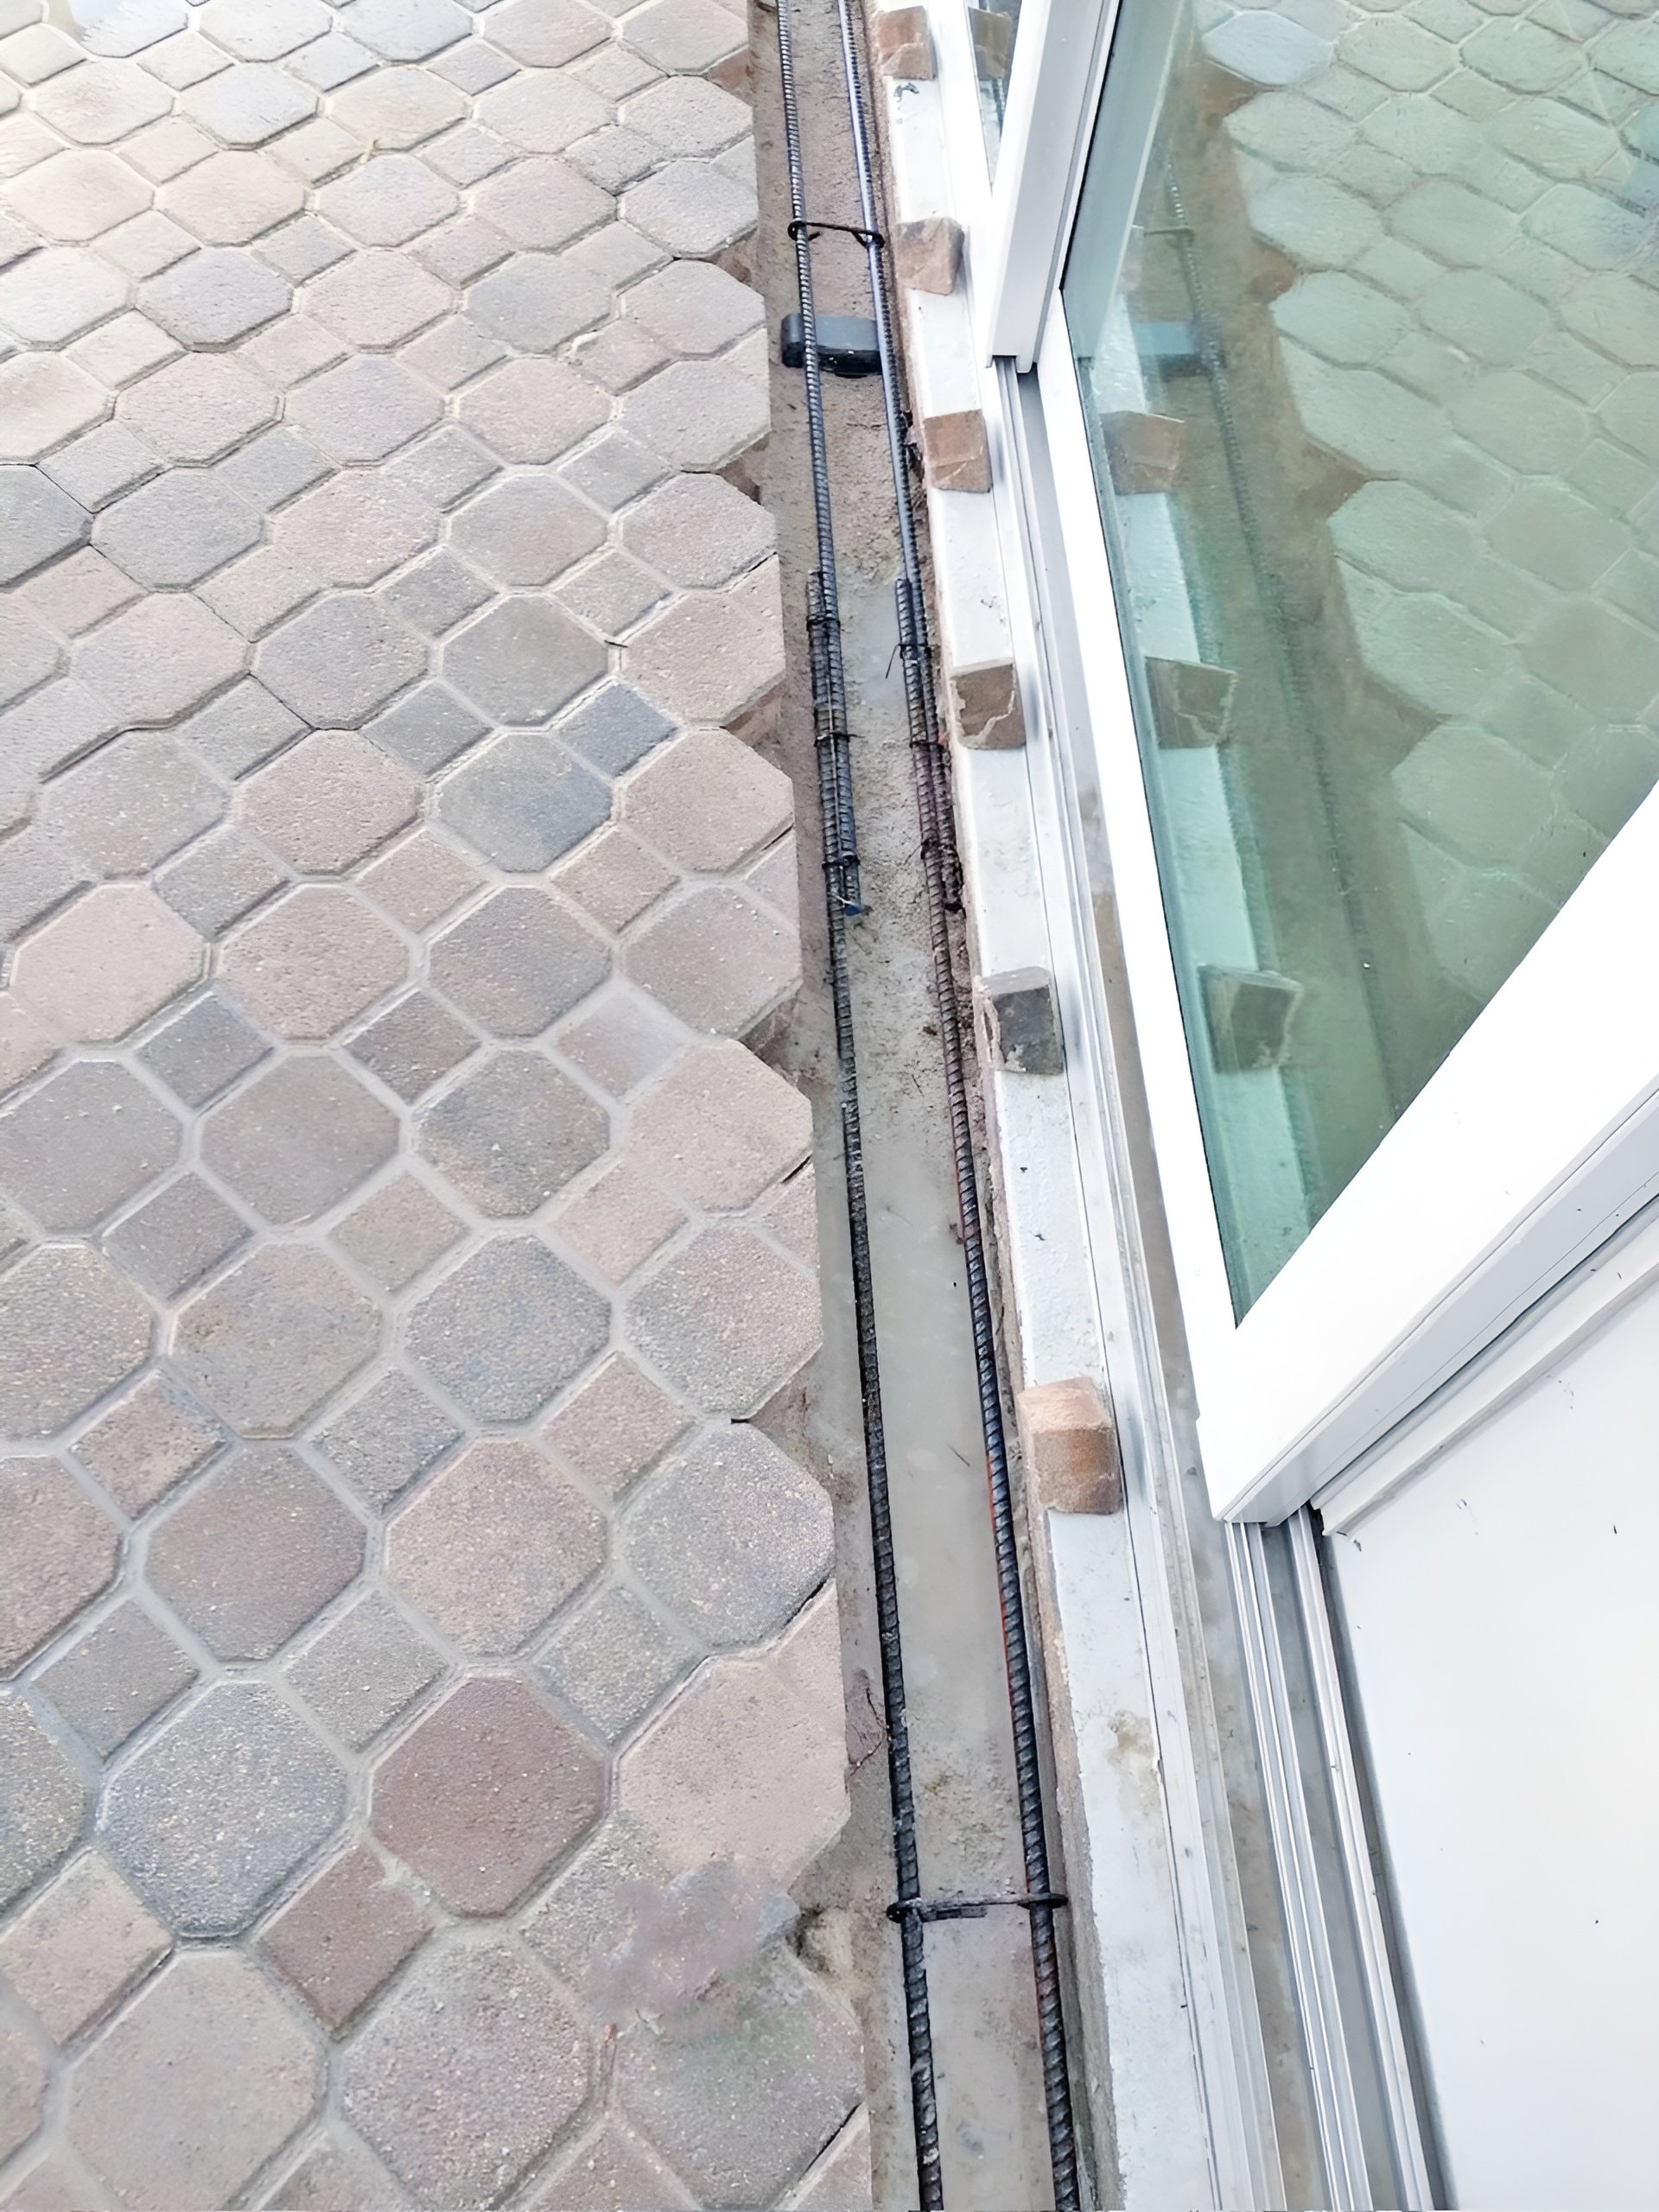
Rebar Reinforcement:
It is recommended to consult with your local contractor to determine if rebar reinforcement is recommended for the Footer area before concrete pour. Usually rebar is required for driveways and other high traffic areas.
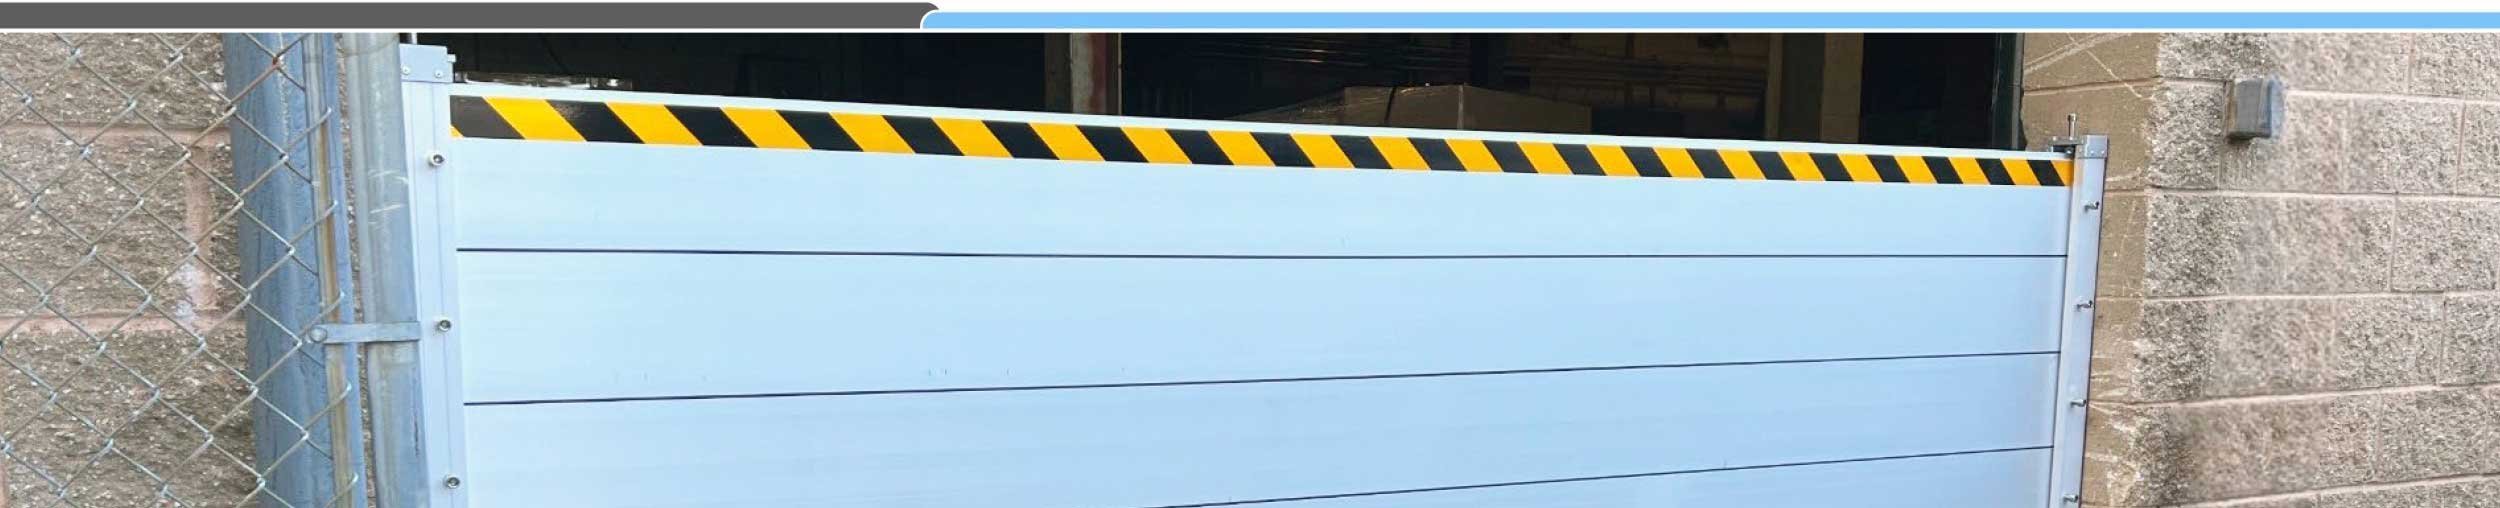
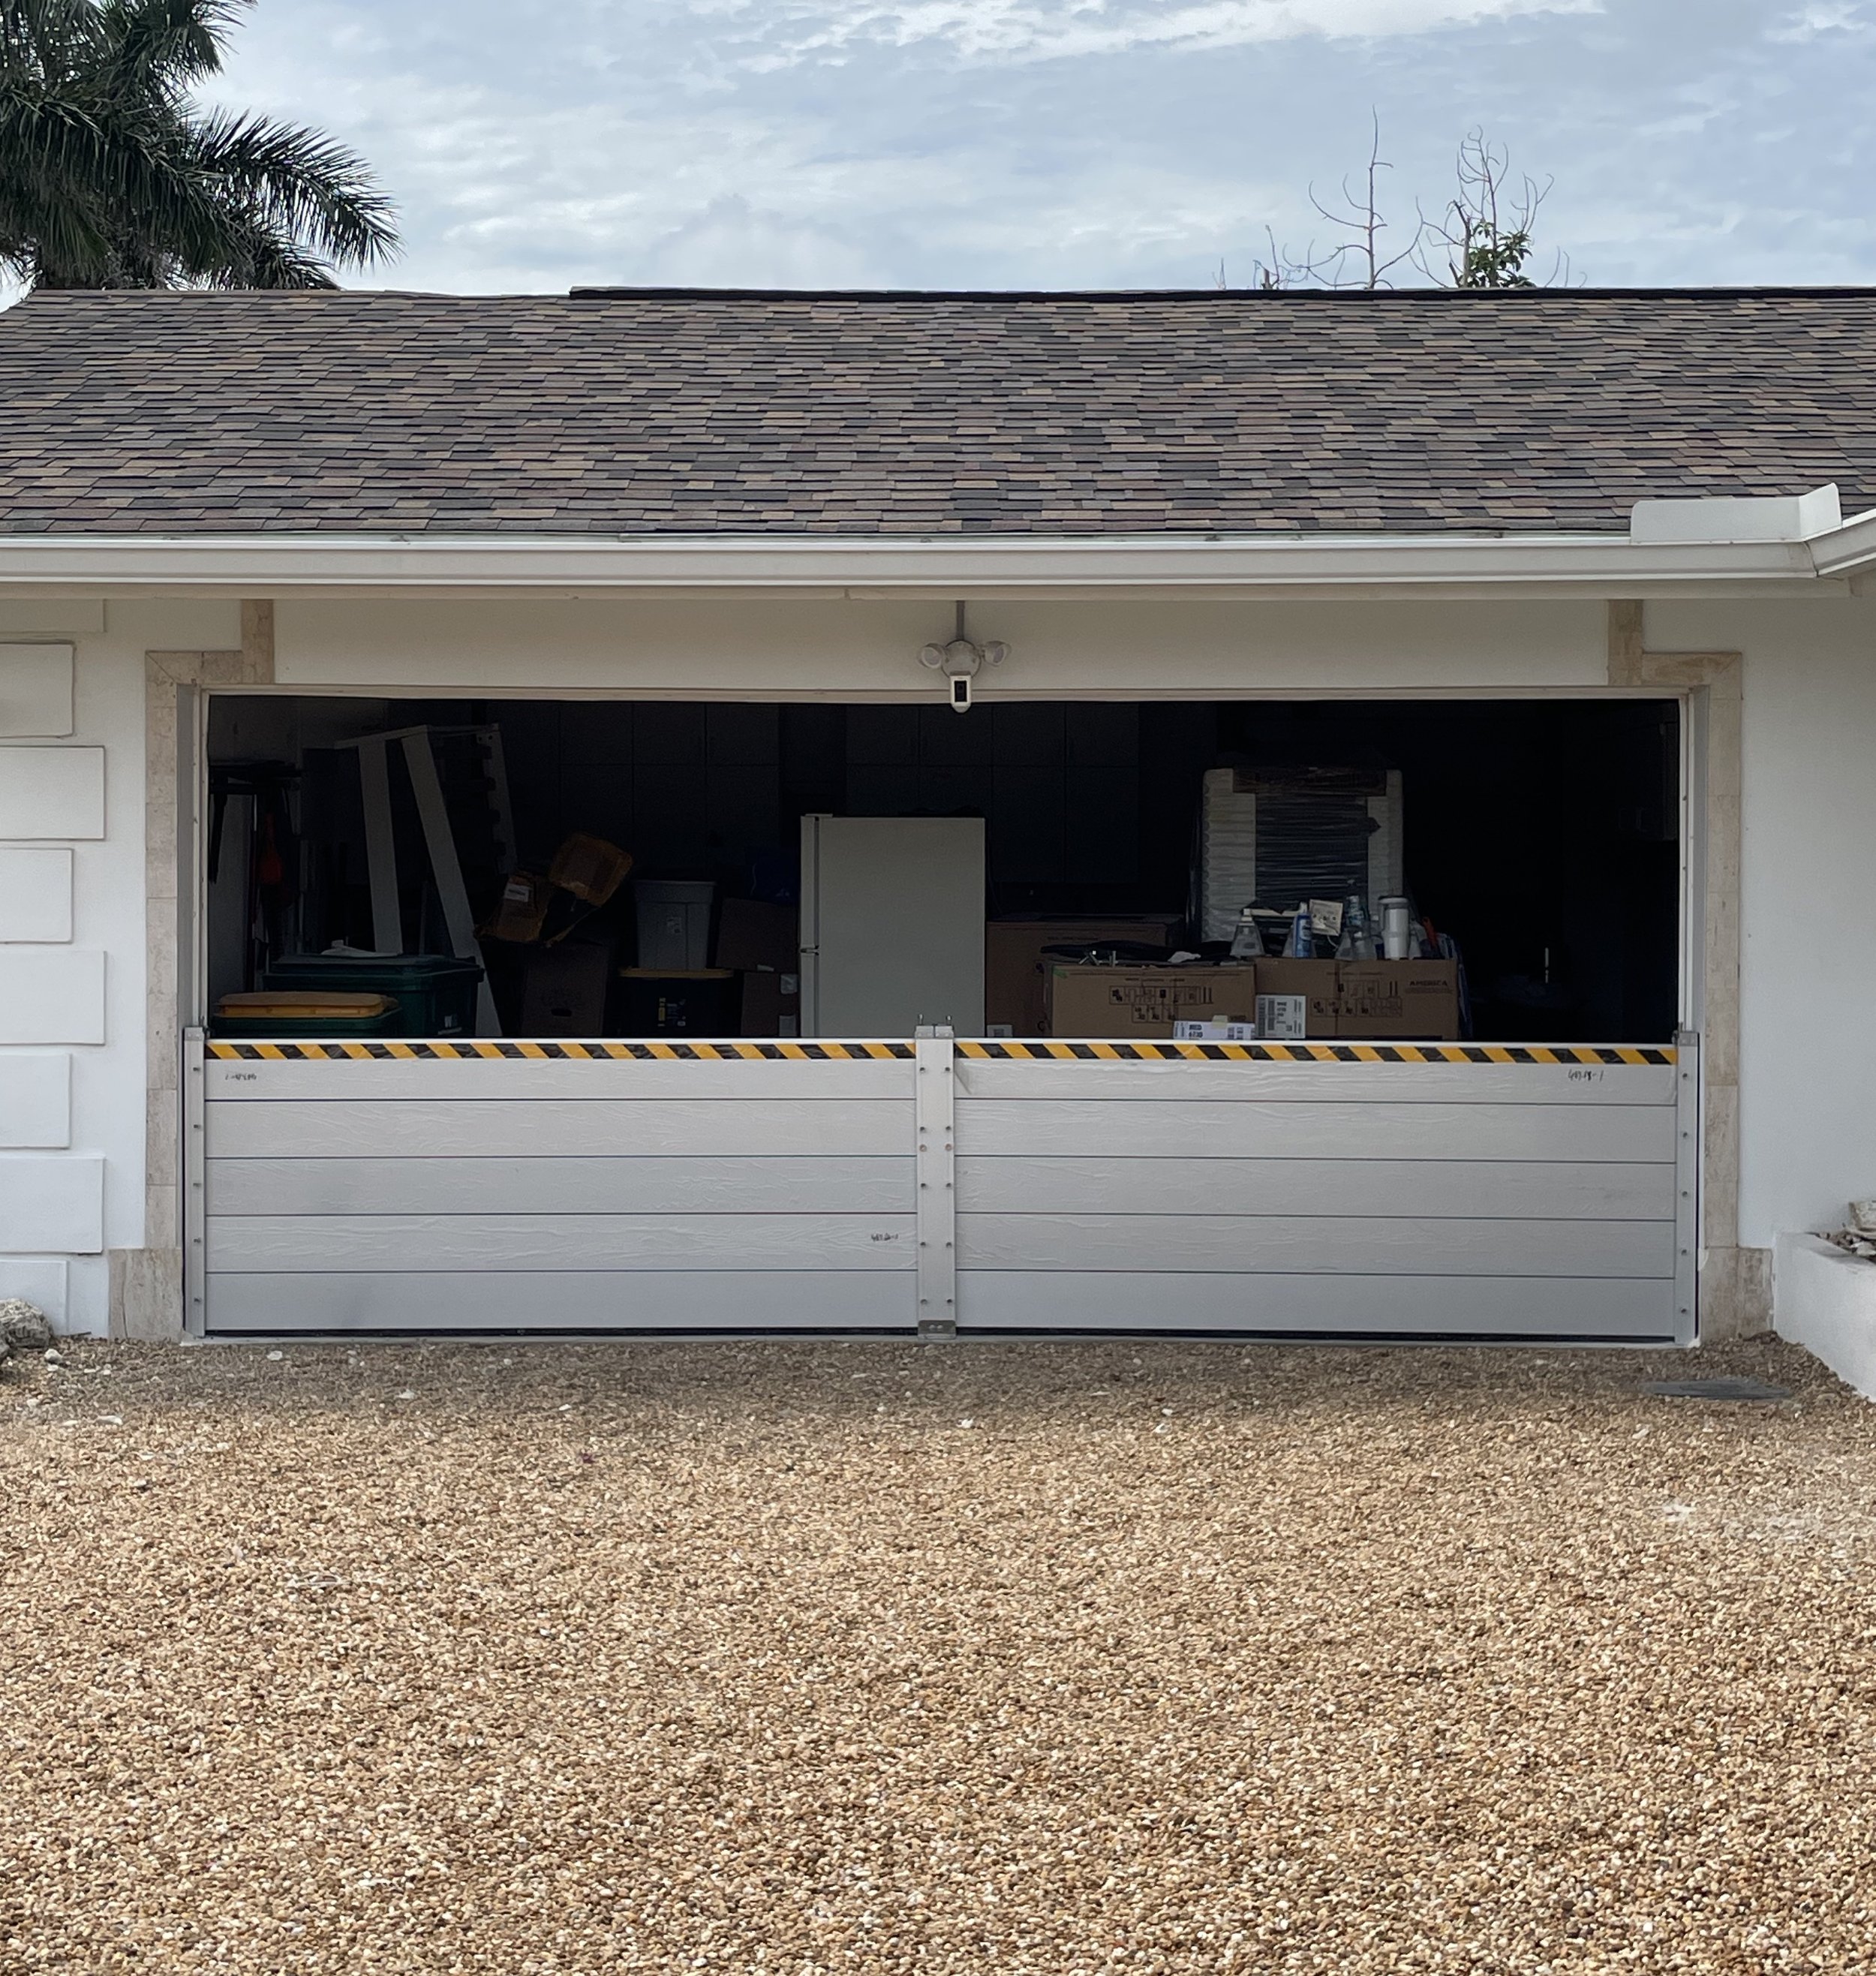
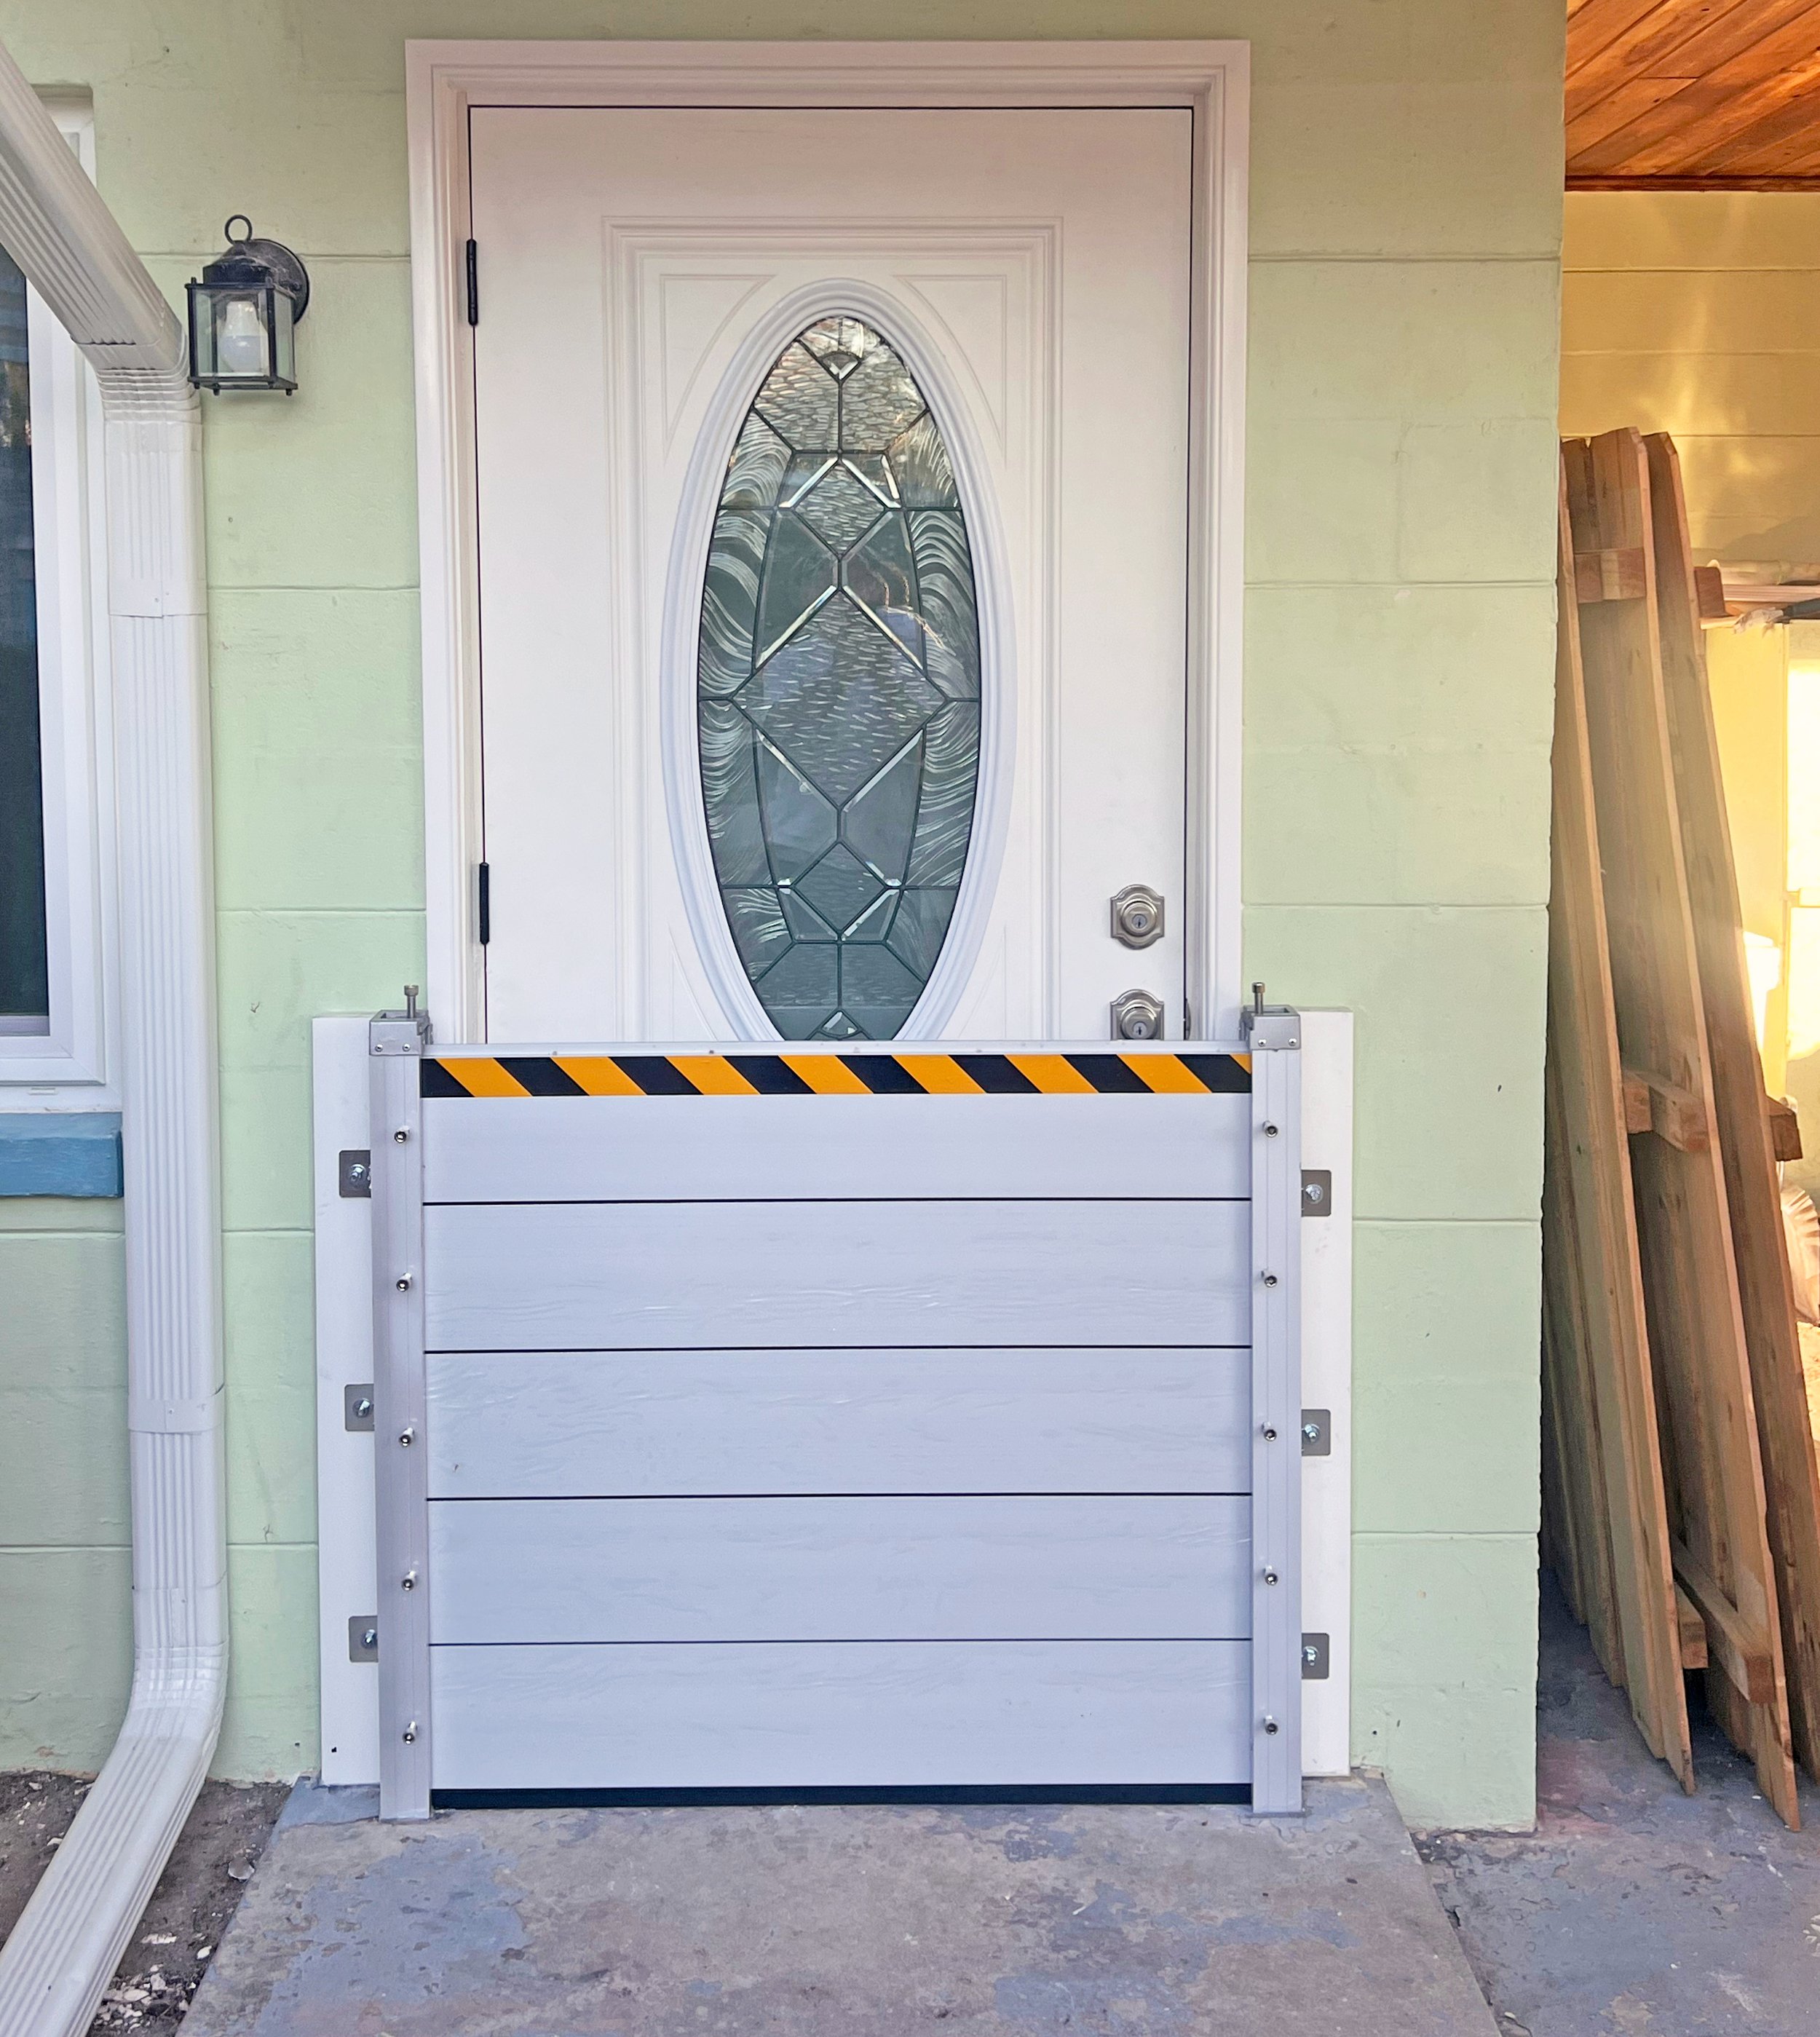
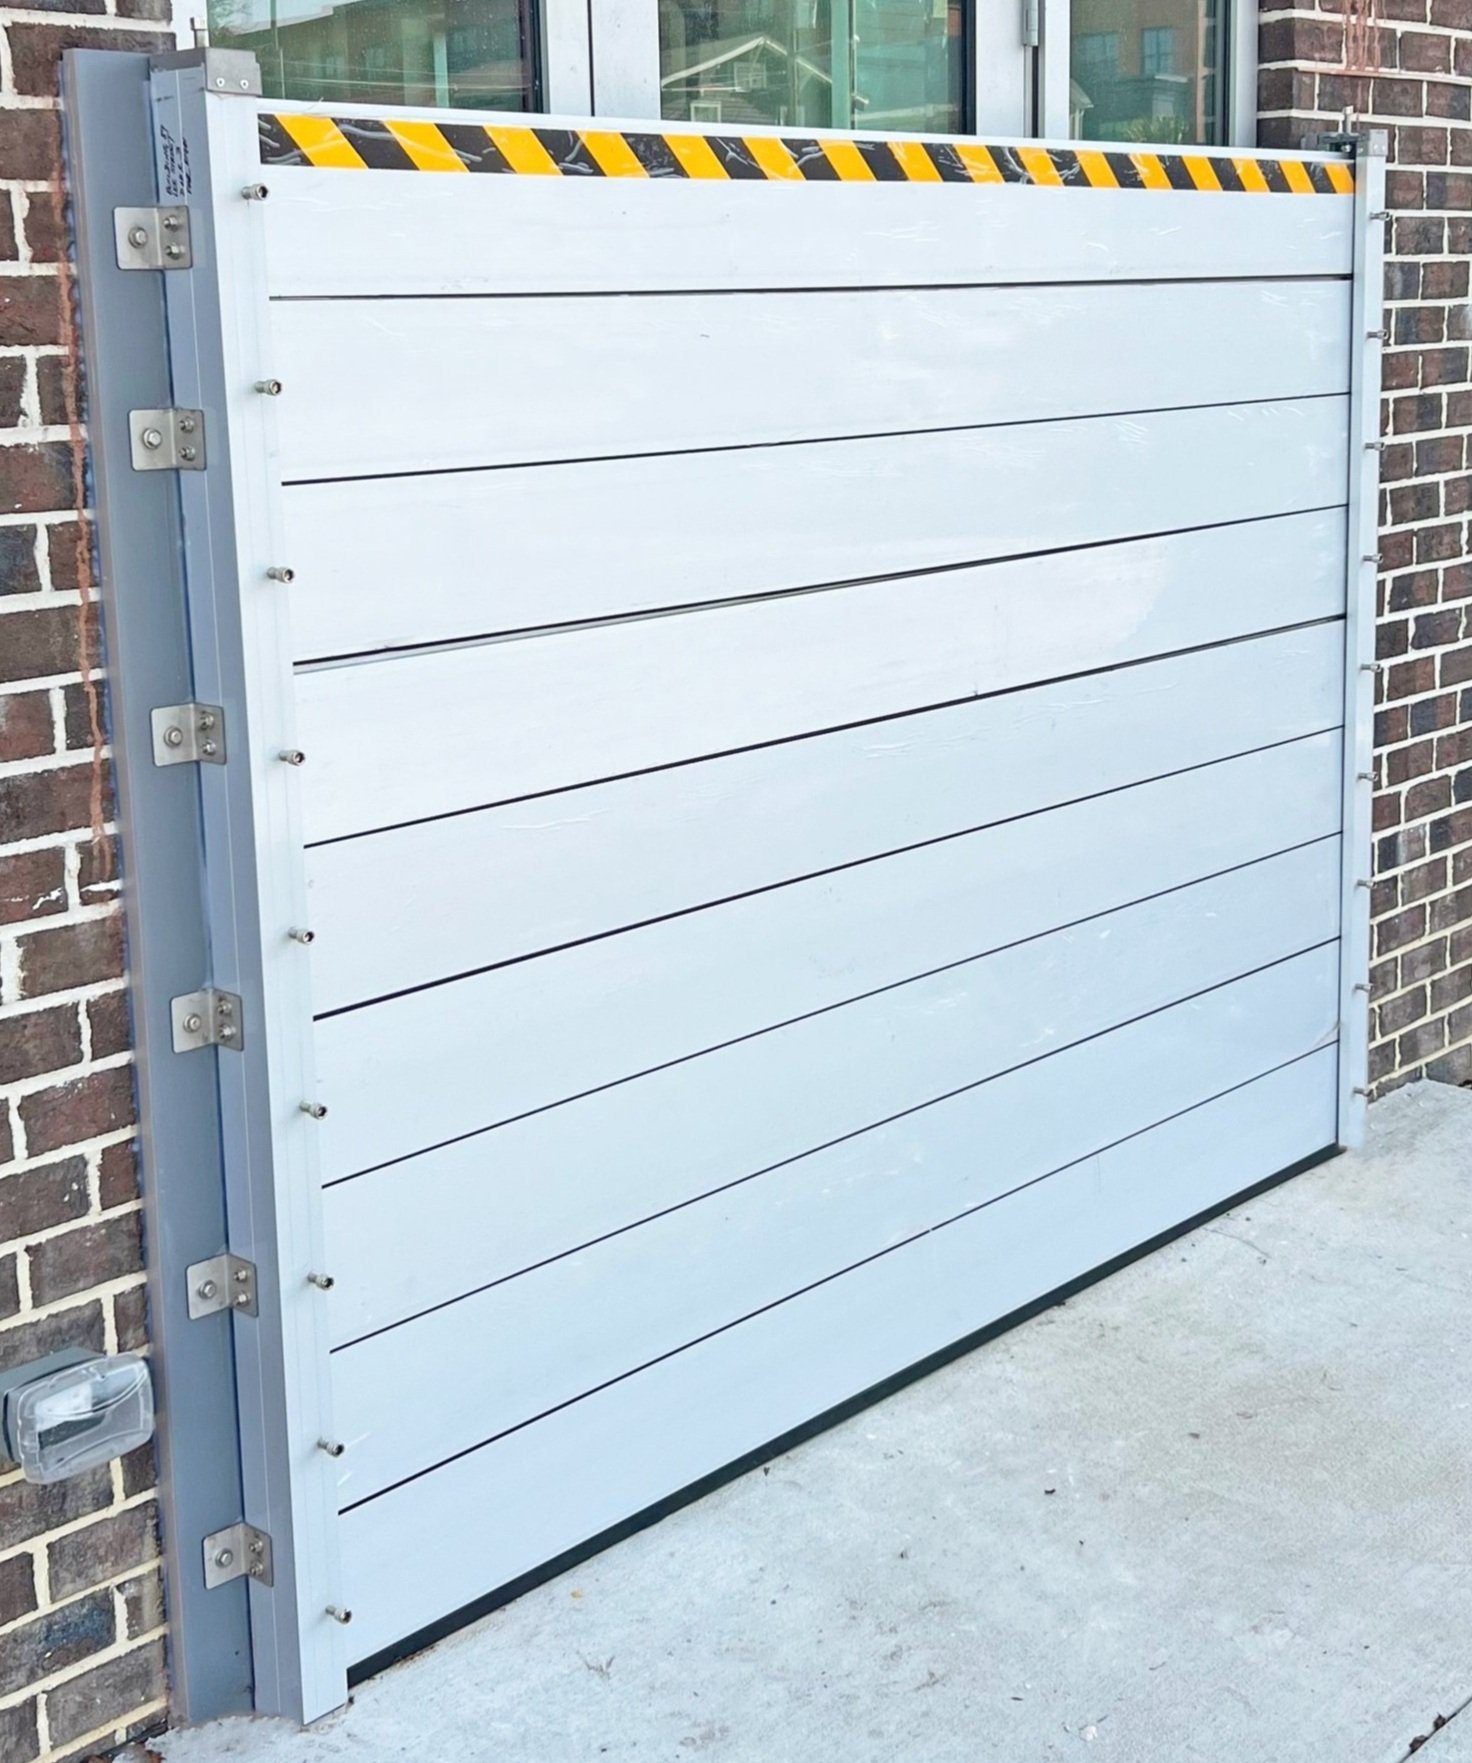
Deploying Your Flood Log Flood Barrier

Slotting in Planks
Aluminum planks are slotted into post channels when a flood event is expected. To begin inserting planks make sure that all plank tightening bolts (in posts) are loosened, so that the planks can be inserted freely.
Slide out the post top tightening plate to gain access to the post’s U-channel.
Identify the bottom plank, which has a larger seal off than the other planks. This thicker seal allows it to get a good seal on slightly varying ground below. Slide the bottom plank into the channel in the posts, until the plank reaches the floor below. Add successive planks until all planks are stacked in the channel.
Barriers come with safety tape adhered to the top plank, making it easier to see the barrier in low light settings. Place this plank on the top of the stack of planks.
If you prefer a barrier without safety tape at the top, please advise at the time of ordering.


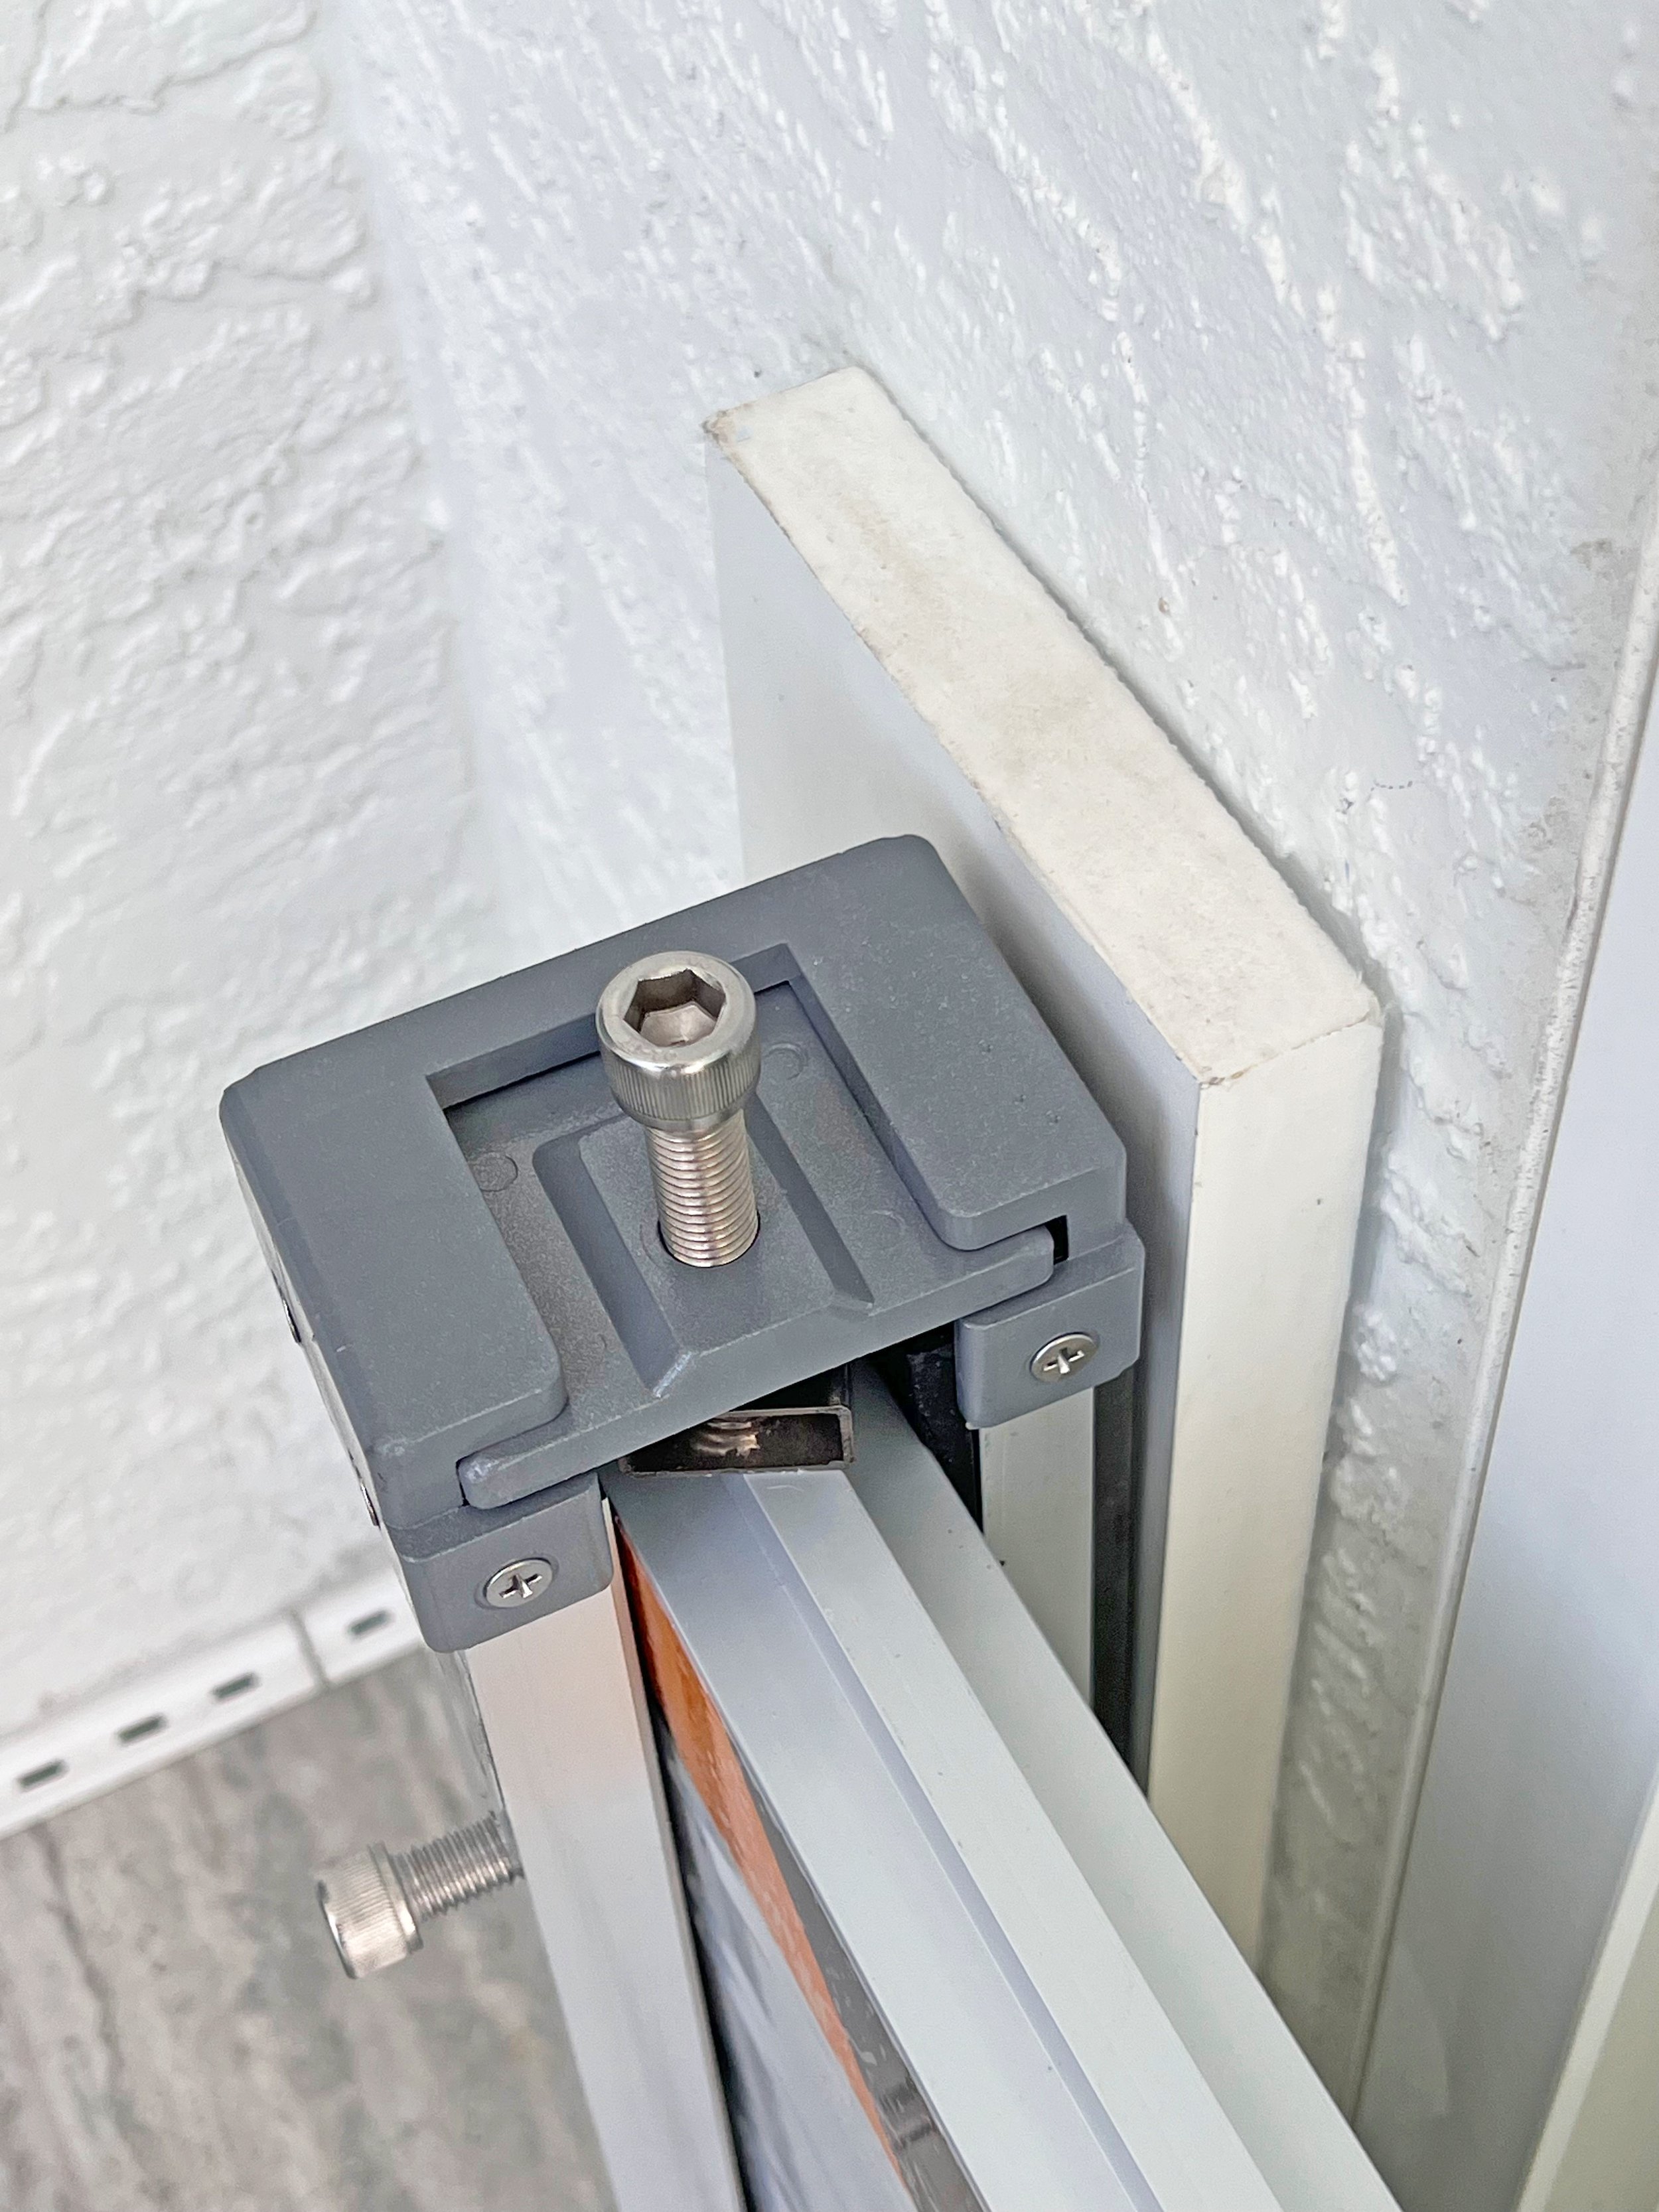
Tightening Down Planks
Once all planks are slotted into the post channels insert the post top locking plate into the notch at the top of the post. Use the included Allen wrench to tighten down the planks, enhancing the seal between them and the flood below. Be sure not to over tighten the planks, so that you can still screw down the plank tightening bolts in the next step. .
Use the Allen wrench to screw down the plank tightening bolts on the posts, securing the planks against the neoprene strip inside the channel.
Once all planks are tightened down, your barrier is ready to protect against flooding.


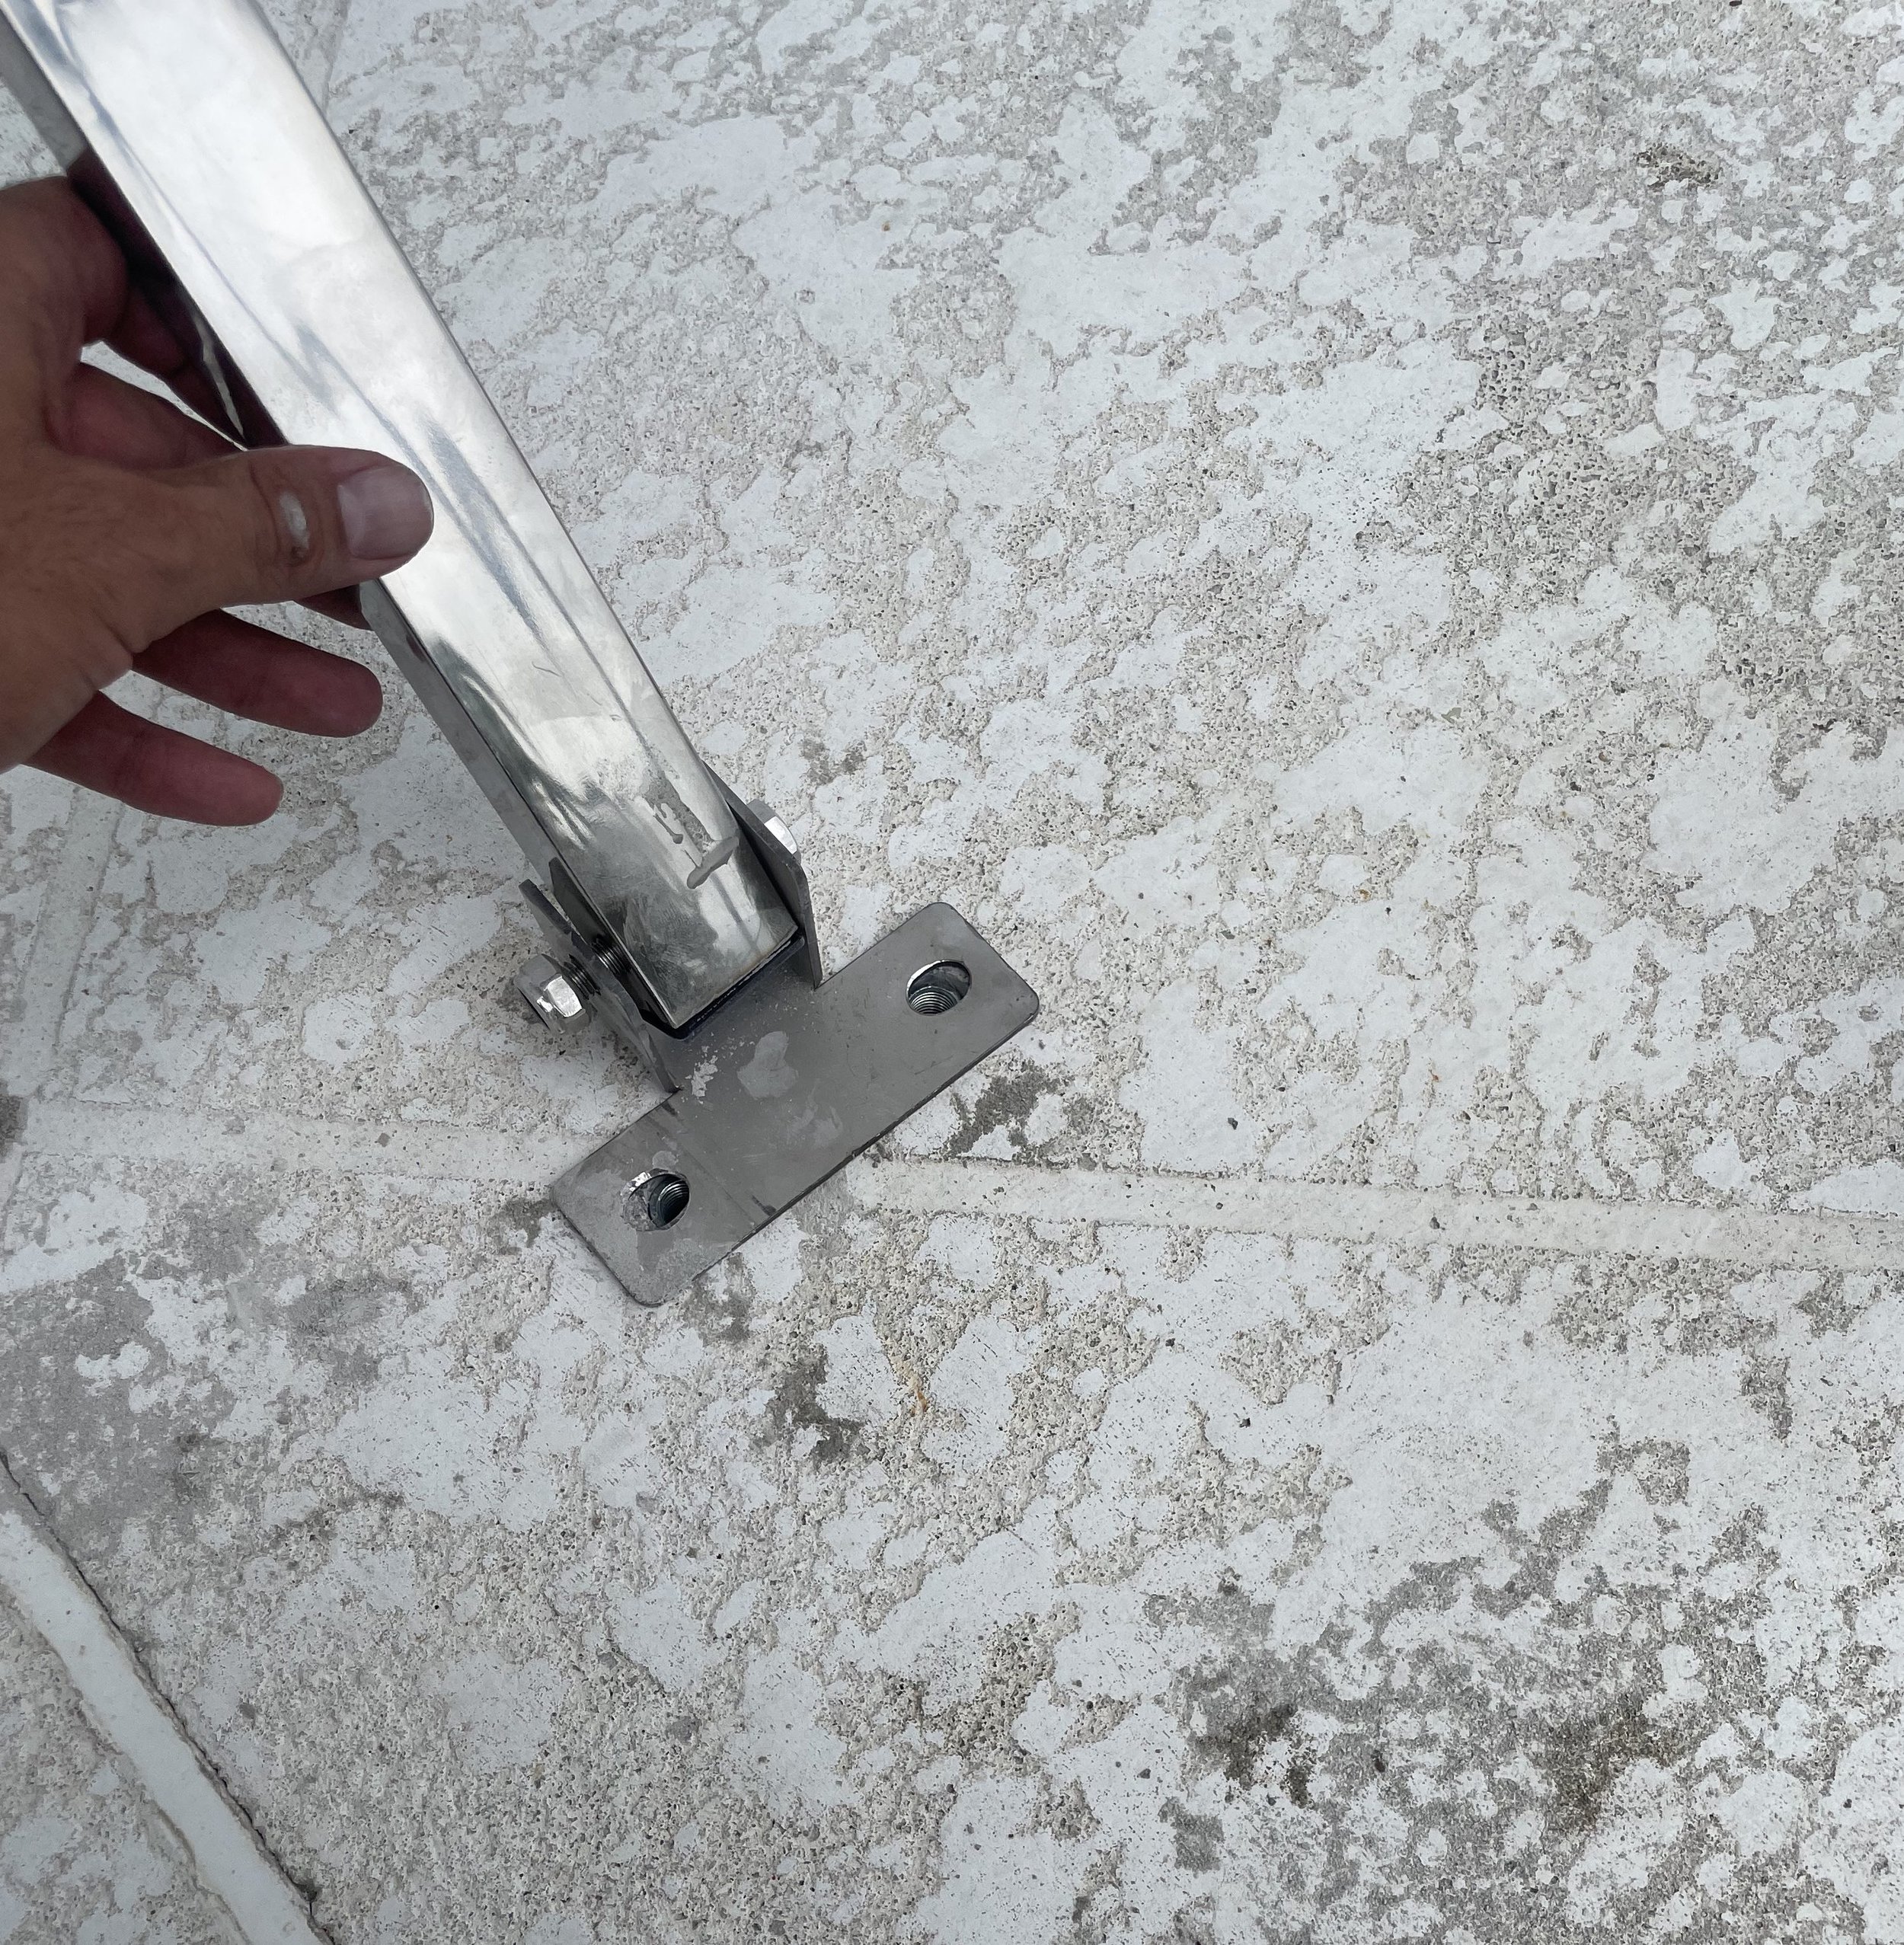
Adding Plank Buttress Brackets (Optional)


For longer plank spans you can add additional support by adding a plank buttress bracket. Typically, we recommend limiting unsupported spans to 12ft, however, if heavy current or wave action is expected, we suggest adding a center buttress support, even for shorter spans. This bracket goes on the inside (dry) of planks and is bolted to the ground using drop in anchor bolts. Note that this is different from the buttress support for center posts and is designed to be used when longer plank lengths are preferred, without a center post.
Follow the same drilling instructions and for the post installation to install the Plank Buttress Bracket. Typically a removable installation is preferred, using a drop in anchor bolt.
When installing, ensure that the straight (90 degree) front end of the bracket is resting up against the planks. To plank lock down on the top of the bracket should be placed over the top plank and tightened down using an Allen wrench.
Once installed, this will provide additional support against heavy current, and storm surge stresses.
Note: Plank Buttresses are placed on inside (not water side) of a barrier
See a Video About the Hammerhead™ Aluminum Flood Plank Barrier
If you have any additional questions about installation or use, do not hesitate to contact us by mail at sales@garrisonflood.com or call us at +1-929-299-2099