
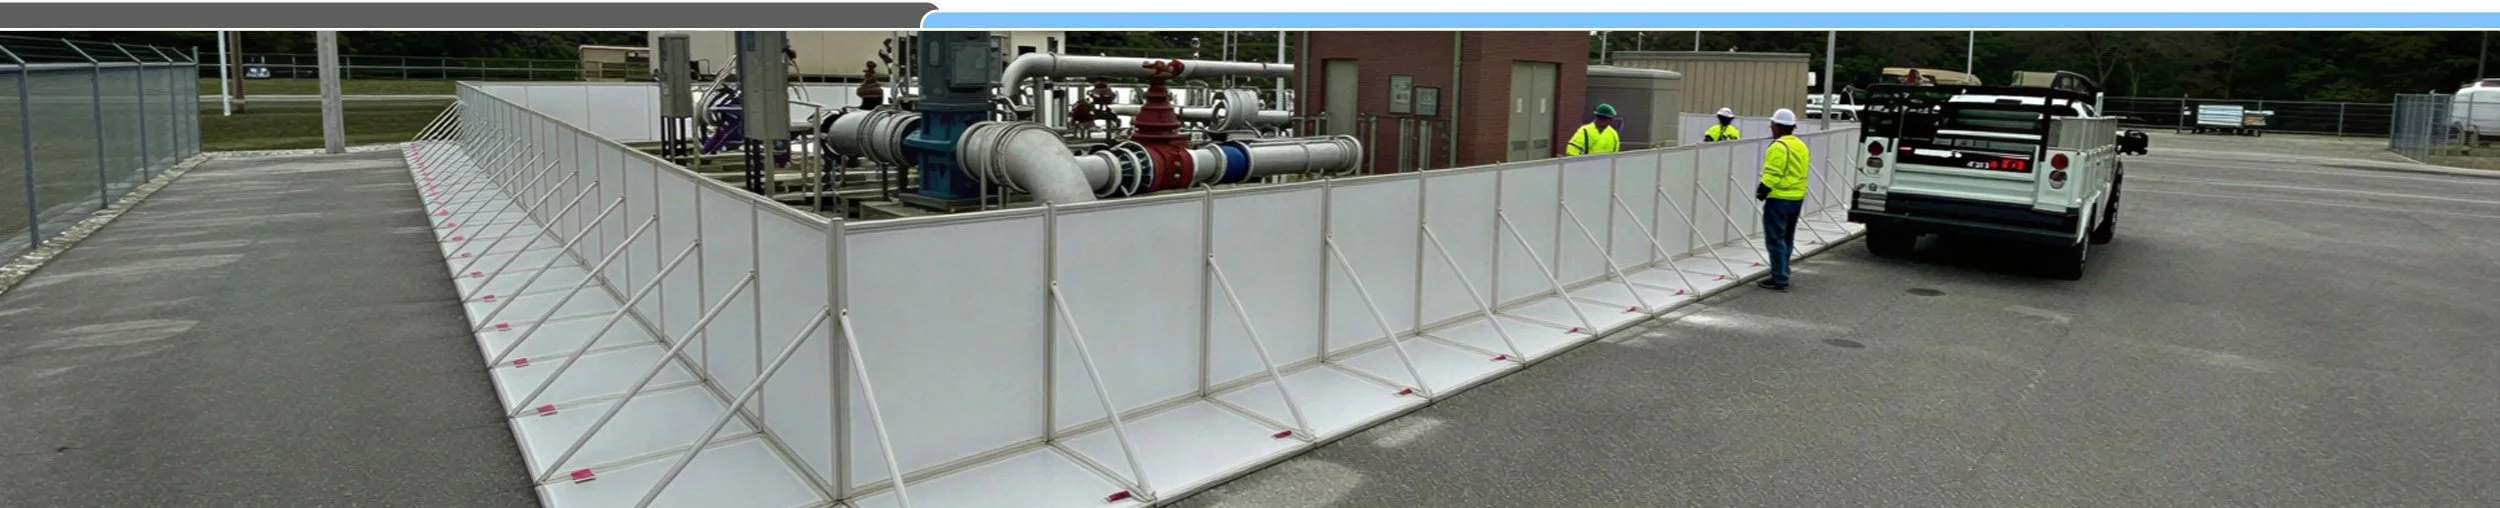
BlueFIN Installation Instructions.

Staging BlueFIN Barriers.
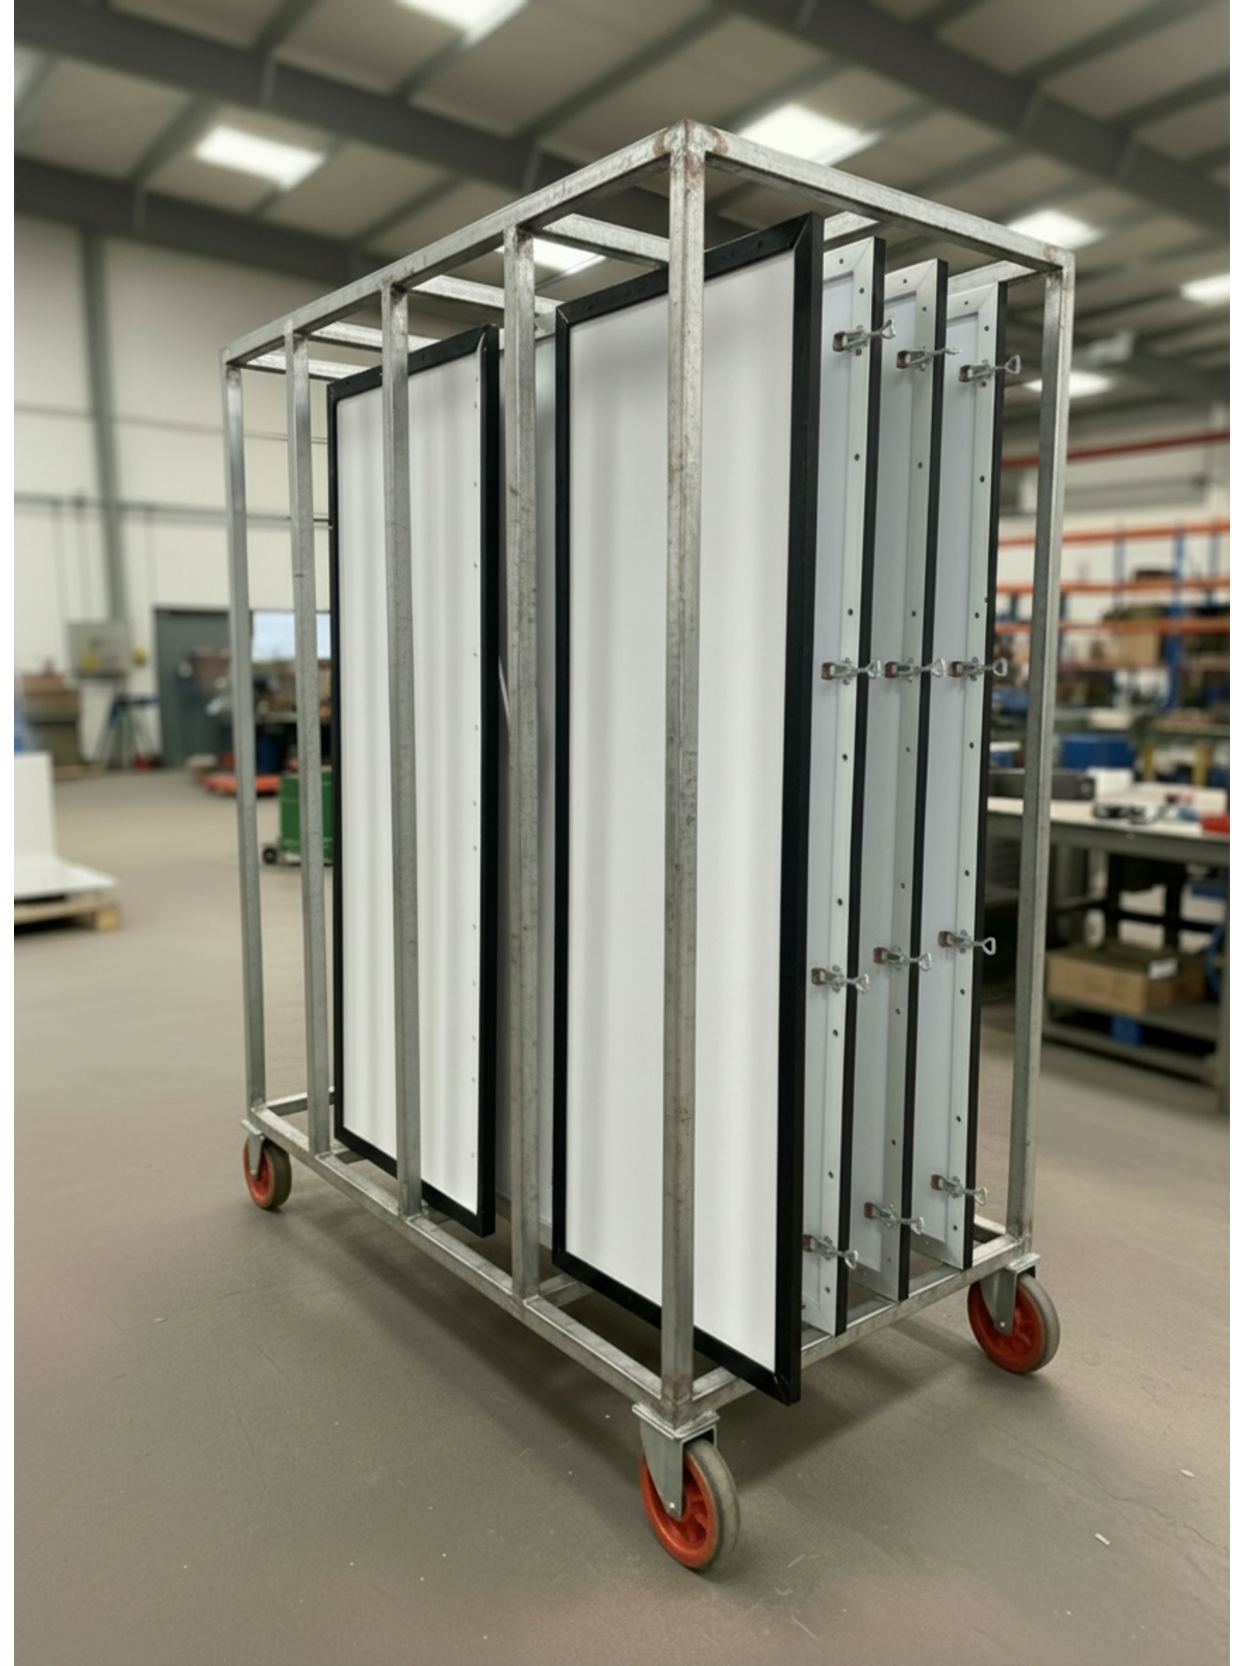
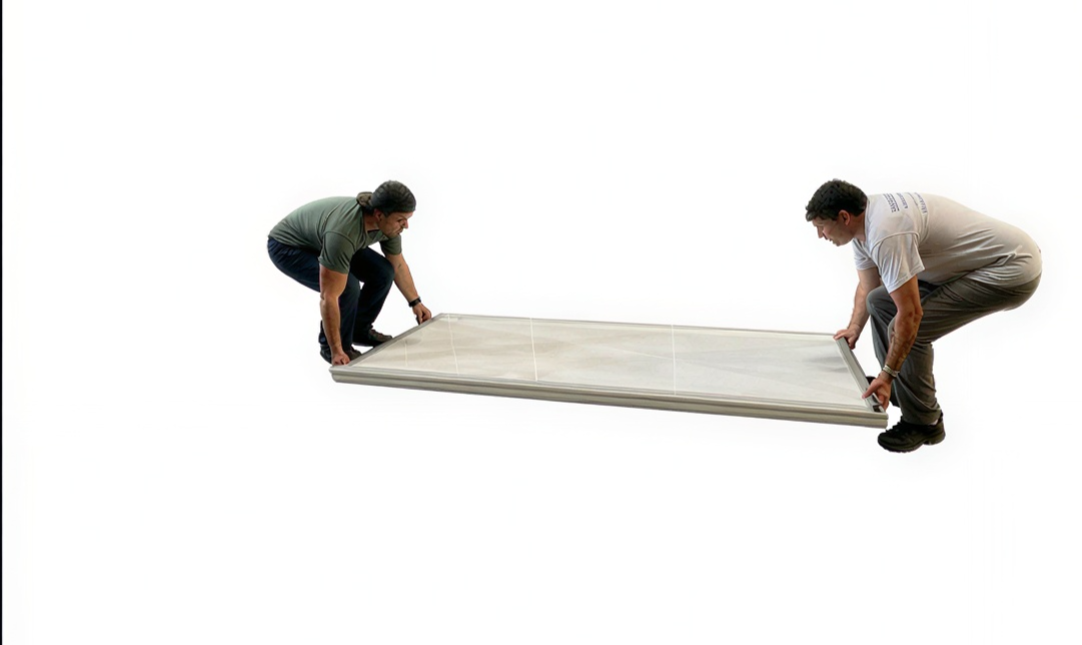
We recommend transporting BlueFIN flood wall panels from storage stacked on a pallet or rack and utilizing material handing equipment for greater efficiency, if available. This allows for quick staging of material on site, which speeds overall installation time. Barriers vary in size and weight but we recommend two people to handle each flood wall panel and a third to assist with positioning and connection. The transportation of panels from storage to the location where it will be installed is a big contributor to the overall installation time.
Positioning Flood Wall Bottom Panels.
Remove a BlueFIN flood wall BOTTOM panel from the staging stack and position it horizontally on the ground adjacent to the bottom panel of the previously installed BlueFIN. Be sure that the black seals are facing downwards. Check that all latches are in the open position and flipped back so they do not interfere with alignment. Confirm that the pre-drilled attachment holes for the top panel are positioned at the back (or the dry side) furthest from the water. These holes will be used to connect the upright panel.
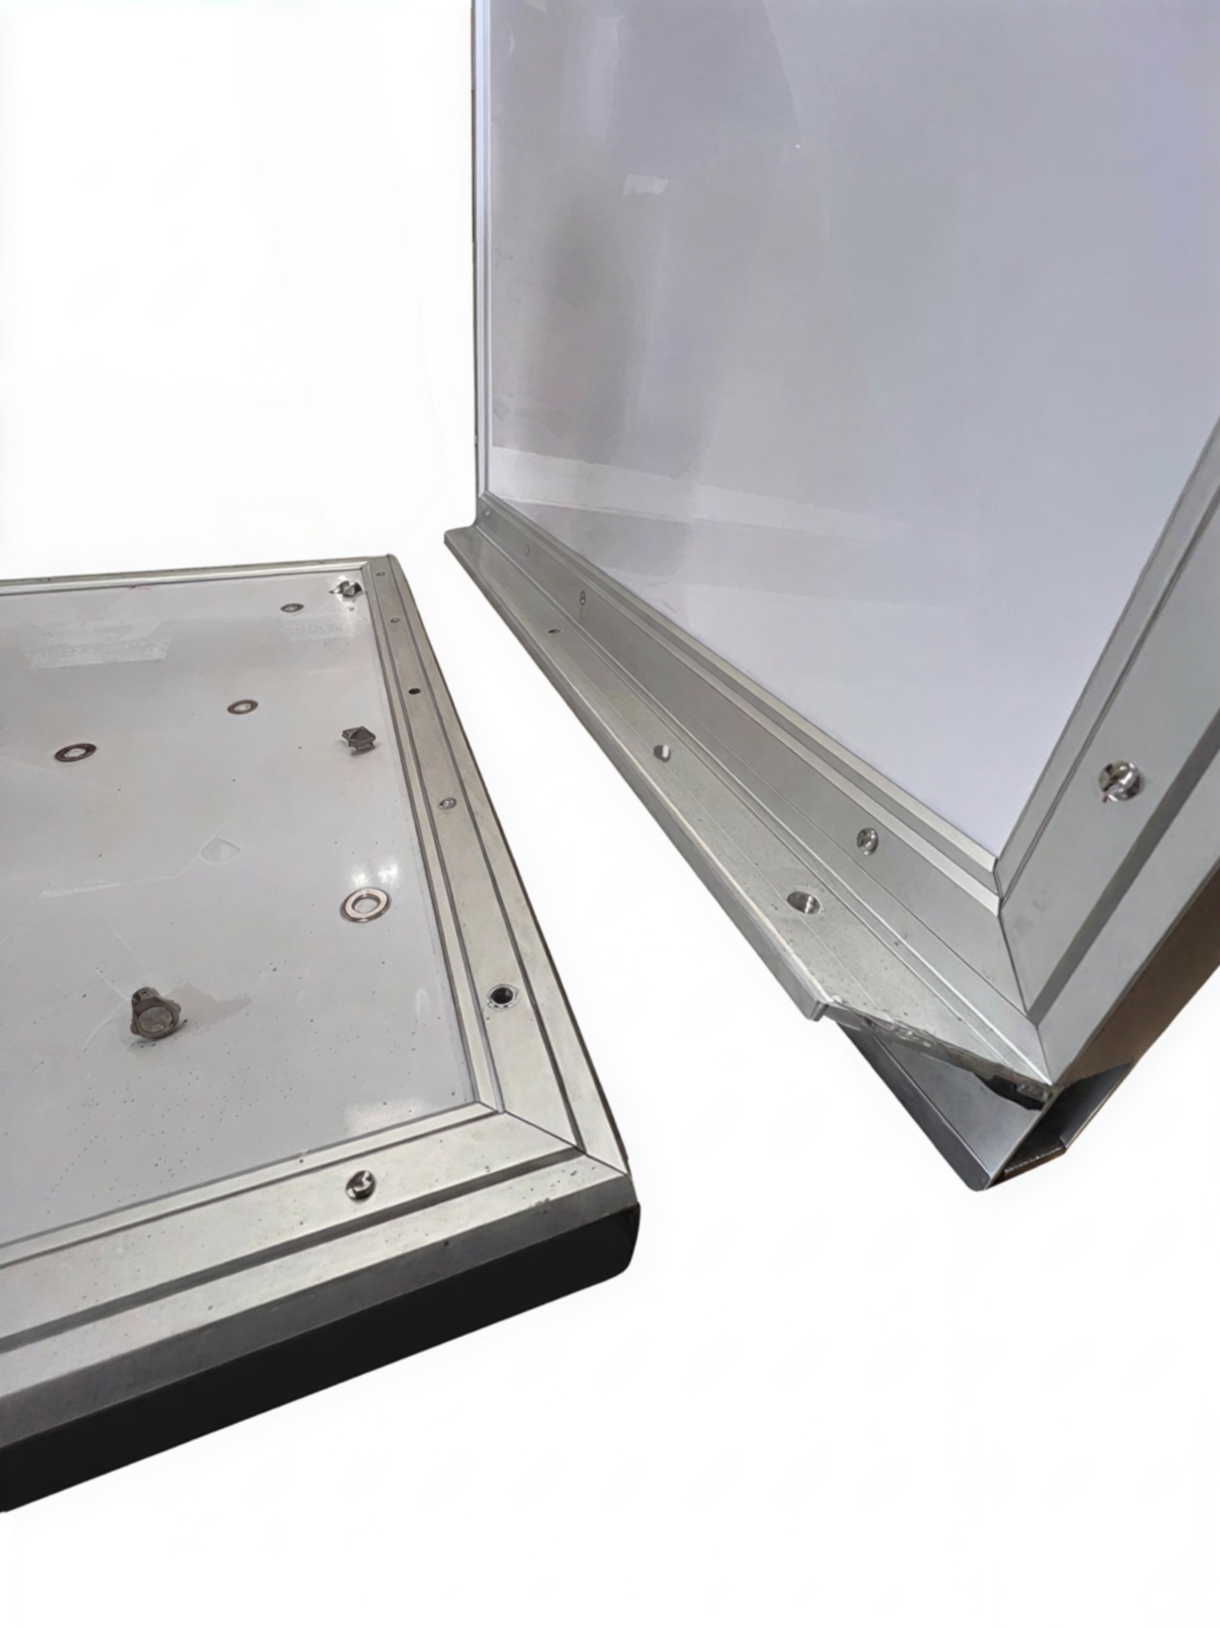
Connecting Upright Flood Wall Panels To Bottom Panels.
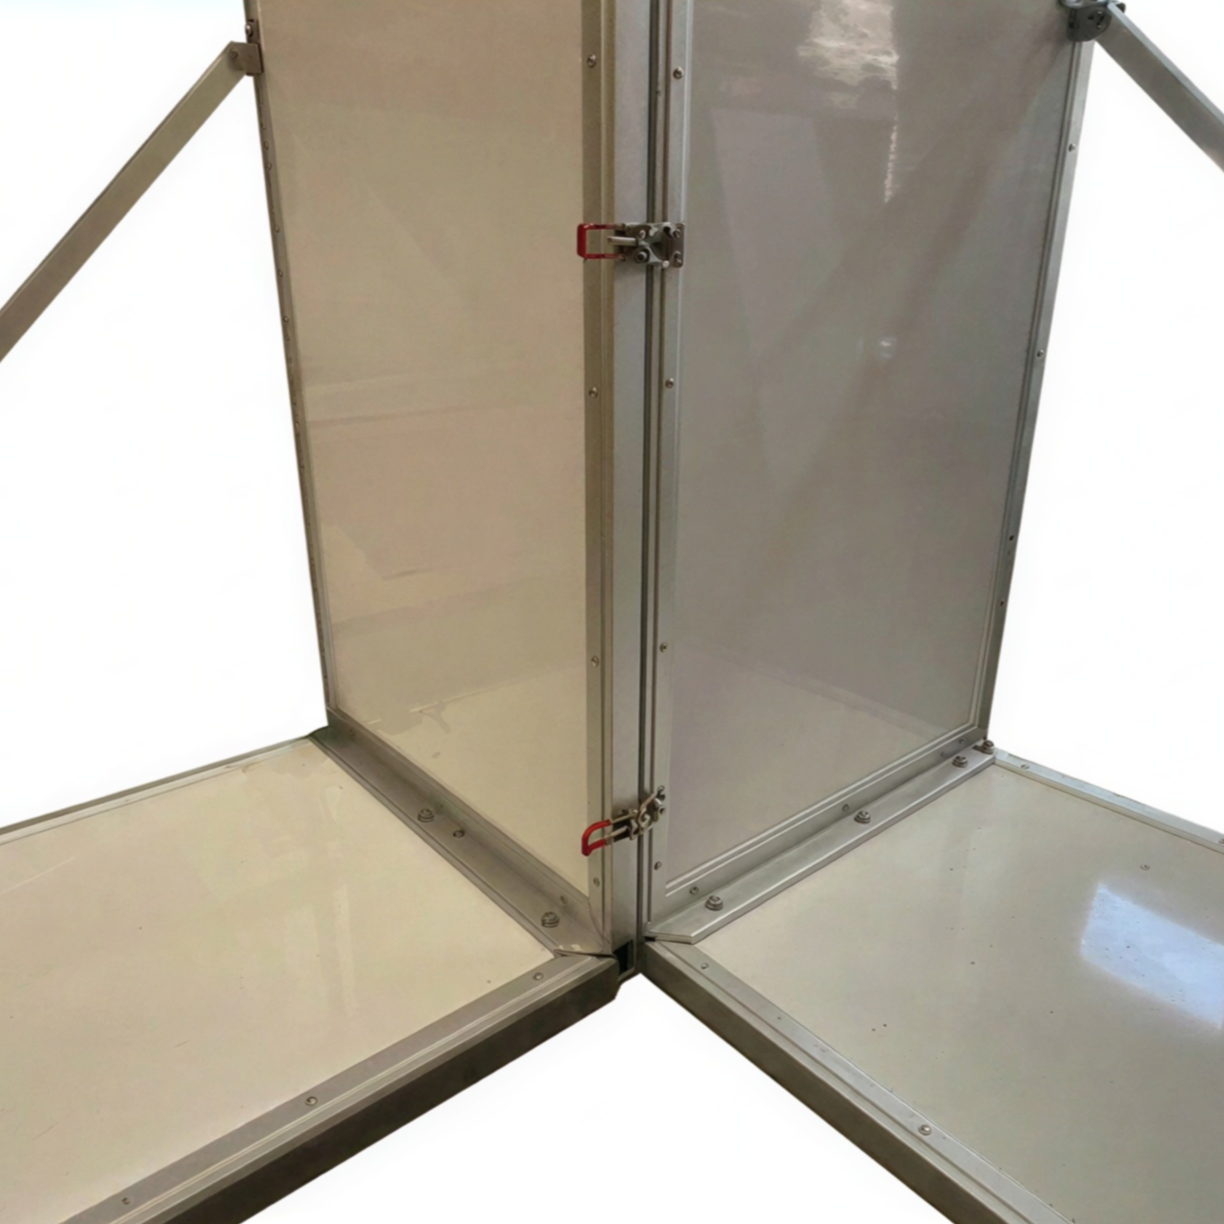
Take the UPPER BlueFIN panel from the stack and bring towards the back edge of the already placed bottom panel (the back is the area furthest from the water). Raise the panel upright (vertically), such that the UPPER panel’s overlap/connection extrusion is facing downwards towards the ground, with the connection lip extending forward towards the water side. Align the holes from the top overlapping extrusion with the holes in the bottom panel edge and place the upright panel into position. Be sure that the overhanging lip from the top panel hooks over the raised portion of the bottom panel and that all holes are aligned. Note: It is always good to check that the black inter-panel seal is in place underneath the overhanging lip of the top panel before installing.
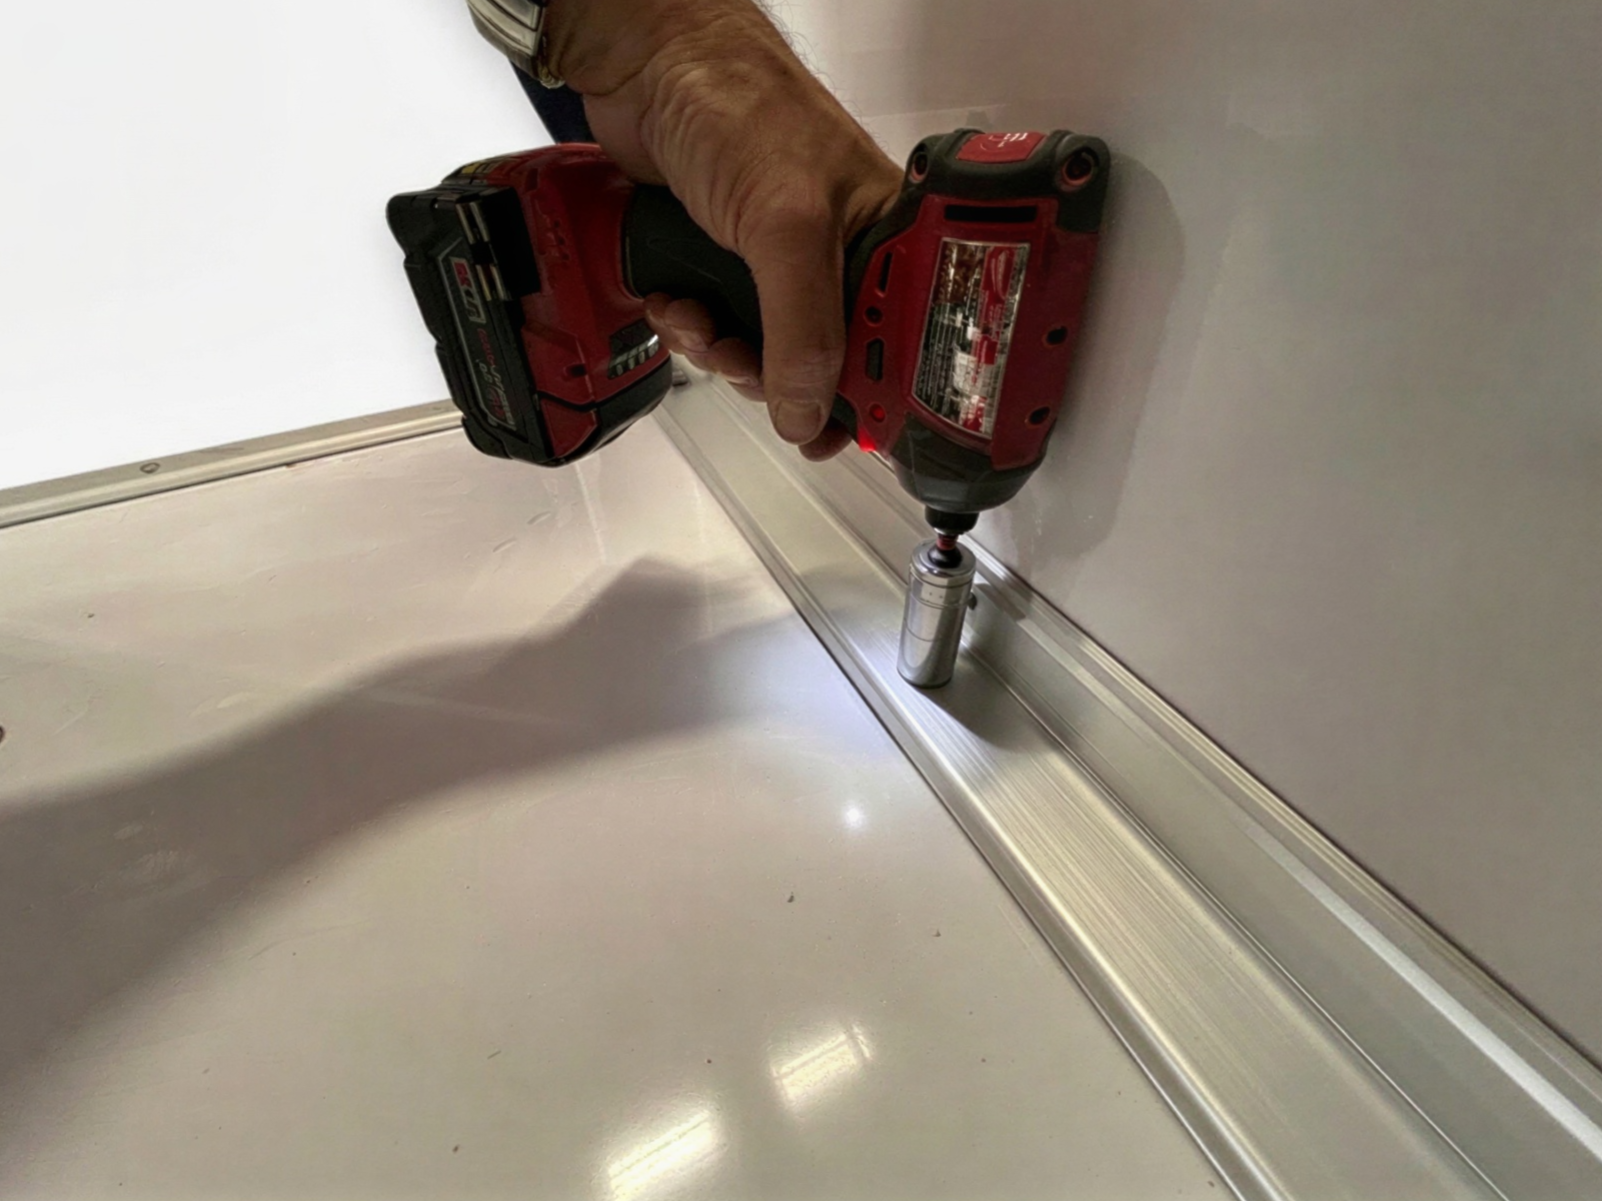
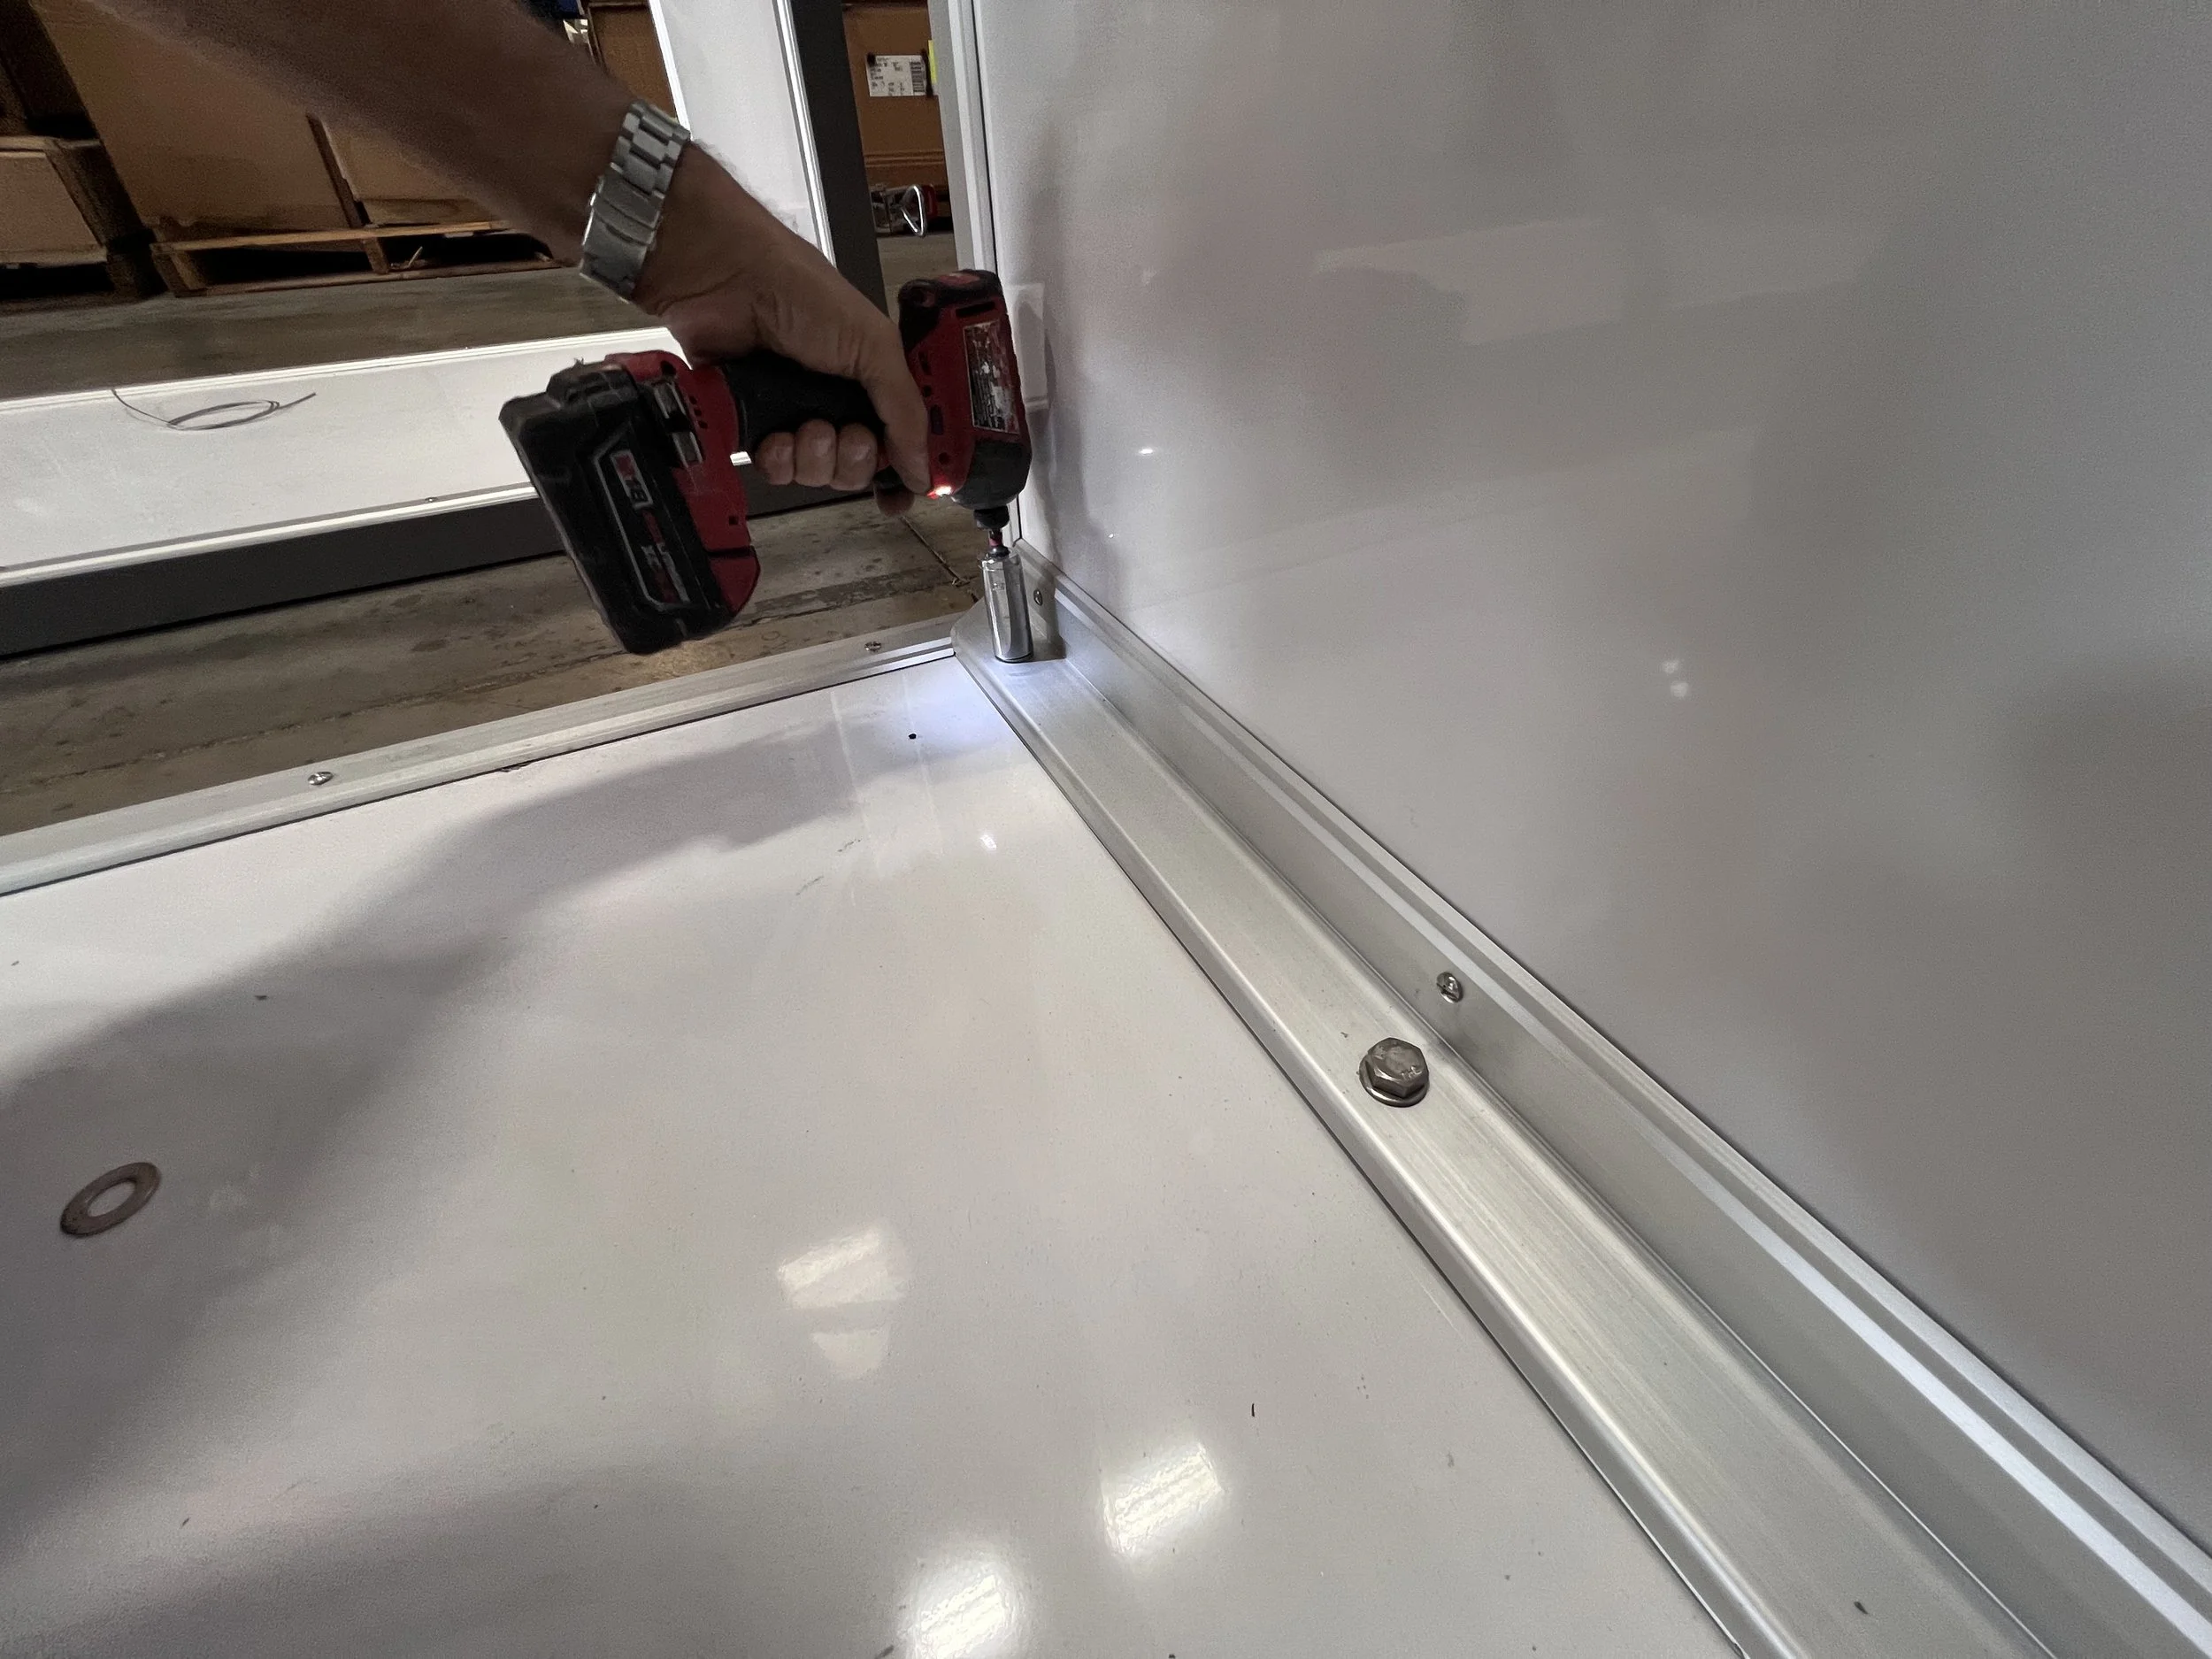
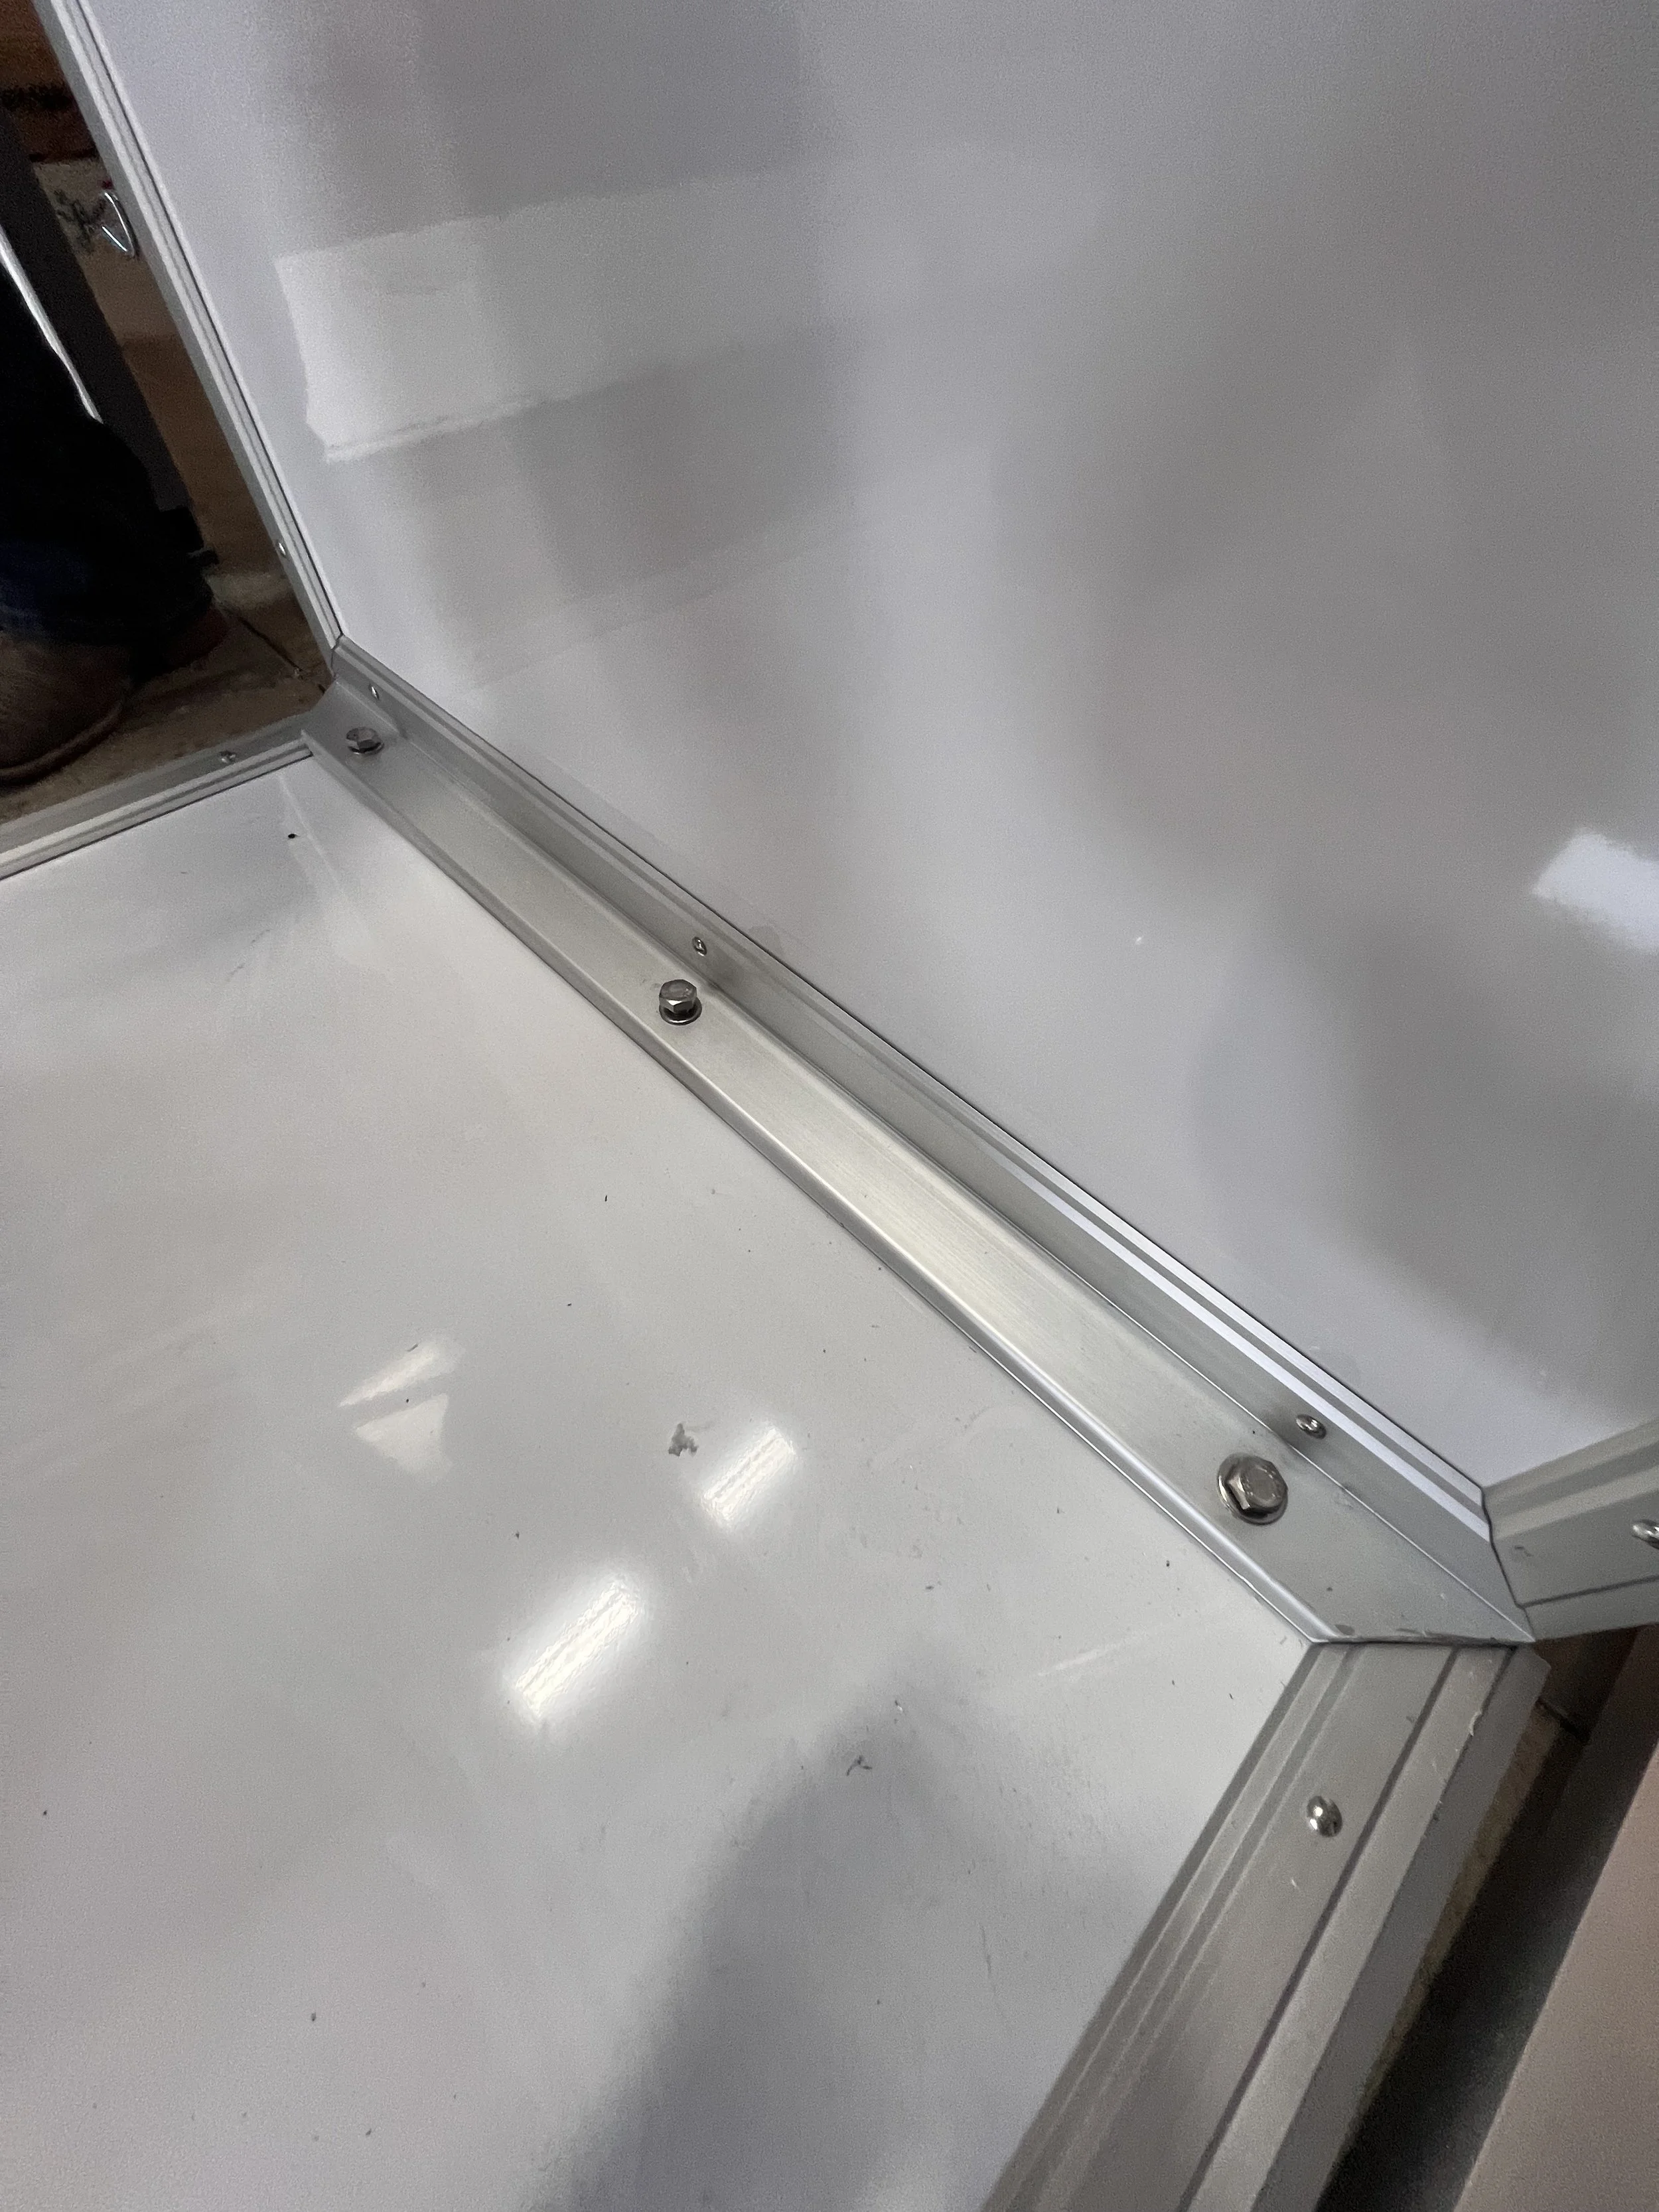
Locking Upright and Bottom Flood Panel Sections Together.
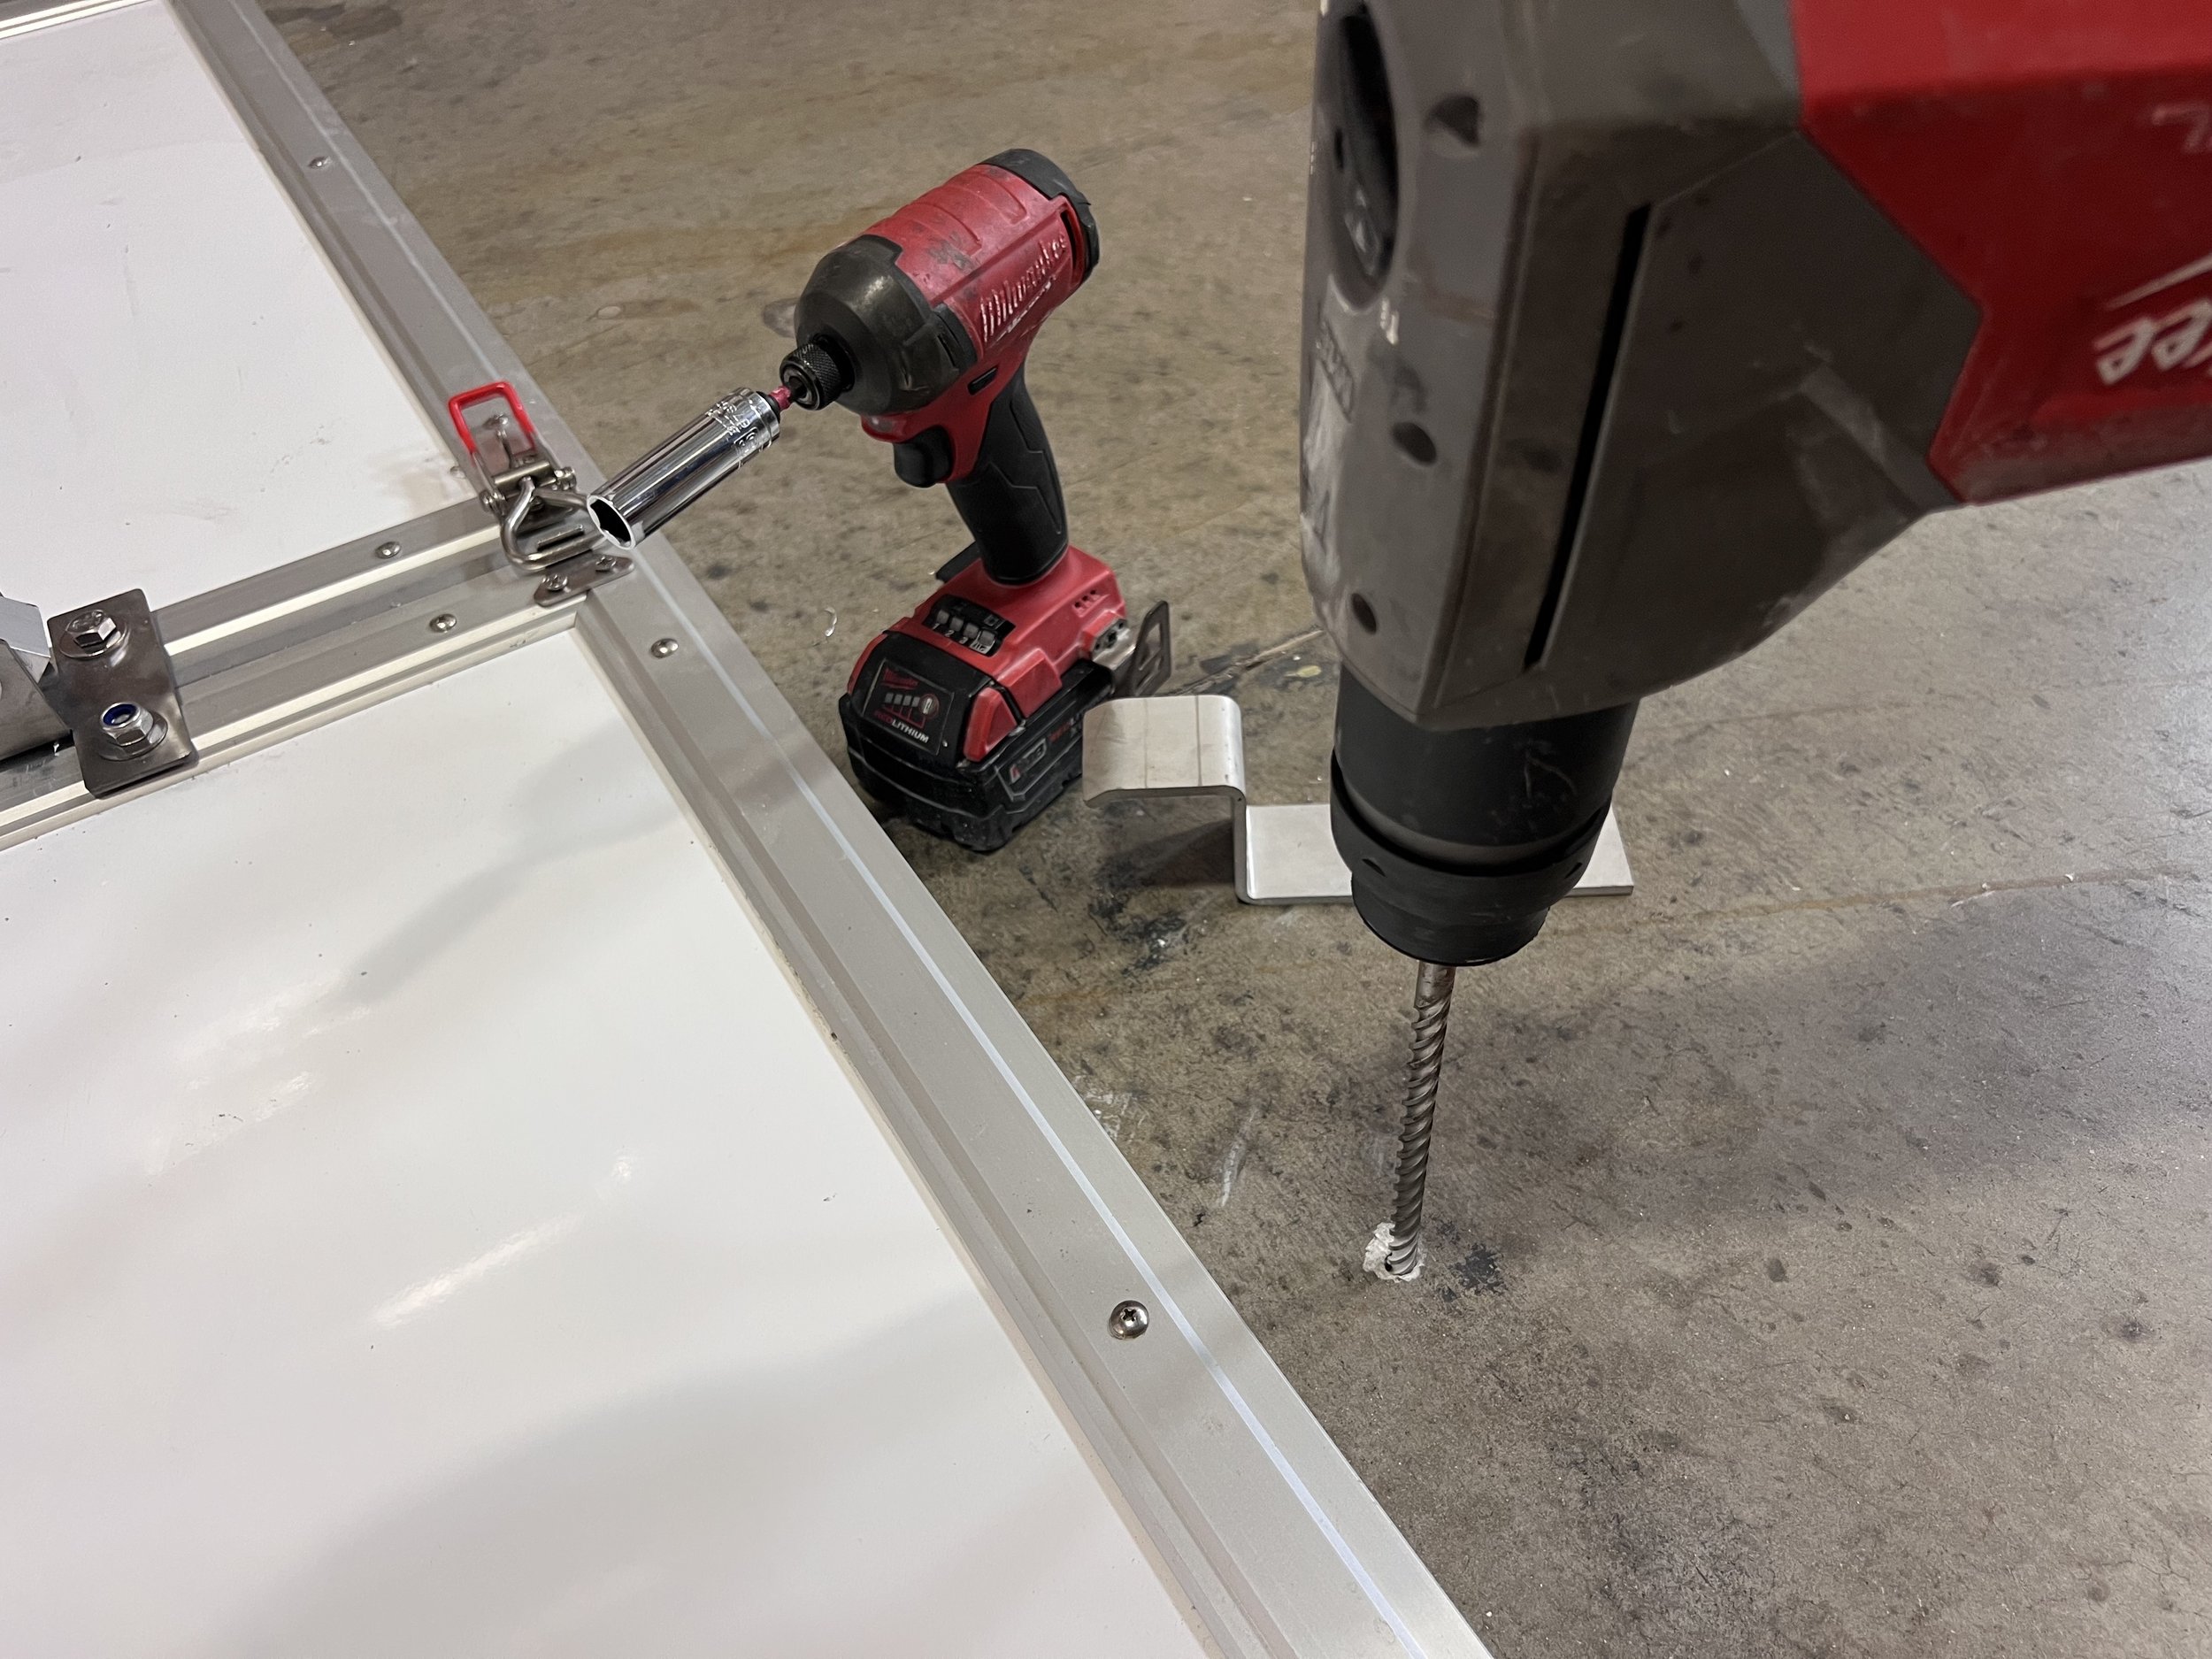
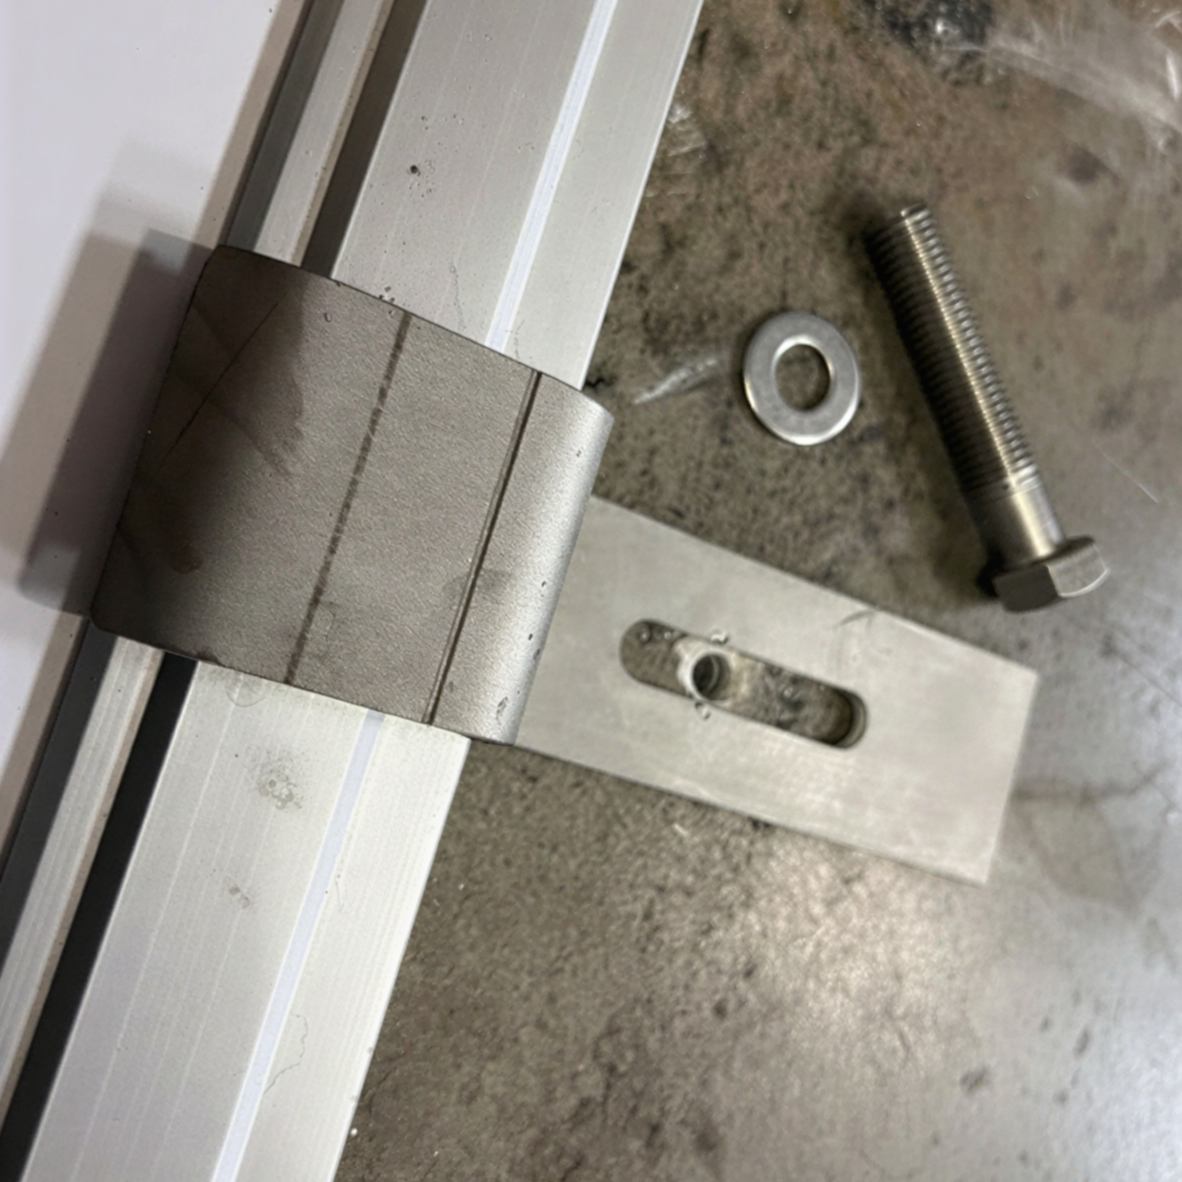
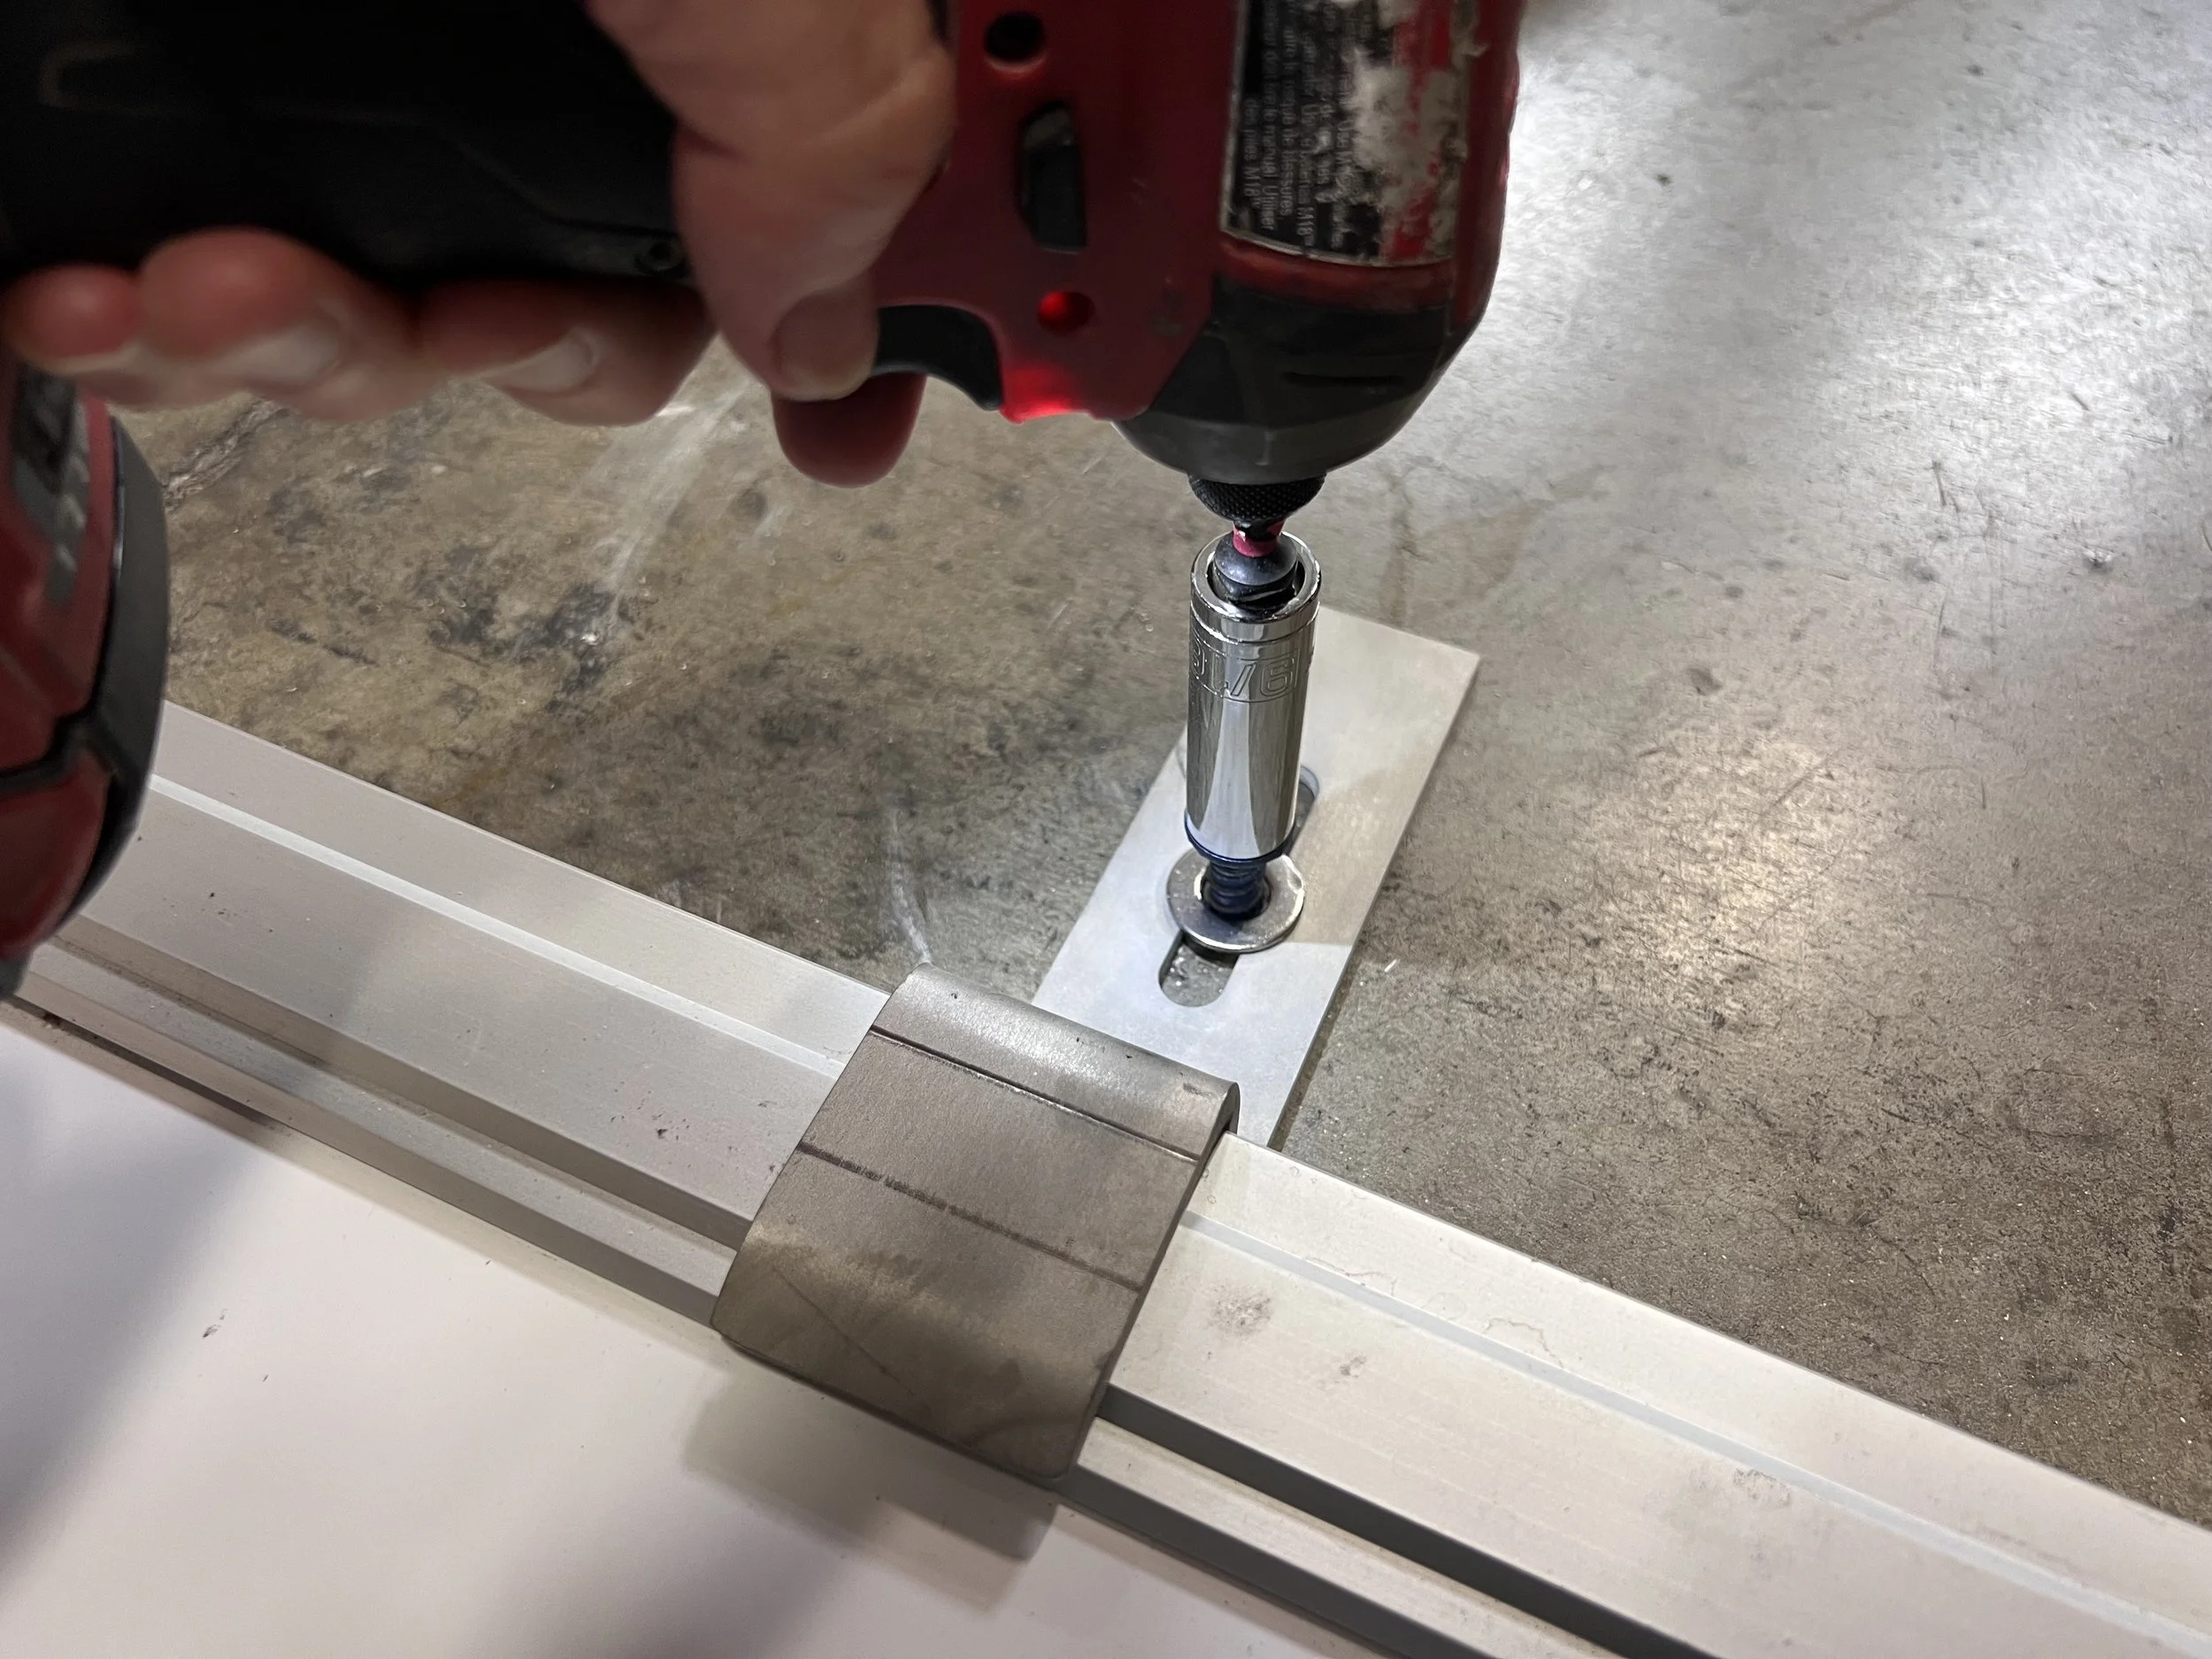
Once you have positioned the upper panel upright on top of the lower panel, with the holes aligned, use the included M12 hex head bolts to fasten the top panel to the panel below. Use an electric drill with a socket hex head attachment to speed connection. As you tighten the bolts, the rubber seal will be compressed between the top and bottom panel. Be careful not to over torque and strip the bolt hole receiver. Always connect all bolts for the necessary upright support.


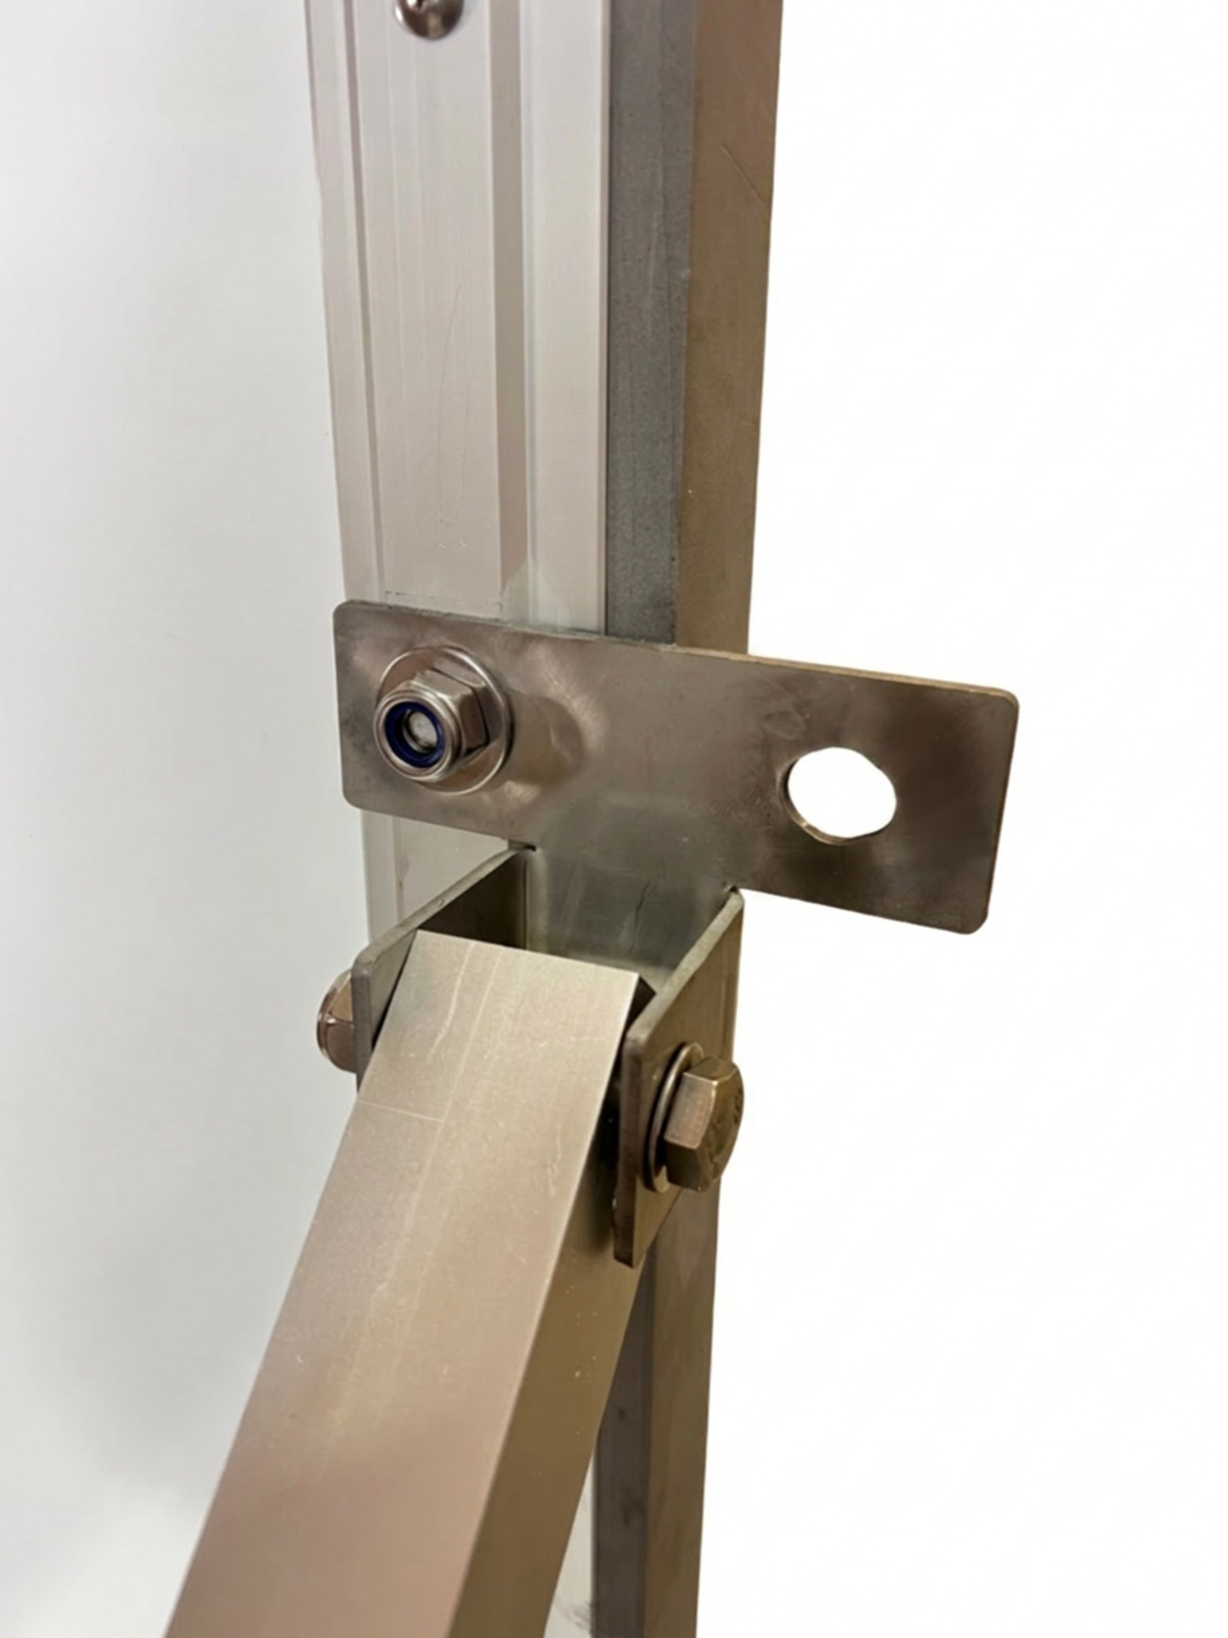
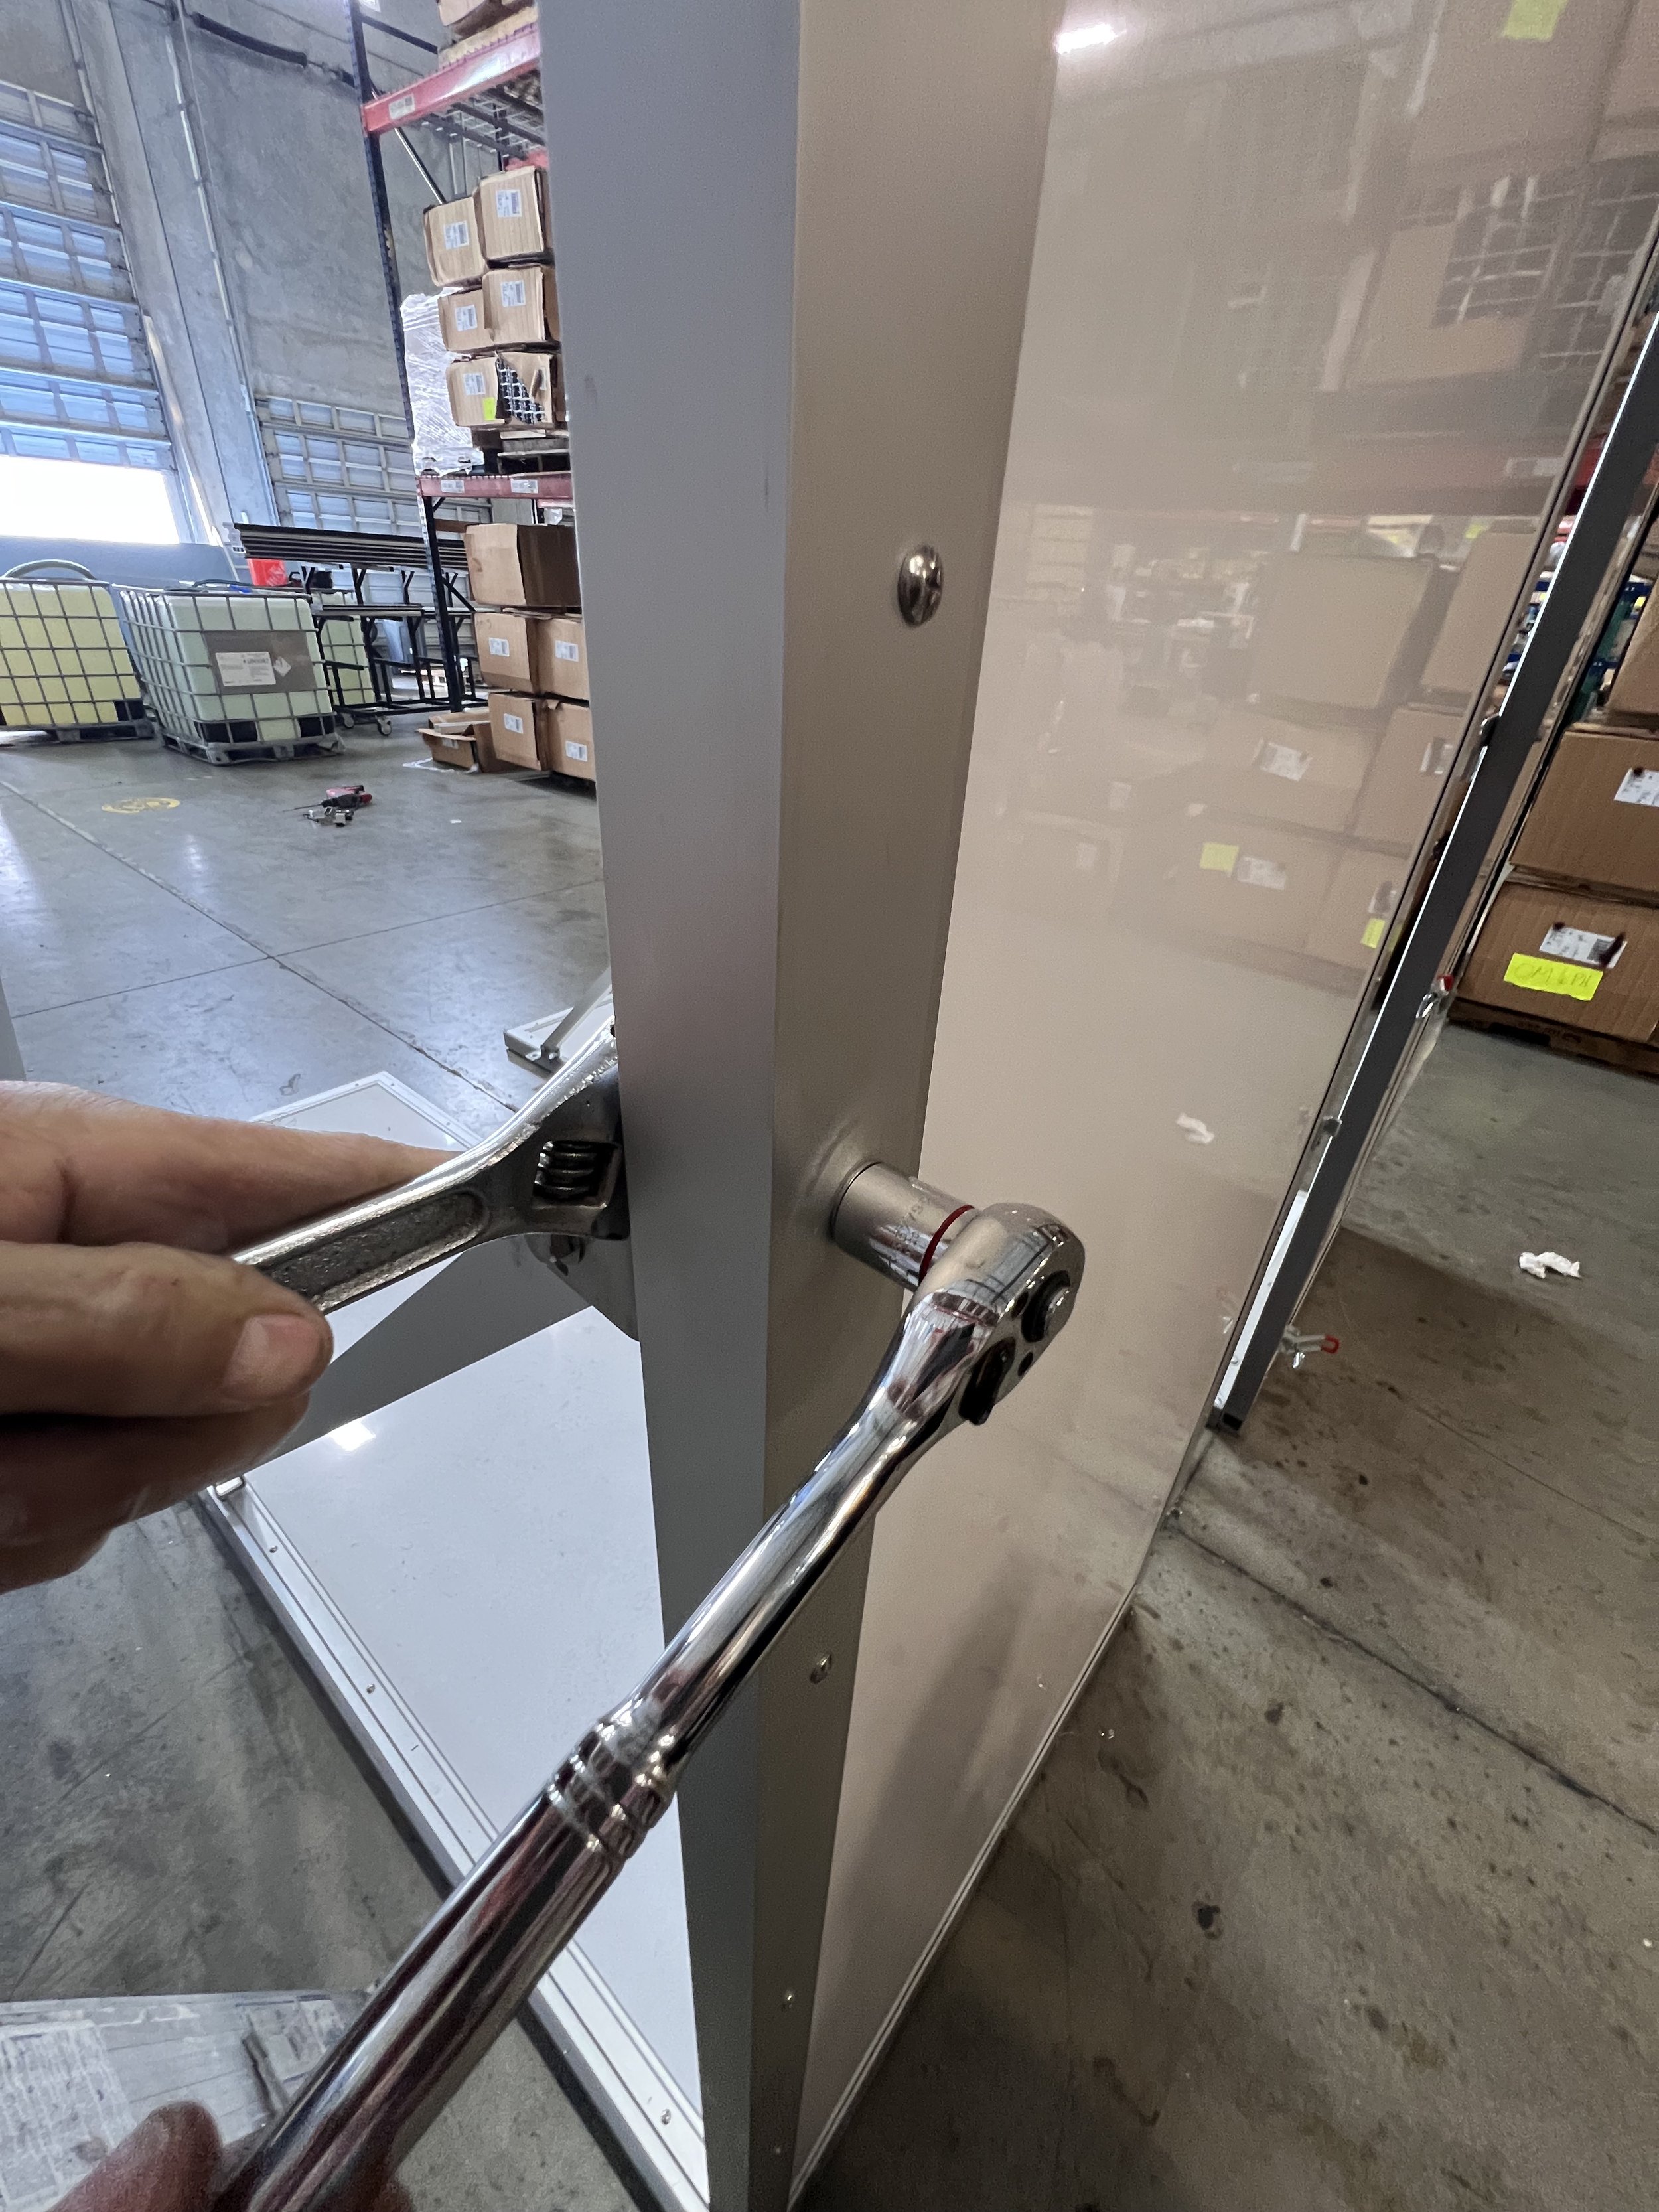
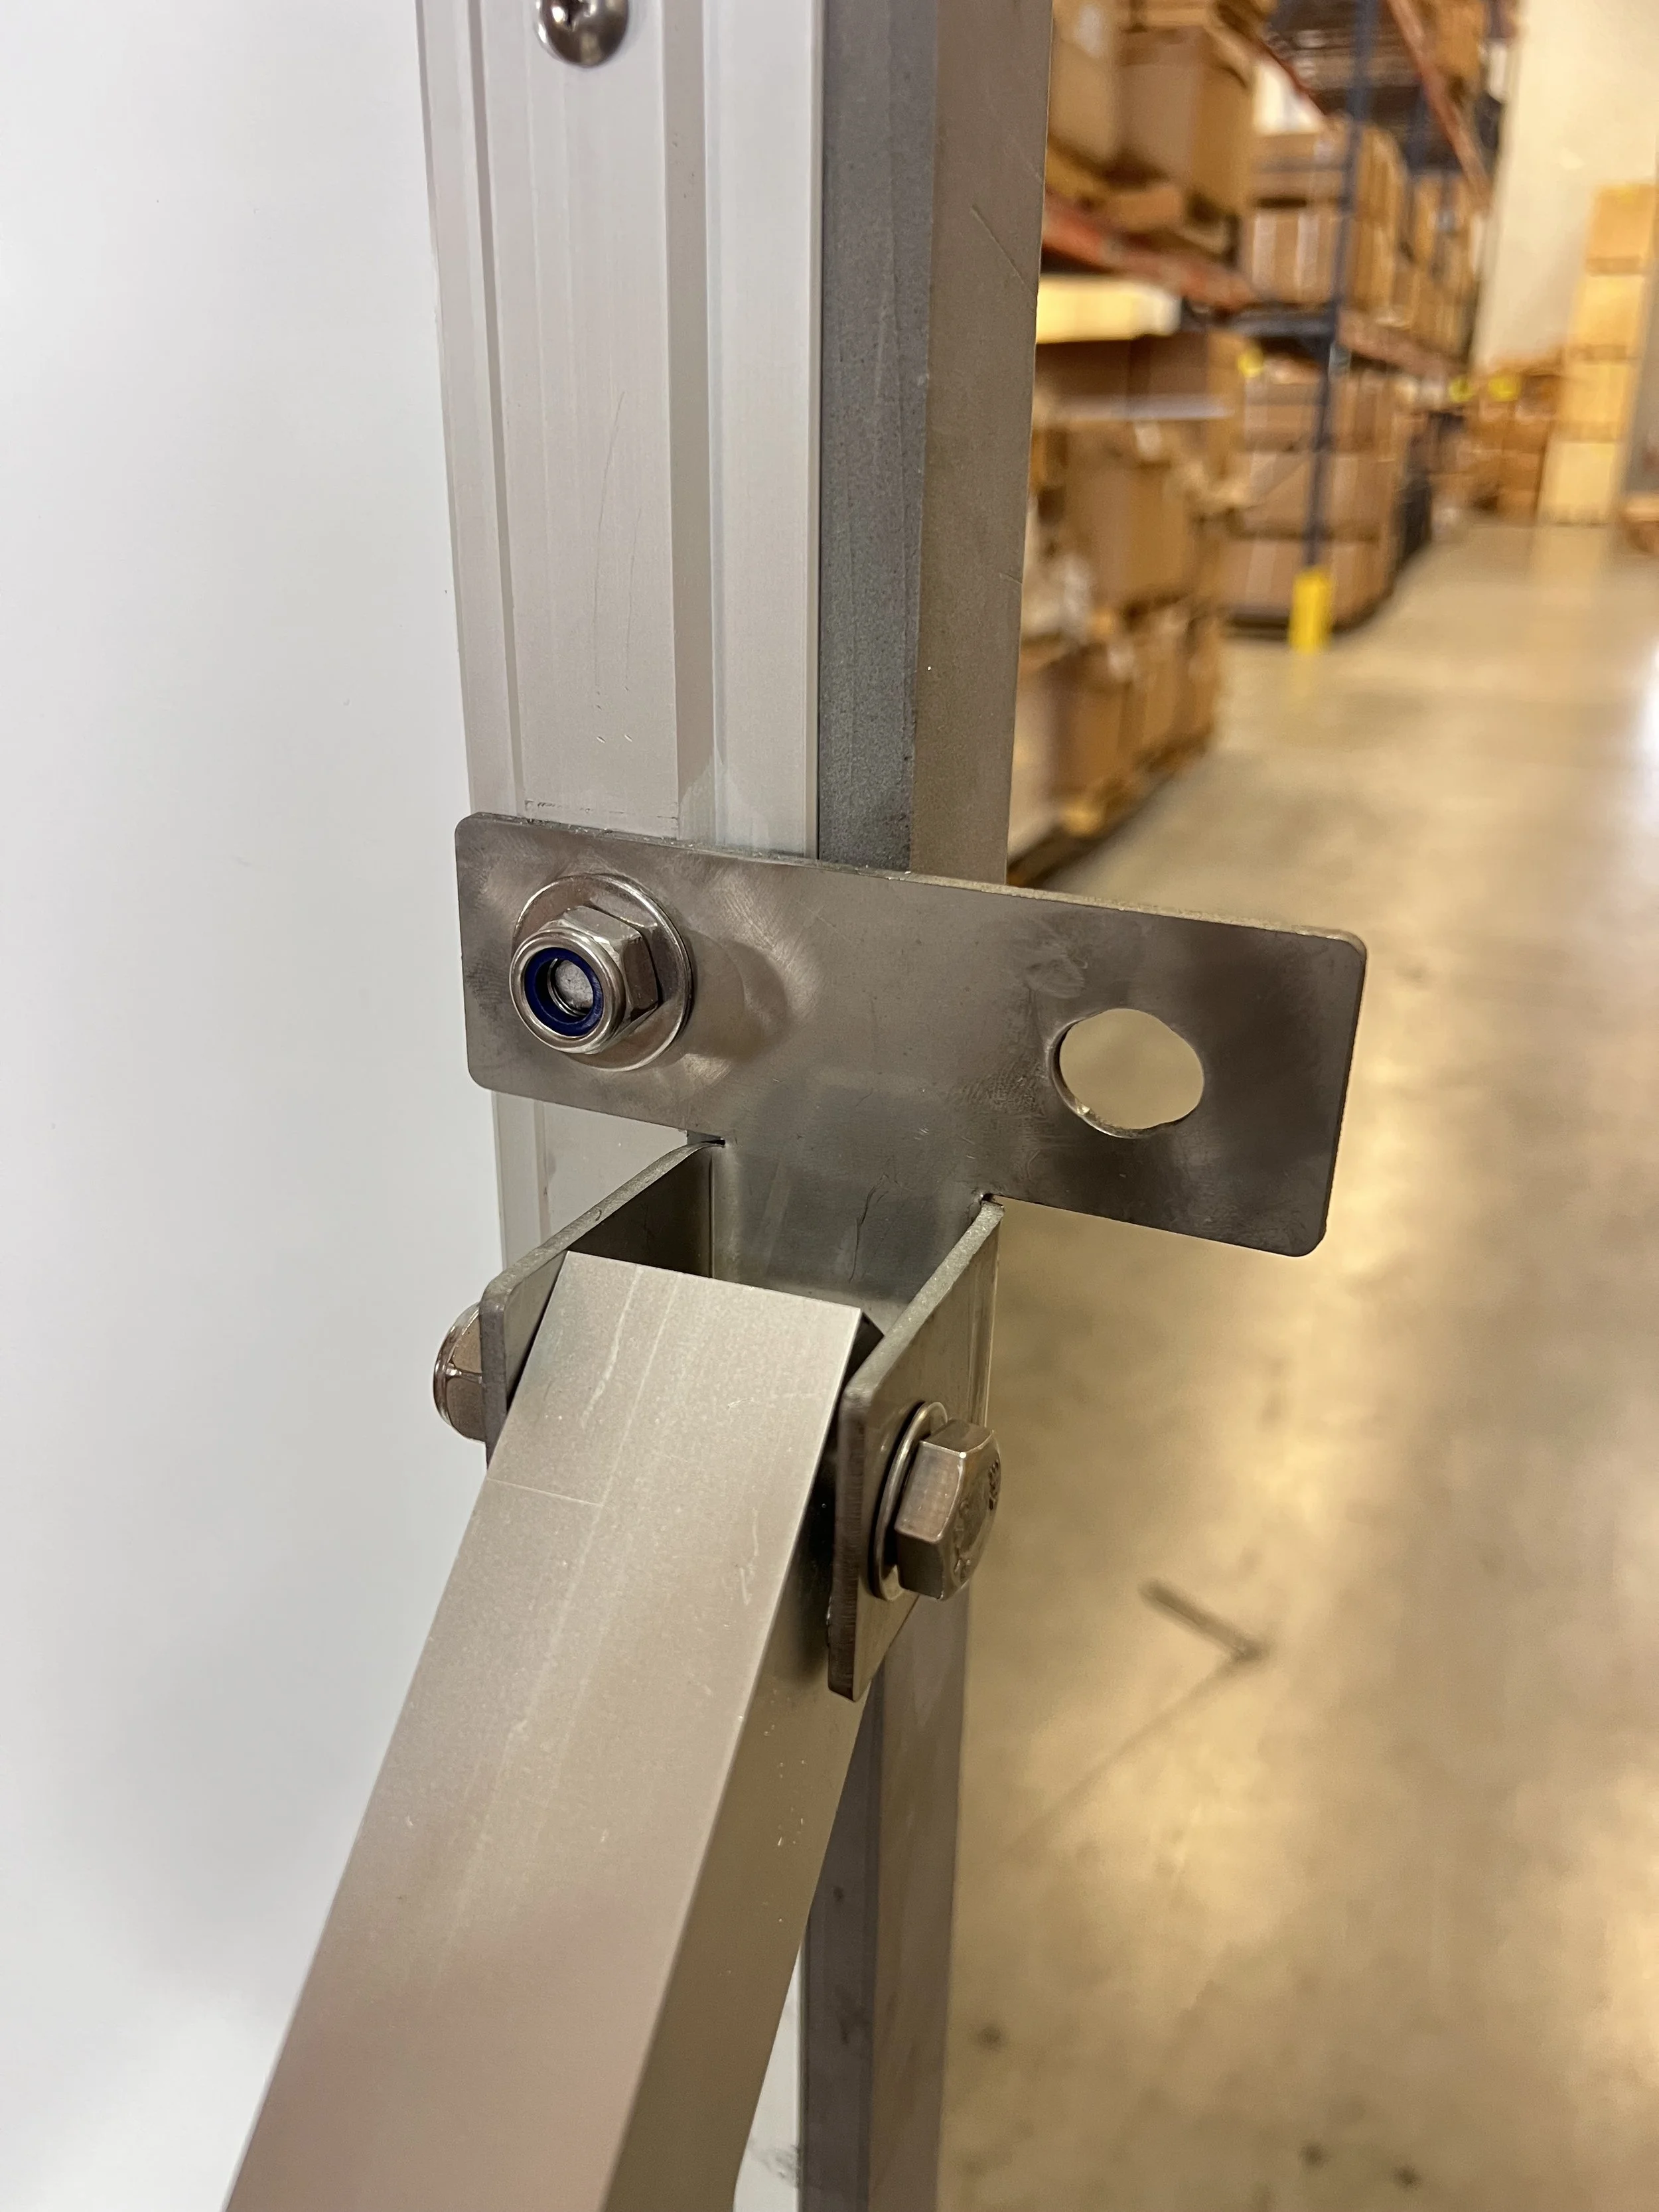
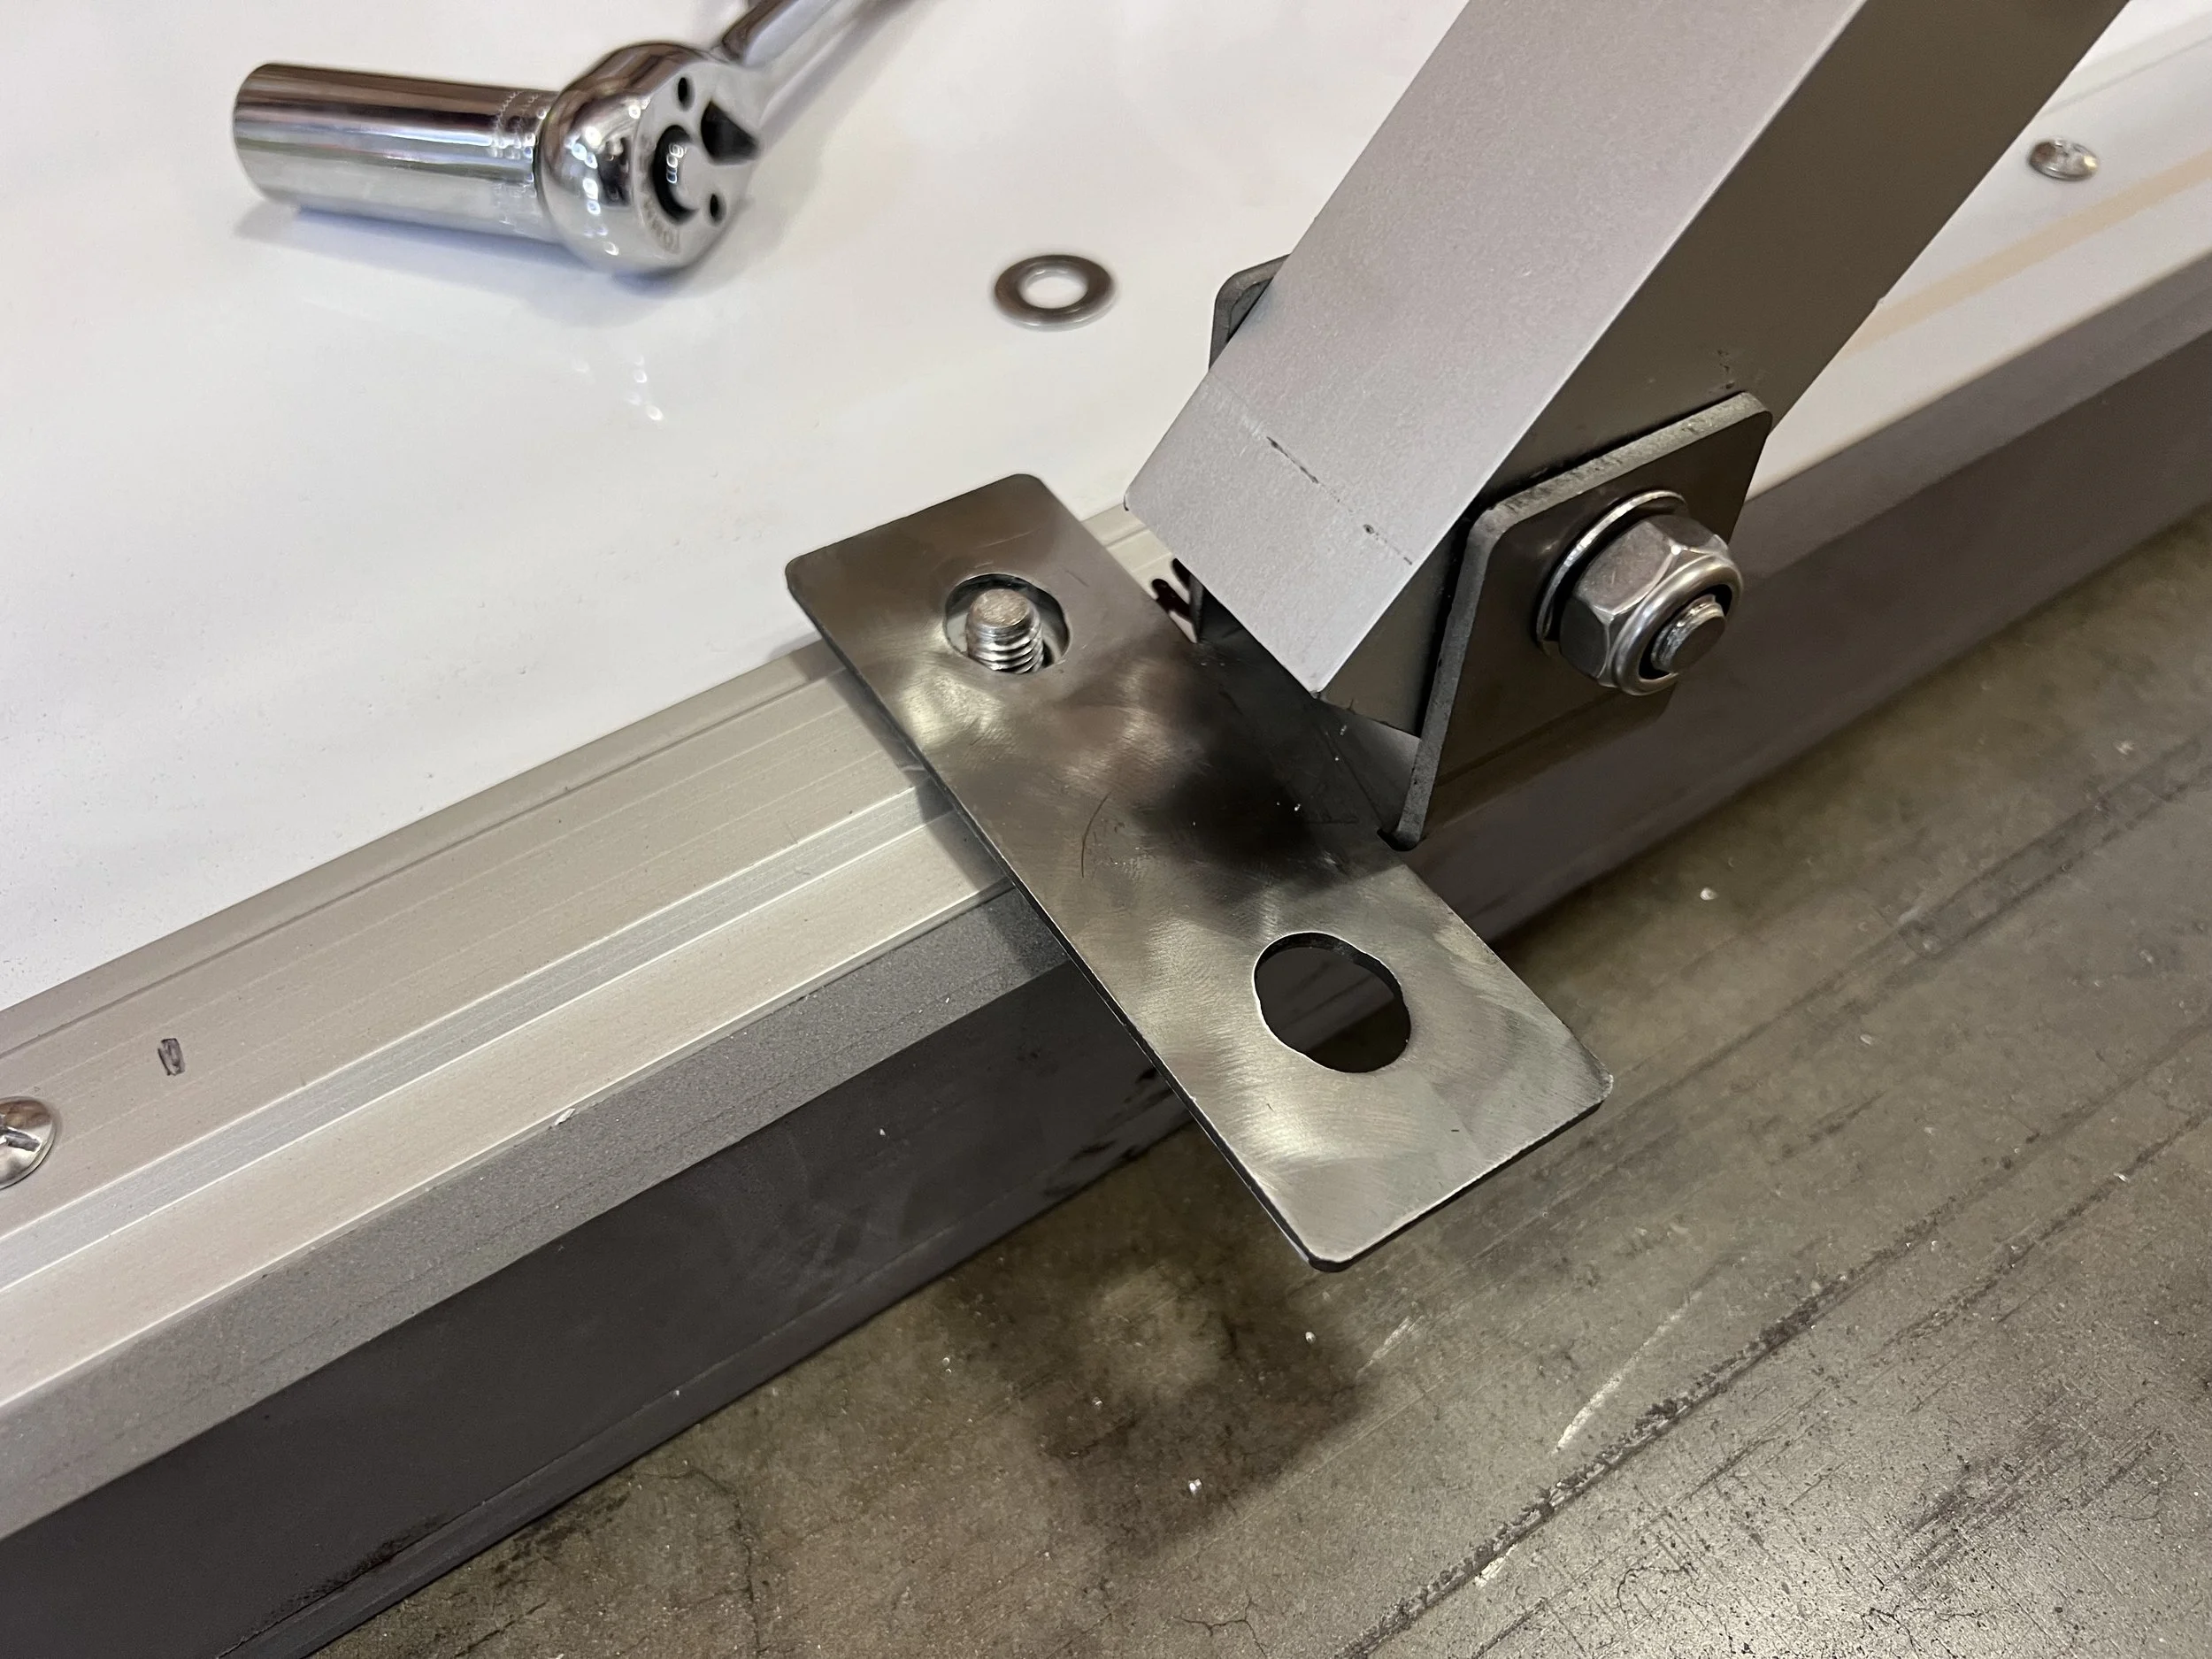
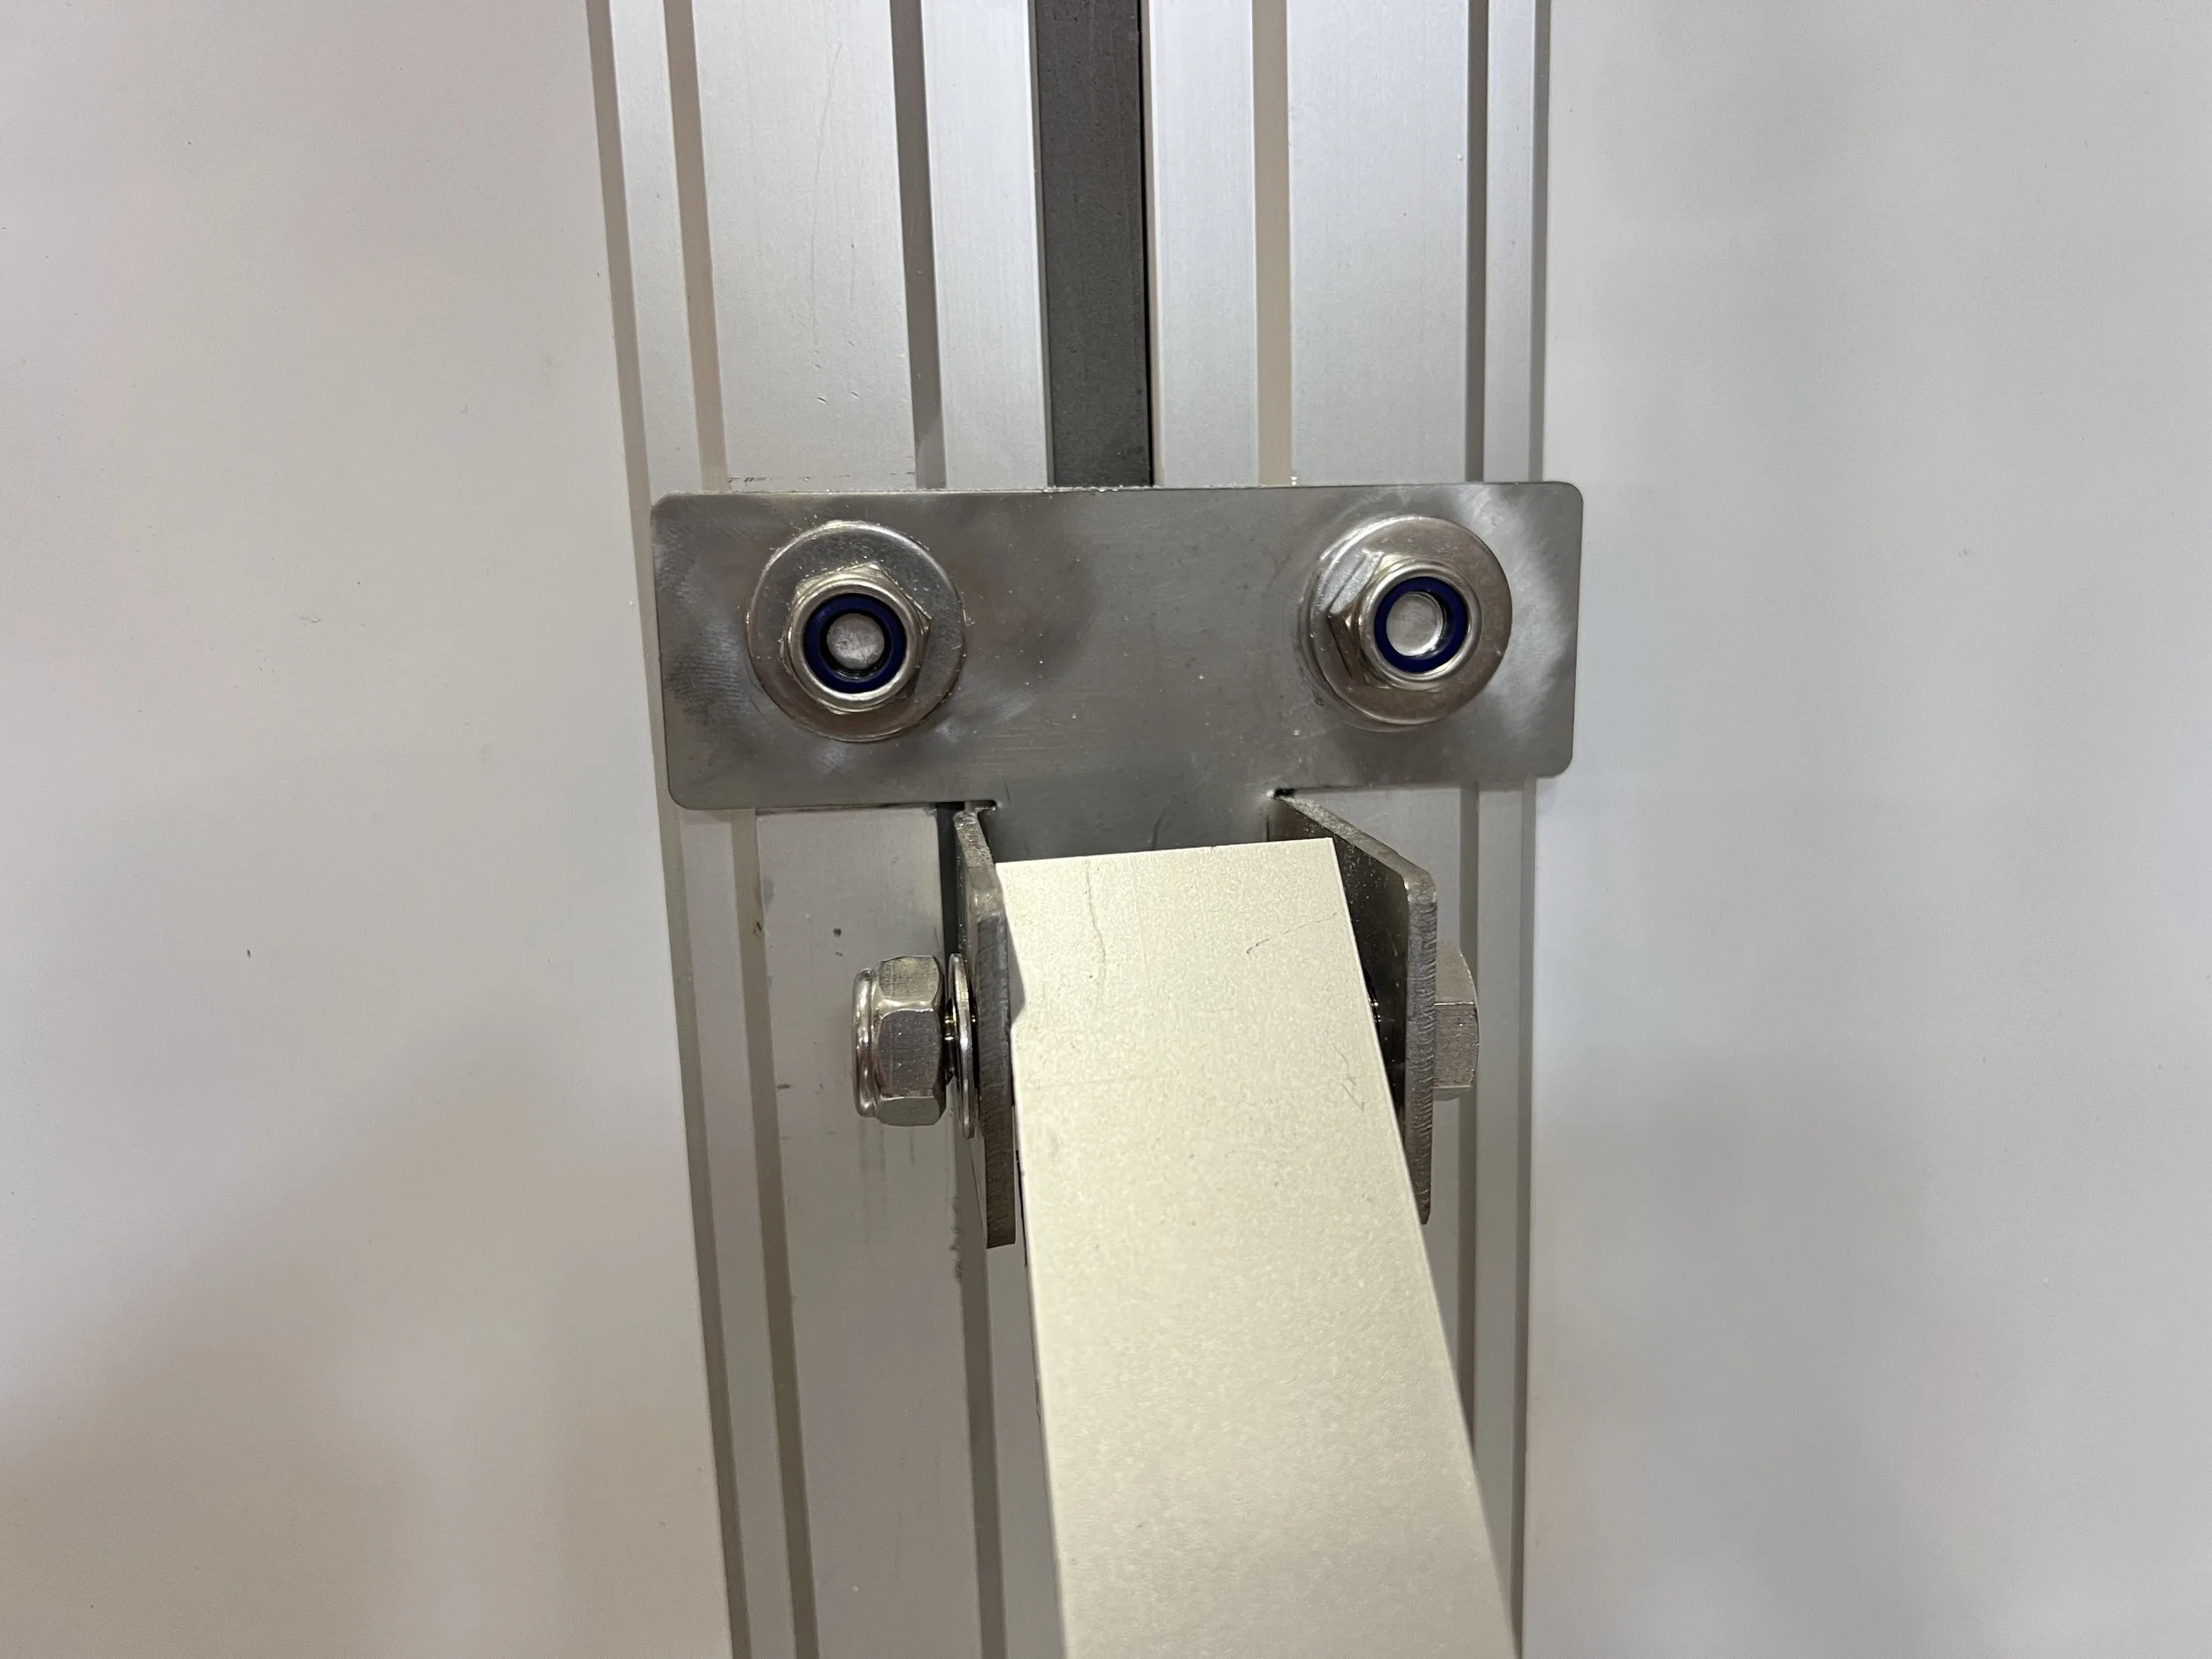
Attaching the First Side of the Kicker Leg Connection T to the Flood Wall.
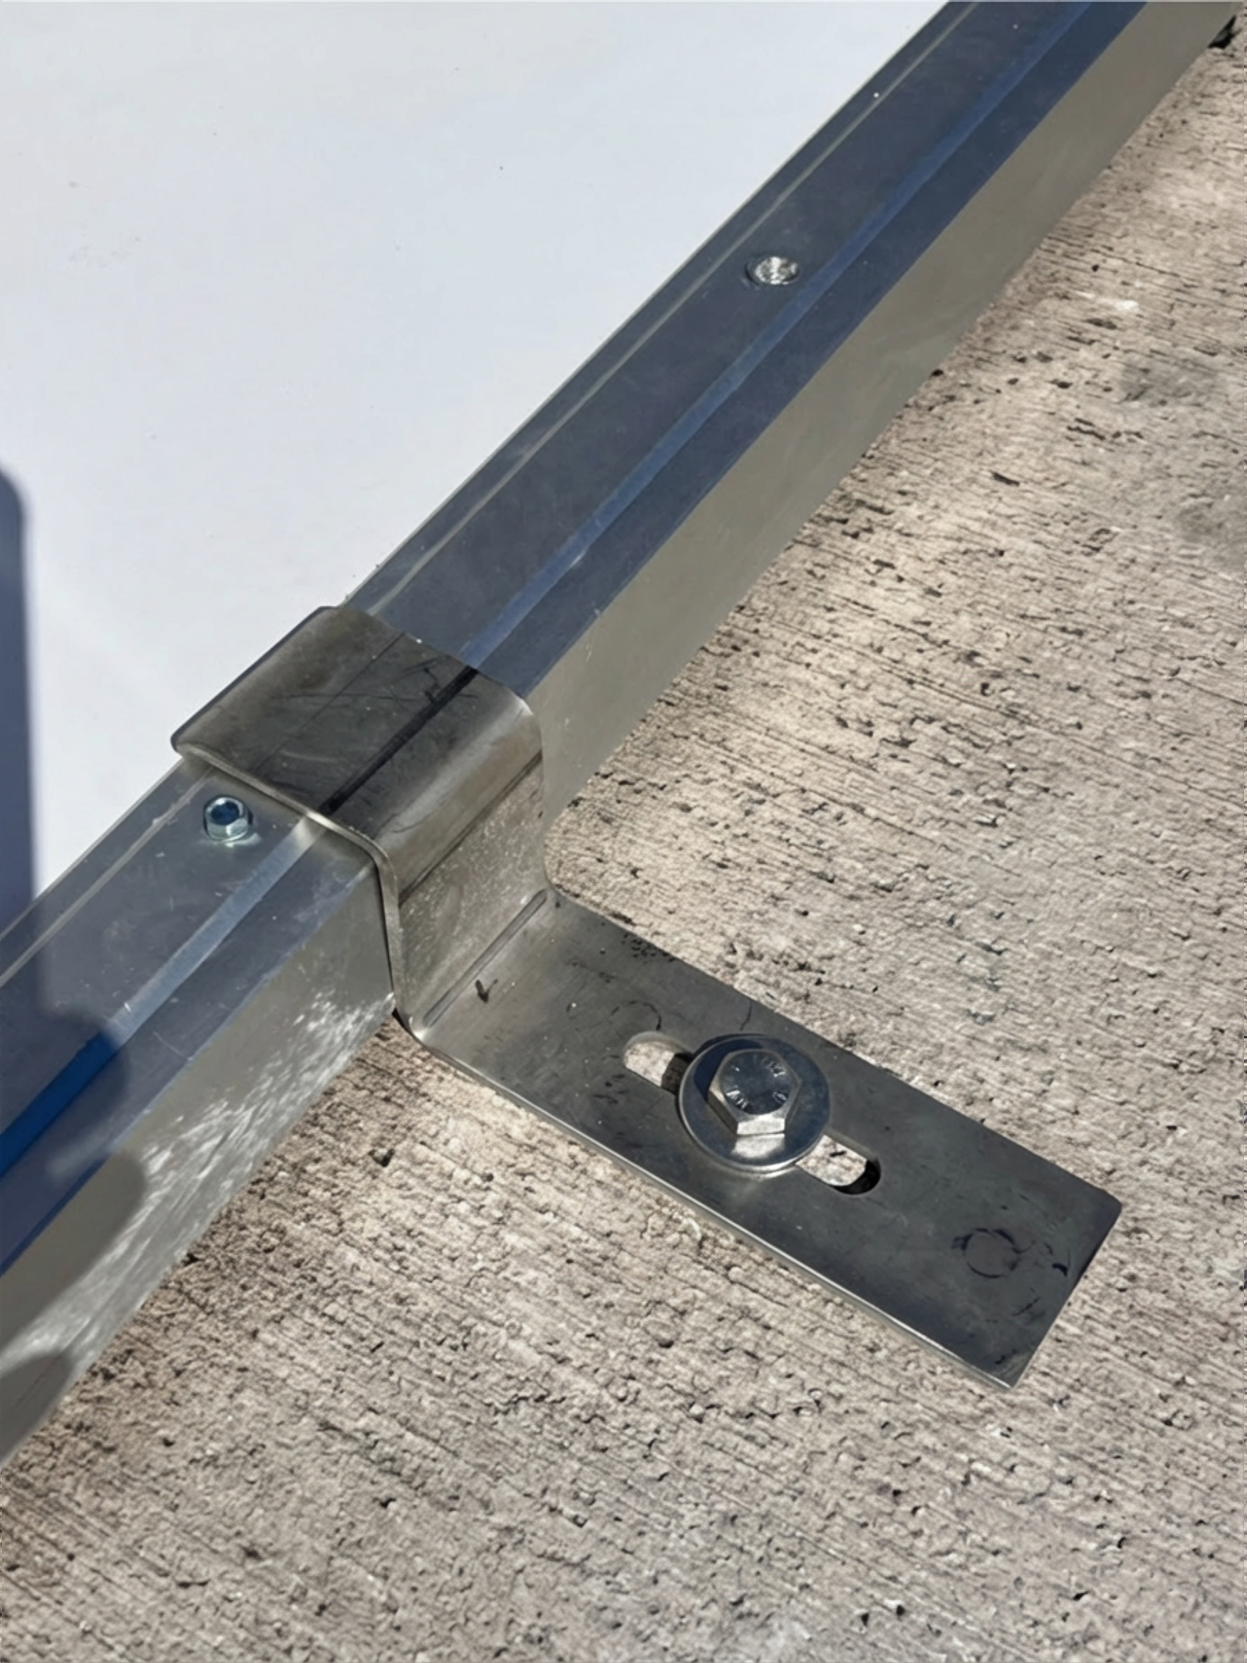
Kicker let(s) are attached to brace the upright panel to the bottom ground panel. Depending on the height of your panels, there may be 1, 2, or 3 kicker legs. The kicker leg attachment is bolted to the top and the bottom of each kicker leg, allowing it to be installed at an angle.. Panels are pre-drilled to receive kicker legs and bolts. Position the T-connector plate on the upright panel by aligning it with the bolt hole and slide a bolt from the rear of the panel (dry side) through to the the font of the panel and T-plate. Tighten the bolt. The other half of the connector plate will be unattached, awaiting positioning of the next panel in the flood wall. Connect the bottom T-plate to the bottom panel, in the same way. To insert the bolt, carefully tip the panel sideways to slide the bot into the hole in the seal and the aluminum extrusion.
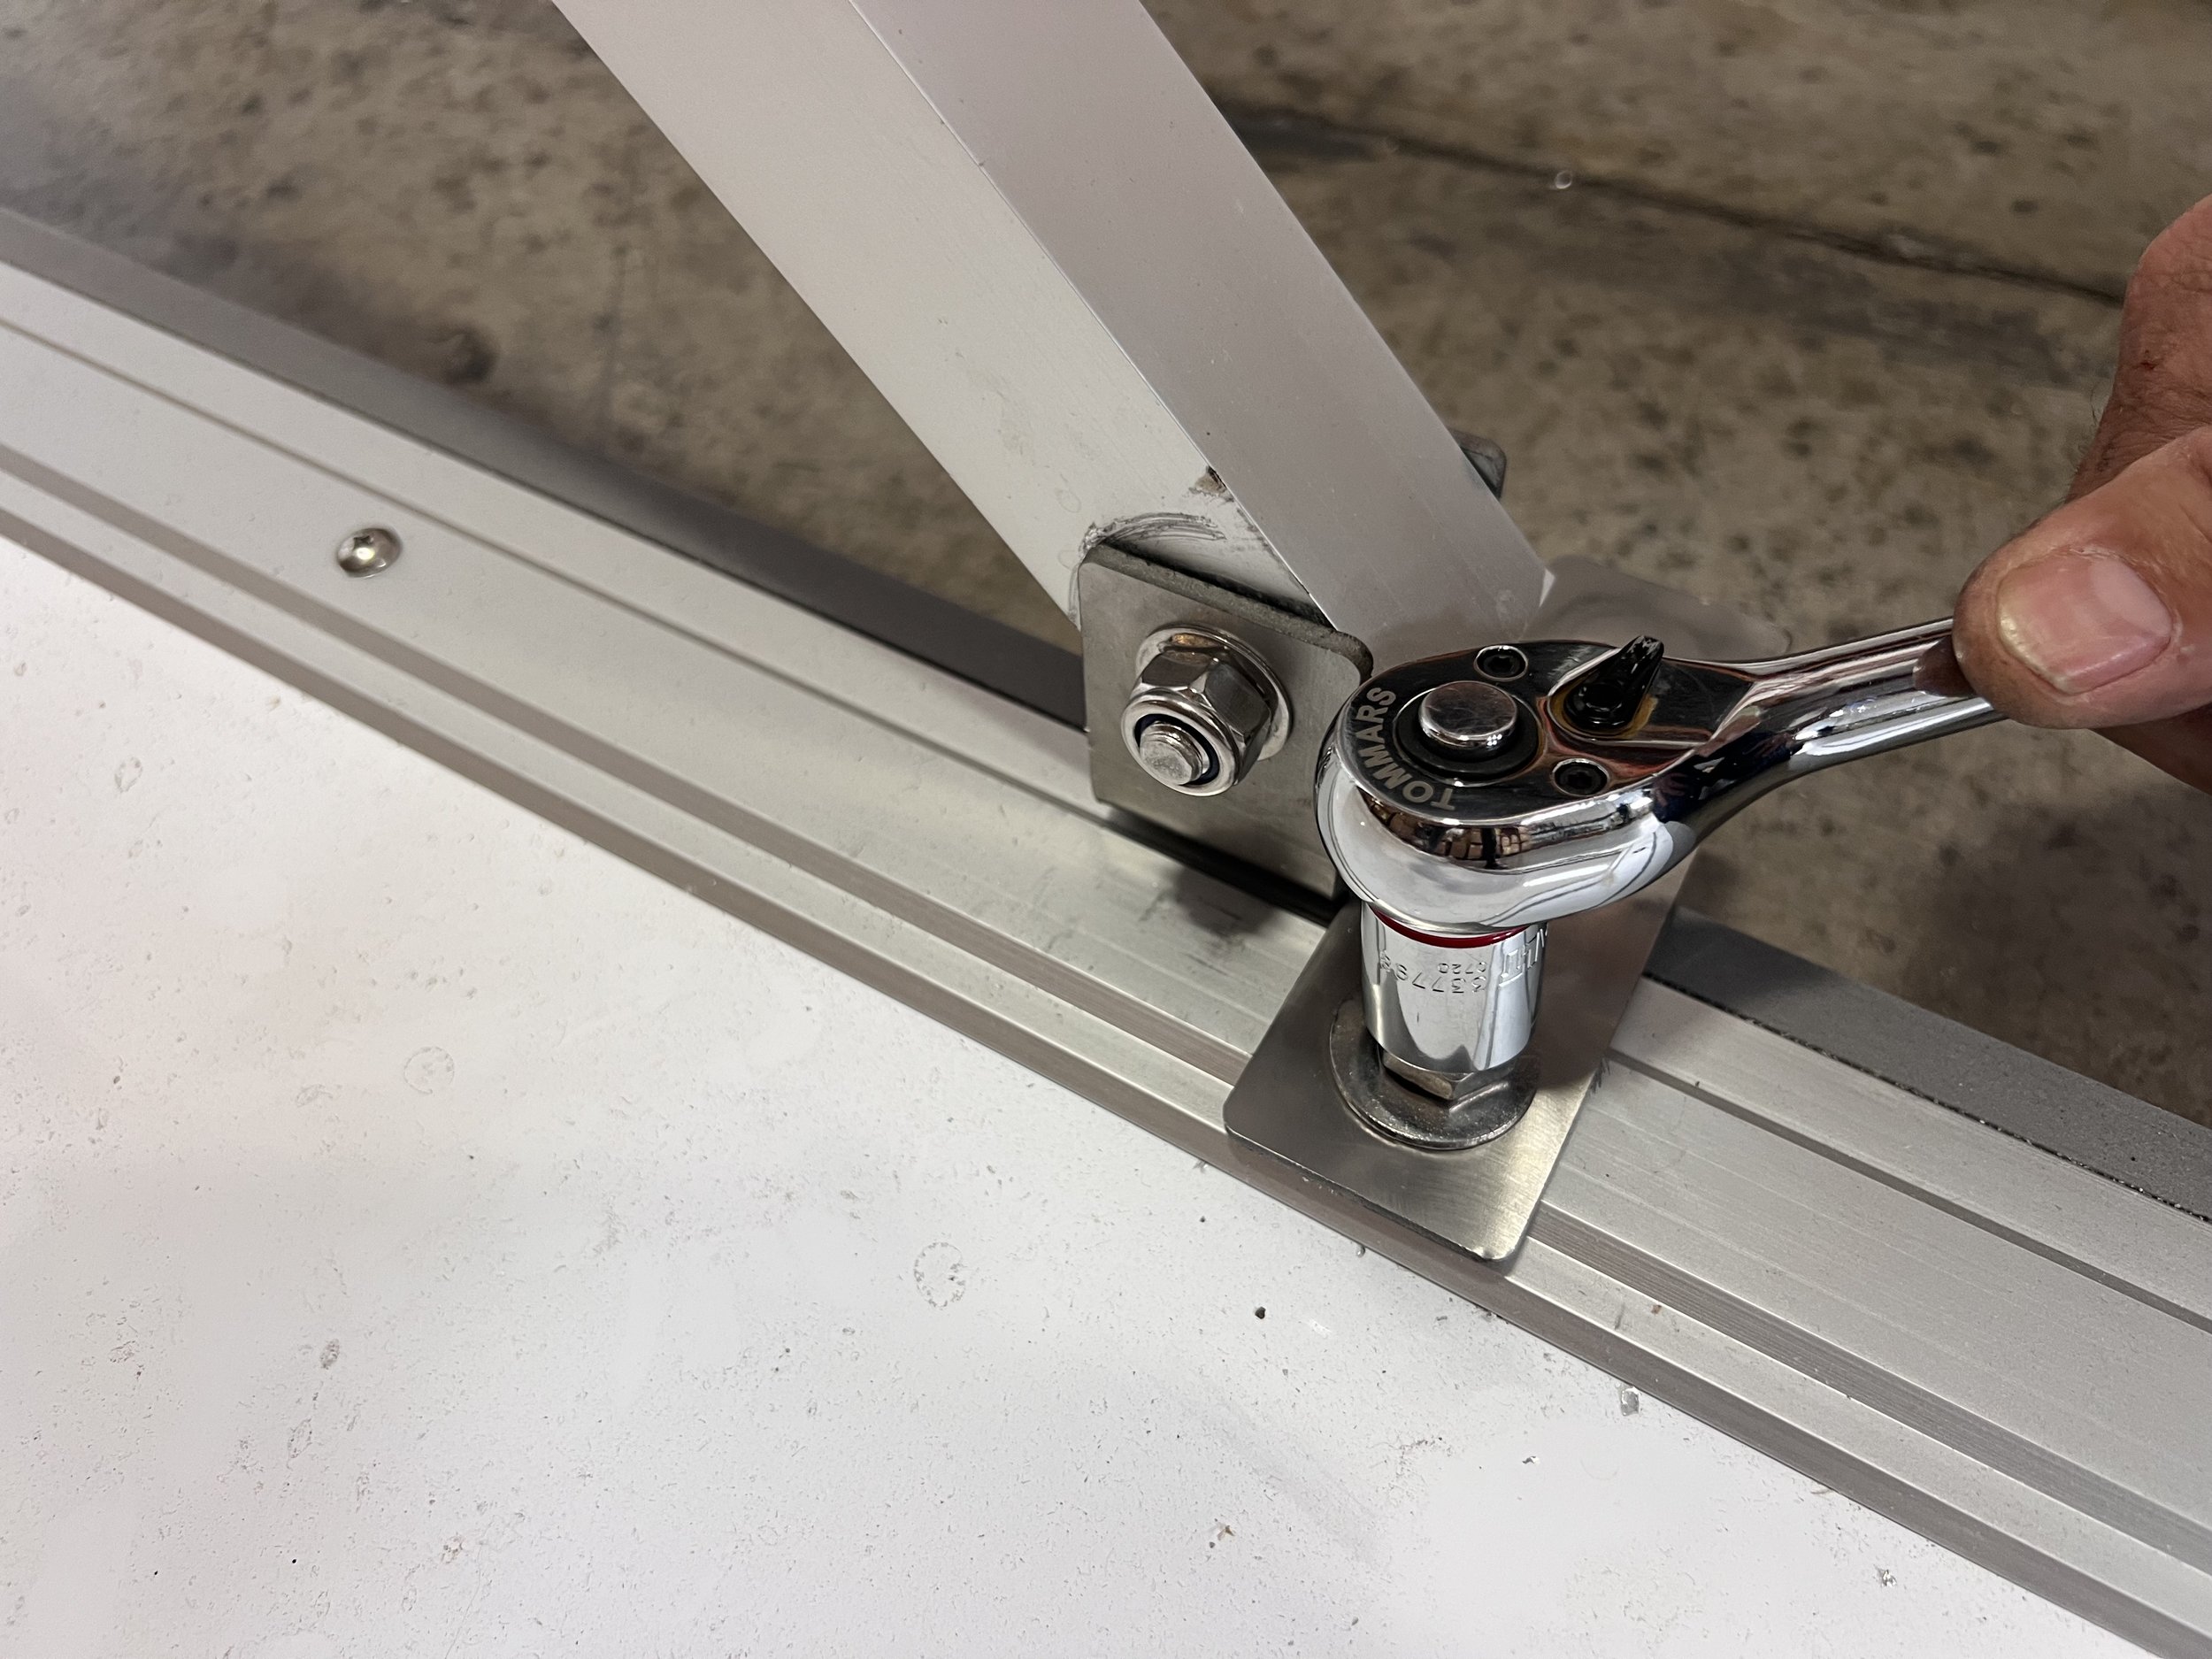
Attaching the Second Side of the Kicker Leg Connection T to The Adjacent Flood Wall.
Place the next BlueFIN panel adjacent to the first panel and align the other half of the T-plate connector over the adjacent panel mounting holes. Alighn both the upright T-plate and the bottom panel T-plate. Bolt the T-connector at both the top and the bottom of every kicker leg. Remember that you will need to pre-insert the bottom panel bolts before aligning the panels as it will not be possible to get under the adjacent bottom panel when the two upright panels T-plate is connected or the panels are latched. NOTE: Do not fully tighten down the bolt until the panels have been latched (in the next step). Once latched, tighten the bolt down to create a strong connection.
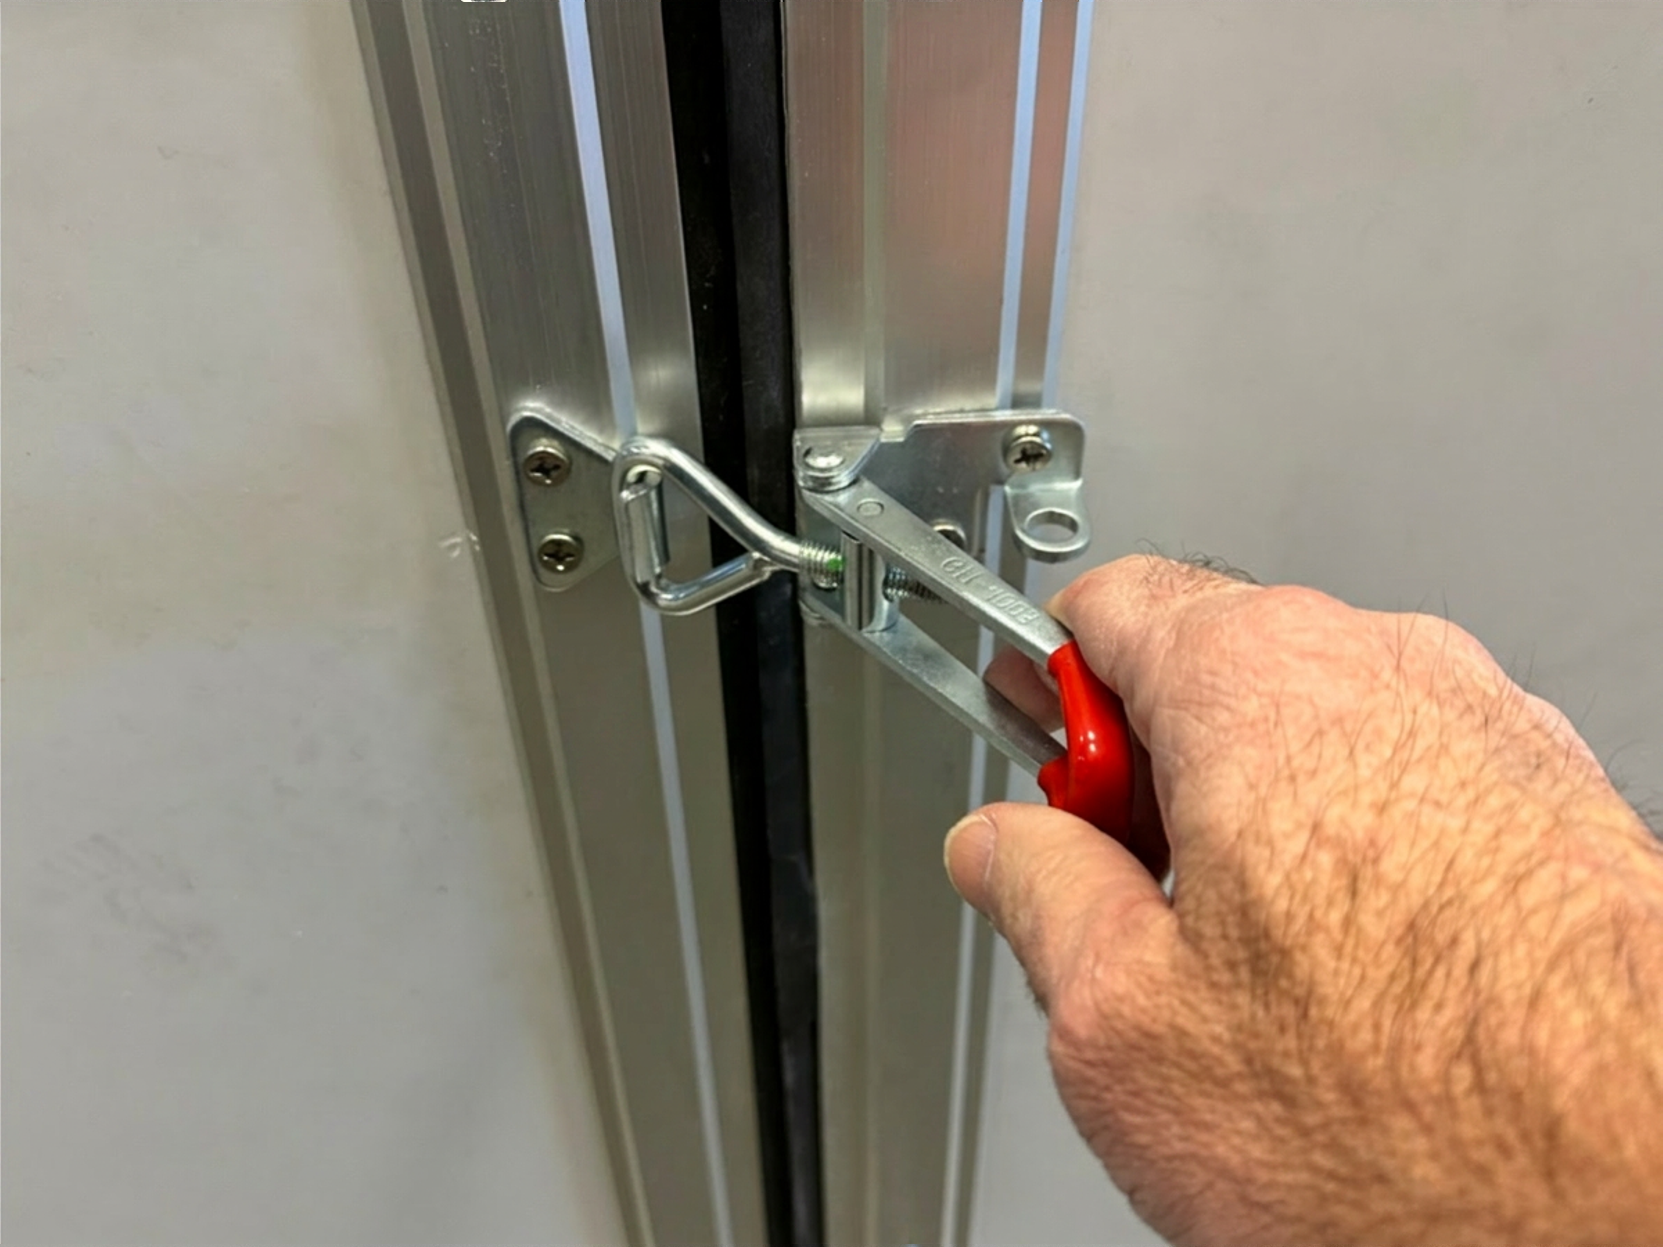
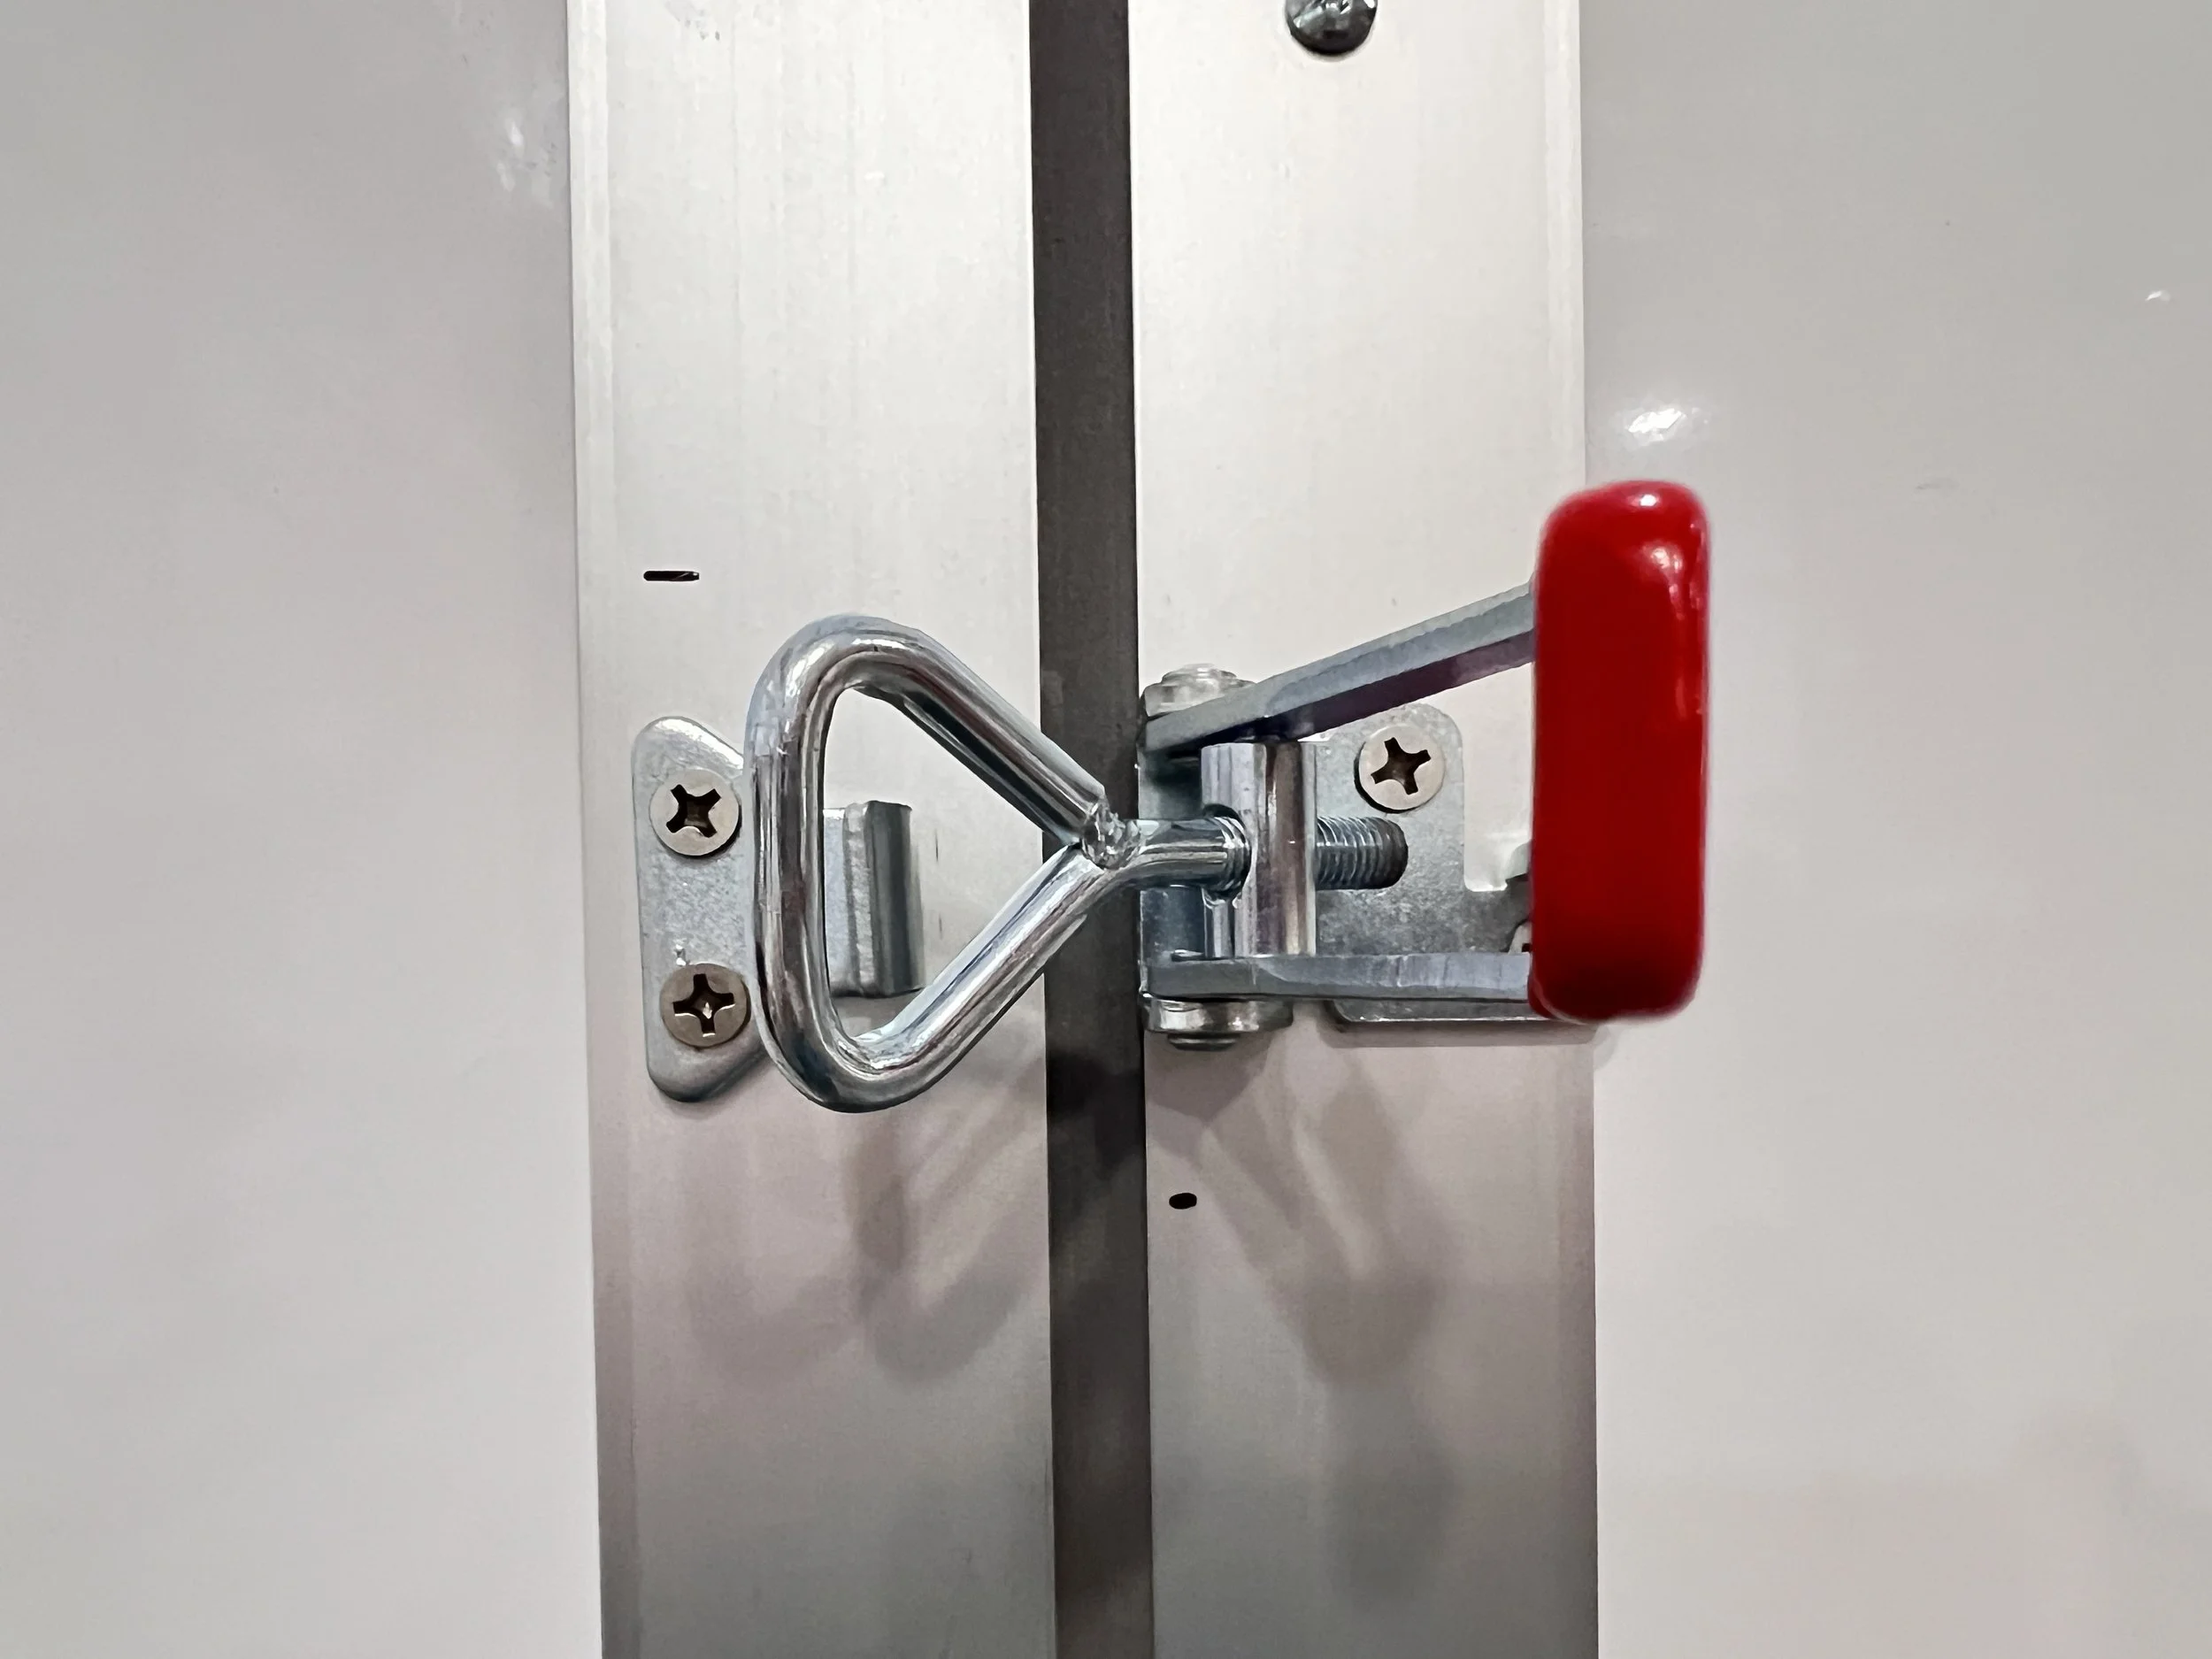
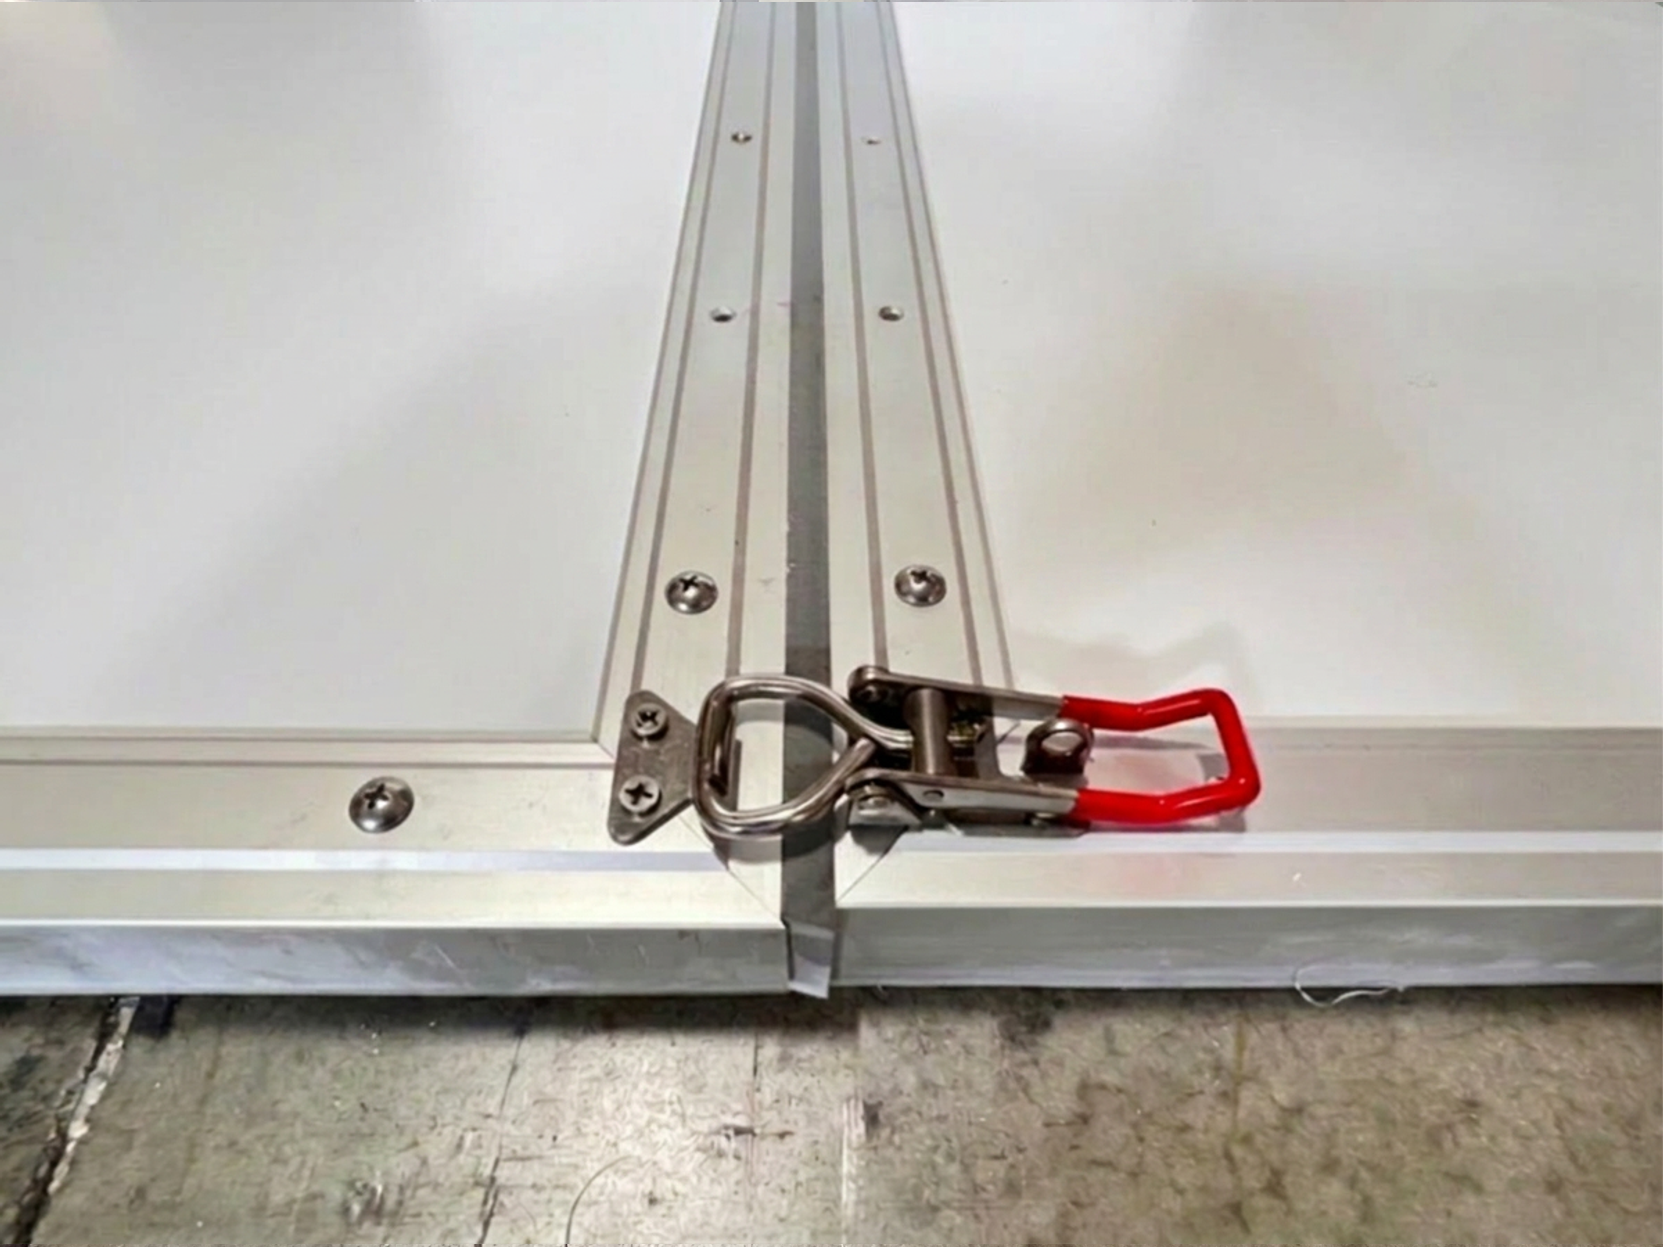
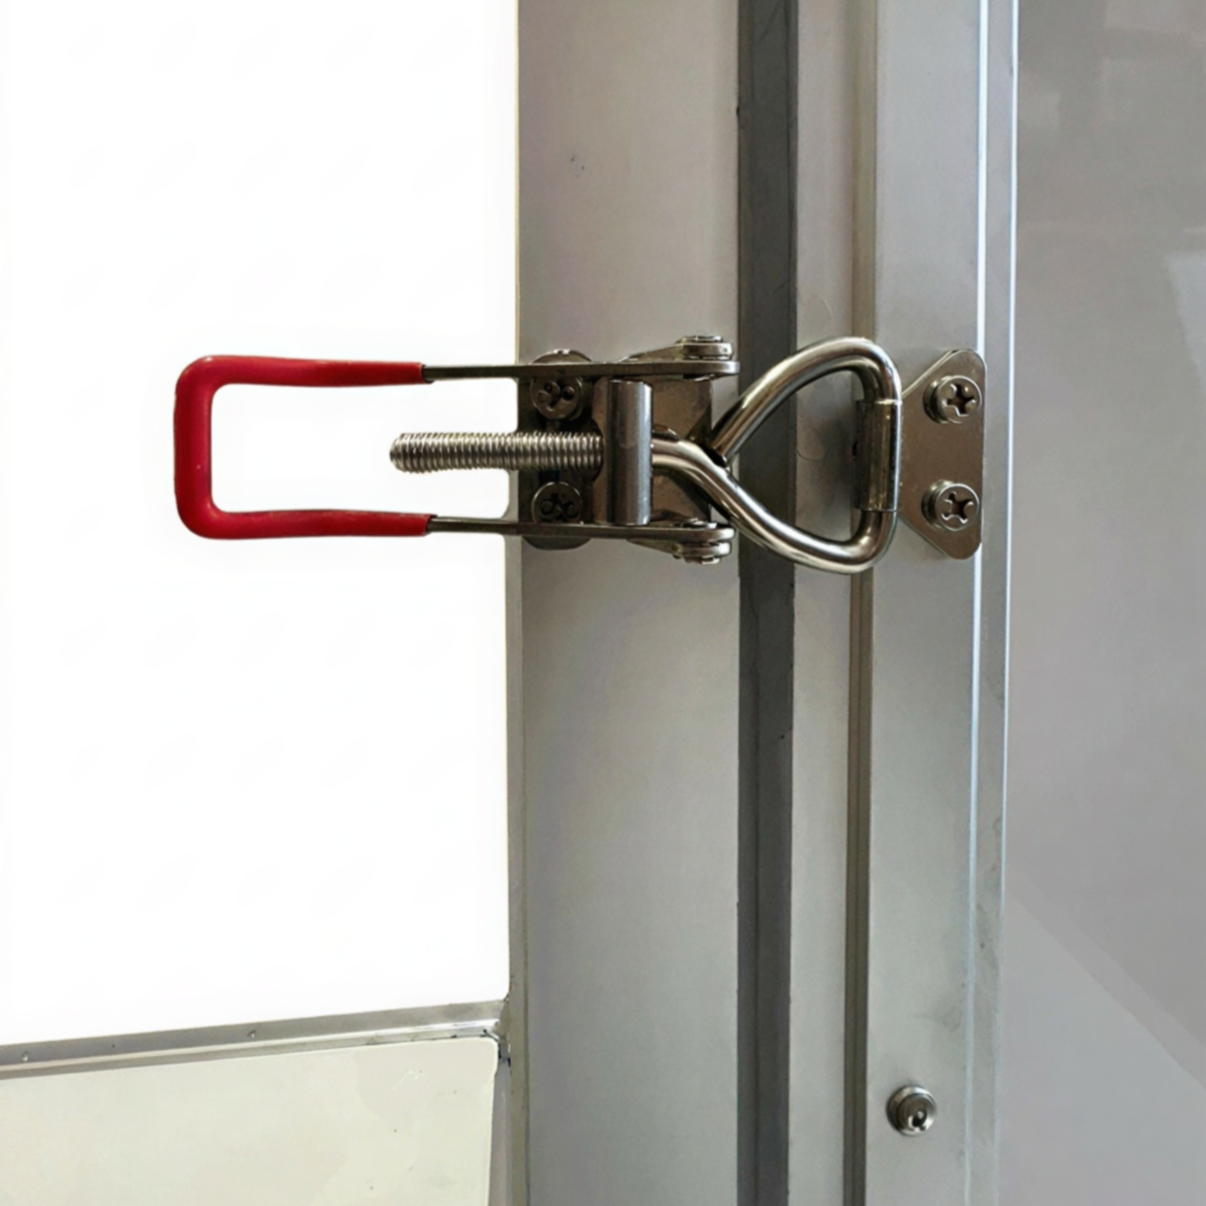
Latching two assembled BlueFIN panels together
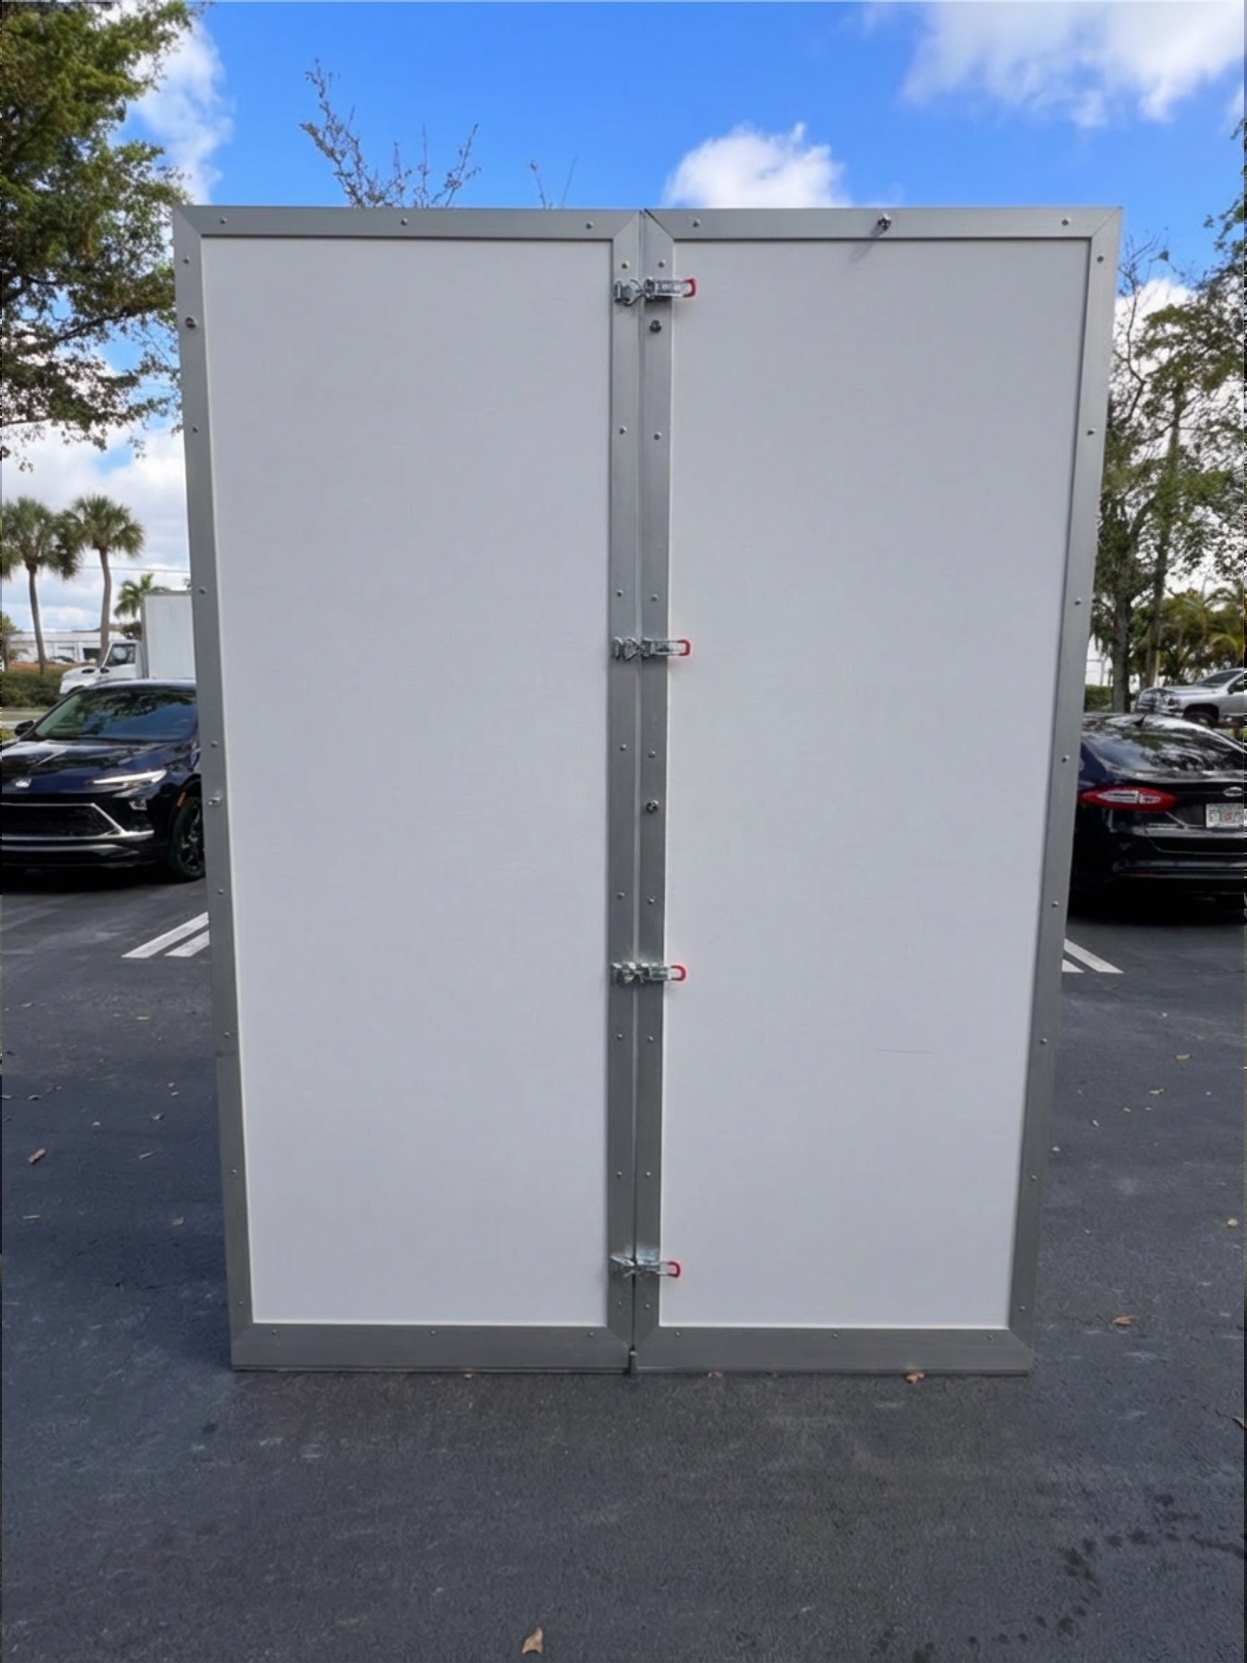
BlueFIN panels are connected together by abutting a BlueFIN panel against the adjacent panel, such that the rubber seal on one panel touches the aluminum extrusion on the adjacent panel. Note: If you have connected kicker support legs (in the prior two steps), panels should already be properly positioned and ready to be latched together. With panels in position, place the loop of the latch over the receiver hook. Then adjust the threading of the loop such that latching the panels together creates sufficient pressure to seal the seals between the panels. Start with the base latches on the ground panel and then move to the latches on the backside (dry side) of the panels, ensuring that all latches are locked. You can secure panels against being disassembled, by adding a padlock though the lock loop on the latches.
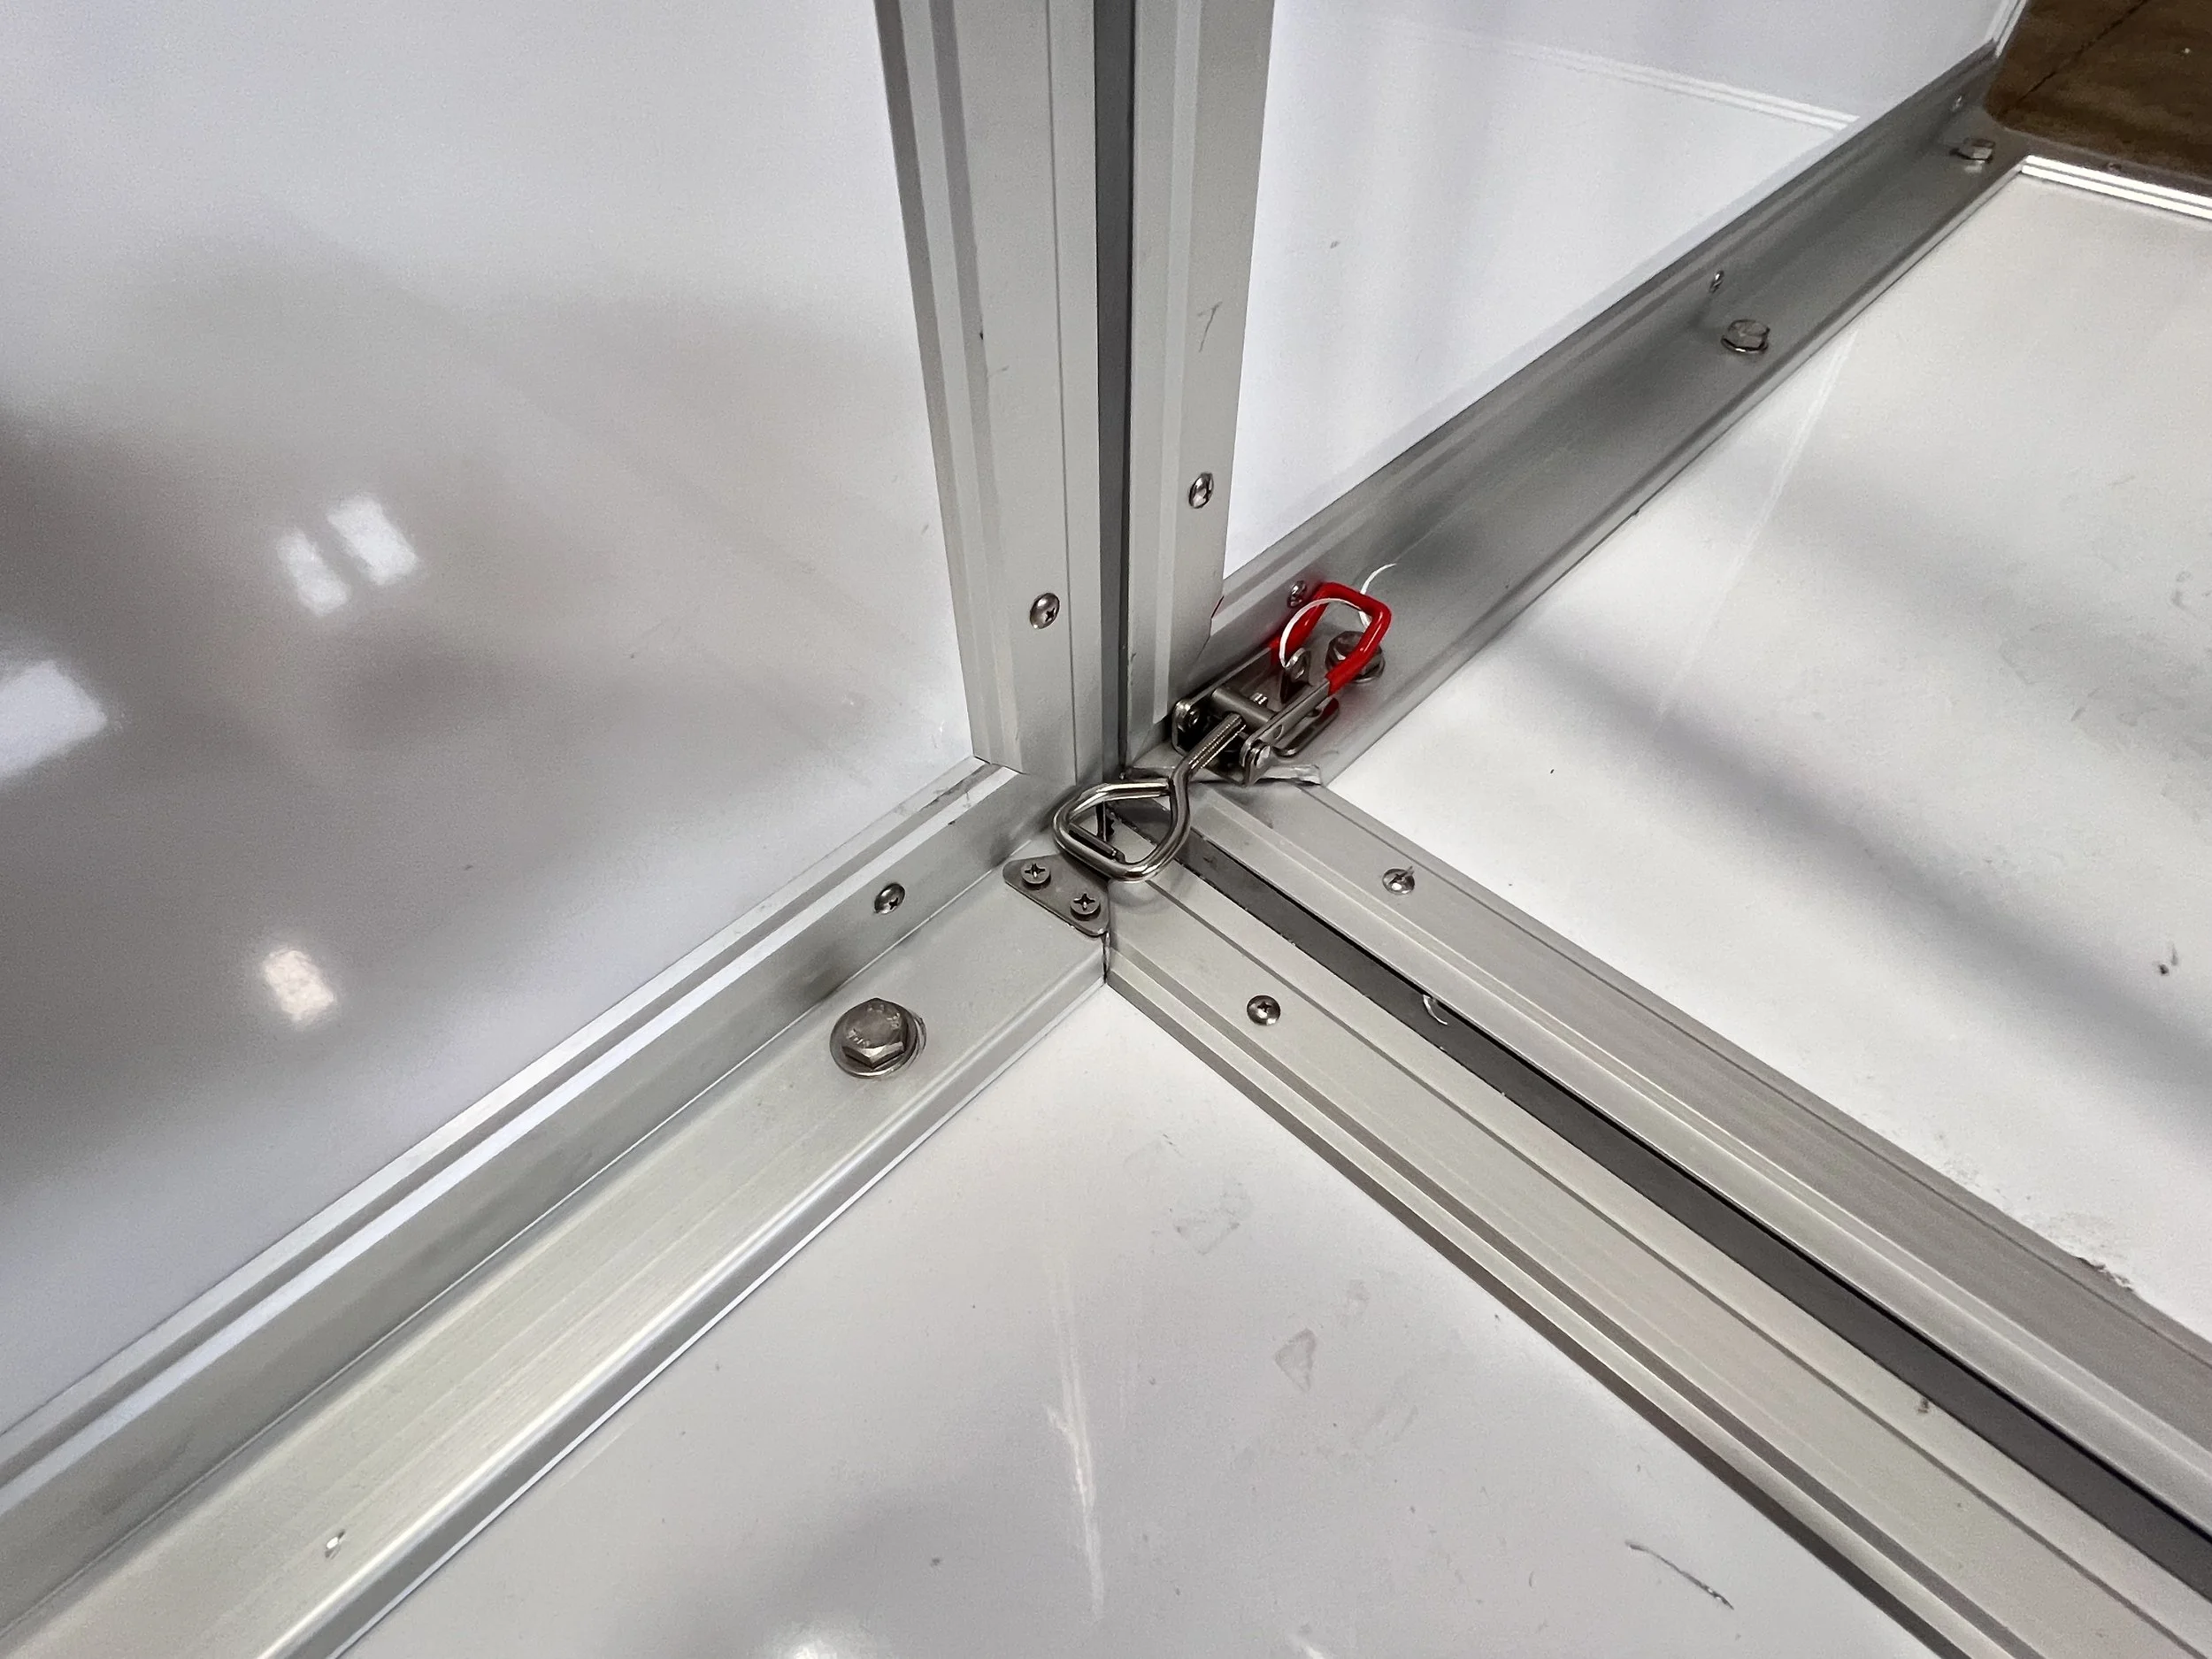

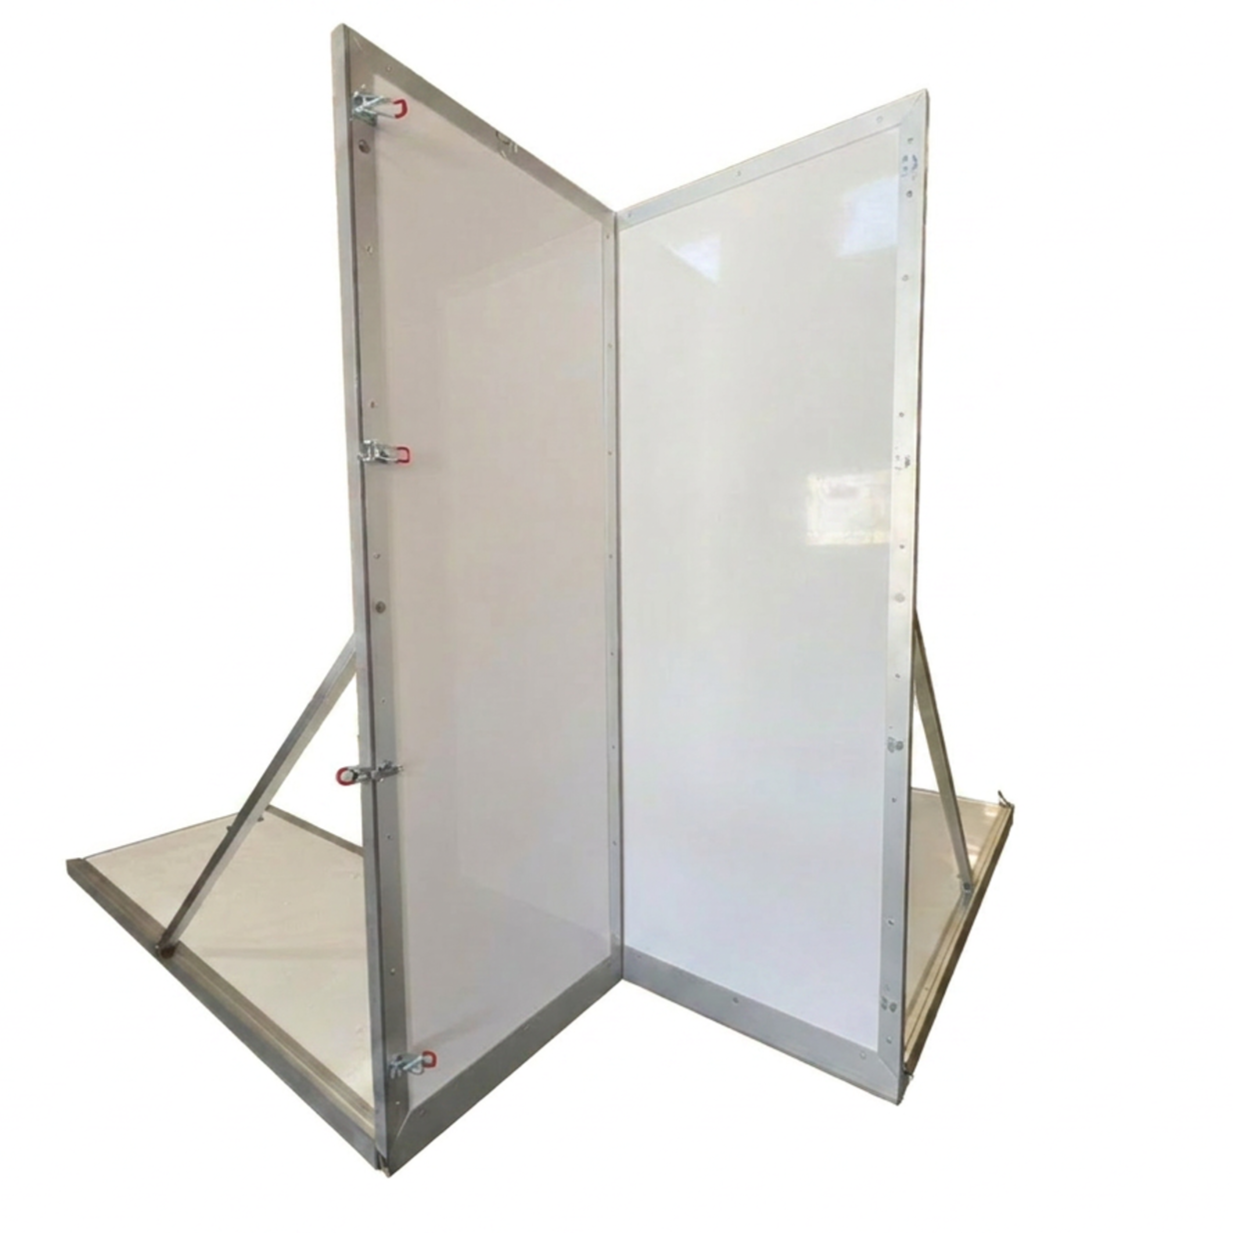
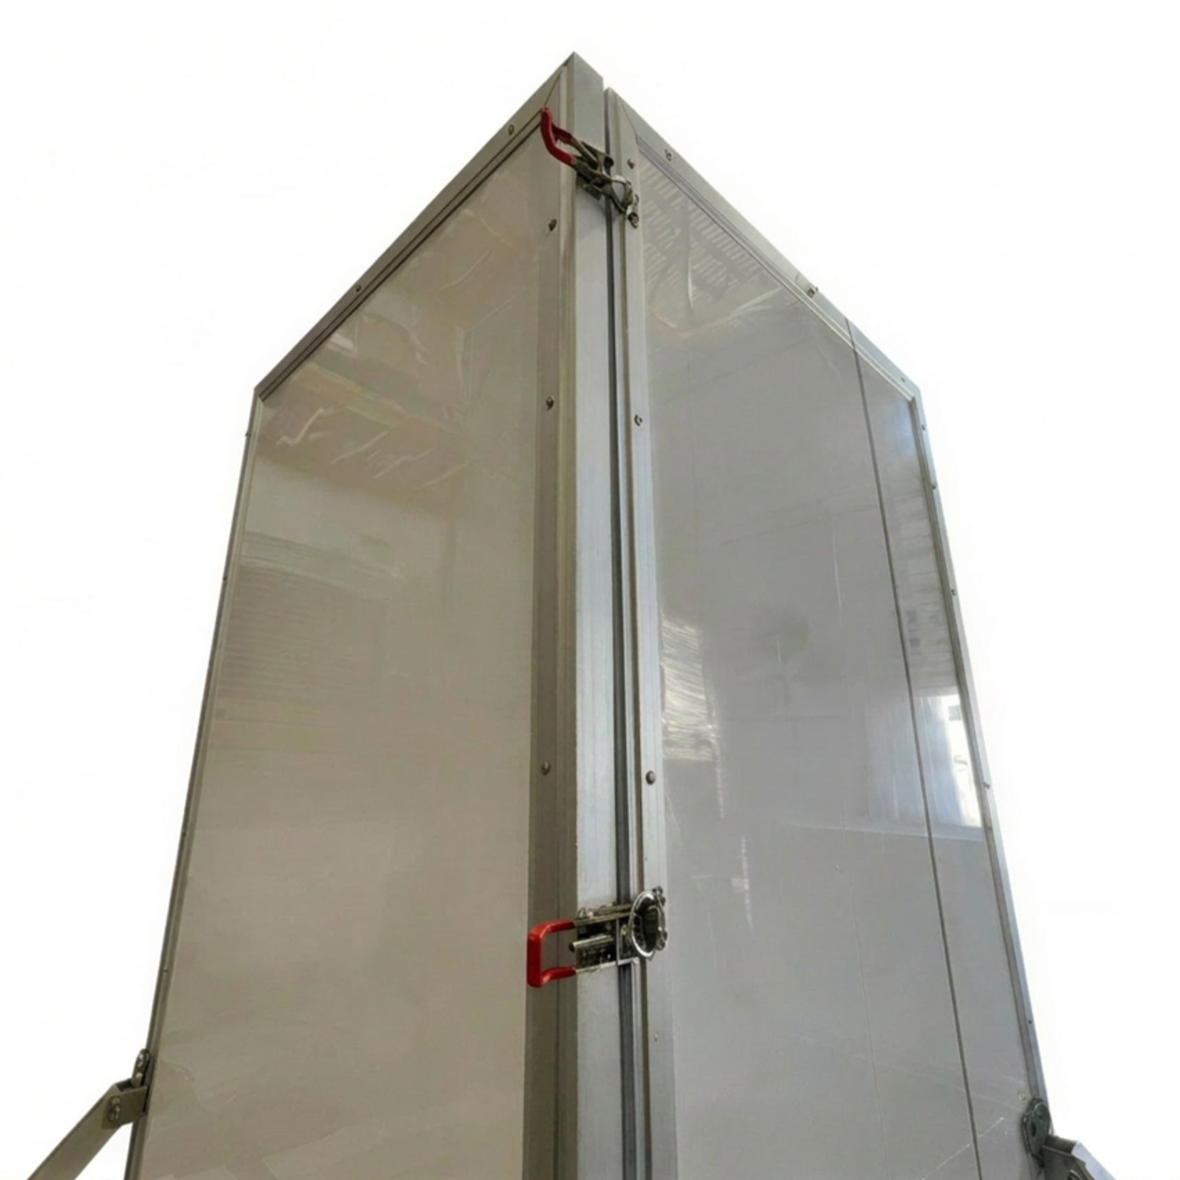
Creating 90 Degree Turns.
BlueFIN panels can be ordered as 90 degree TURN PANELS. These panels are nearly identical to a standard straight BlueFIN panel, except that the end of one side of the panel has the latch receiver mounts (or the latch) along the edge of the pane and not on the front facing surface of the extrusion as is typical. This allows the turn panel to abut the adjacent panel at a 90 degree angle, along the rubber seal and to latch together utilizing the same latching system as standard BlueFIN panels. To connect the turn panel, position the frame extrusion of the turn panel against the rubber seal edge of the straight panel and latch the latches together such that the rubber seal is compressed against the adjacent aluminum extrusion, creating a waterproof seal.
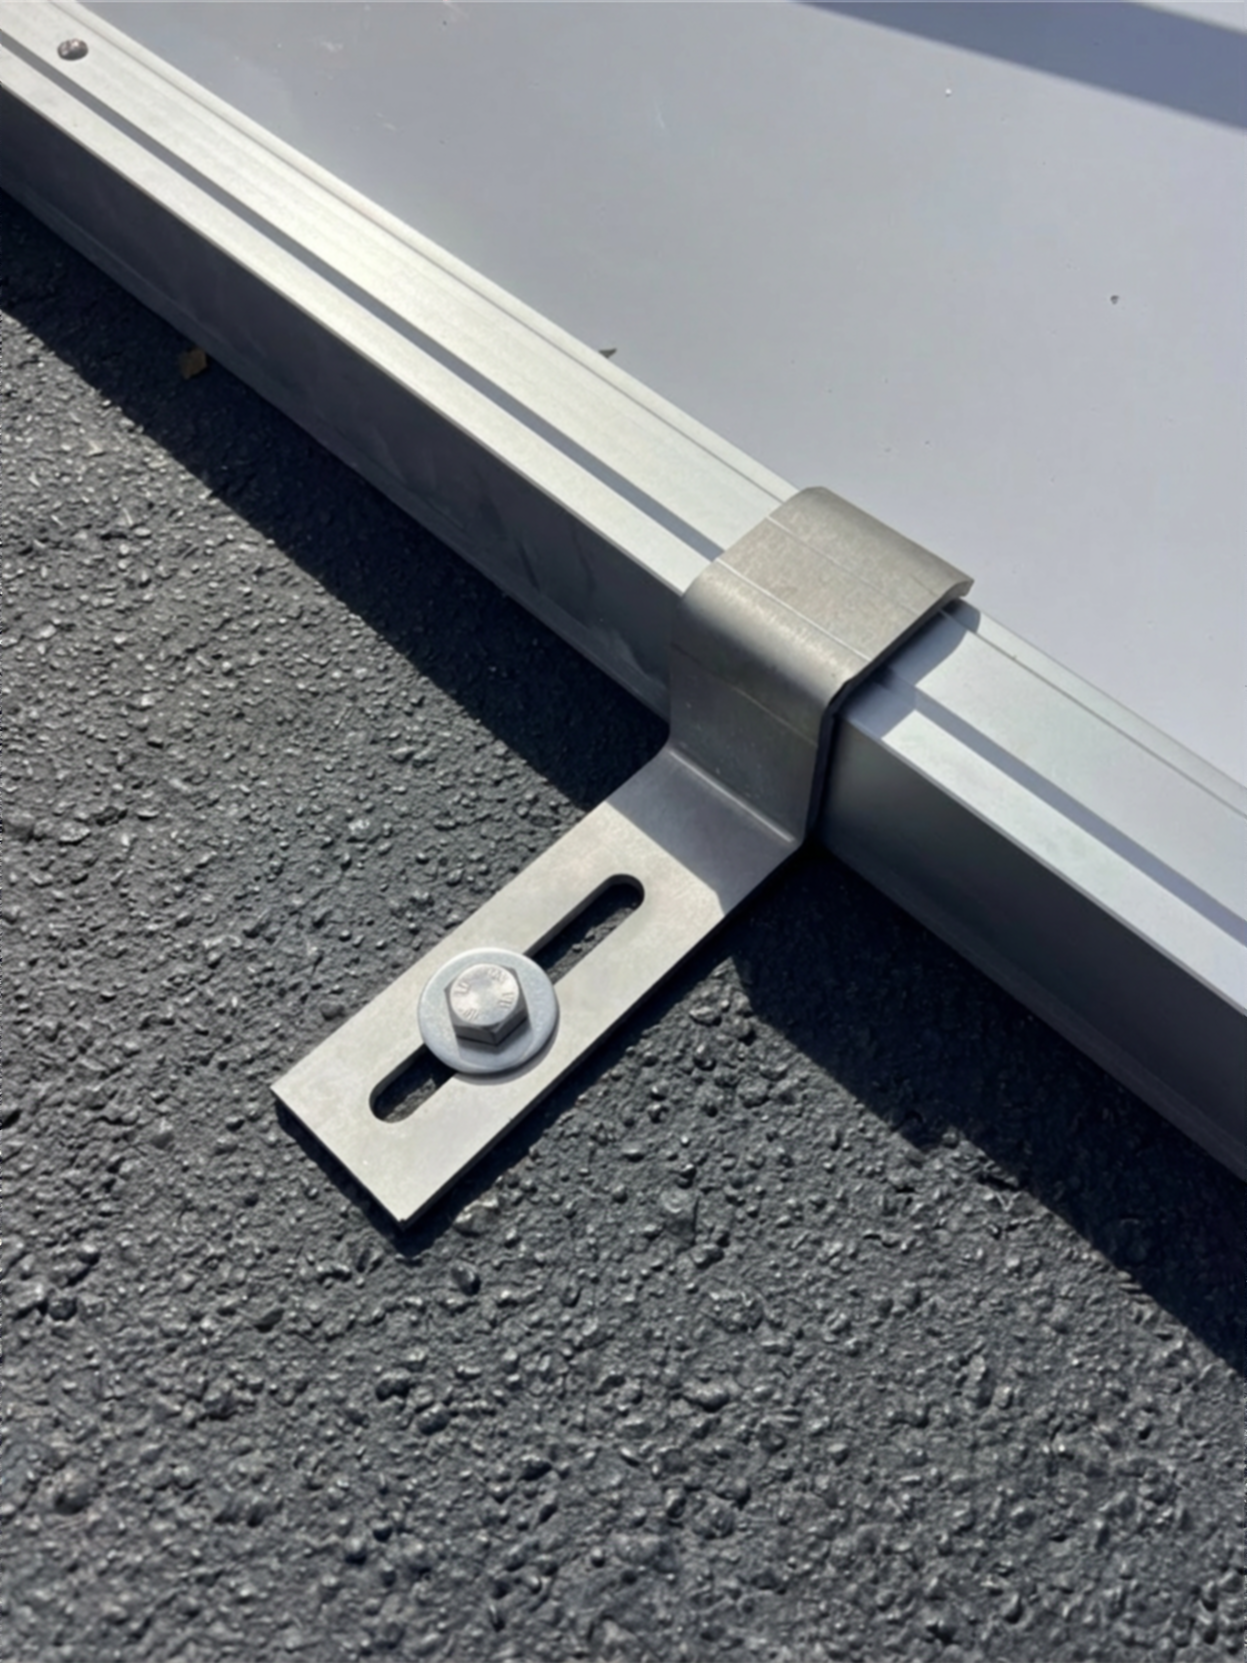
Adding Ground Anchors to Stabilize BlueFIN in advance of a flood.
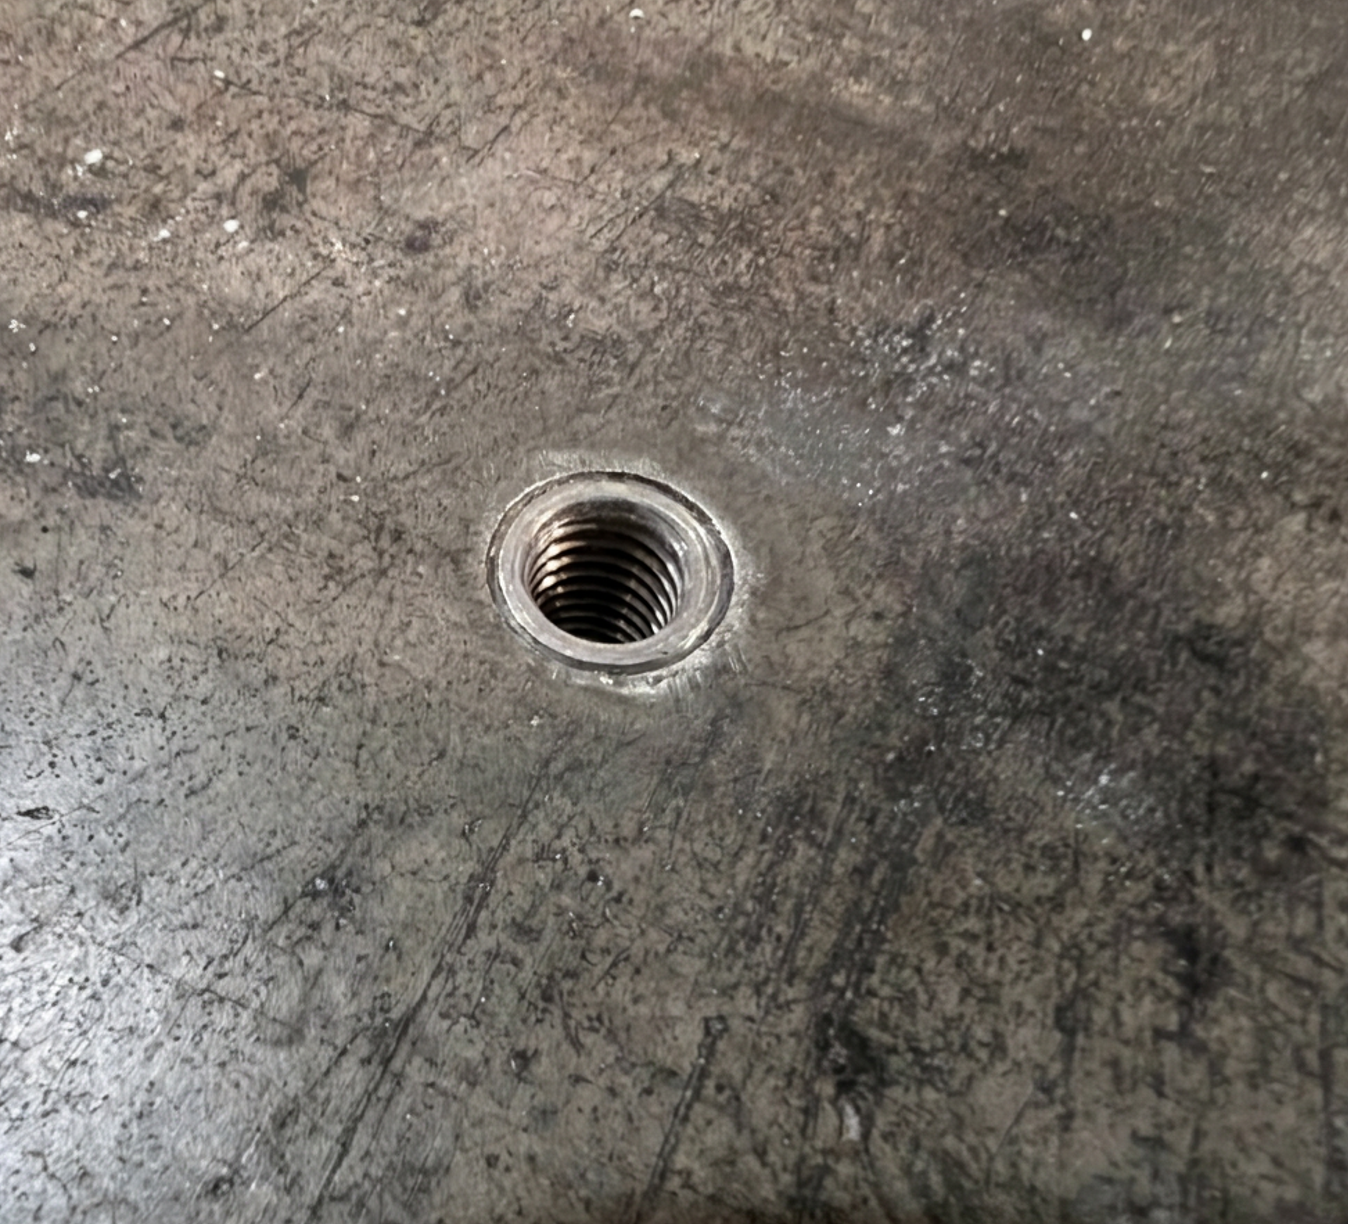
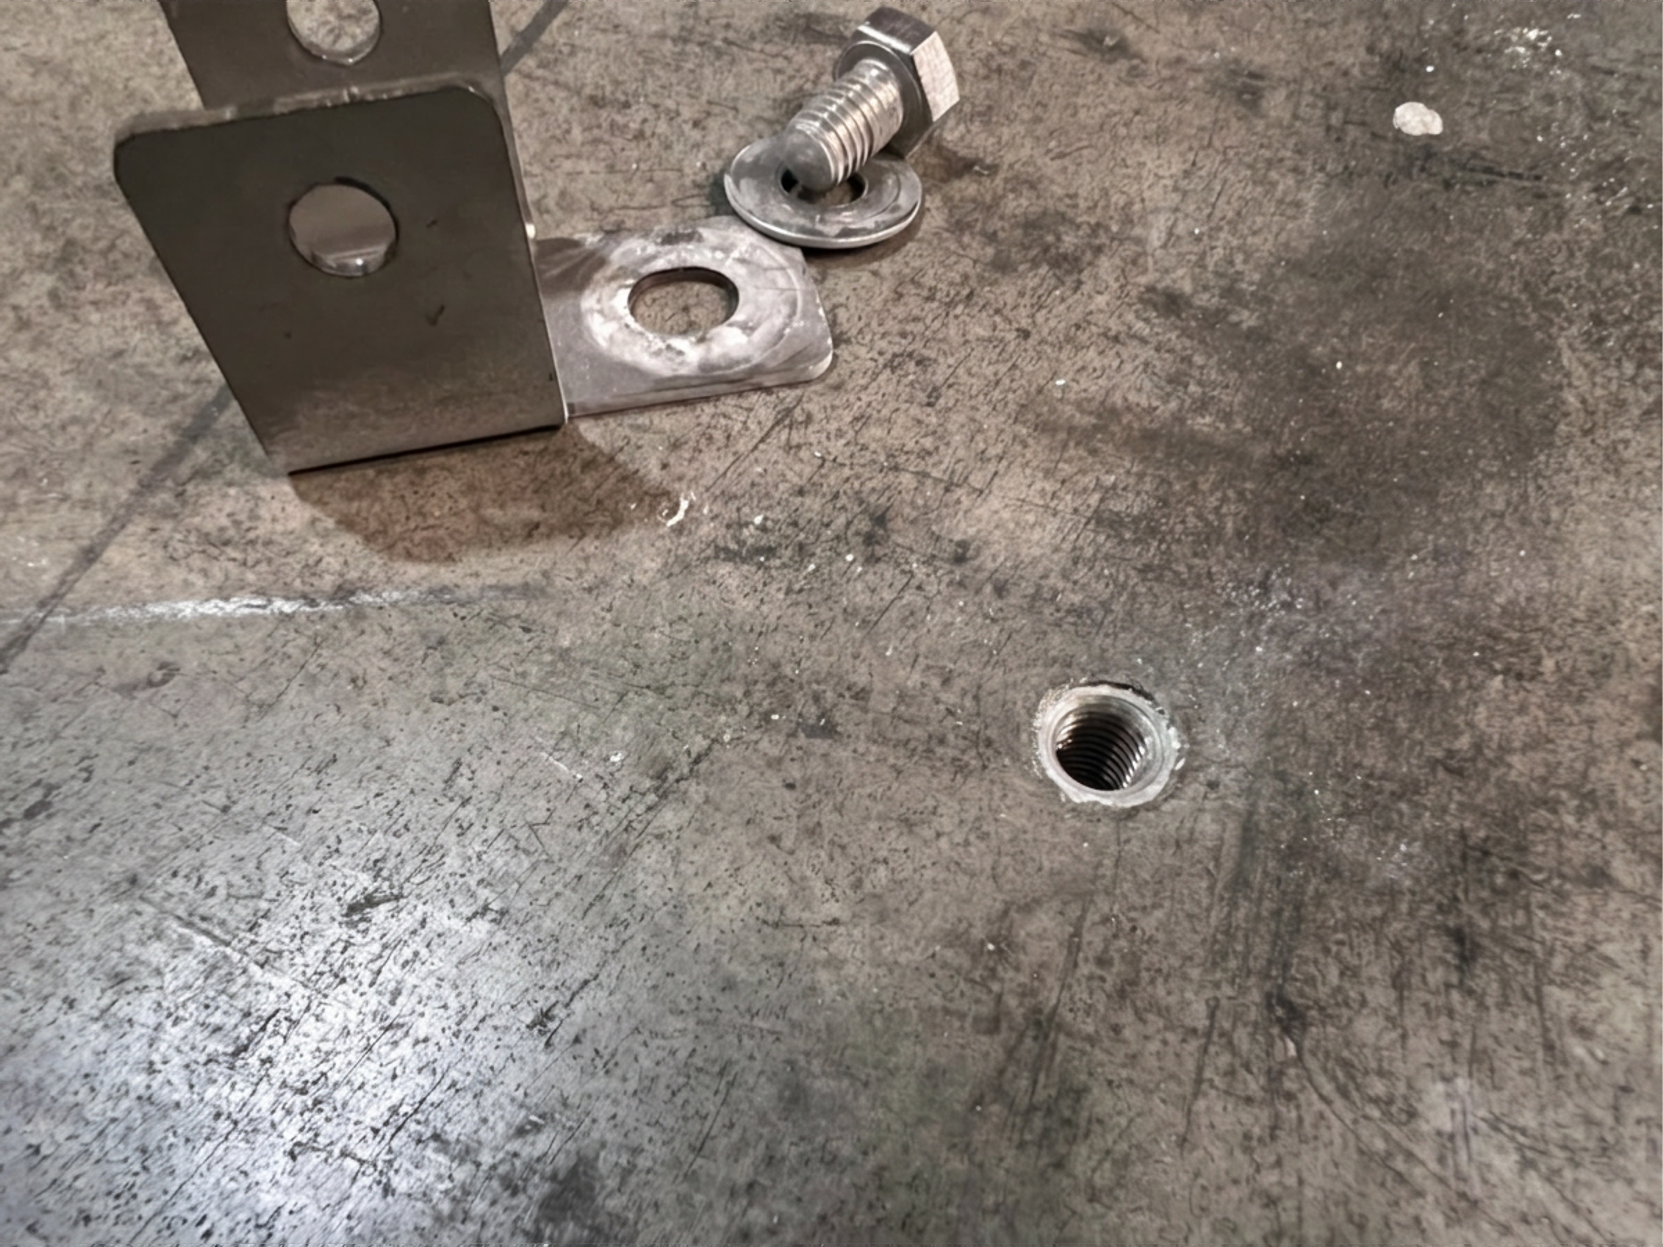
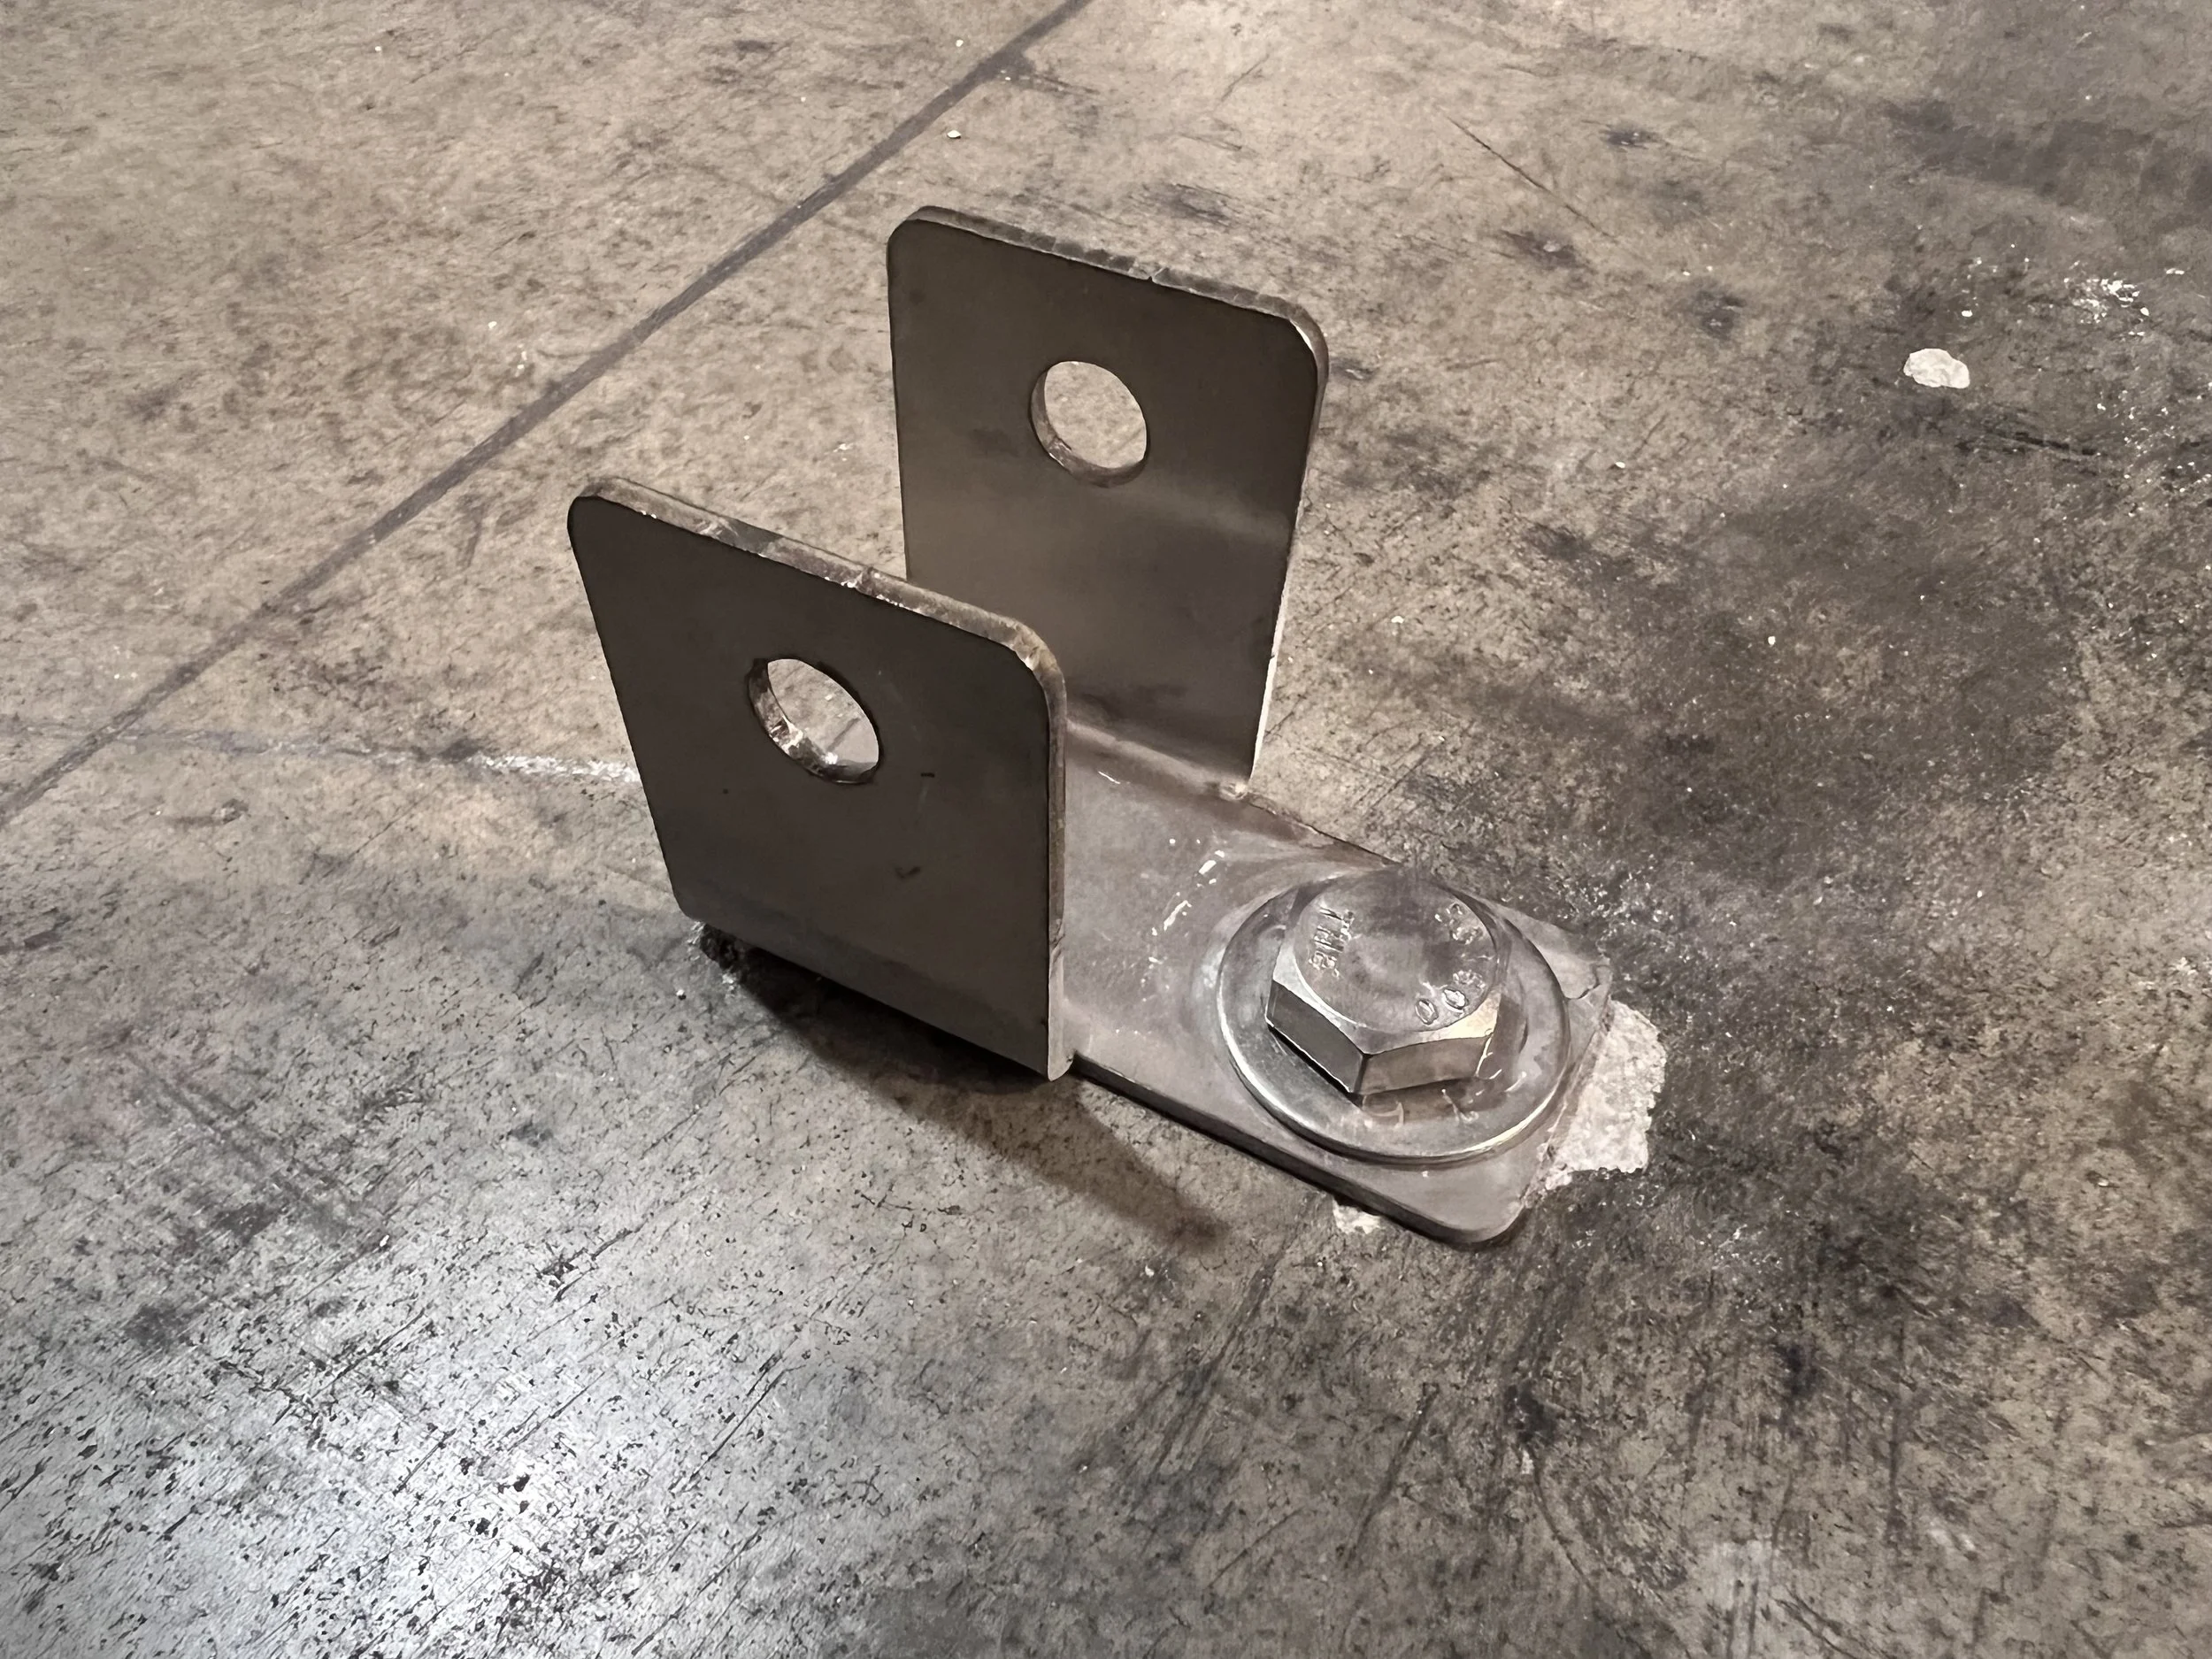
Secure the bottom panels to the ground below using the supplied ground anchors. The anchors are used to stabilize the panels against wind and movement until the water level rises and adds ballast to the top of the panels. Ground anchors counteract any inherent buoyancy in the panels, ensuring they remain fastened to the ground below during light flooding and before water weight ballast is provided. The anchors are placed at the front of the ground panel (wet side towards the water) and are positioned such that the lip of the anchor spans over the thick area of the panel’s extrusion clamping it over the panel’s extrusion. This prevents movement of the panels front to back, once the anchor is bolted down. Utilize the appropriate anchor bolt for the ground conditions to securely bolt the anchor and the clamped panel. NOTE: For 3ft wide and 4ft wide panels, utilize 2 ground anchors per panel. 6ft wide and 8ft wide ground panels, utilize 3 ground anchors per panel. At the end of a run of panels we also recommend utilizing the ground anchors to fasten the sides of the ground panel. In addition to the ground anchors It is also possible to place weights on top of the bottom panels to supplement ground anchors or where anchoring may not be feasible.
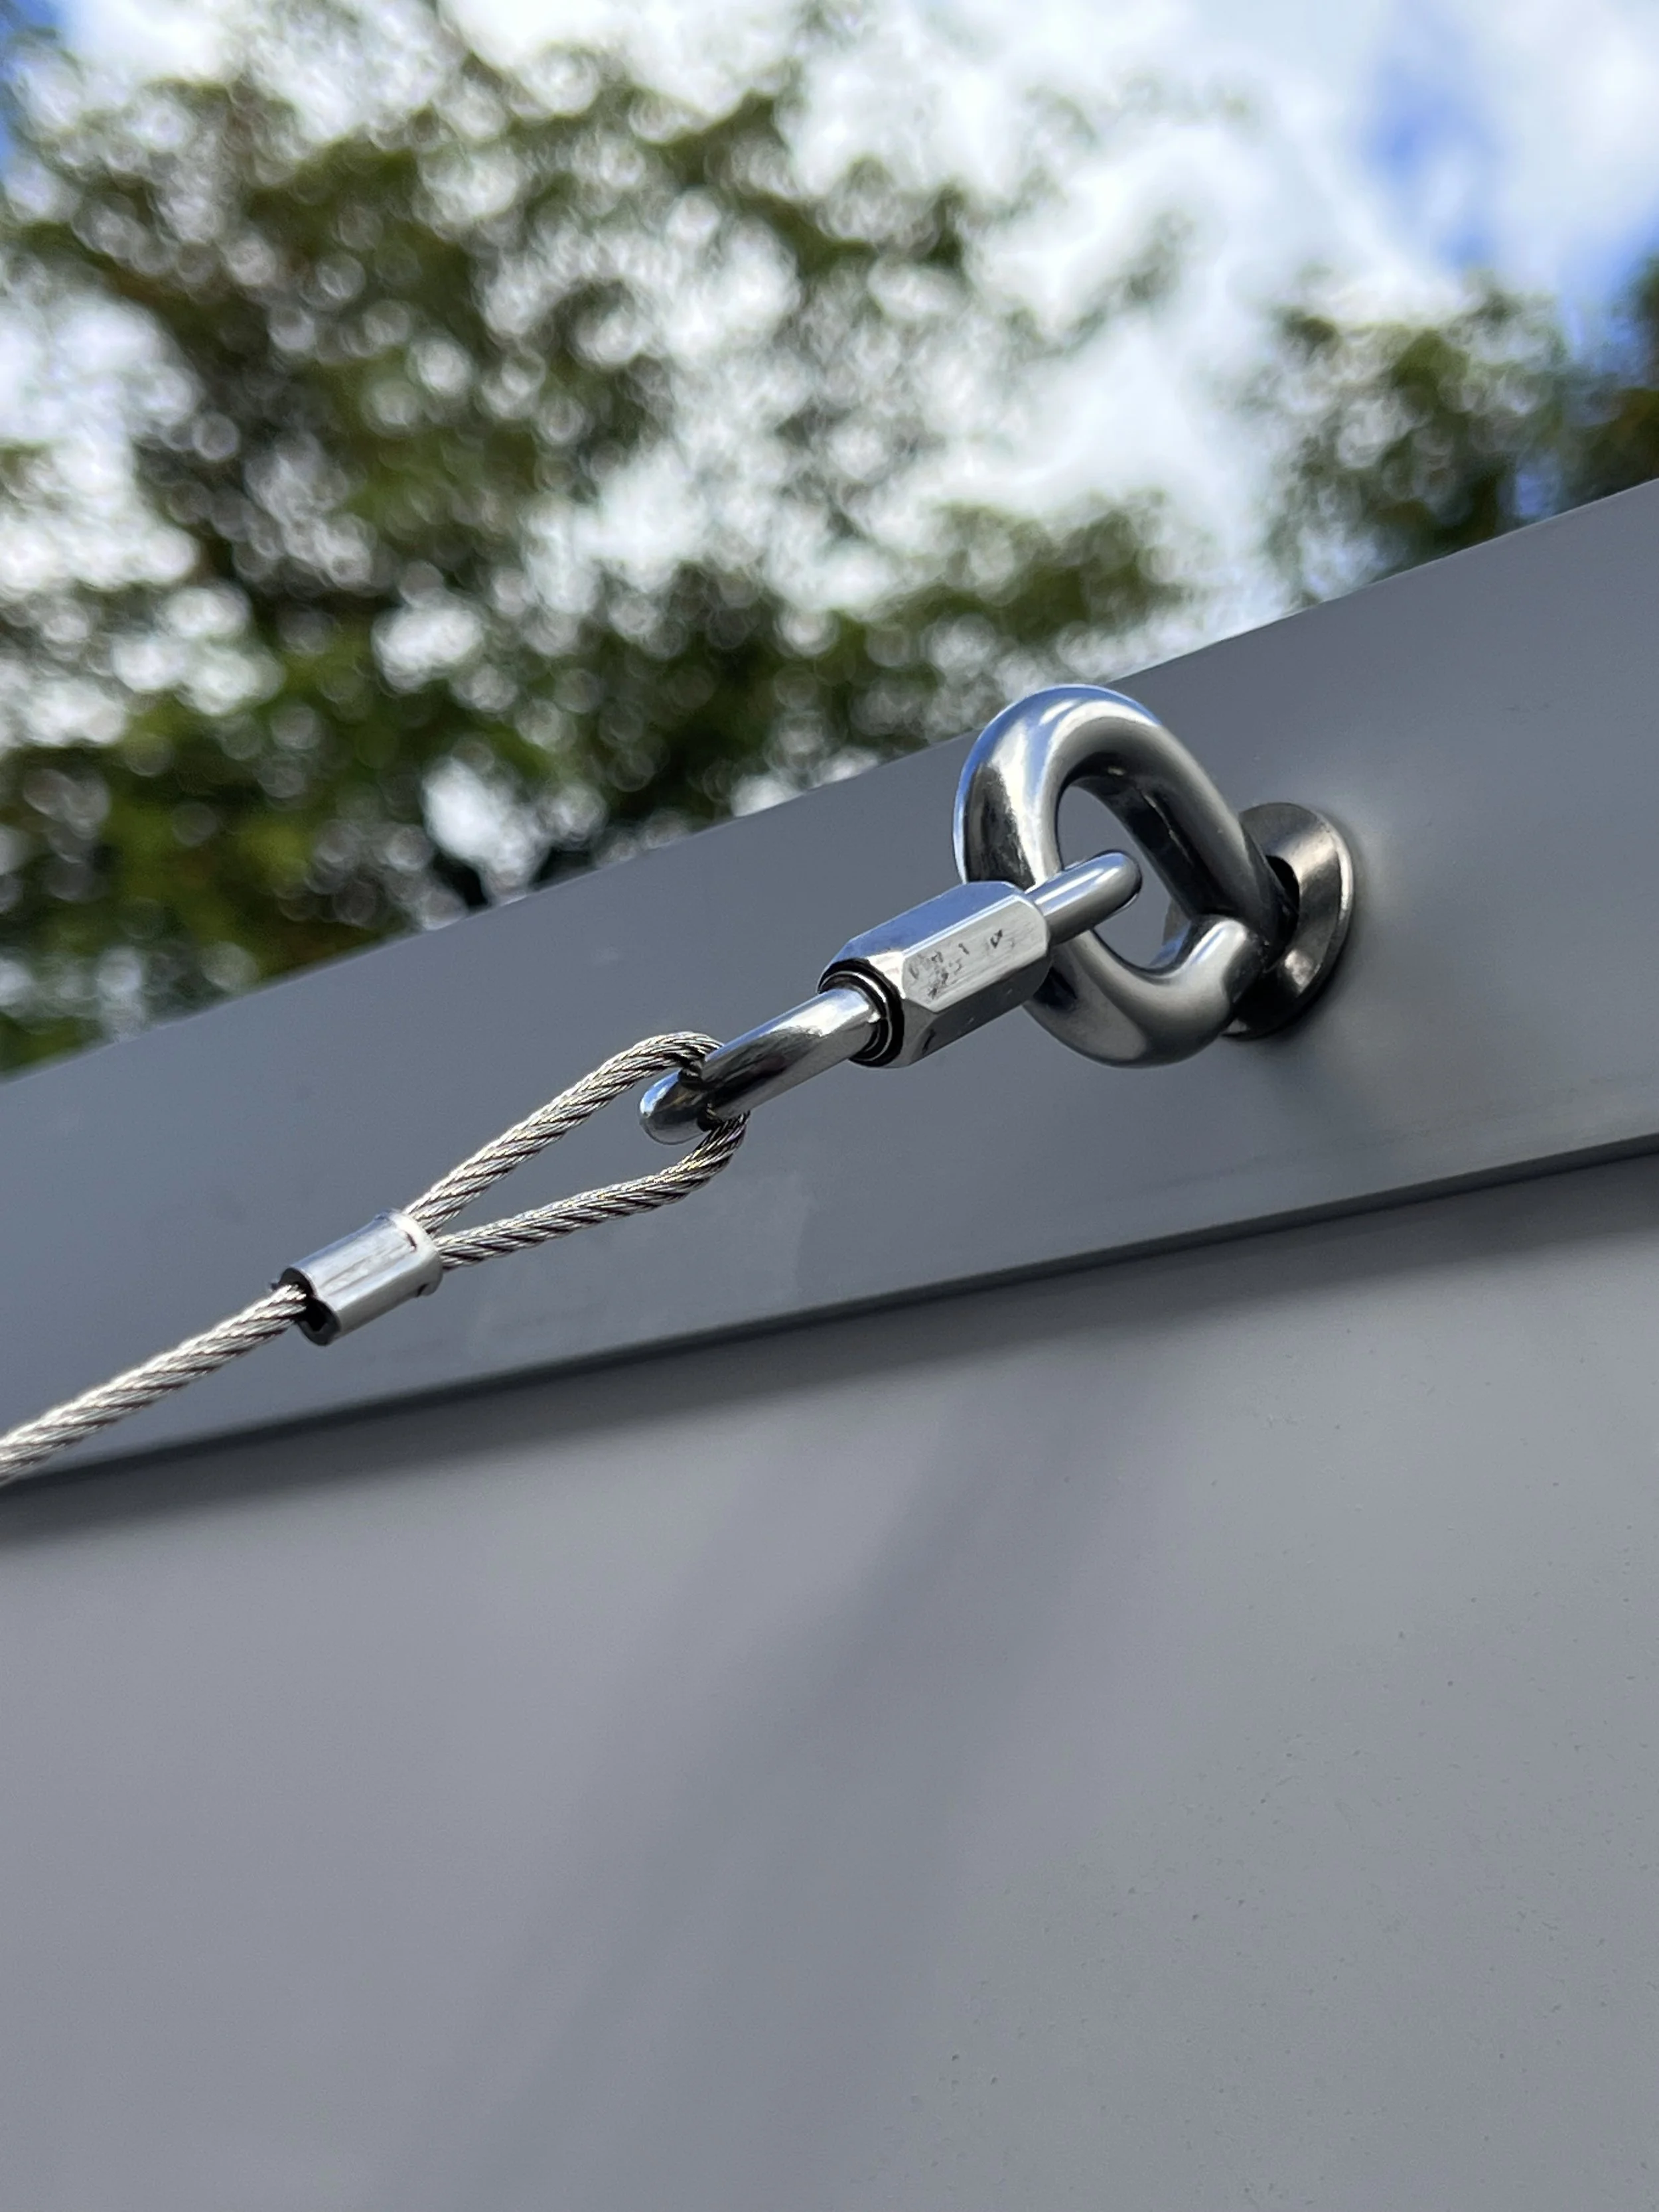
Adding Wind Cables to Further Brace BlueFIN.
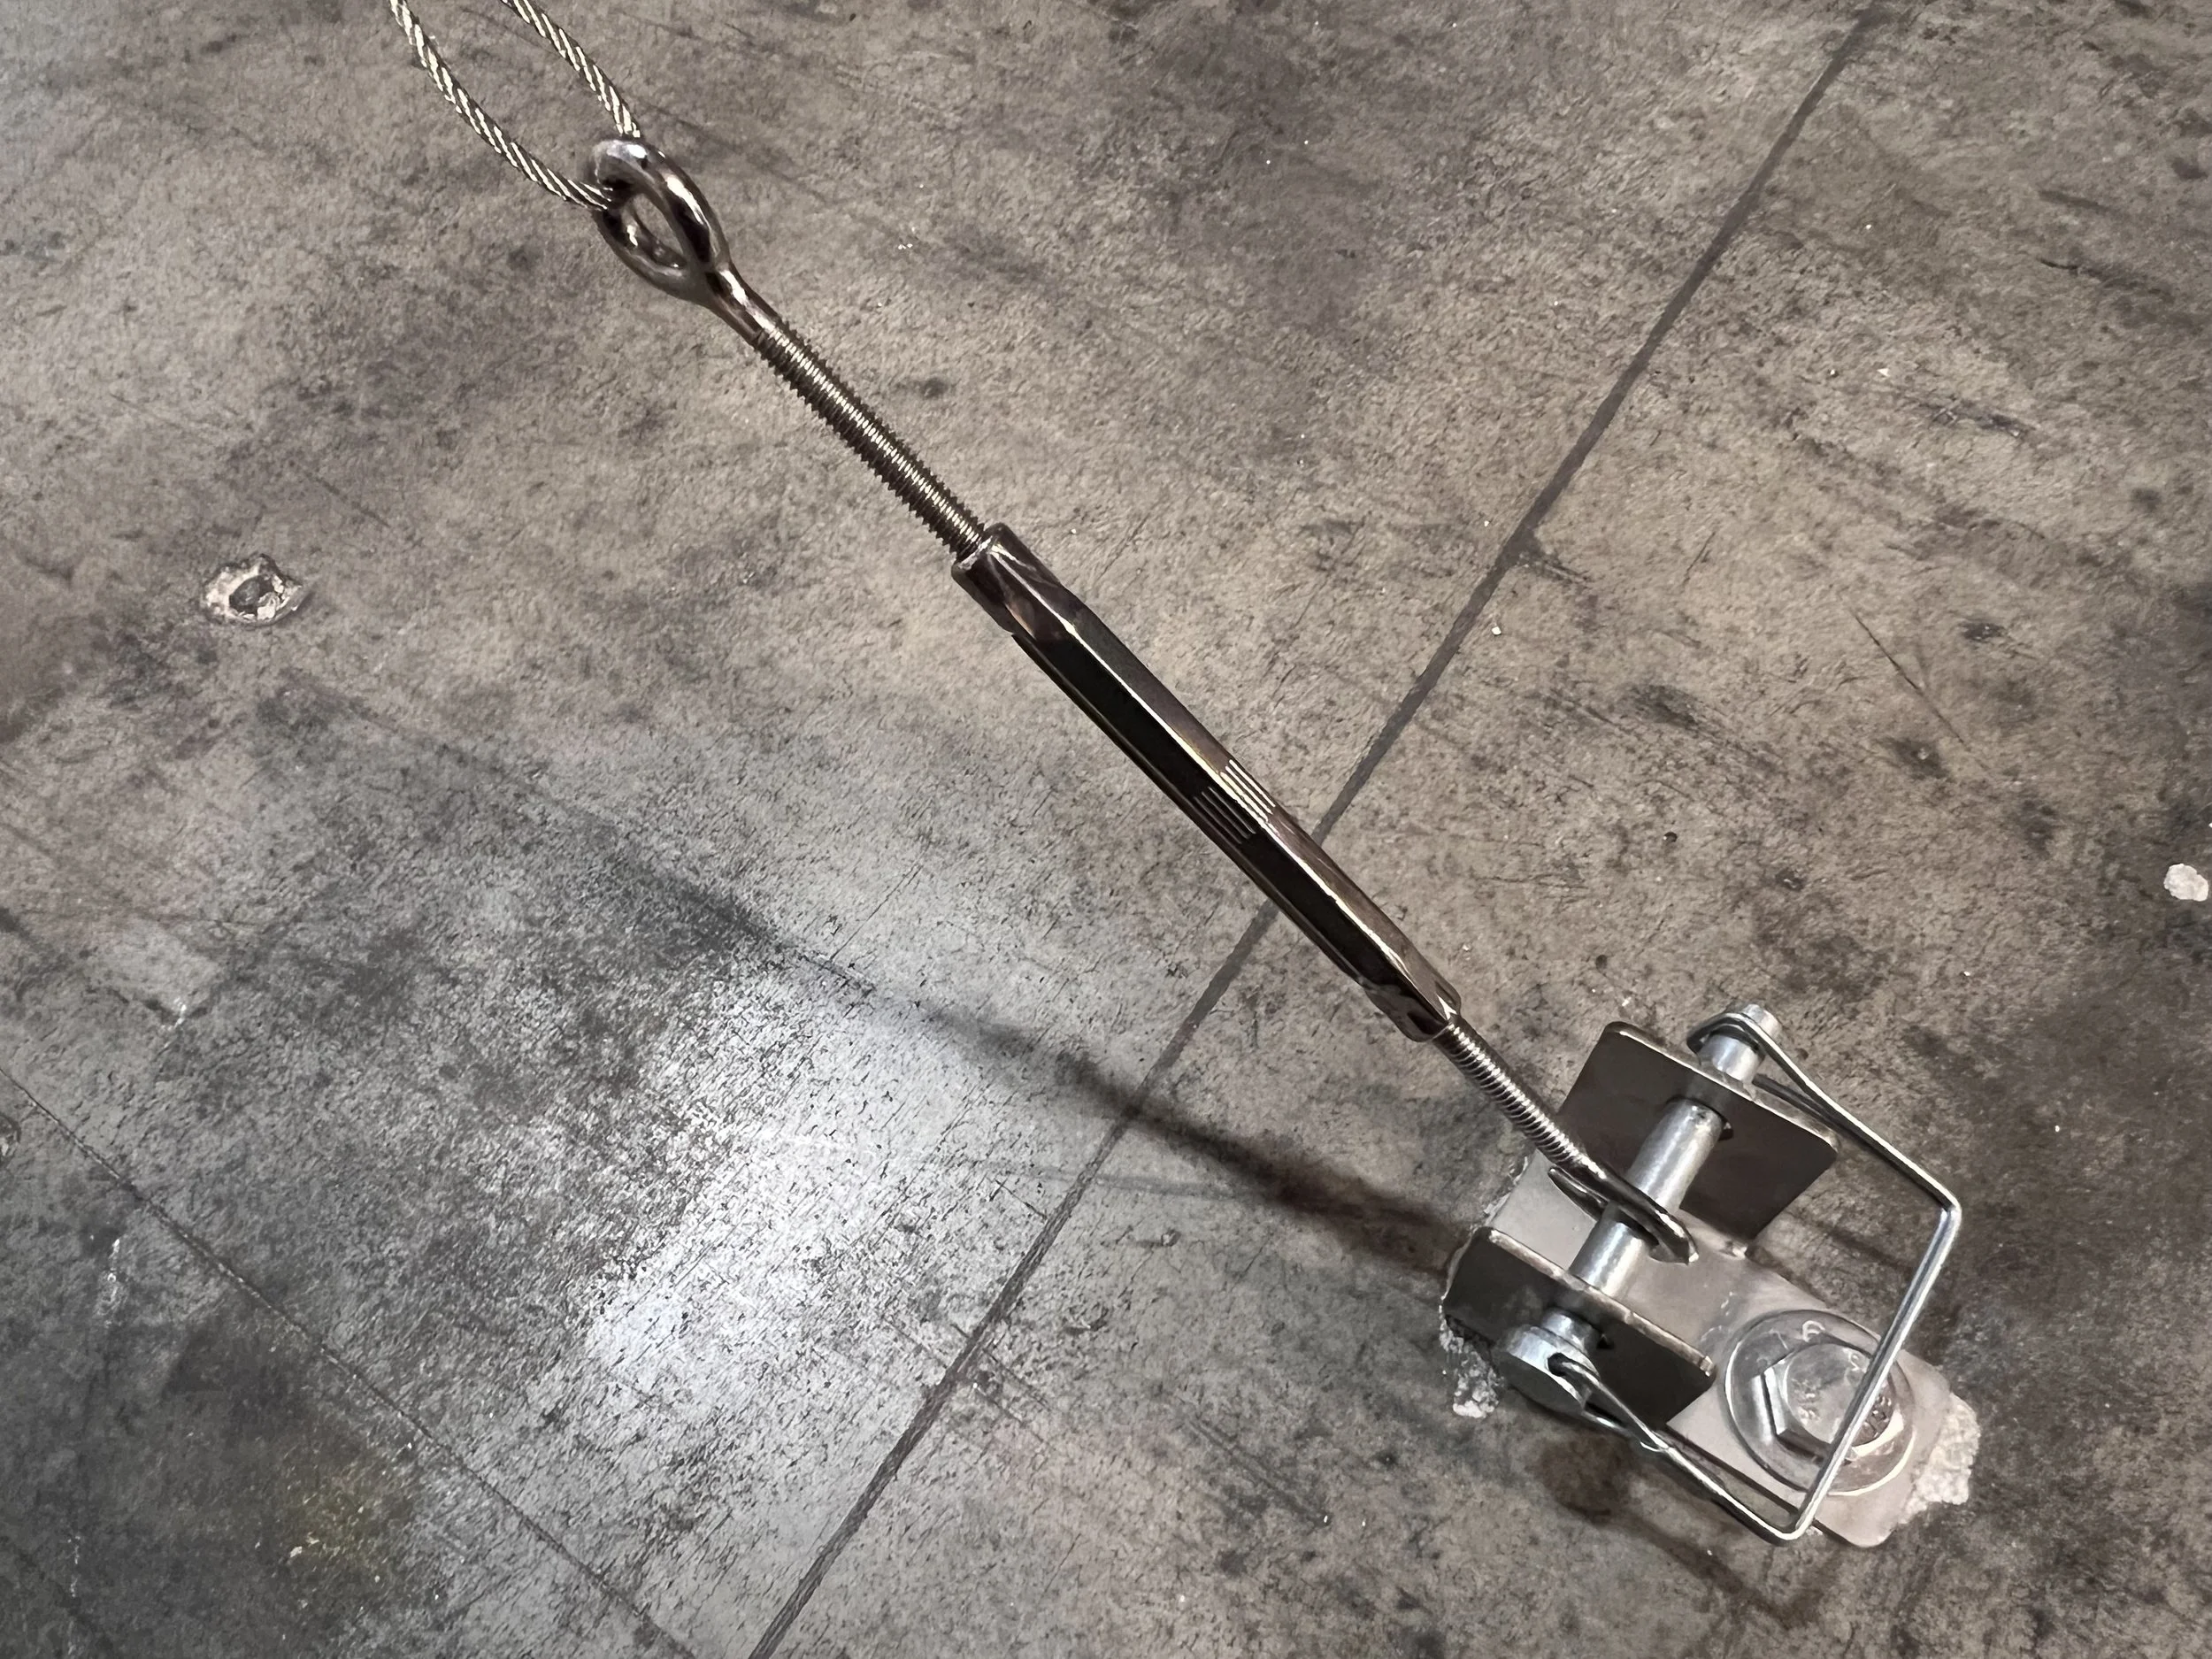
Supplemental wind cables provide additional anchoring against winds that may be expected in advance or during flooding. Pre-drilled anchor points are used to attach an eyebolt, to which an aircraft grade cable is mounted to provide additional stability. This cable is attached to the panel eye bolt using the included locking carabiner clips. The cable is run at a between a 30 degree and 45 degree angle to the ground below and attached to ground anchoring assembly. The ground side end of the cable is connected to a turnbuckle assembly which allows for final adjustment tensioning of the barrier. Simply connect the hooked end of the adjustable turnbucle to the cotter pin within the ground assembly and tension the cable as needed.
Additional Flood Prevention Measures
While BlueFIN flood walls offer industry leading defense against flooding, there are other measures that should considered to prevent flooding in your structure.
Confirm the Smoothness of the Ground Below - While Mayim will protect openings, it is important to review the entire perimeter of your structure for cracks that could allow seepage into your home. Particular care should be taken with plank siding, which could allow water infiltration between slates.
Check your slab for leaks - Floods will cause water tables to rise and it is important to have a secure and watertight foundation that can resist rising groundwater levels. Consult a professional contractor who can help seal any cracks in your foundation. While BlueFIN is designed to protect your perimeter, it is always good to consider potential migration and seepage of water through the ground below, which may lead to unintended flooding behind the barrier.
Install back-flow preventers on all drains and water lines - Flooding causes the water table to rise and creates back-flow pressure in sewage systems, drains and water pipes. It is important to determine if the space behind the barrier is at risk from back-flowing water that can rise through drains or plumbing systems. A professional plumber can install back-flow preventer valves to prevent water infiltration behind the flood wall.
Consider back-up pumps - Dewatering or sump pumps are always recommended as a second line of defense against any water leakage. No perimeter is hermetically sealed and as such some leakage should always be expected. Garrison offers our portable Sea Sponge dewatering pump as well as an automatic switch that activates when water is sensed. You might also consider heavier duty in-ground sump pumps to offer greater protection and water pumping capability.