
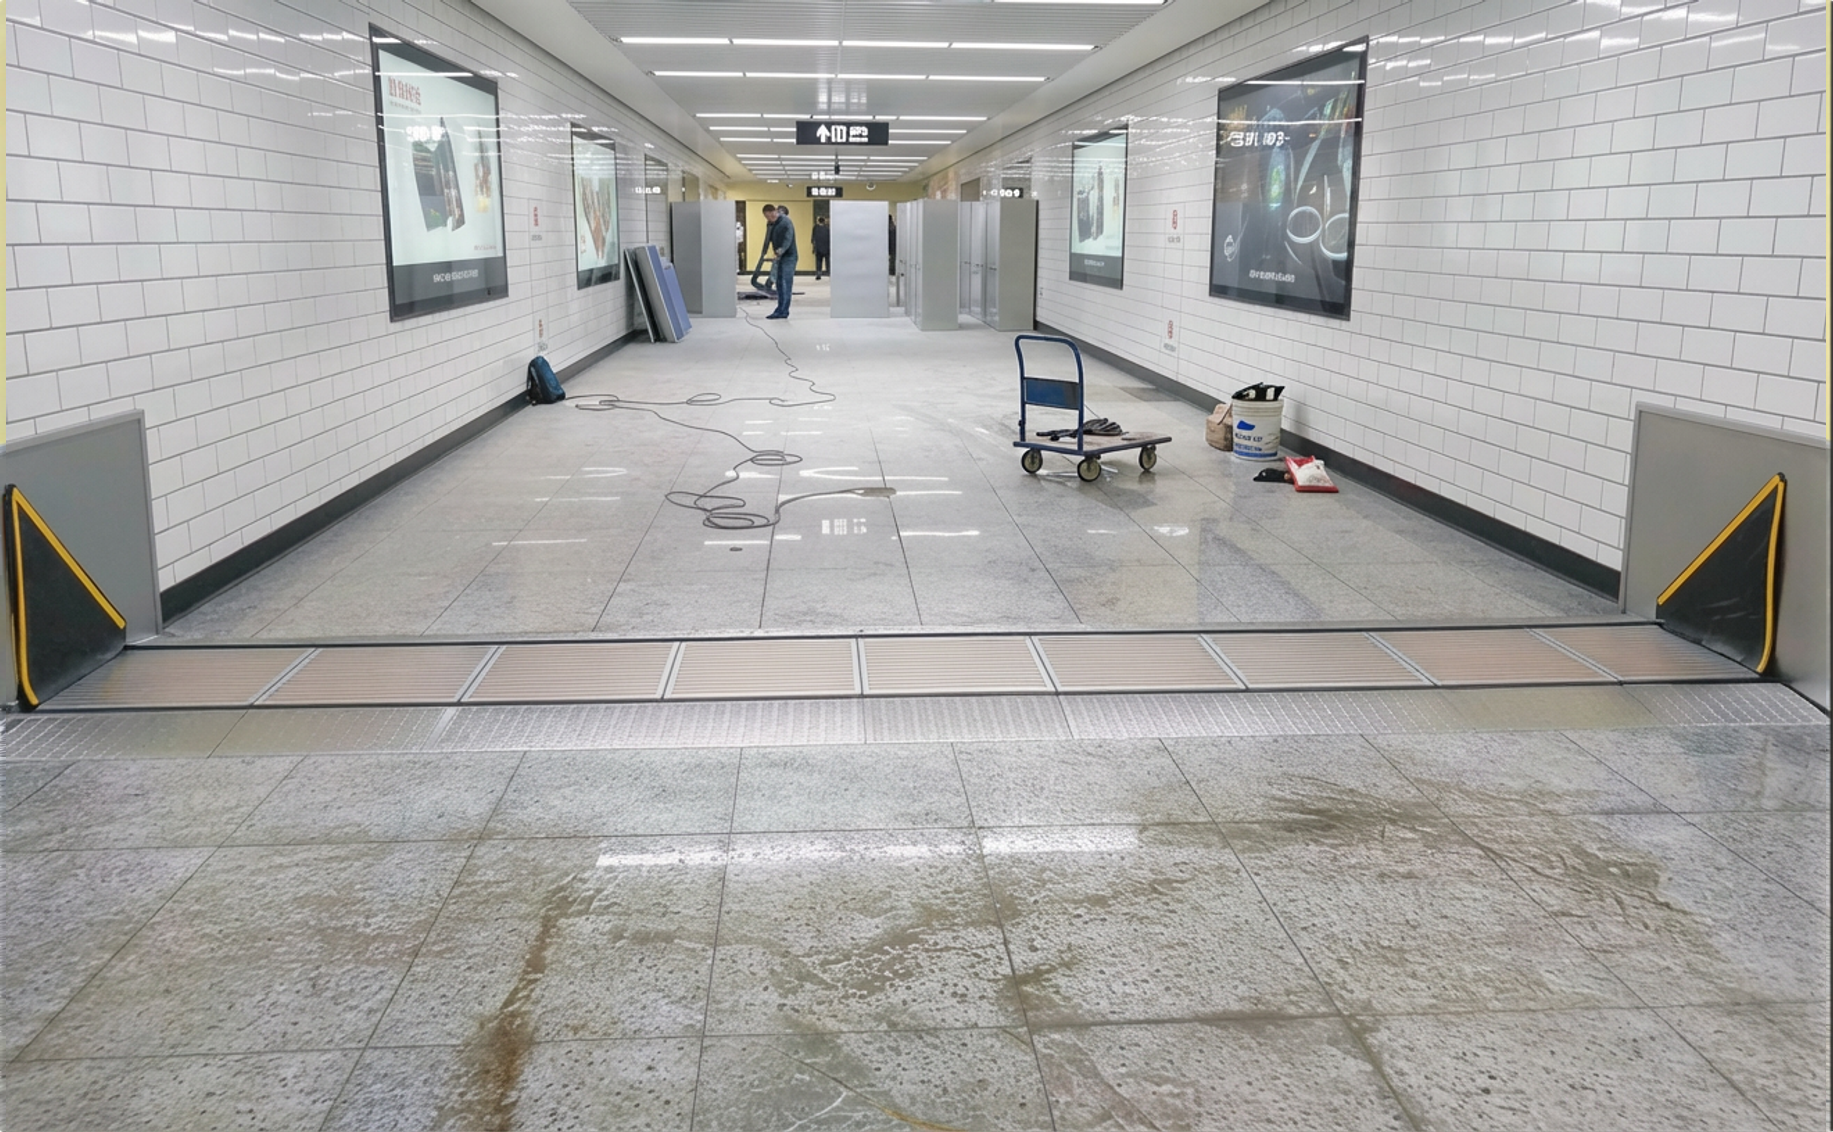
Oyster Flood Gate Installation Instructions

In-Ground Installation Instructions
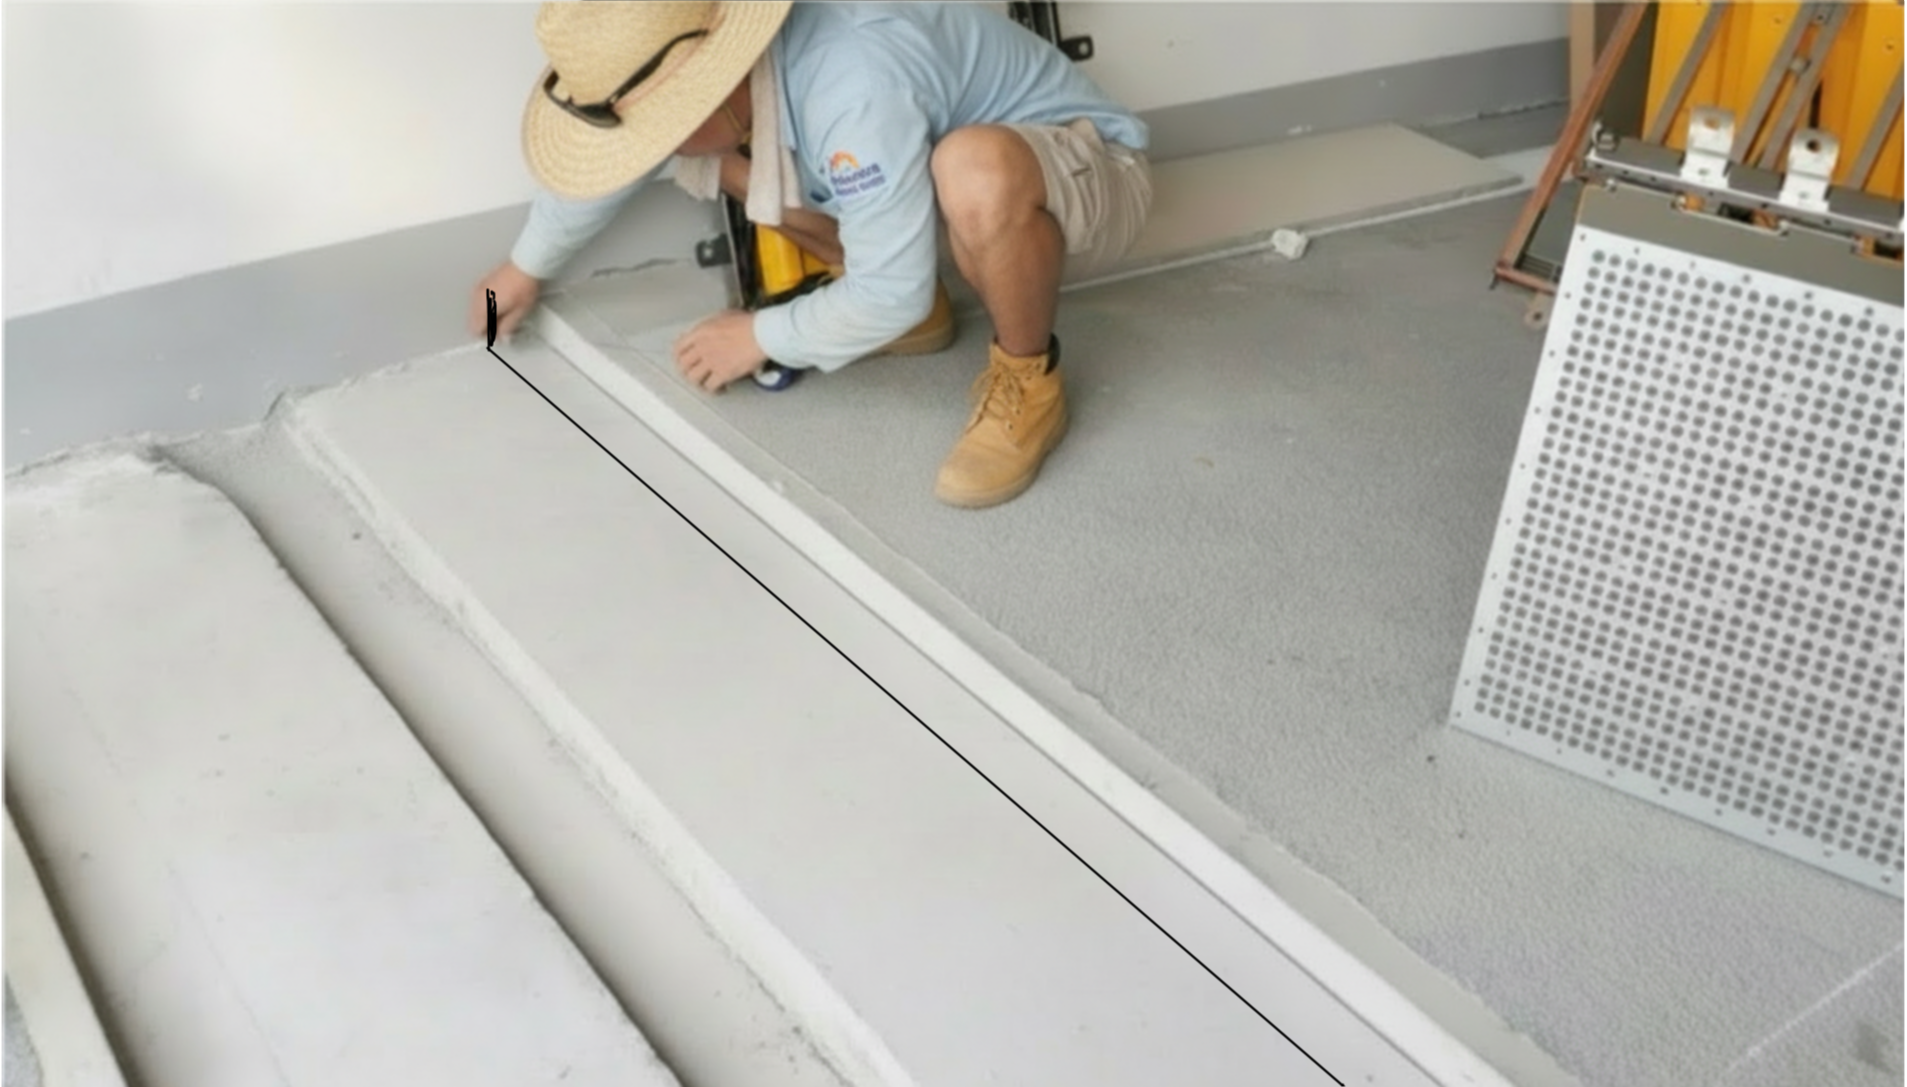
Preparing for Installation
The first step to prepare for installation is to mark two straight lines along the recessed concrete channel , spaced according to the diagram provided. These lines will serve as markers for the location of the two strips of neoprene sealing material that will be used to seal the units to the surface below.
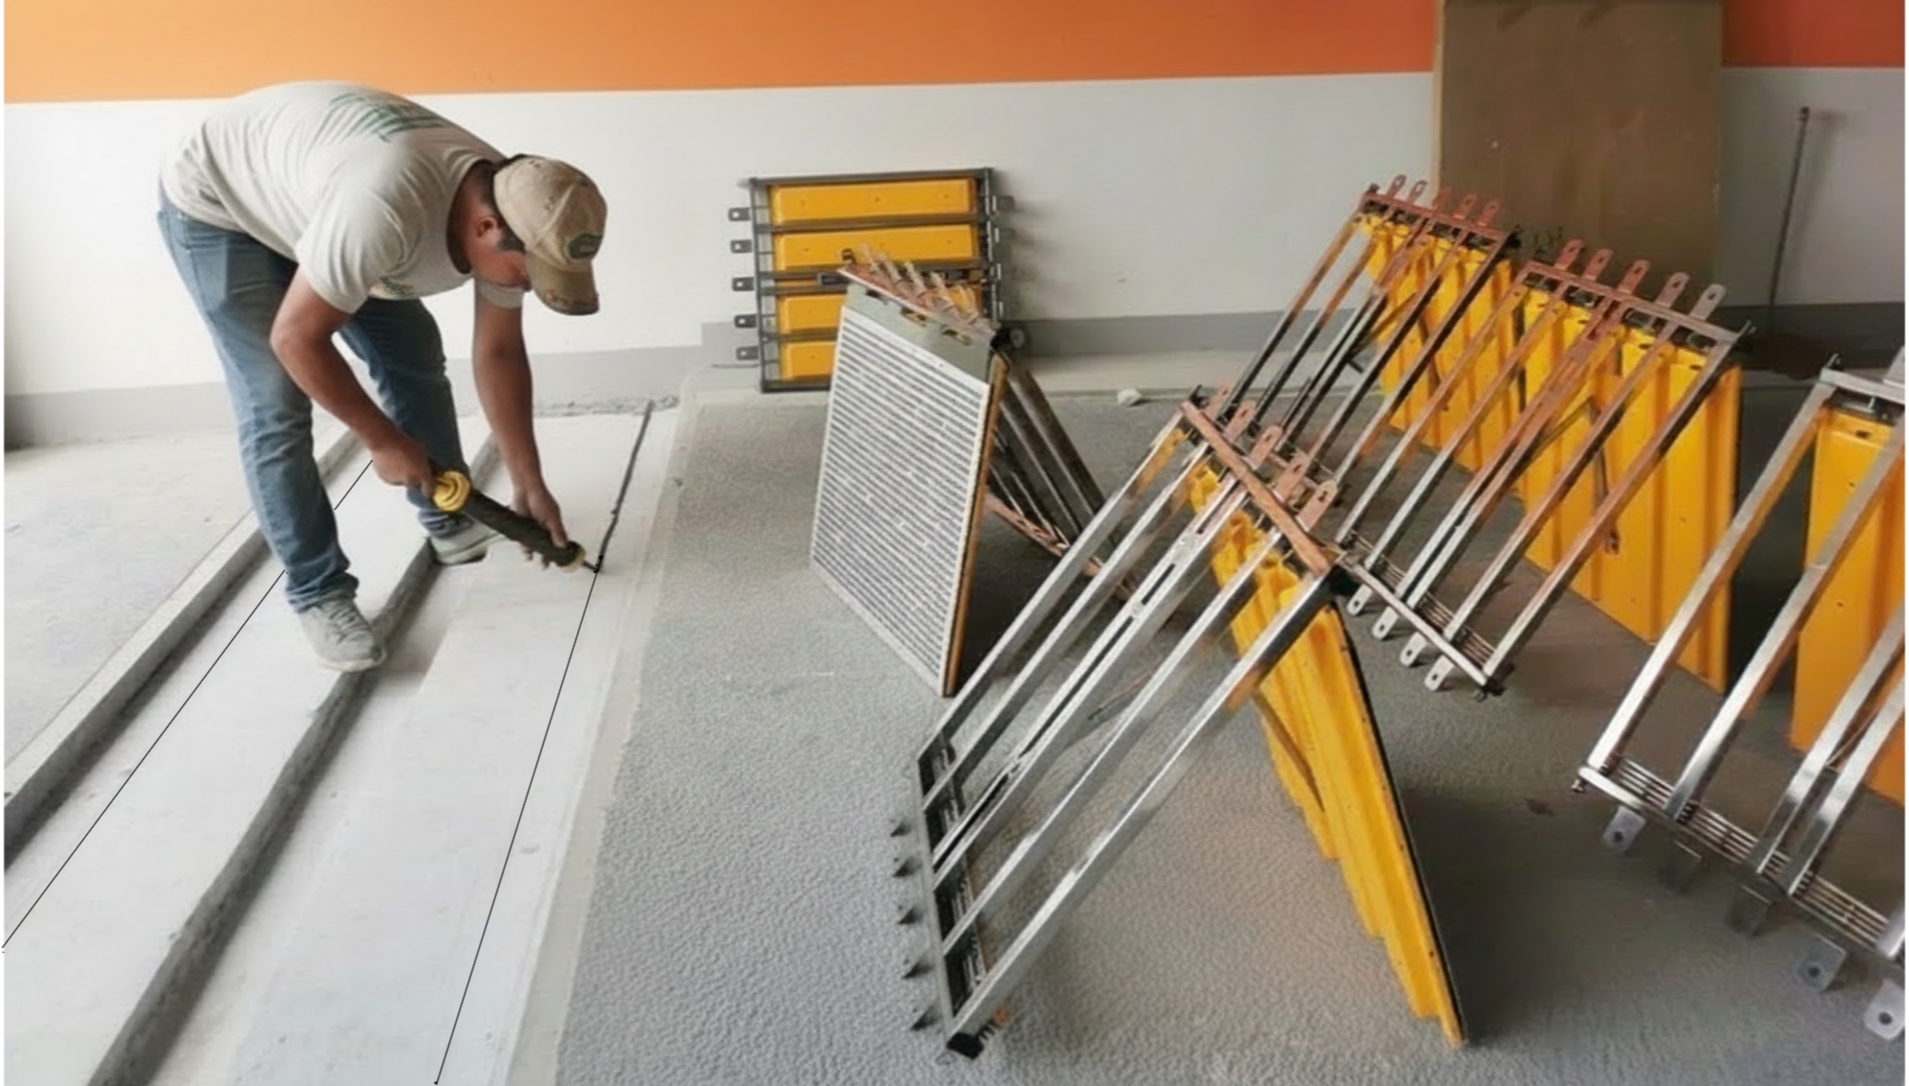
Laying the Adhesive Line
Generously apply construction grade silicone adhesive along the marked lines within the channel, on to which the neoprene sealing strips will be placed.
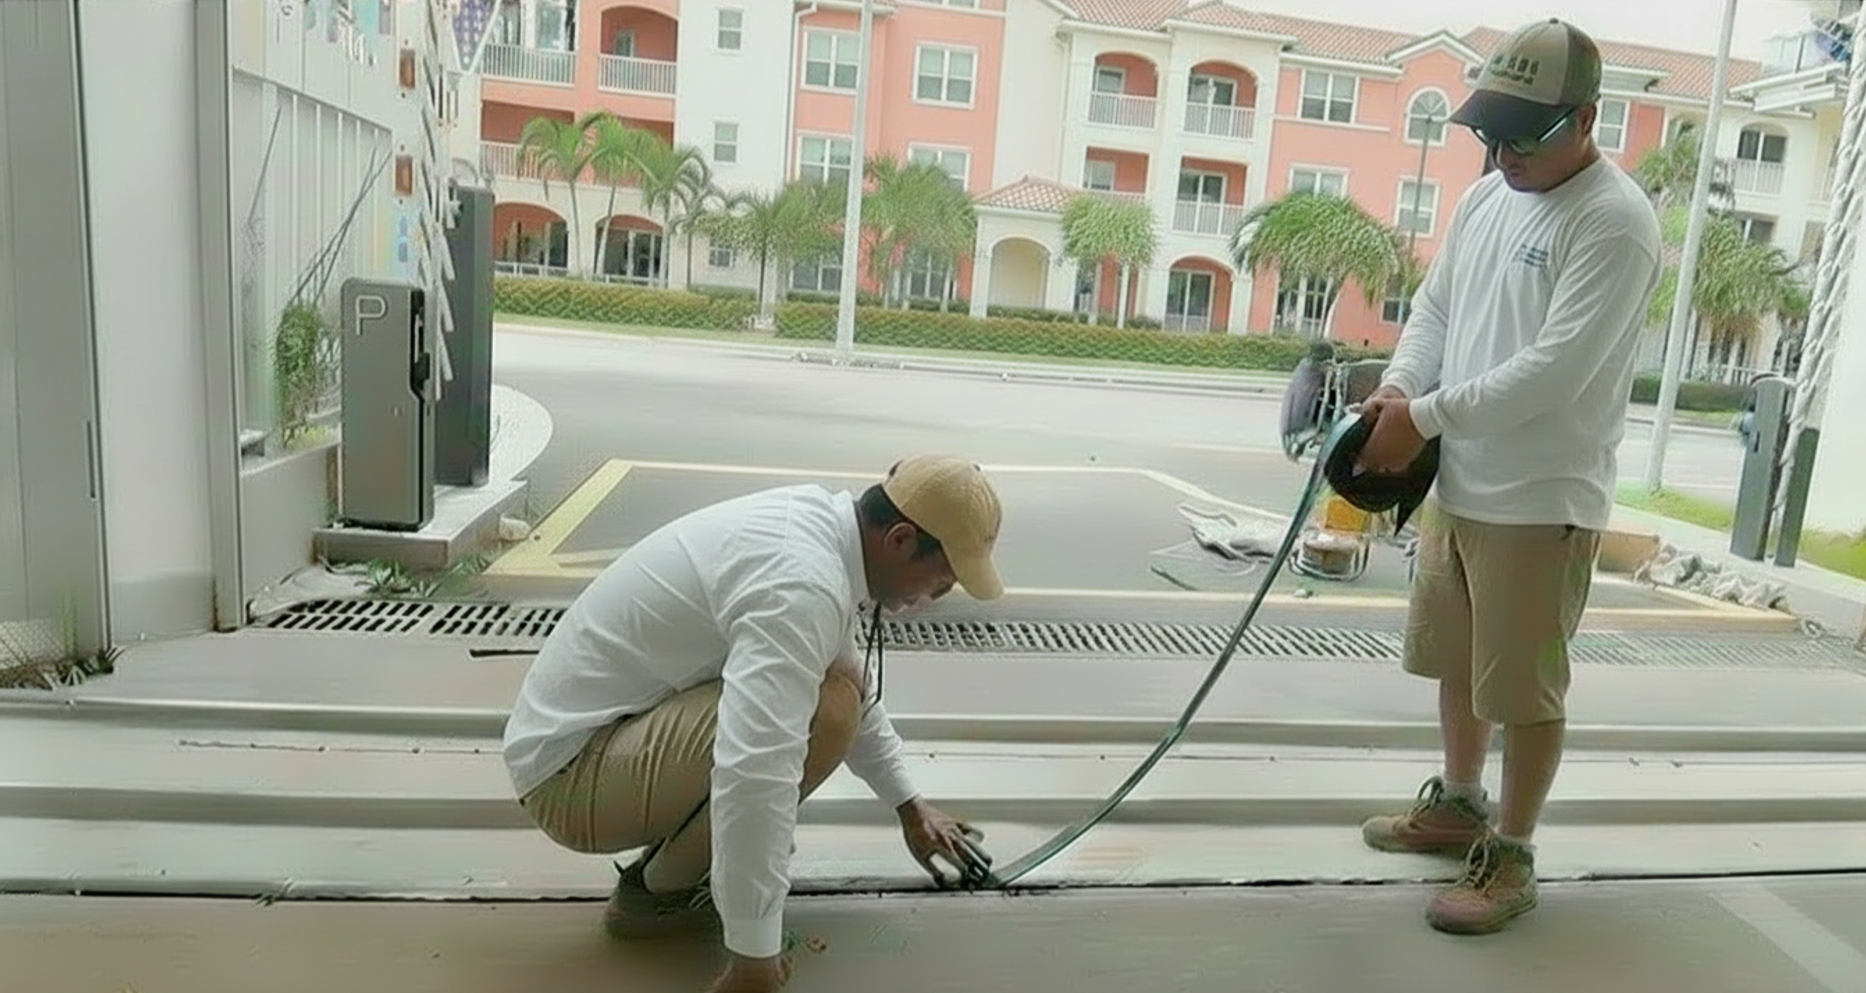
Laying the Neoprene Strips In The Channel
Place the strips on the silicone adhesive, in two parallel lines, spaced to align with the support frame of the flood panel.
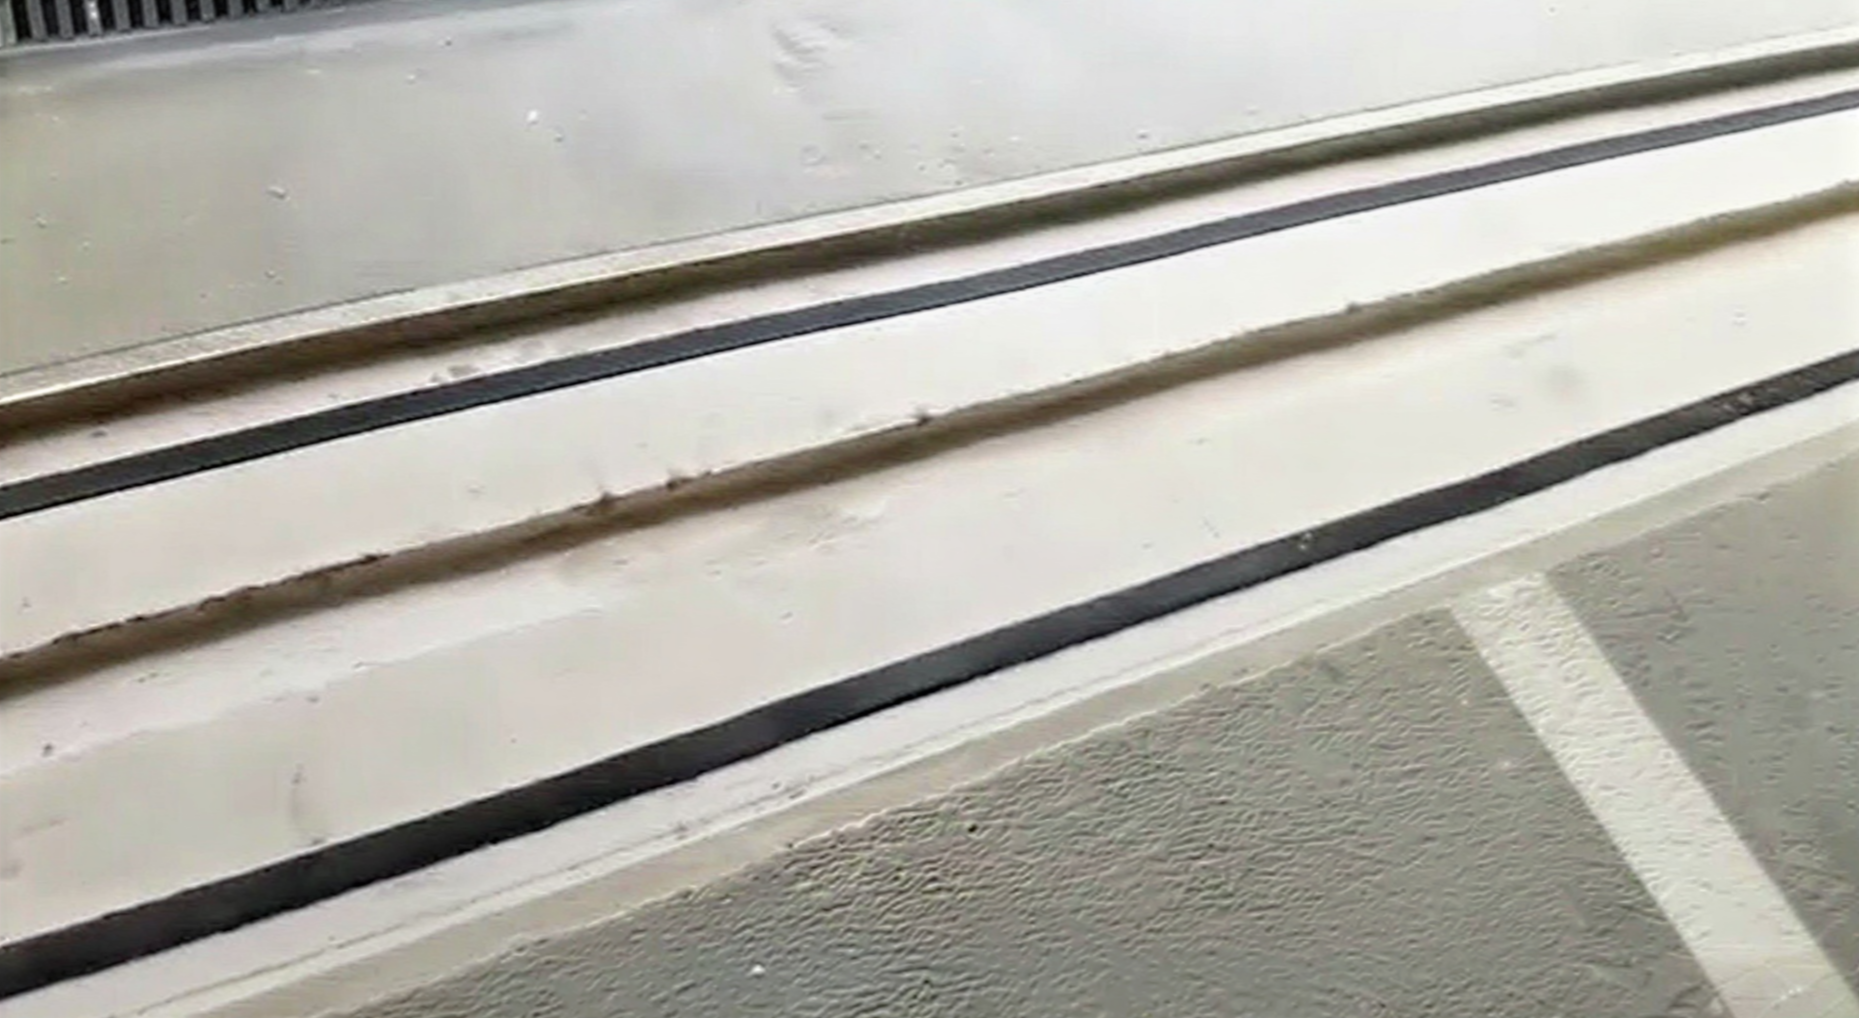
Ensure Neoprene Strips Are Aligned
Check neoprene strips to make sure they are aligned within the channel and spaced properly for panel installation.
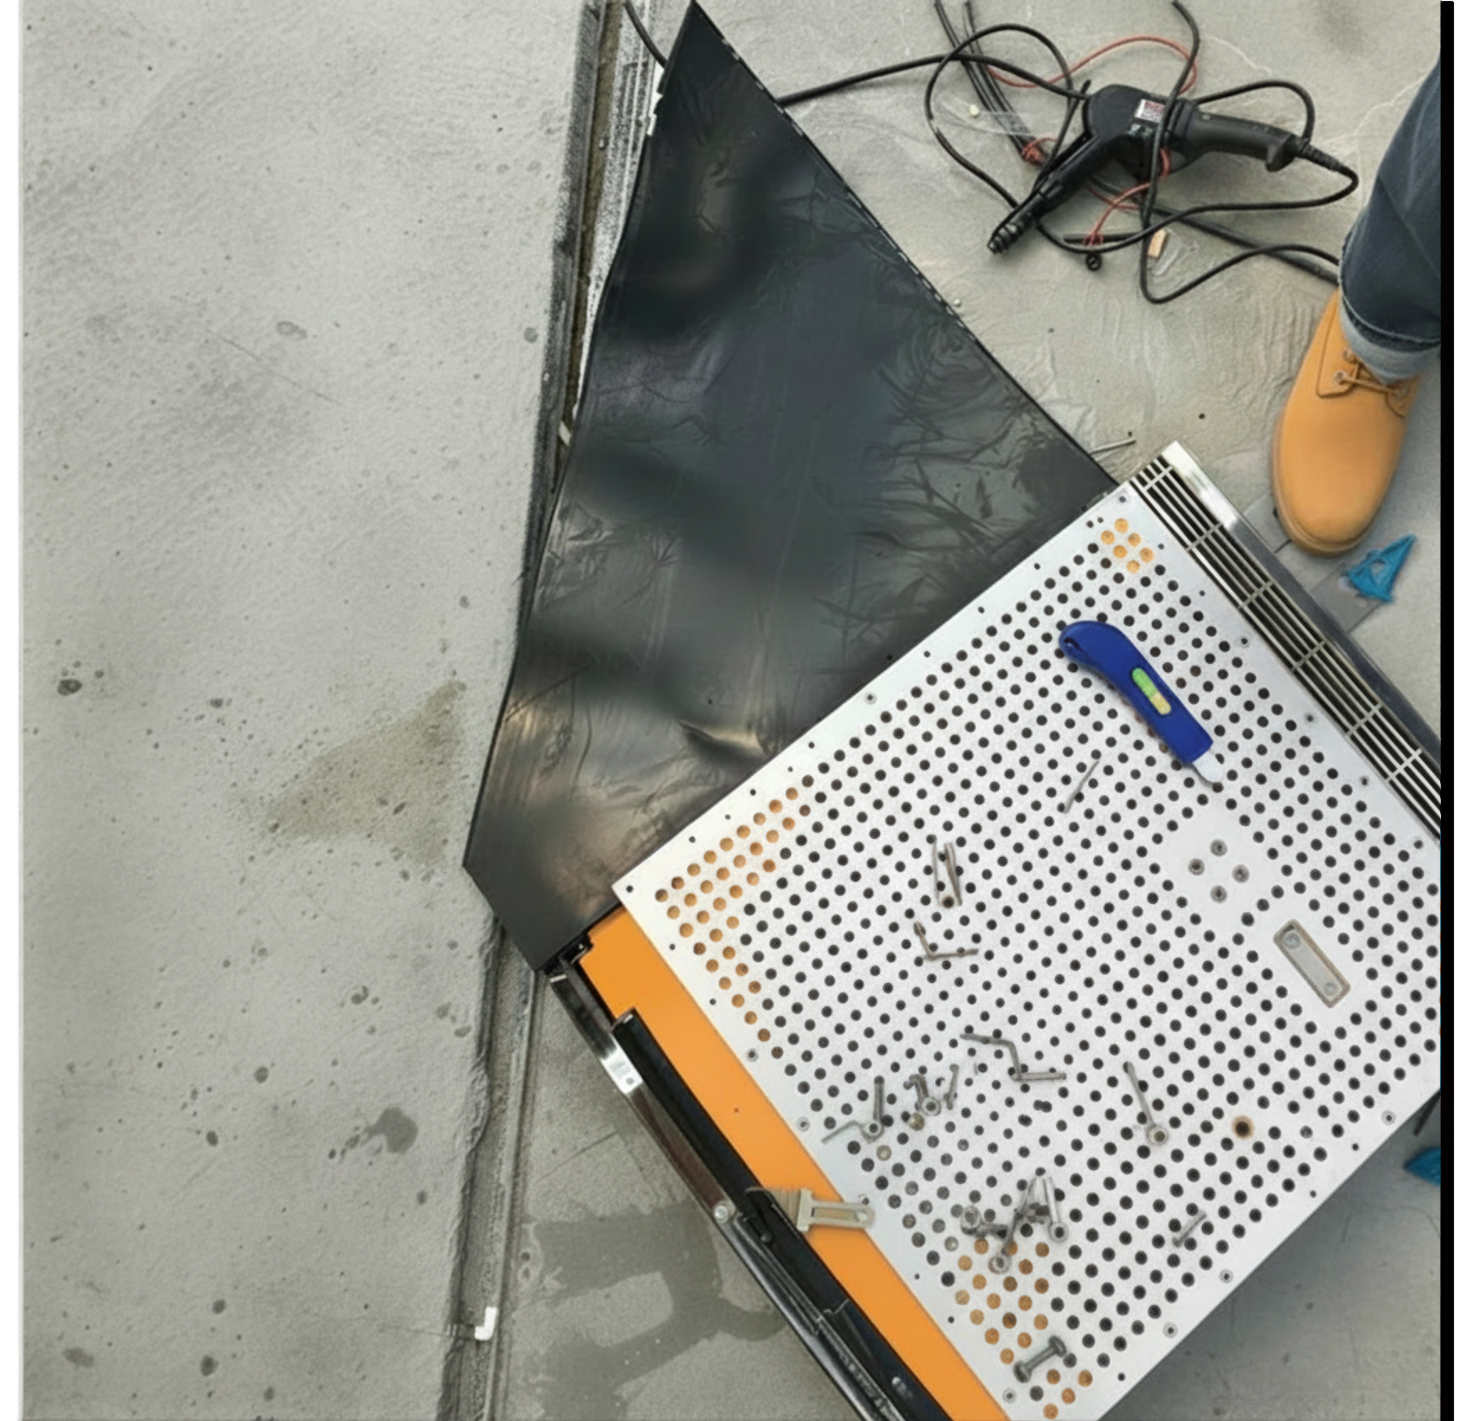
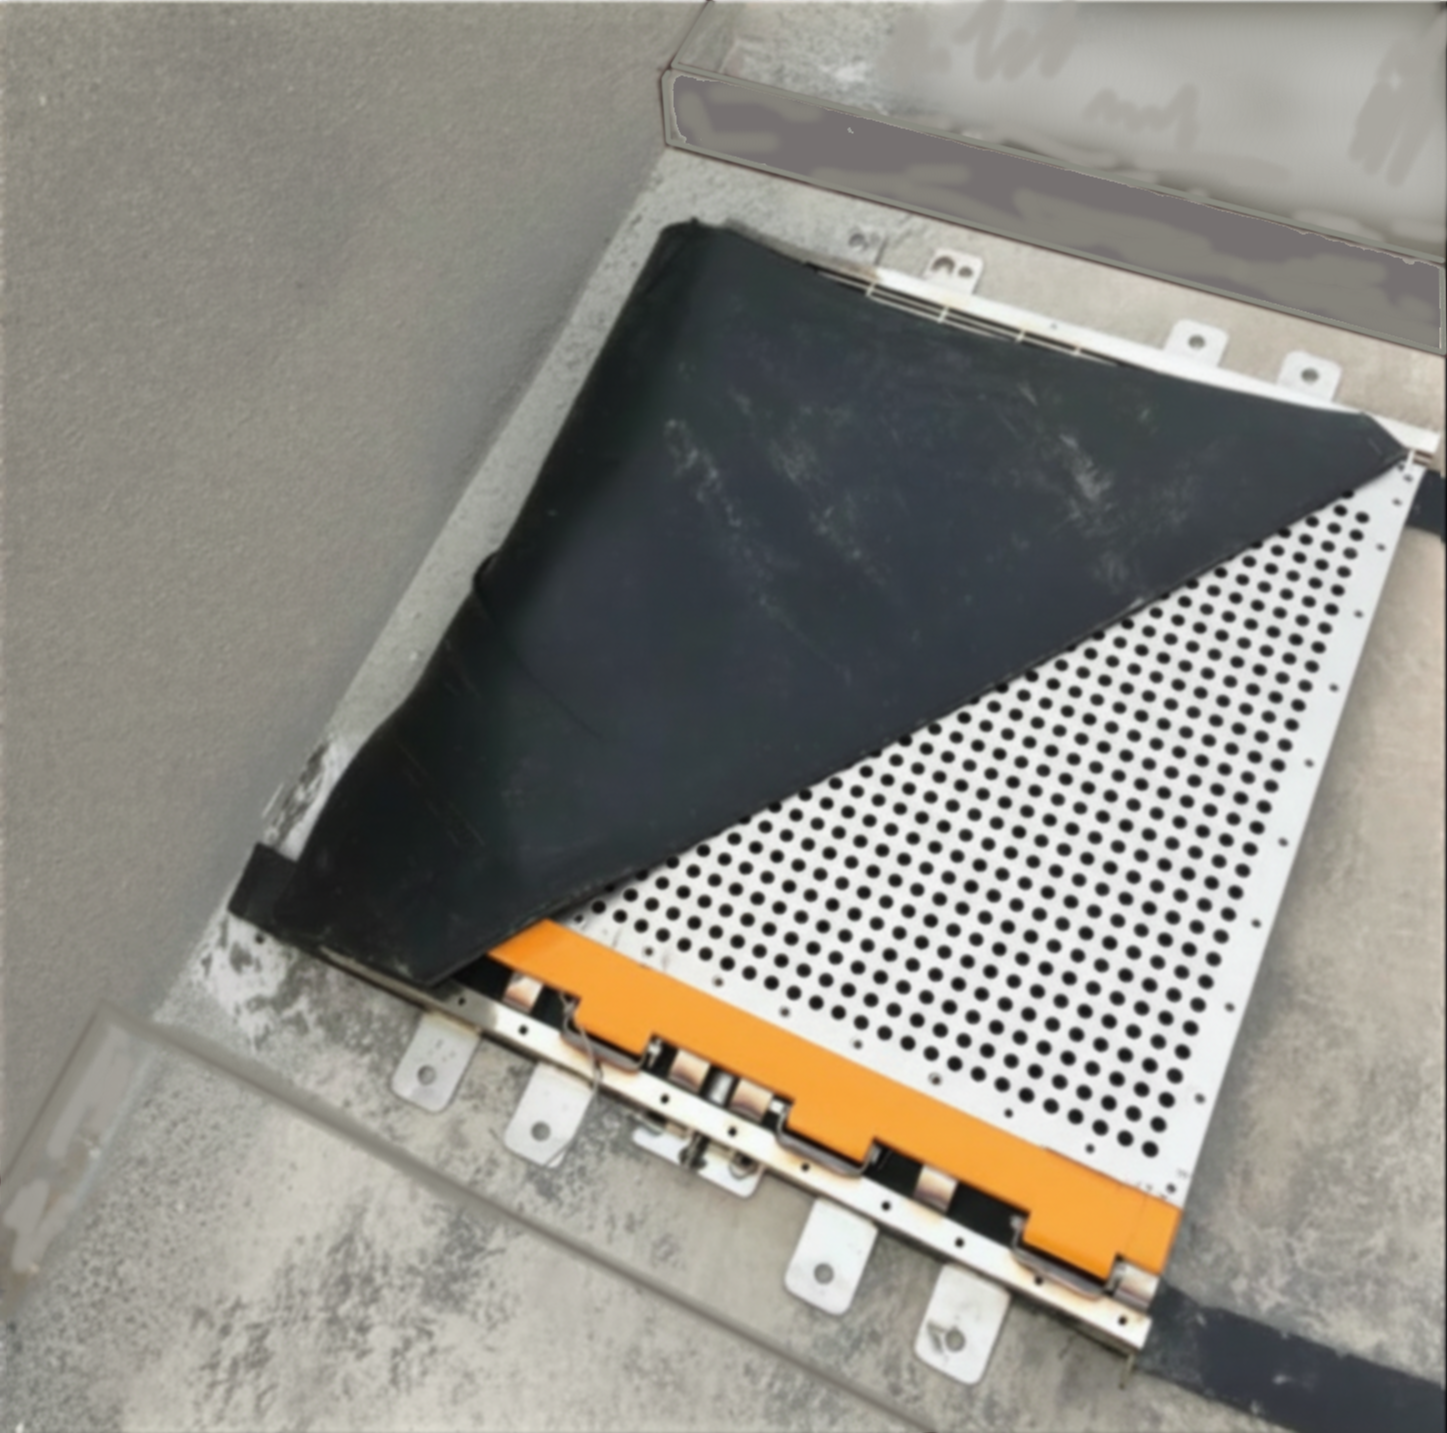
Prepare Triangular Seals On End Panels
Position the black triangular end seal between the anti-skid surface layer and the load bearing layer of what will be the first panel towards the wall on either side. Position the seal so that the short side of the triangle faces inward, away from the water side and the flat side faces towards the water side. Drill pilot holes and place rivets into position. Secure rivets, connecting the seal to the end panel.
Note:L See below section on inserting metal support tabs BEFORE riveting the rubber triangular pieces to the panels.
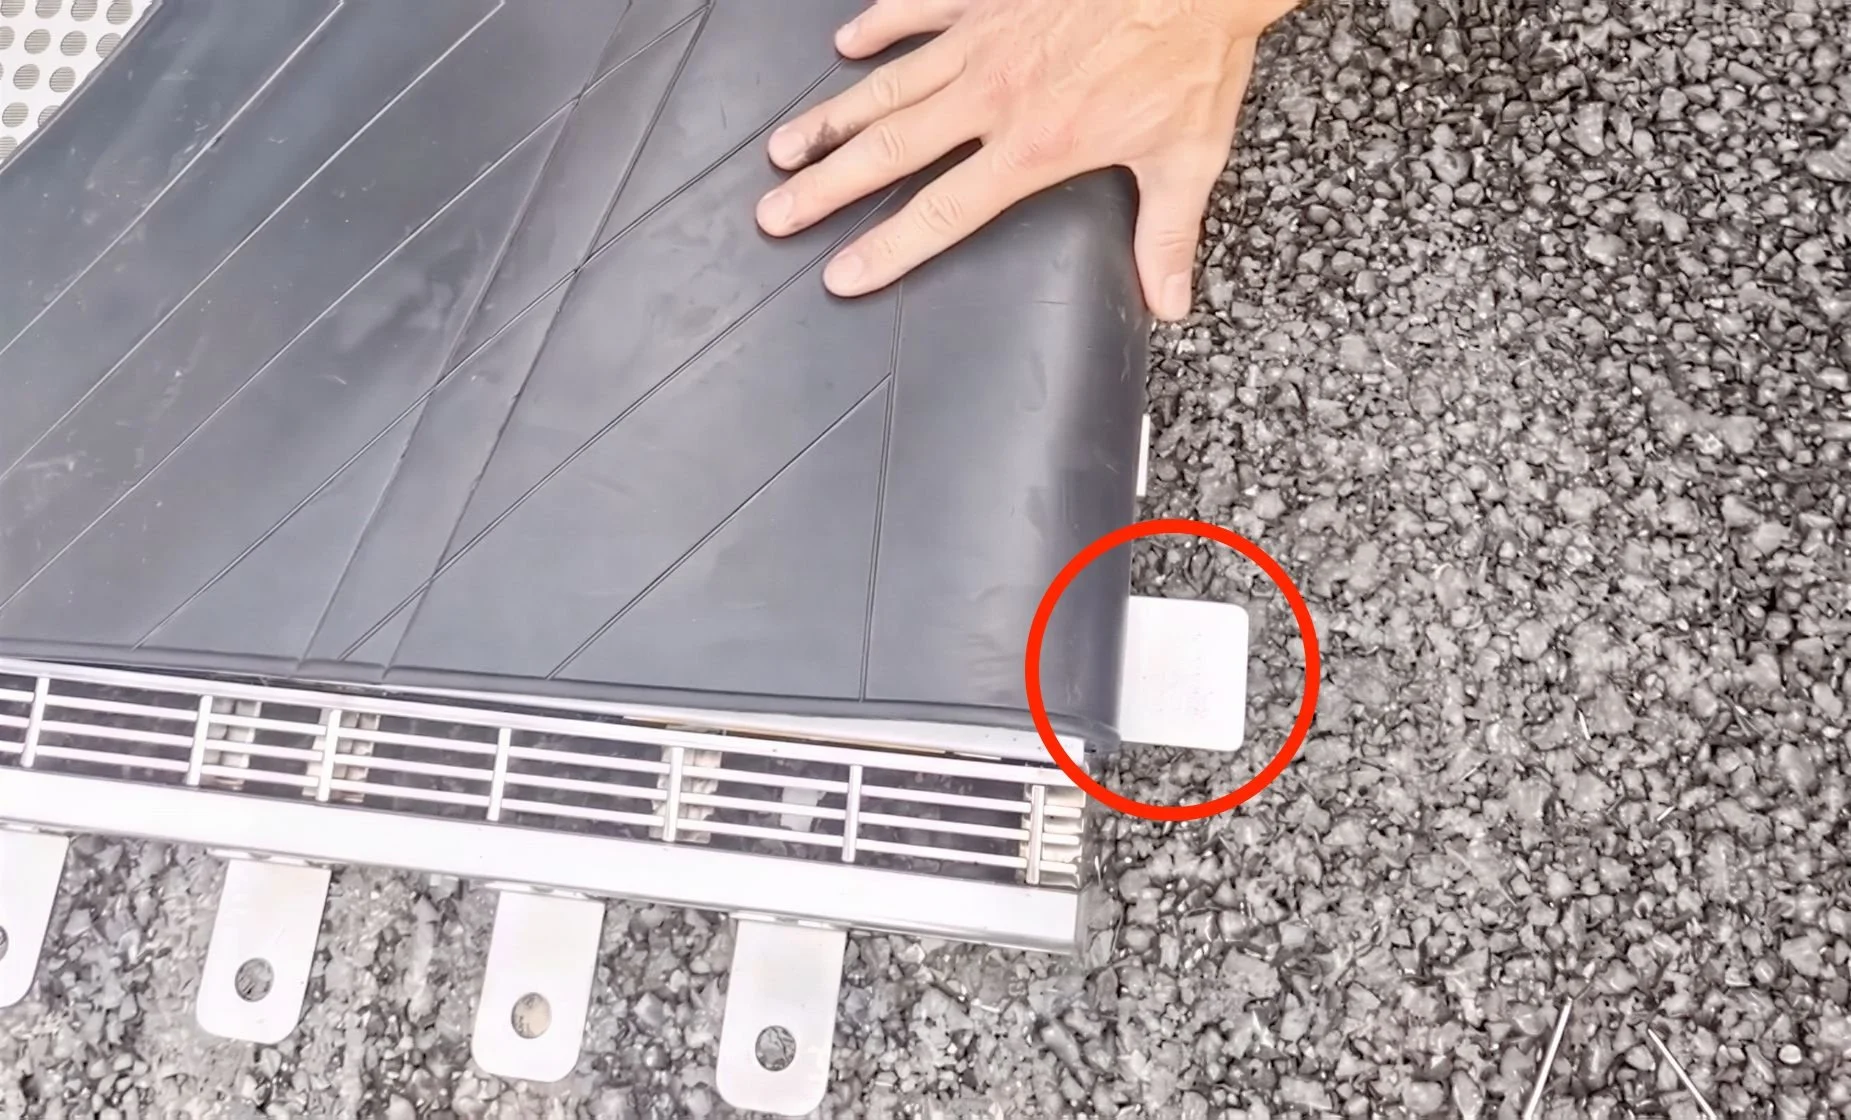
Insert Metal Support Piece Under Rubber
Before riveting the triangular piece, make sure to slot the metal support square into place at the from of the panel. The metal piece holds the rubber triangle raised at the same level as the top of the panel, preventing water from going over the top of the rubber before deployment.
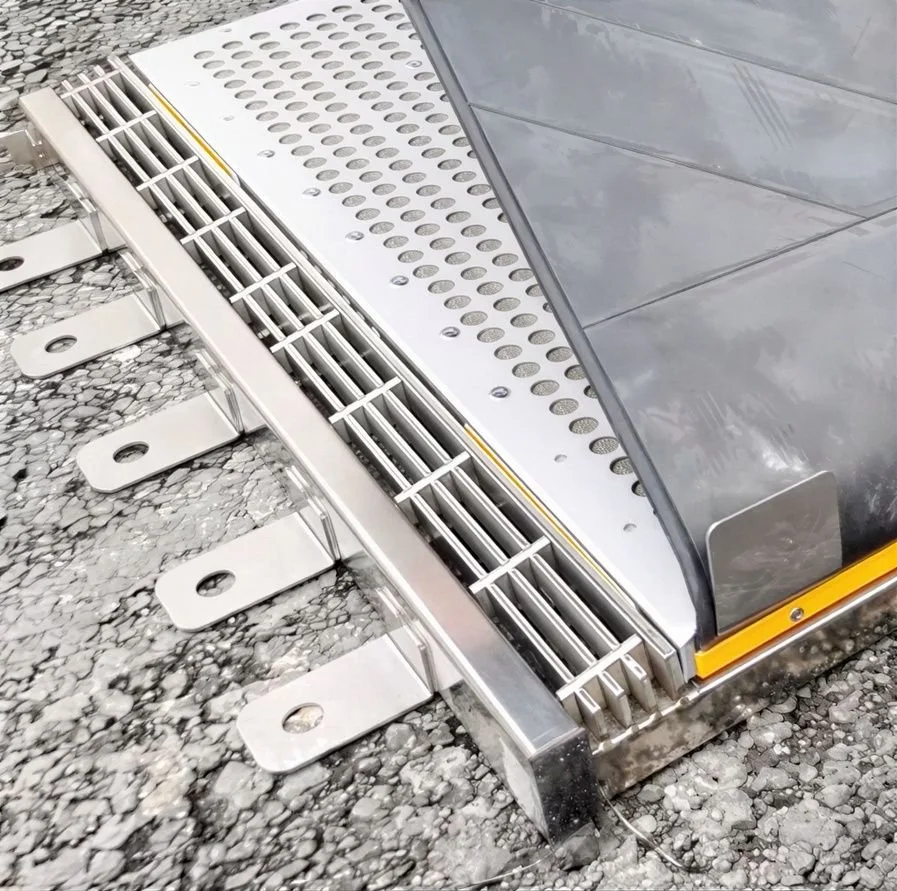
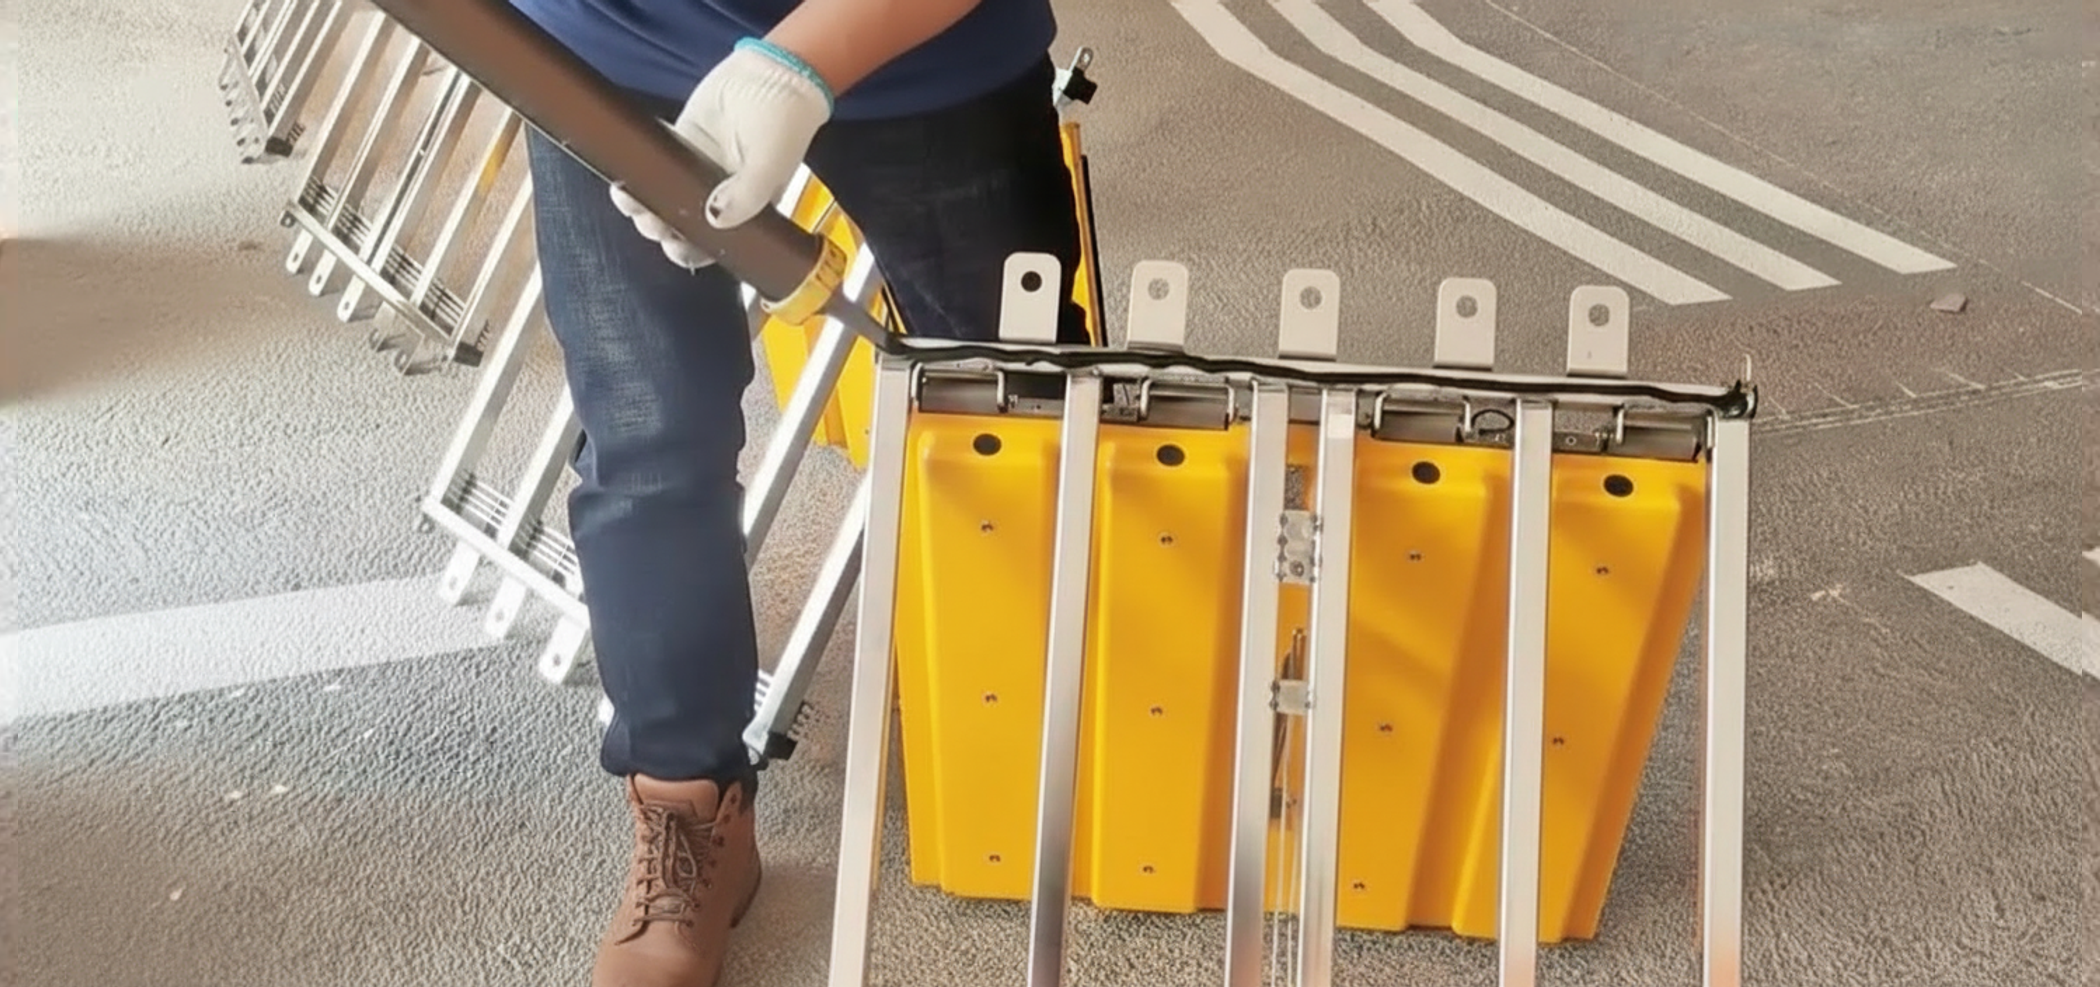
Place Caulking on The Underside of Panels
Apply caulking to the underside of the flood panels. Apply to both the support bar that runs parallel to the waterside and on the adjacent support that runs on the inside of the barrier.
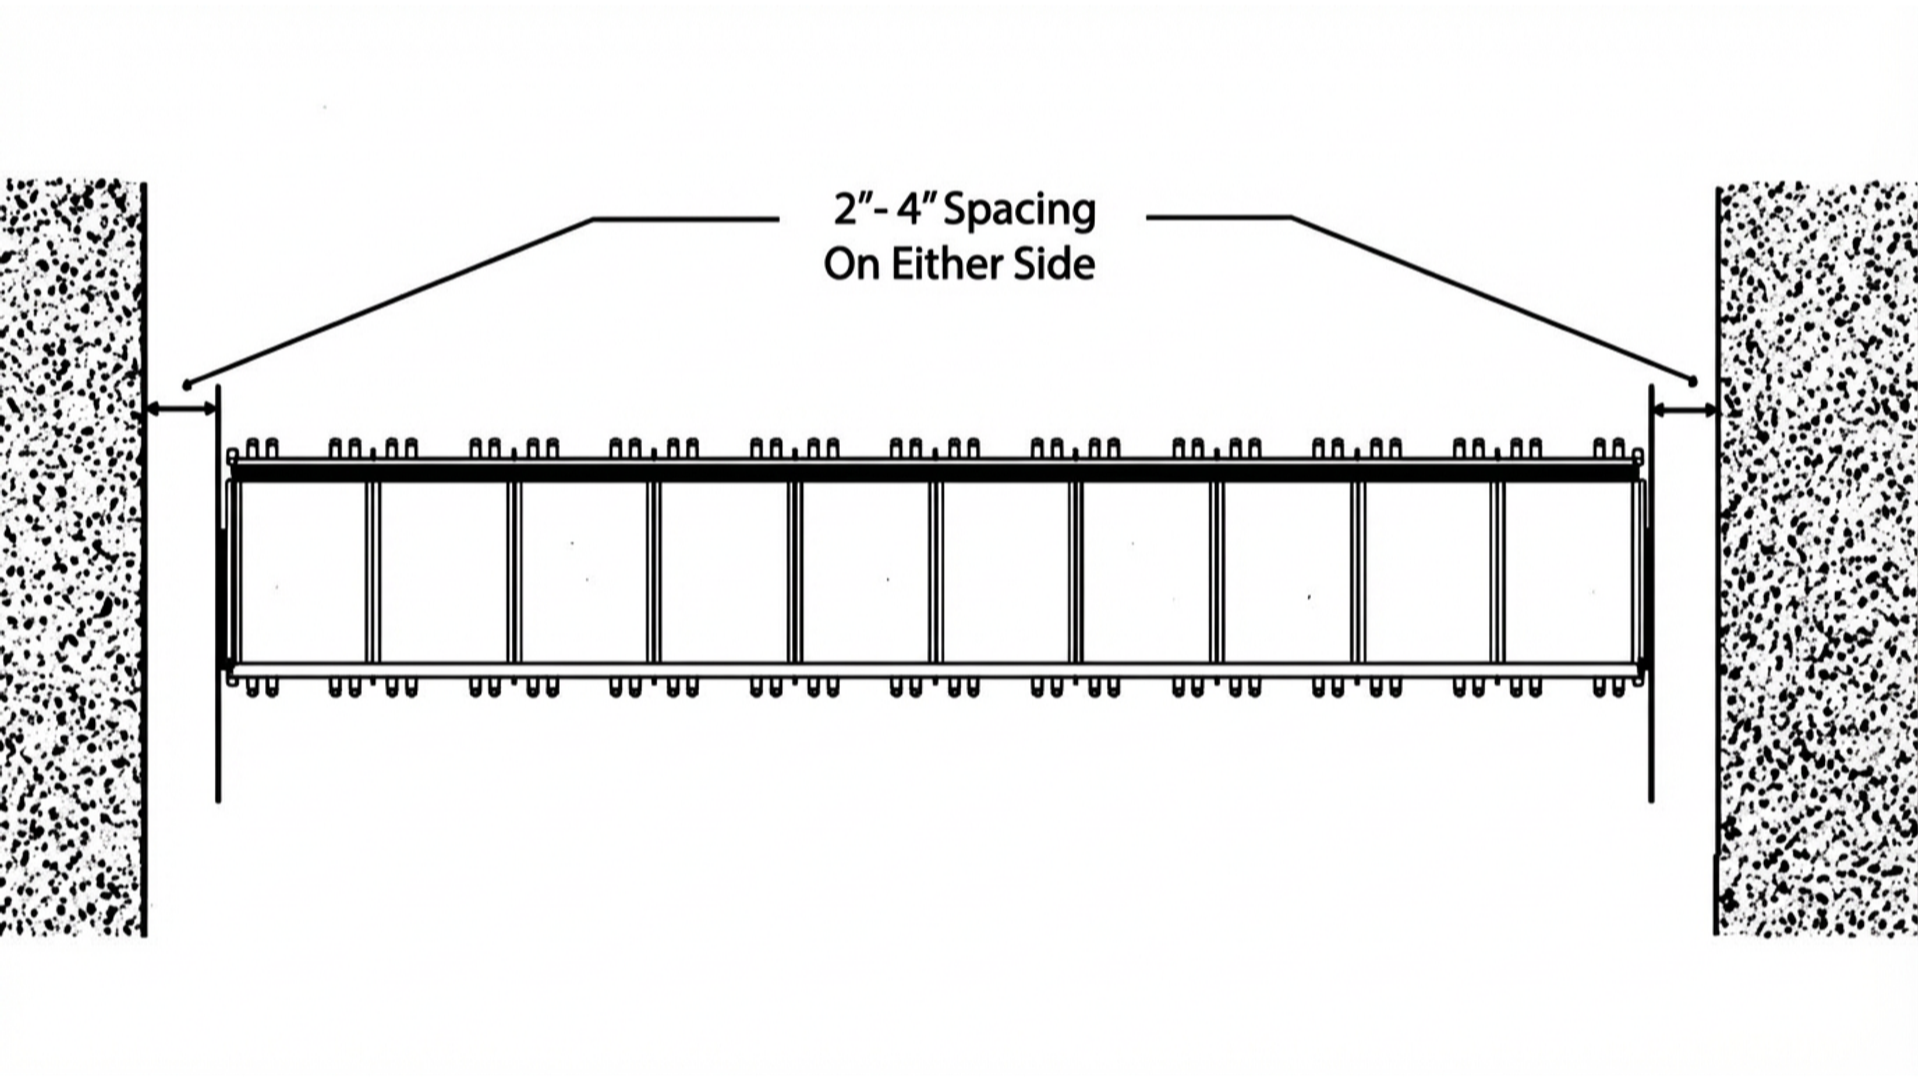
Position First Panel For Install
Place and position the first caulked panel into channel, leaving 2.0-4.0” of space between the panel and the wall and aligning with the neoprene strips. This allows enough room for the triangular end seal to bend and rise as the automatic flood panel is deployed. Meter filler pieces will be added later to fill the area between the frame and the water.
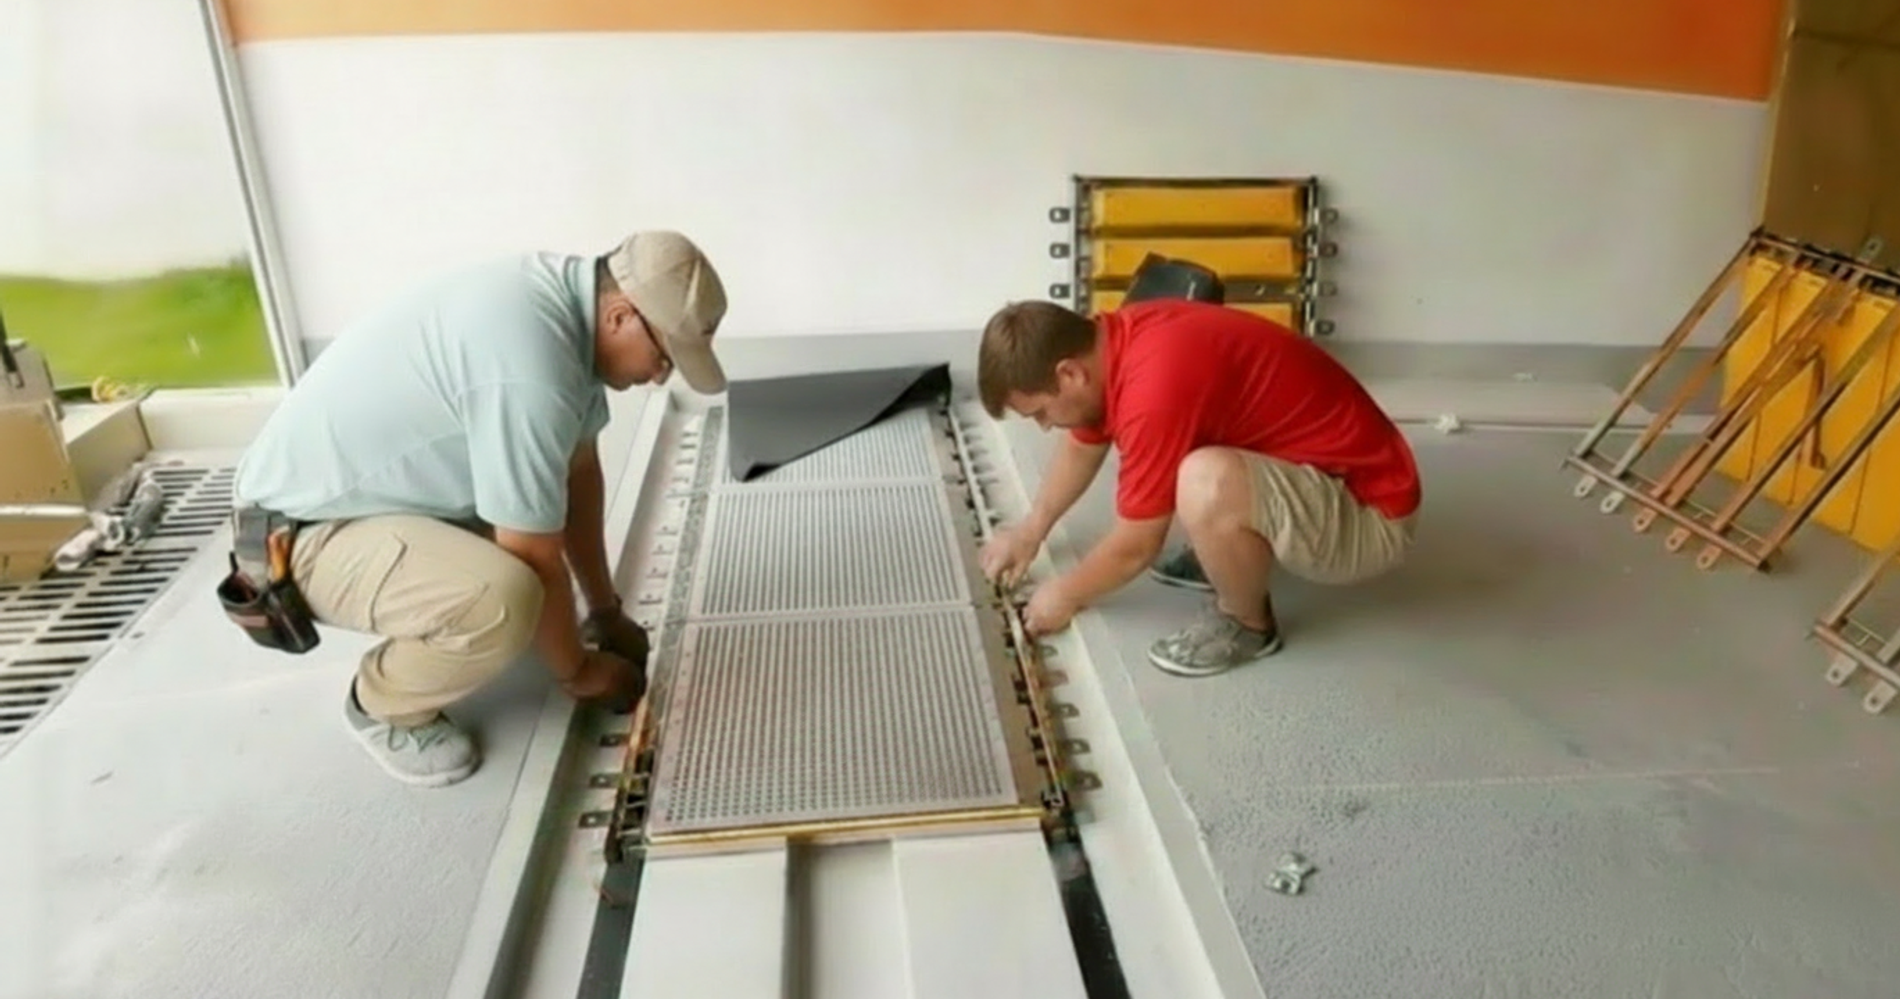
Add Additional Panels in Sequence
Continue positioning panels in sequence, inserting foam sealing strips at the connection between the modules.
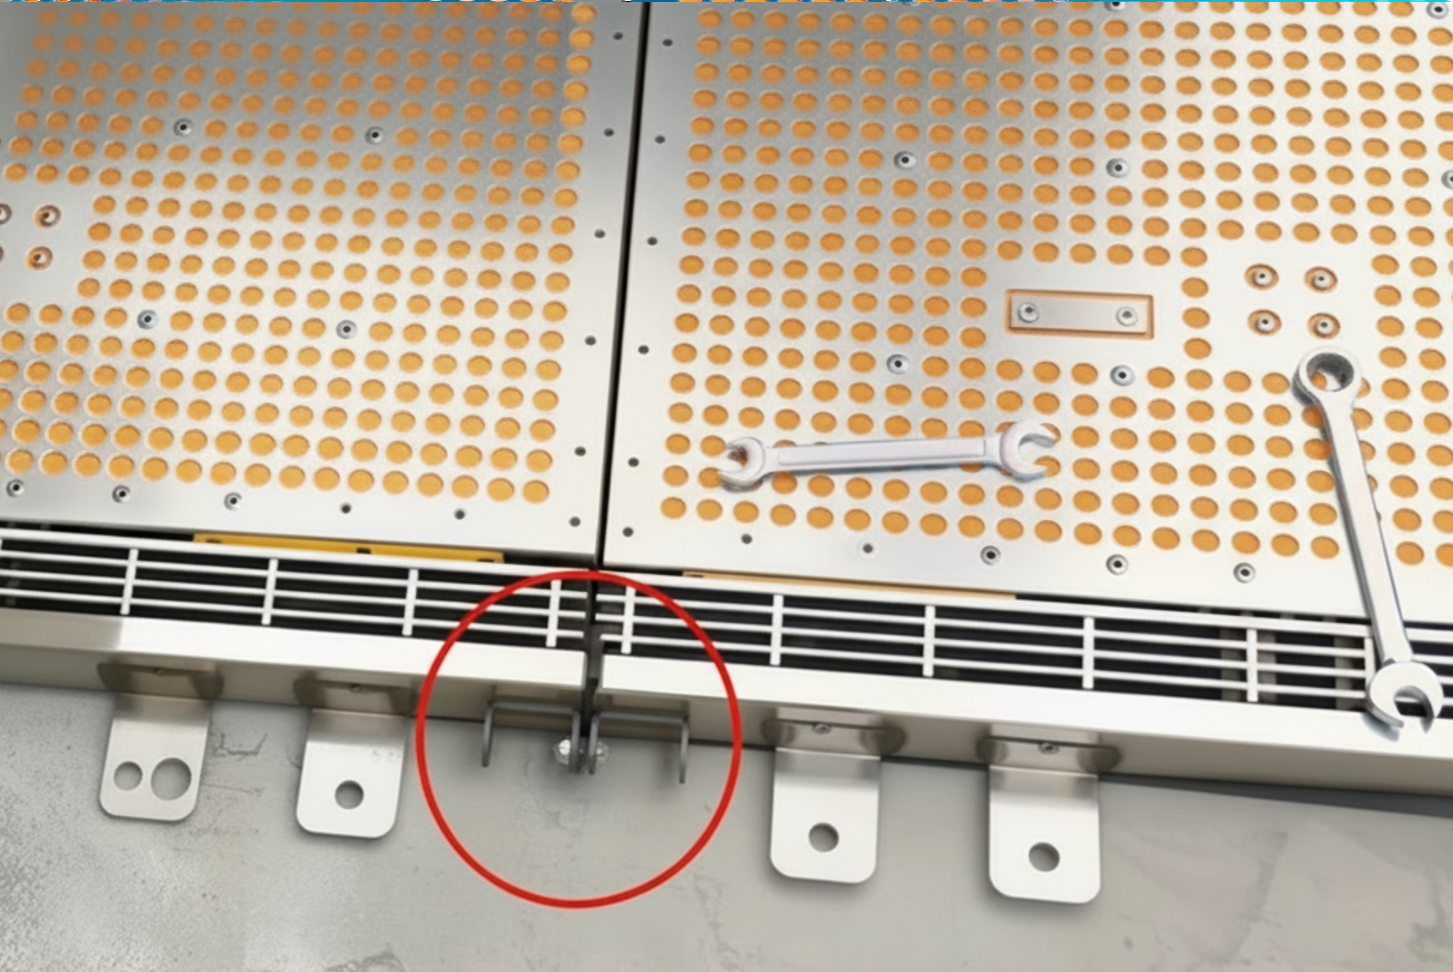
Connect Panels To Eachother
Lock panels together using the connection modules, with M8 self locking bolts and nuts. Once all panels are connected. Confirm positioning of panels in preparation for anchoring.
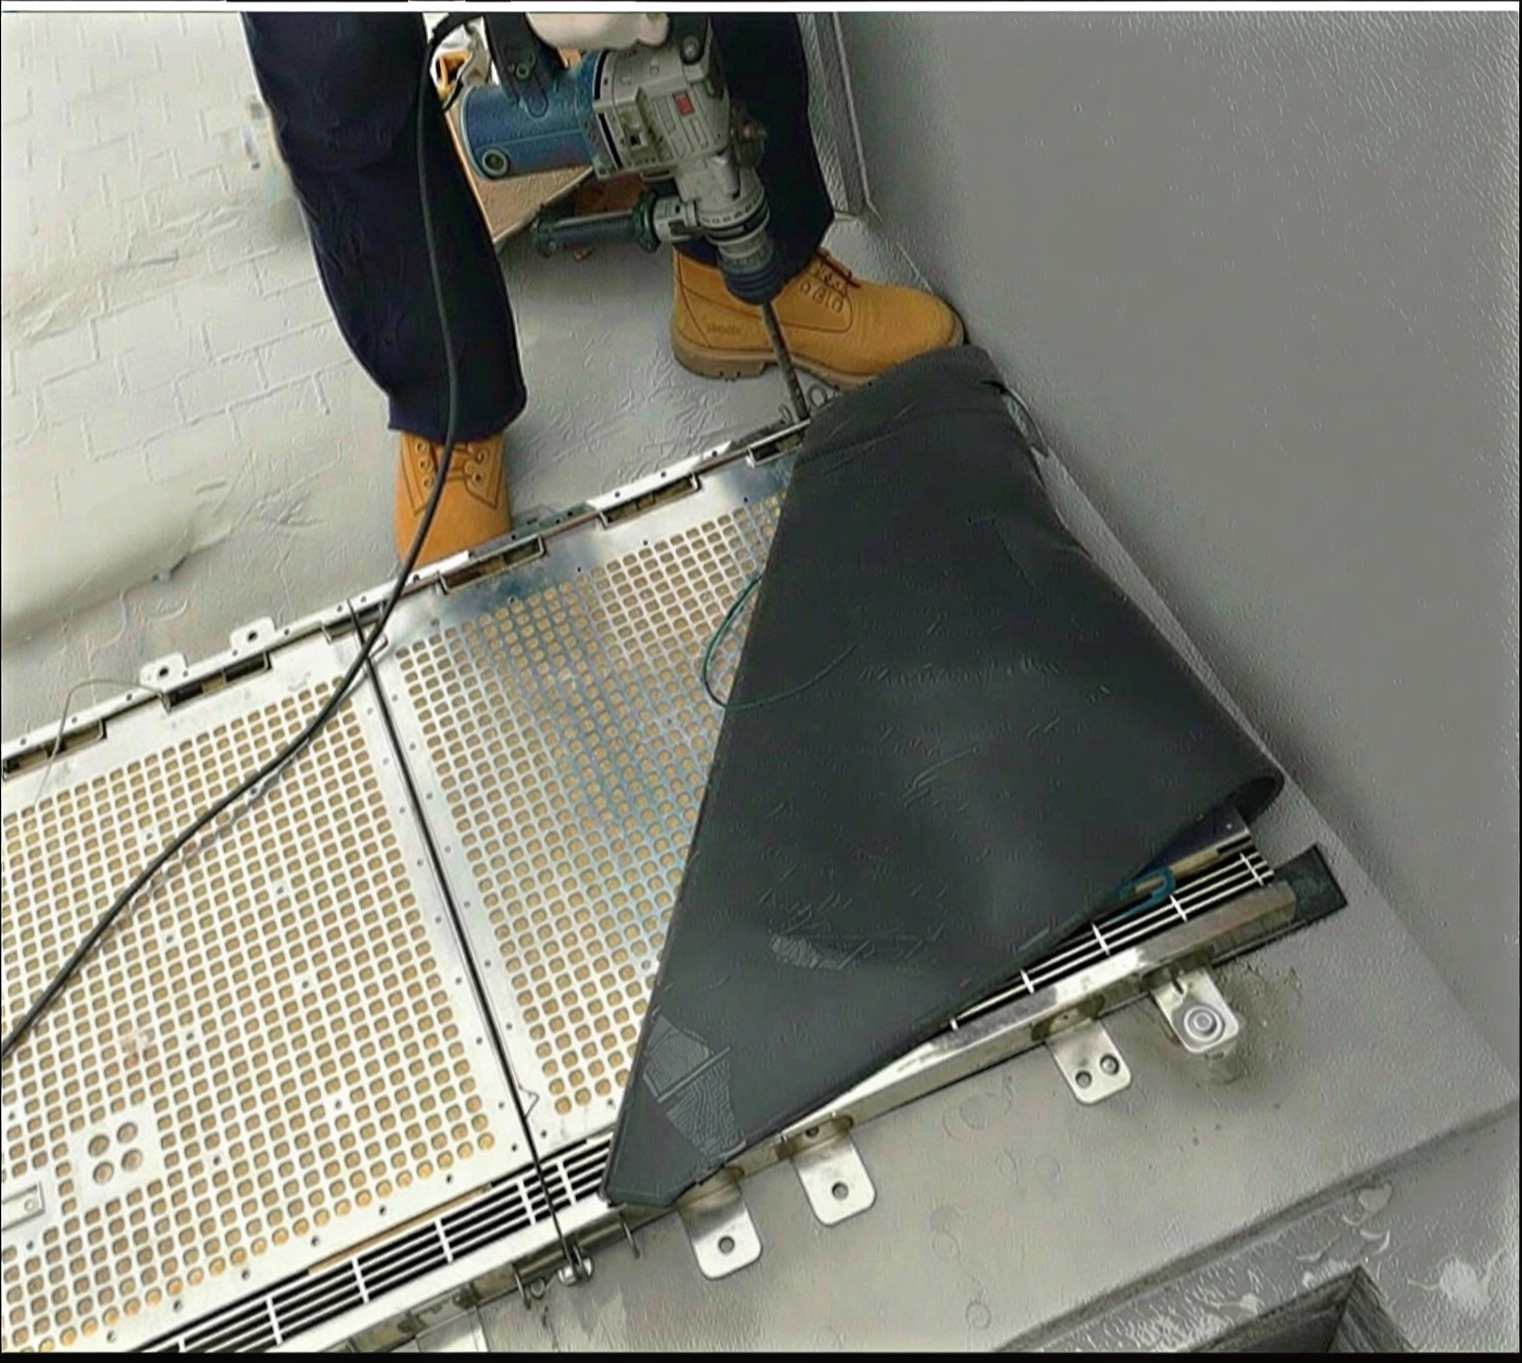
Drill and Anchor Ends of First Panel
Drill and place M10 expansion bolts to anchor the first panel into position. Remember to leave 2.5”-3.00” of space between the panel and the wall on either side.
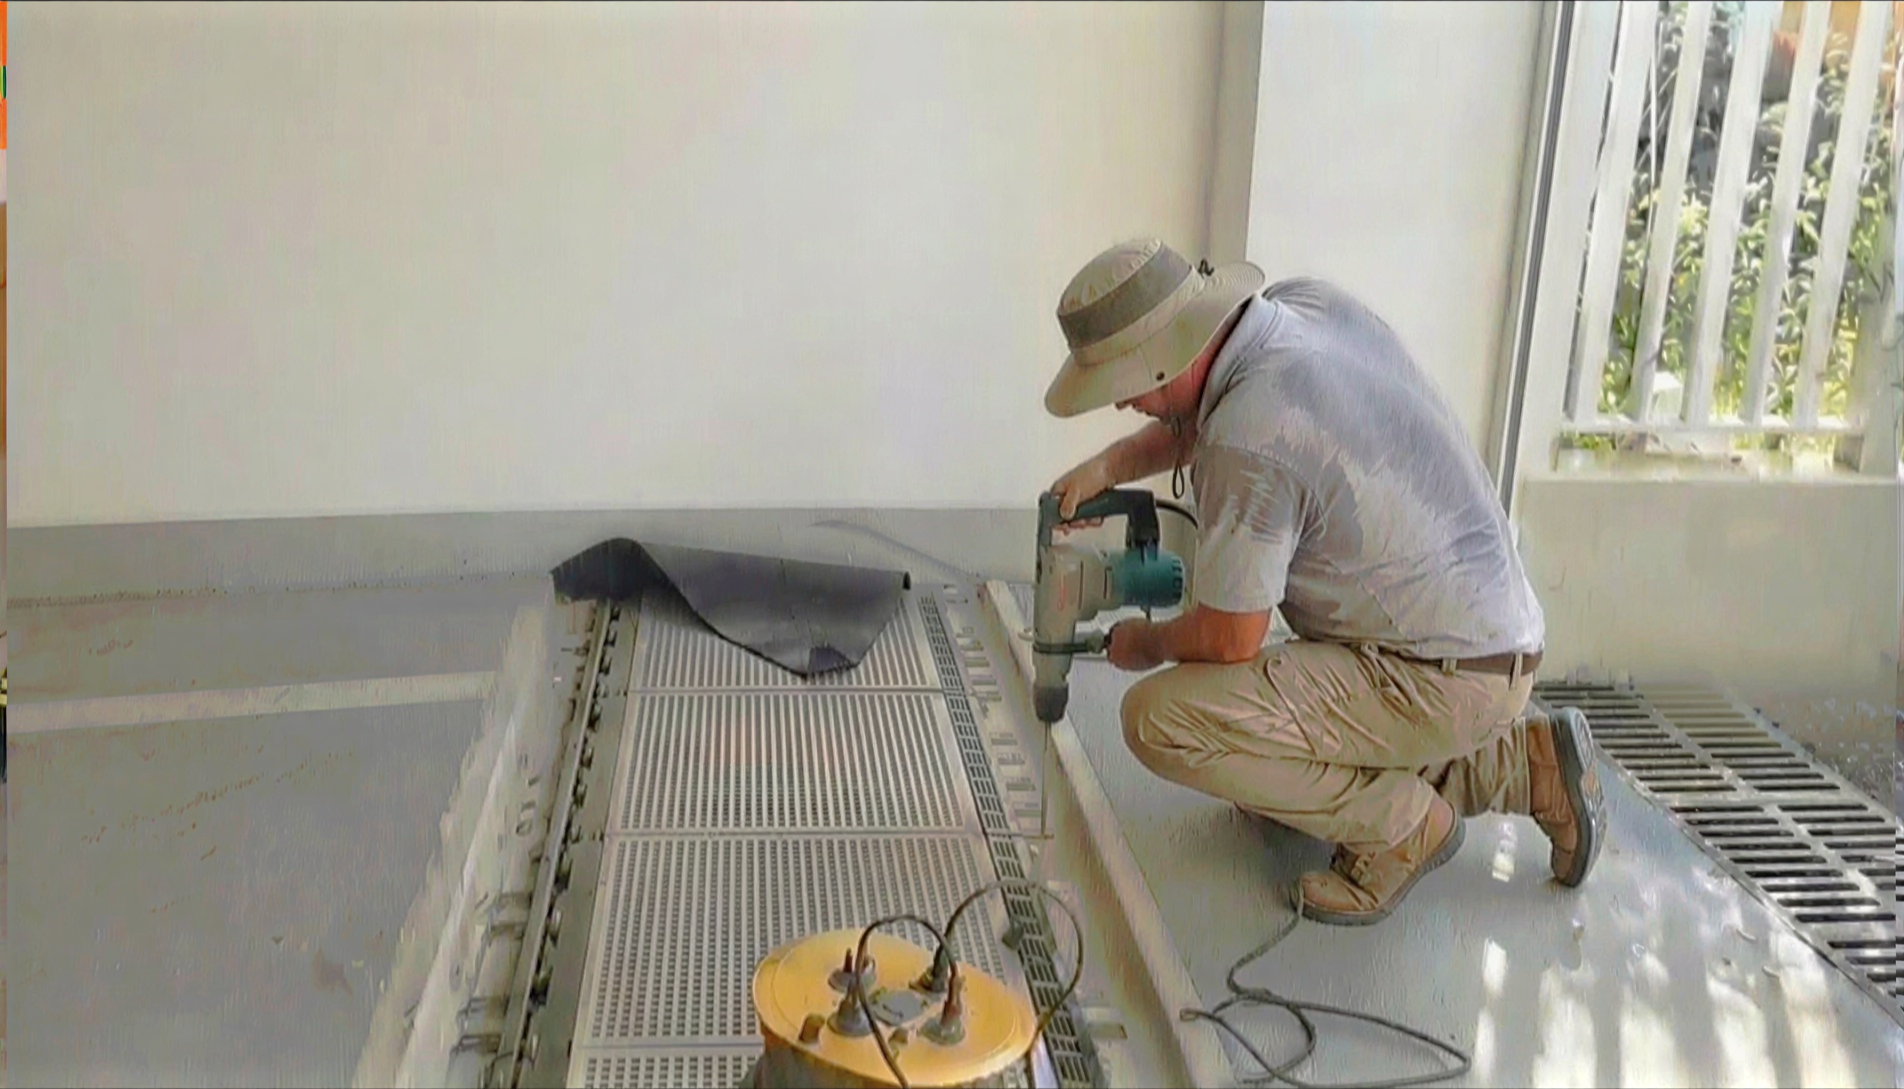
Continue Anchoring Panels
Continue drilling holes through anchoring tab and insert and tighten M10 expansion bolts to fasten panels to the ground. We recommend staggering drill holes and anchoring, anchoring 1-2 locations per panel and then returning to drill and anchor through the remaining anchoring tabs.
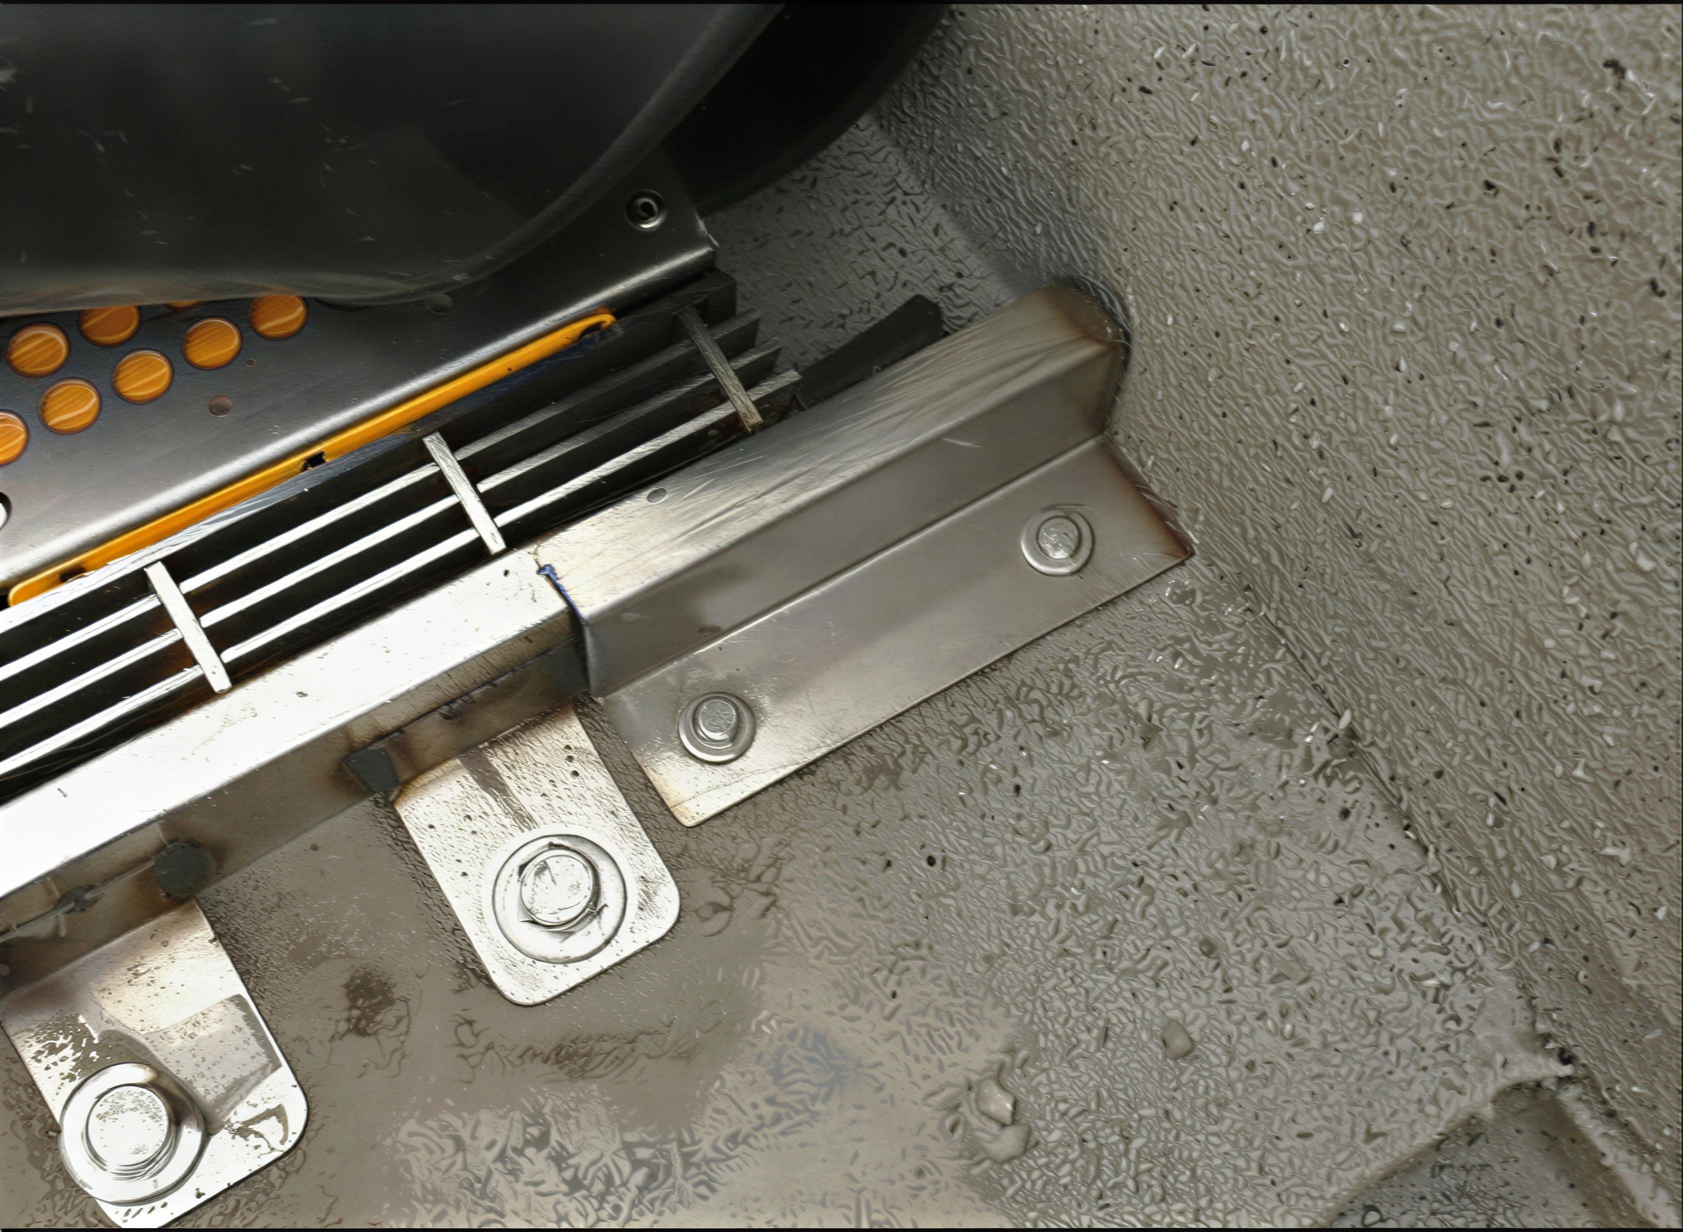
Add filler pieces to ends at wall
Cut Z shaped extrusion to span the remaining opening. Use adhesive caulk to seal the connection between the extrusion and the end panel and the extrusion and the wall. Z extrusions are used on both sides of the opening AND on both sides of each panel (waterside and dry side). Bolt the Z shaped extrusion into position using M6 * 65 small expansion bolts. Be sure to cut the Z extrusion to overlap the panel edge by about 2”
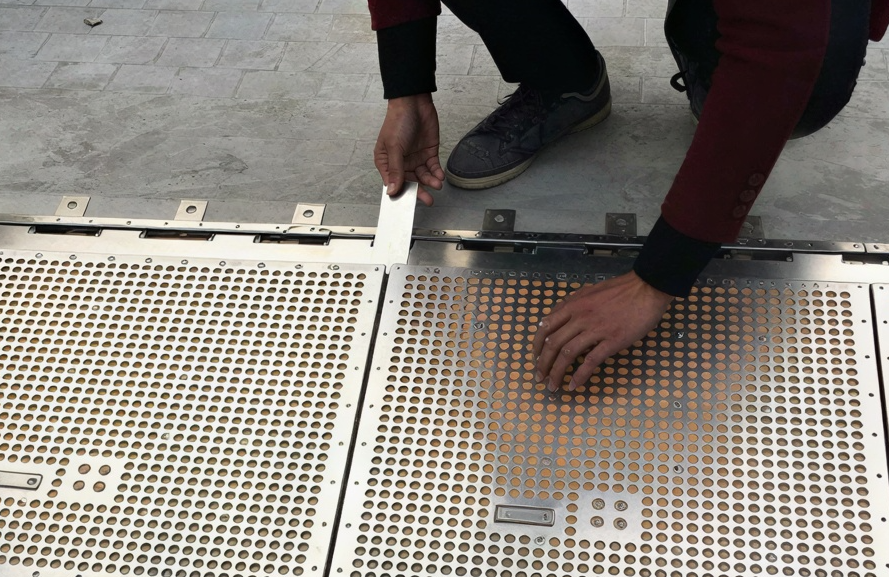
Slide the Silicone and Steel Sealing Strips Between Modules
Slide the silicone sealing strip, together with the steel sealing sheet, between the anti-skid aluminum top plate and the next layer. The Silicone layer goes underneath the metal layer.
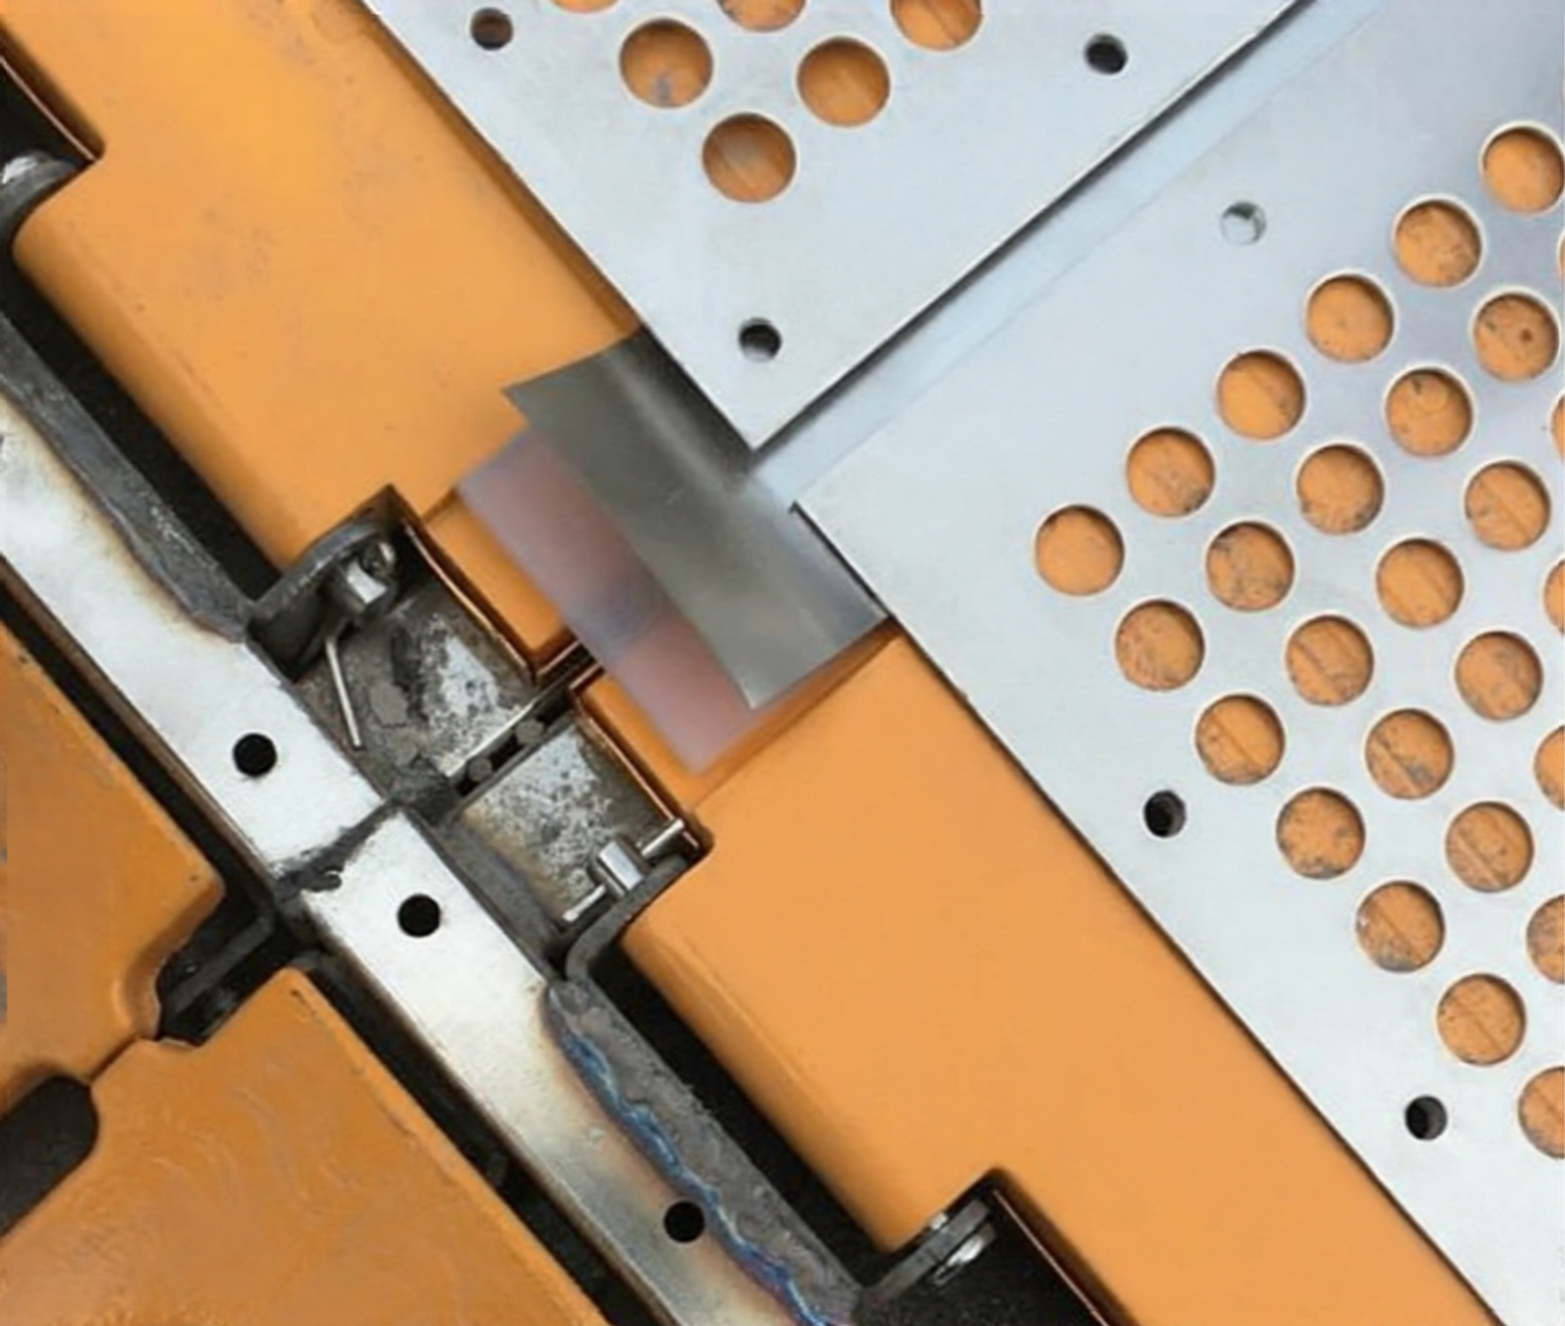
Ensure The Sealing Strip Is Properly Positioned
Take care to ensure that you place the two layers into position, such that they evenly span the seam between panels. Use adhesive to glue the exposed strips down to the panel.
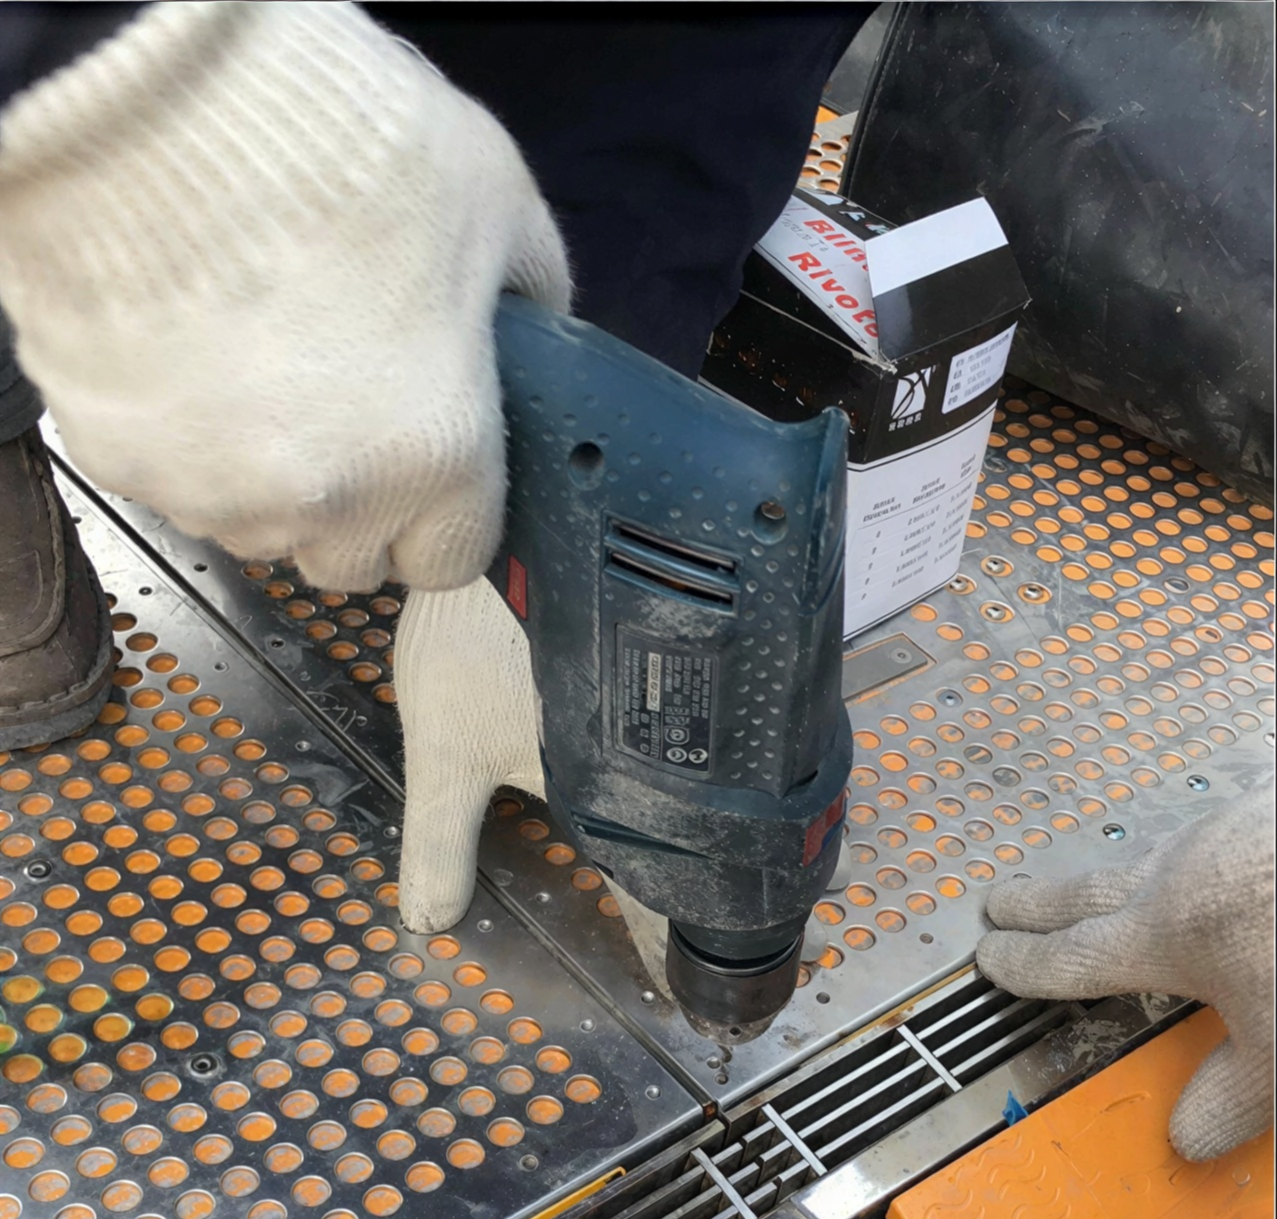
Drill Holes in Preparation for Rivets
Drill holes for 4.8mm rivets on both sides of the seam between the panels.
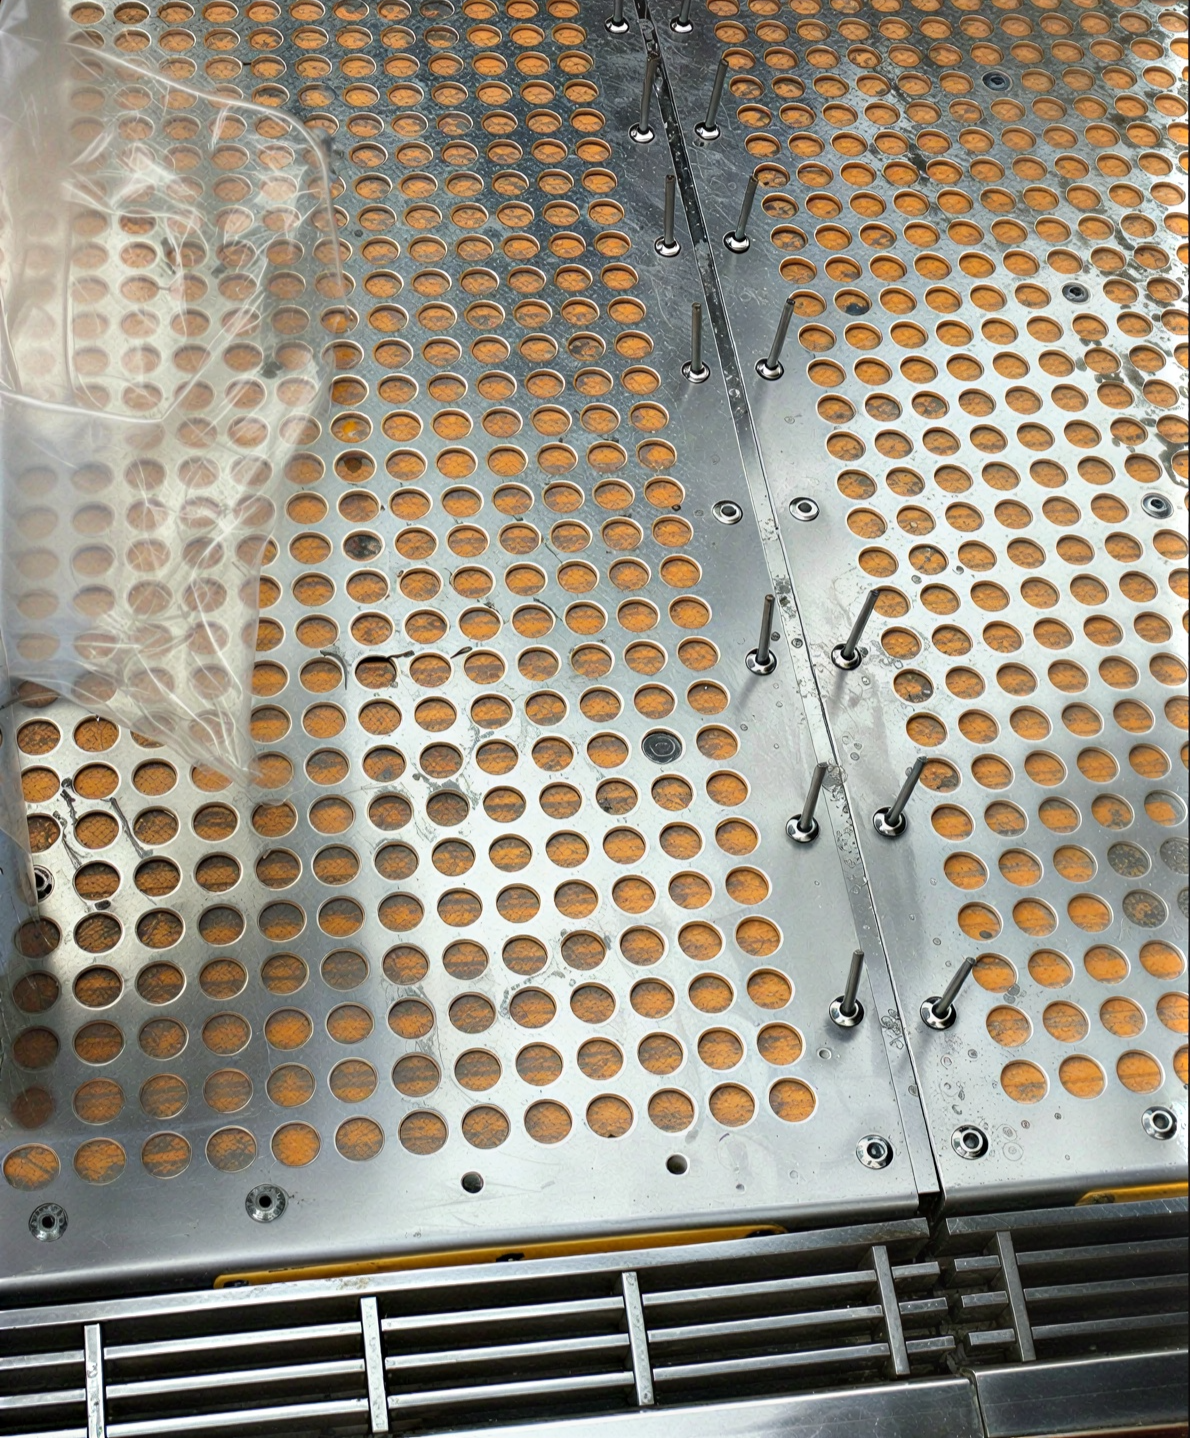
Insert and Fasten Rivets
Insert and fasten rivets, locking the seaming sheet layers into position and creating a watertight sea between the panels. When the system rises during a flood, all fastened panels will now rise together.
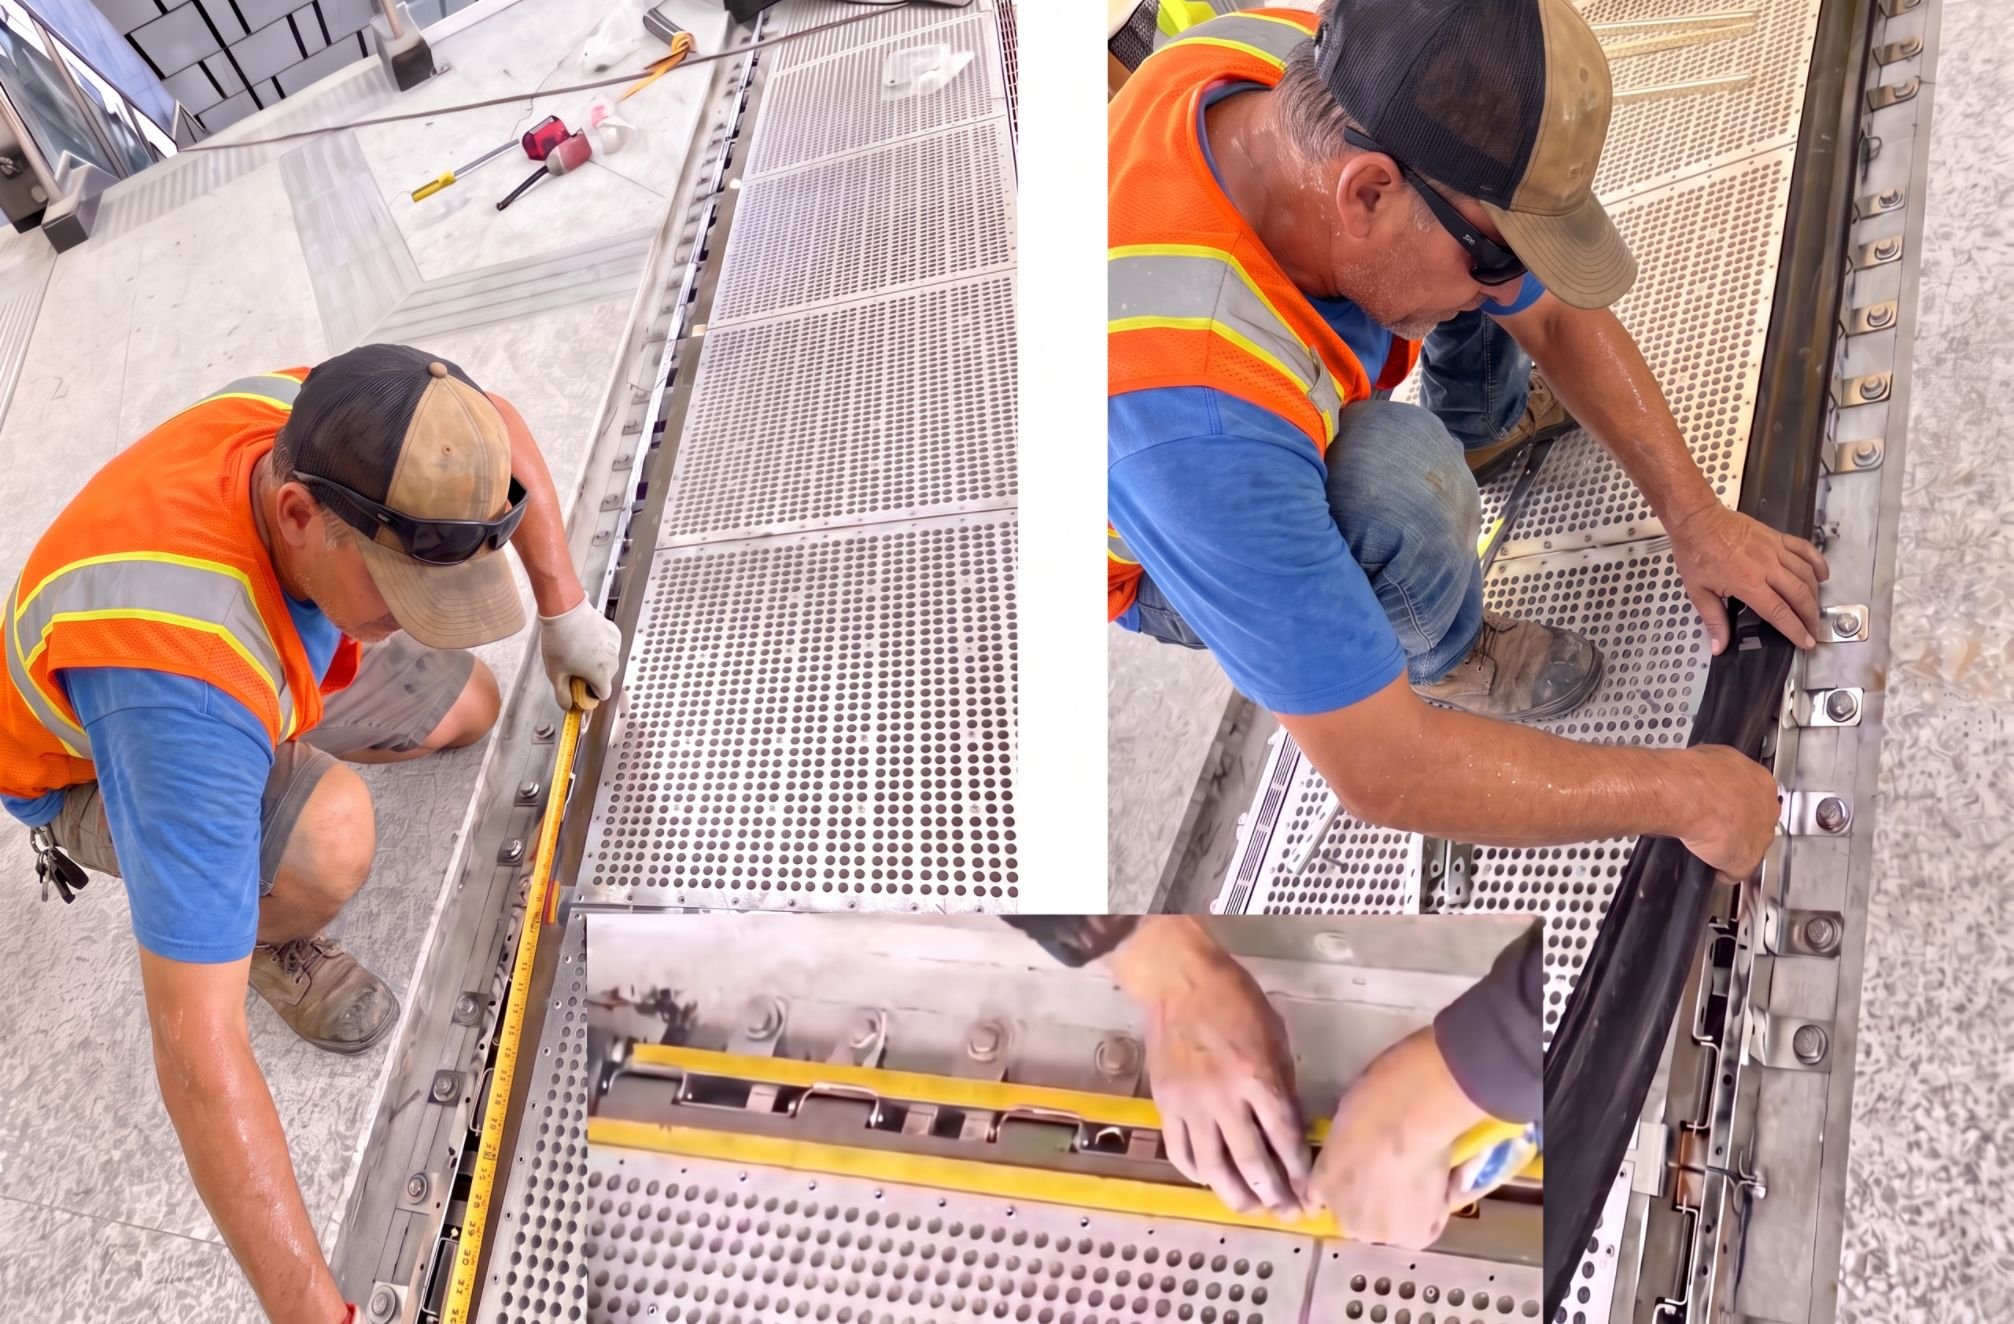
Lay Tape and Then Rubber Sealing Strip Along Hinged Area
Lay a strip of double sided tape on either side of the hinge area. Then, position and place the flexible rubber sealing strip onto the tape strips to as the first step in sealing the connection between the flip-up flood gate panel and the frame.
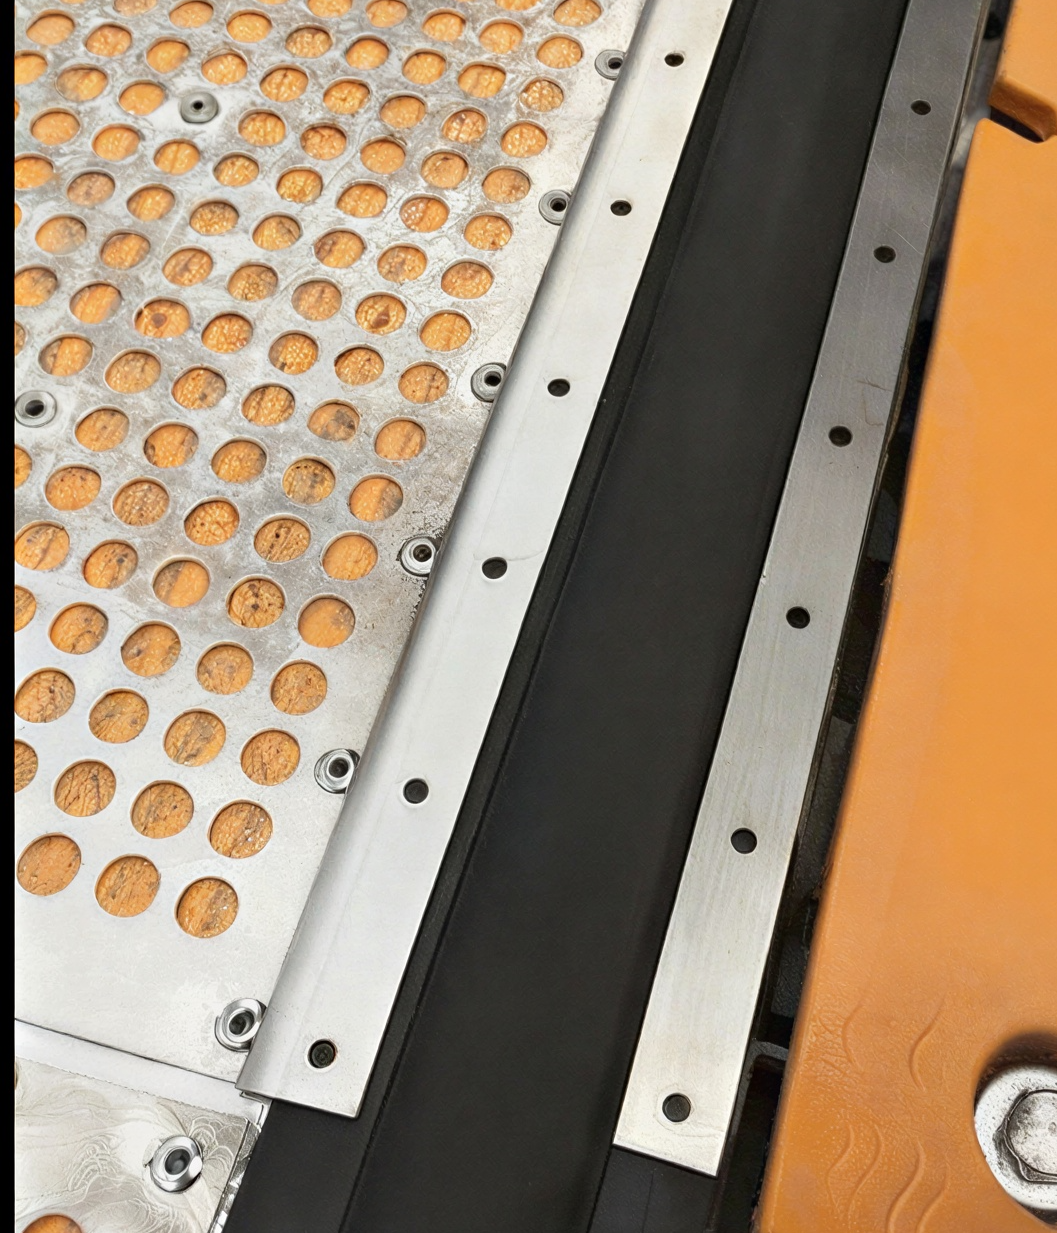
Lay Steel Fastening Strips Over Rubber Seal
Align and lay the flat steel fasting strips on either side of the rubber seal, positioning them over the flip up panel edge on one side and the lower frame on the other side. The metal strips fasten the rubber seal to either side of the hinged opening, creating a solid and continuous water seal.
Note: Be careful not to overlap the existing panel rivets with the metal channel or rubber gasket.
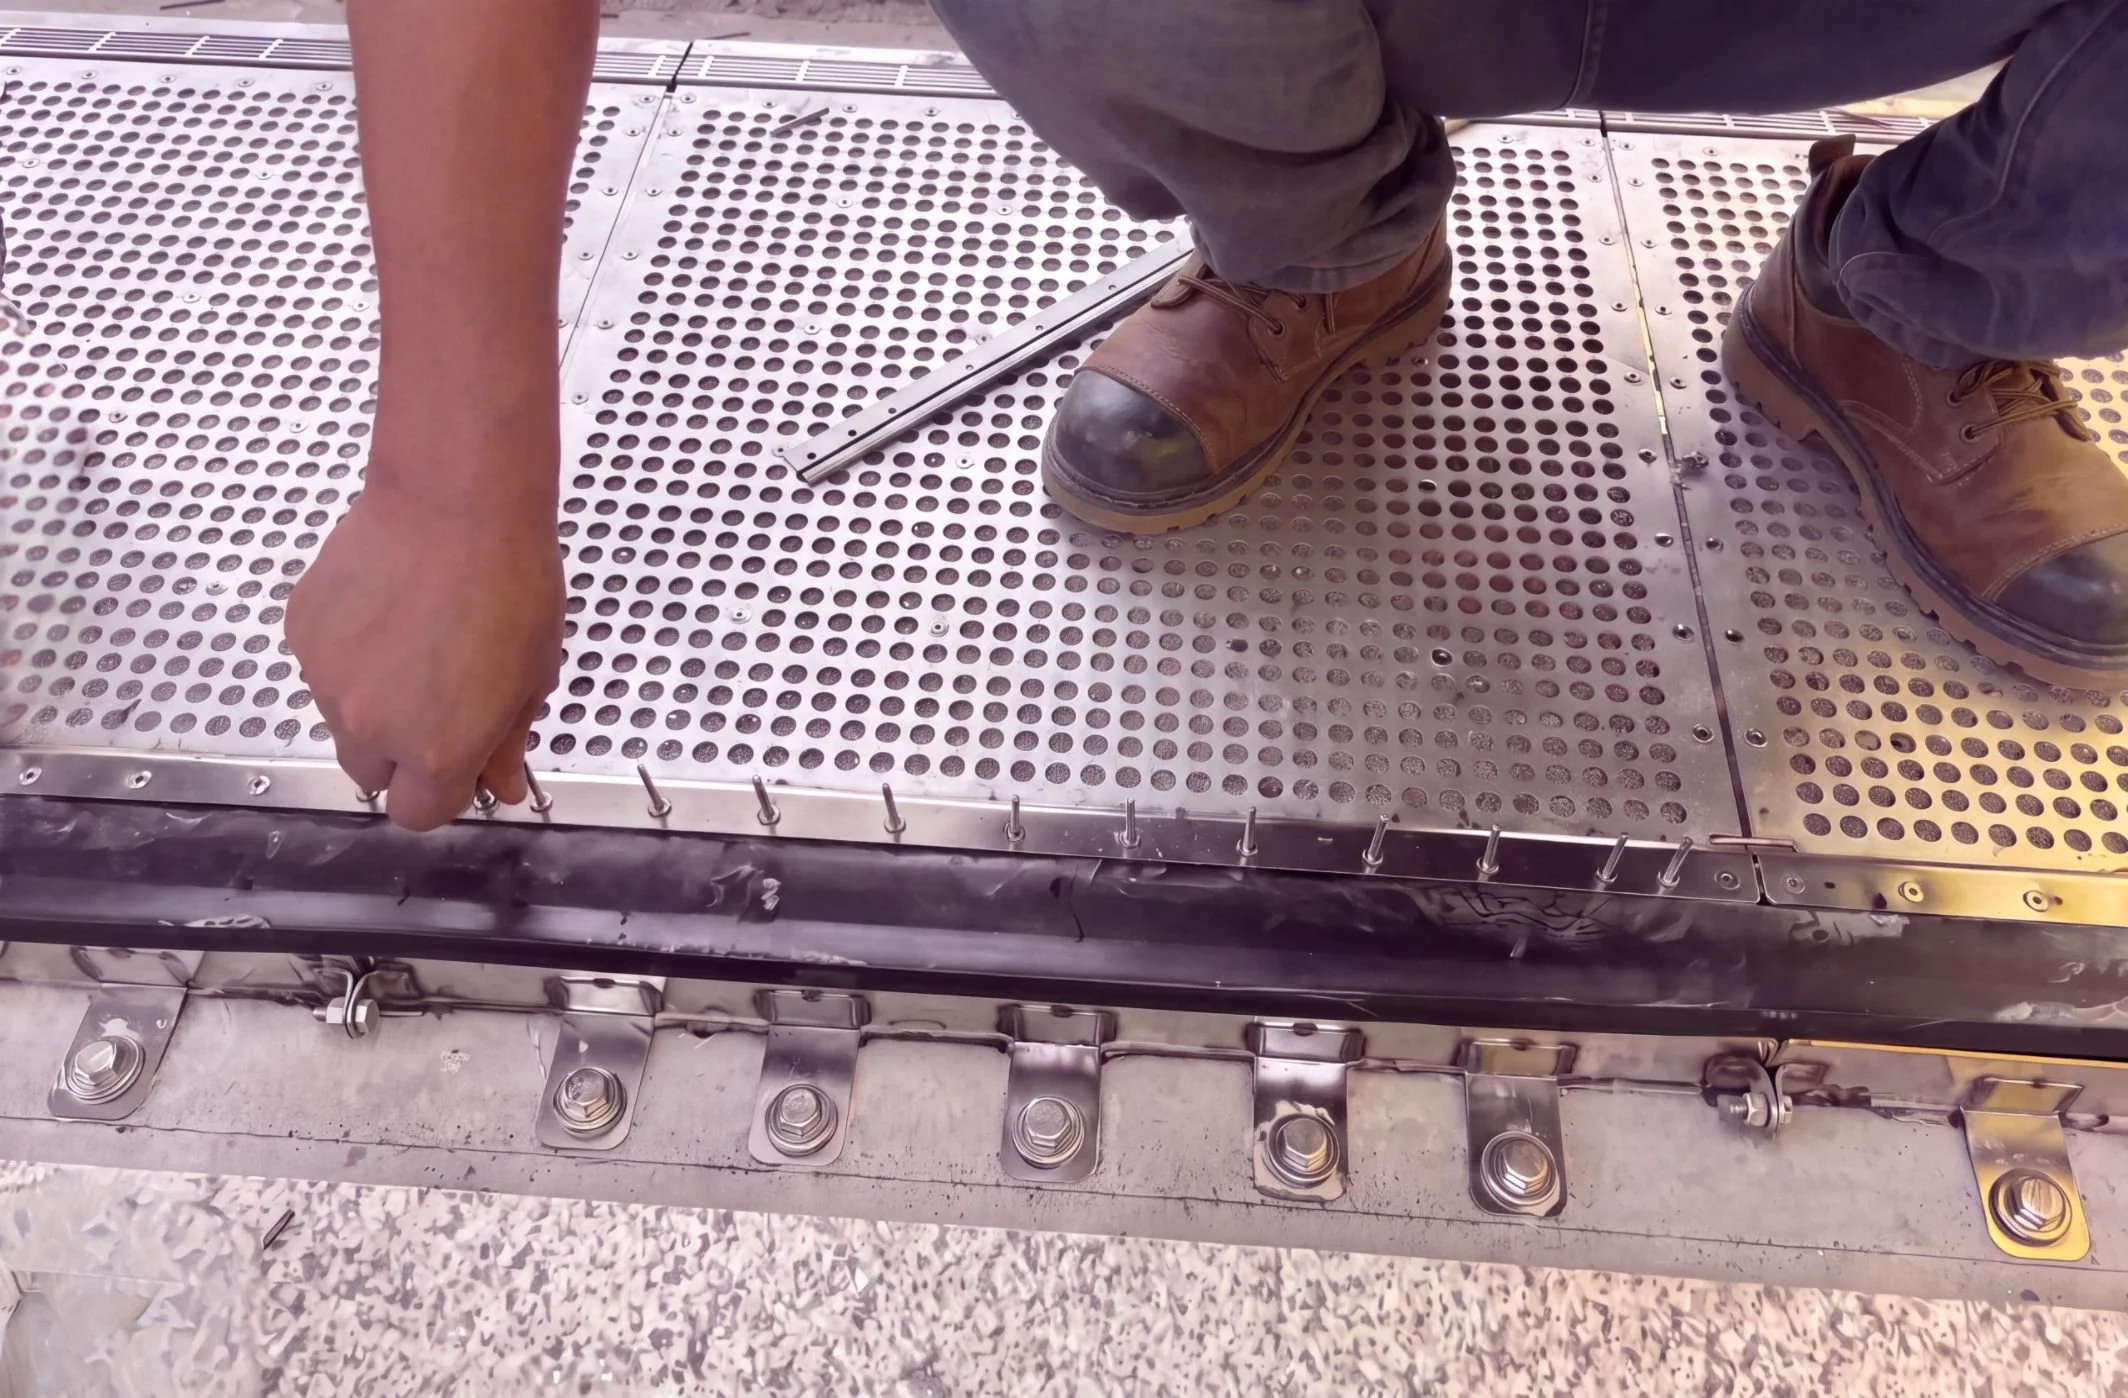
Drill Holes and Rivet Steel Strips to Panel and Frame
Use existing pre-drilled holes in metal fastening strips to guide drilling for rivets. Then insert and fasten rivets
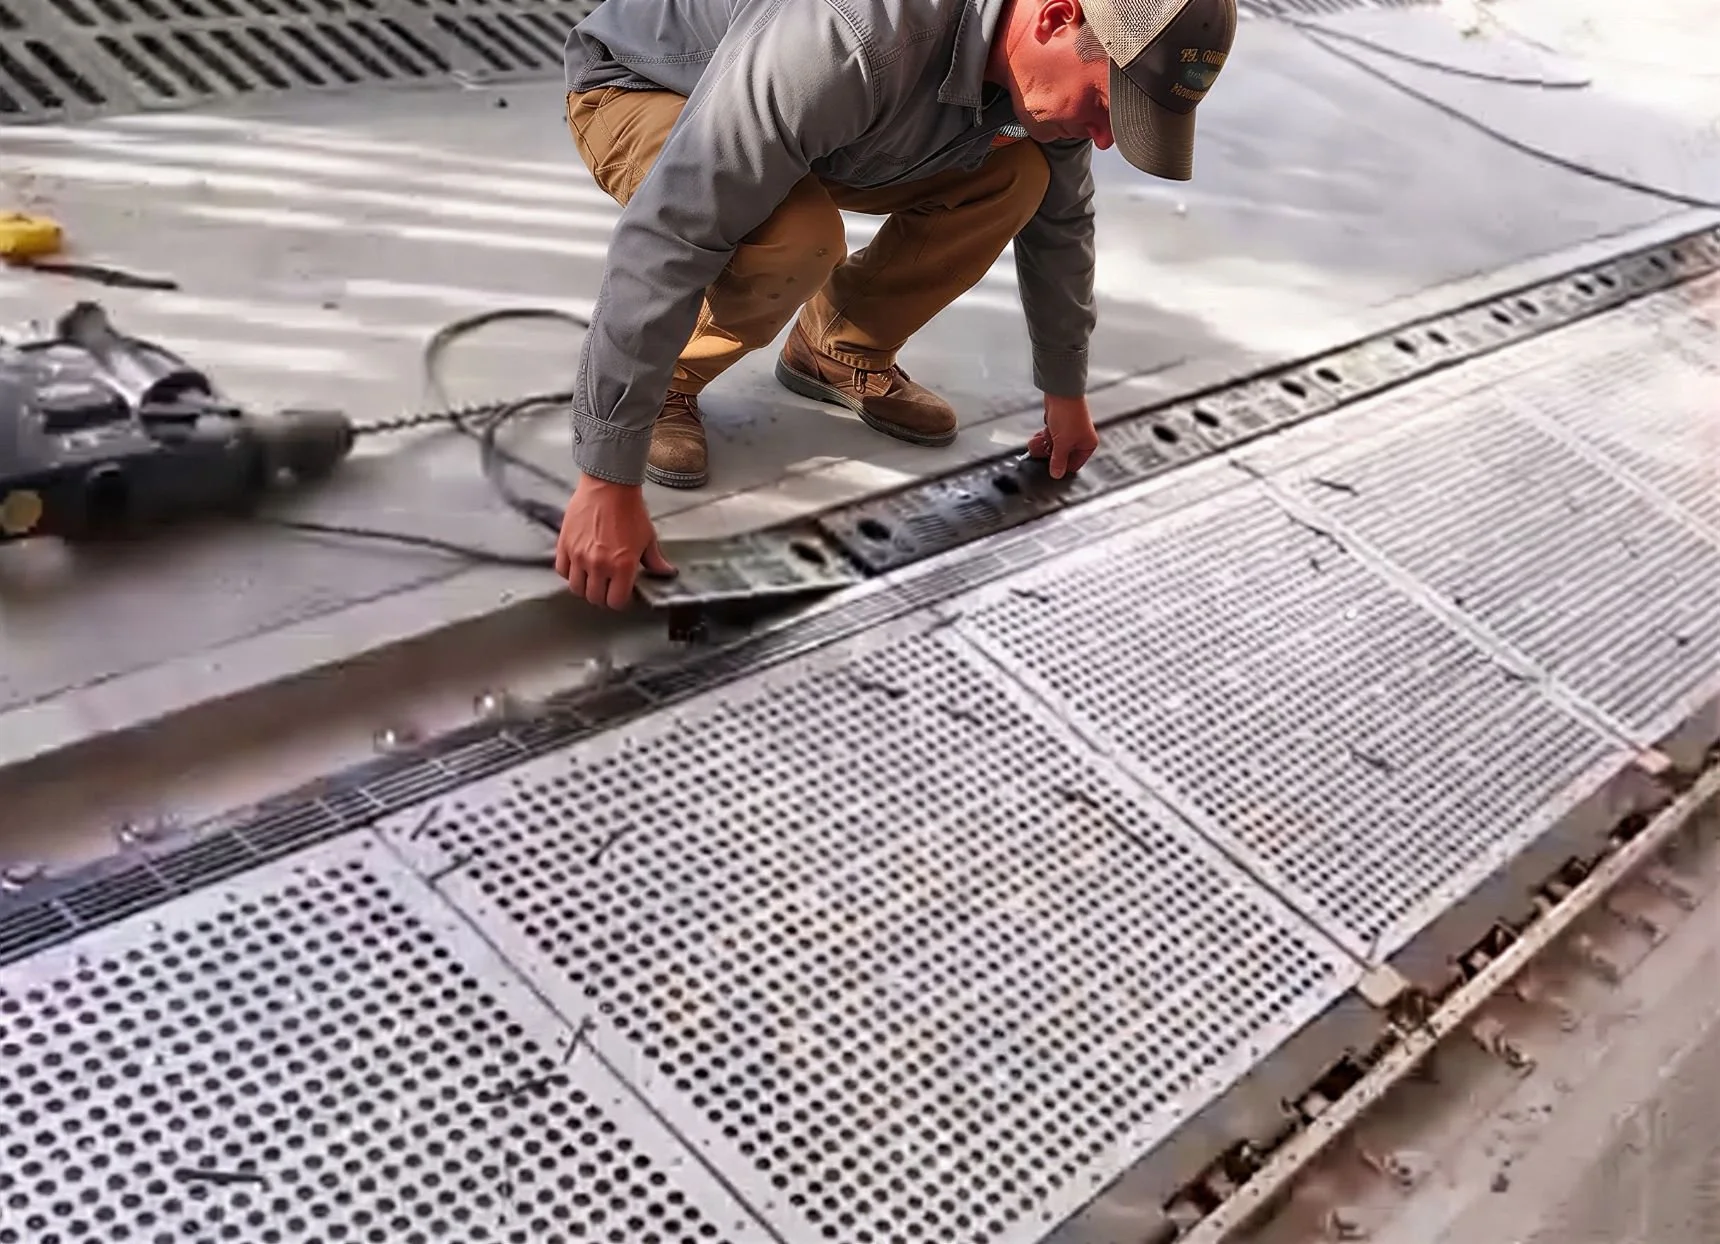
Position and Anchor Ramped Edge Pieces
Position edge filler pieces on both sides of the flood gate panel, drill anchor holes using the holes in the ramps to guide you. Bolt into place using expanding anchor bolts. These filler pieces create a smooth transition between the edges of the channel and the flood gate panels.
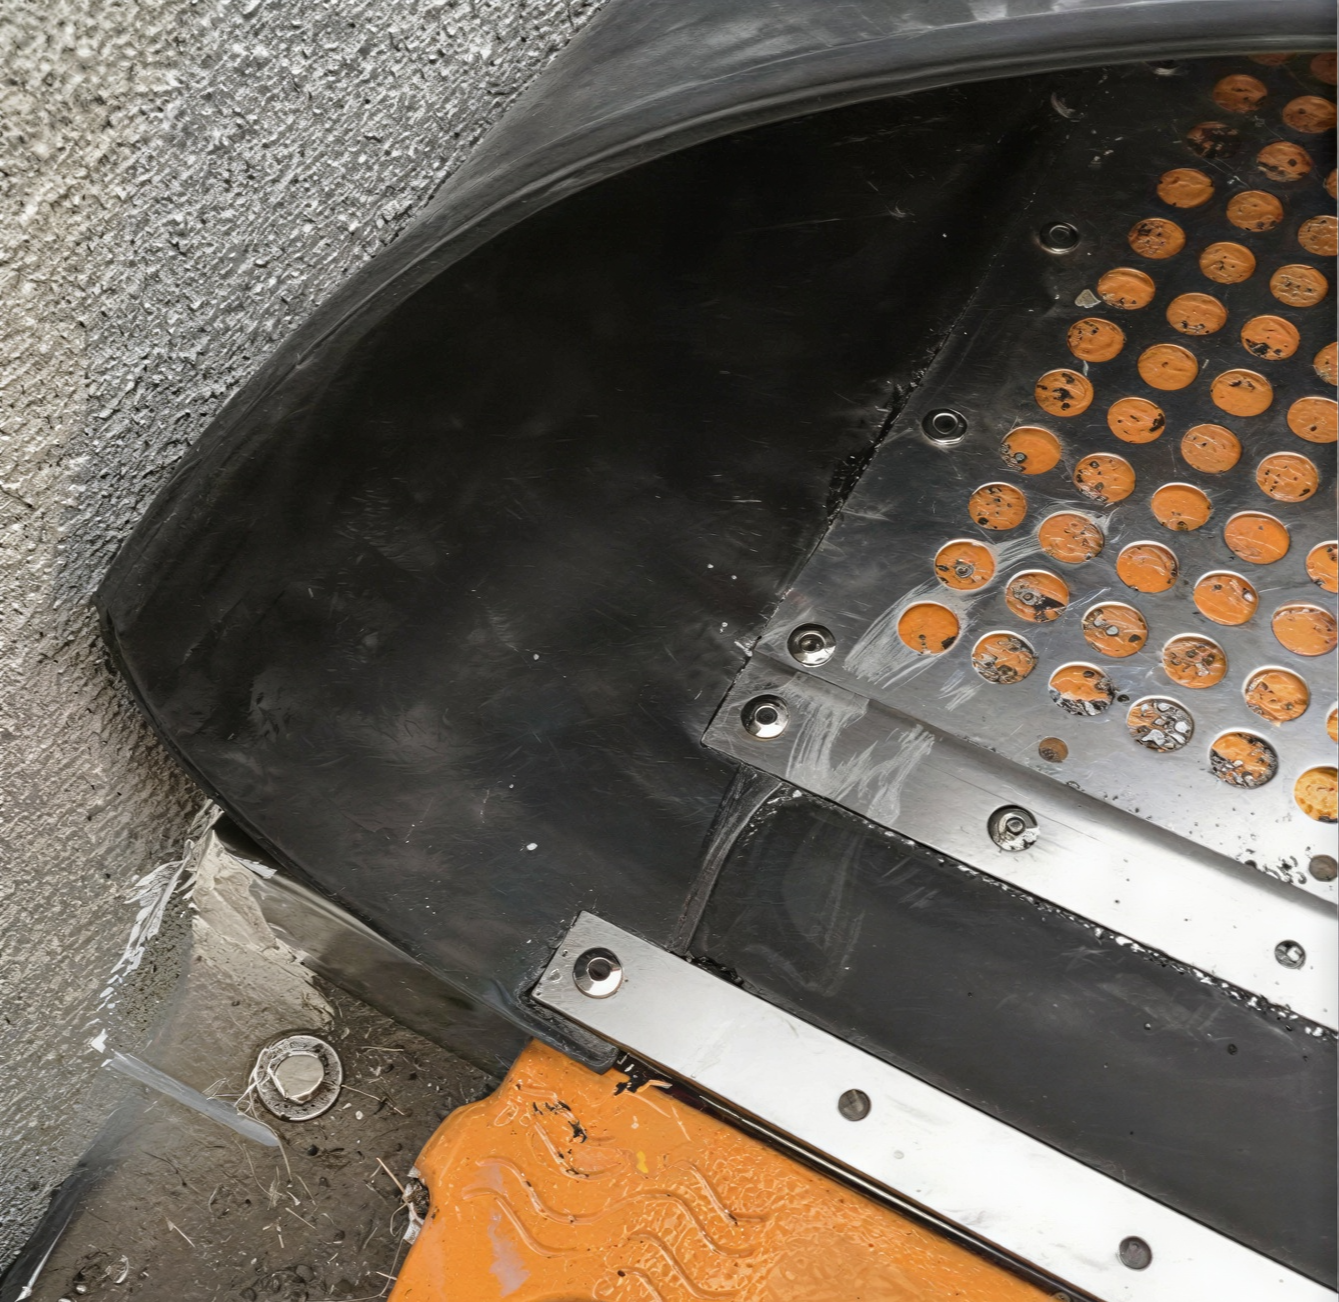
Place and Rivet Rubber End Triangle Under Metal Strip
Place the bottom corner of the rubber triangle seal (for the connection to the wall) under the end of the metal fastening strip and drill and rivet into place, connecting this seal to the hinge seal.
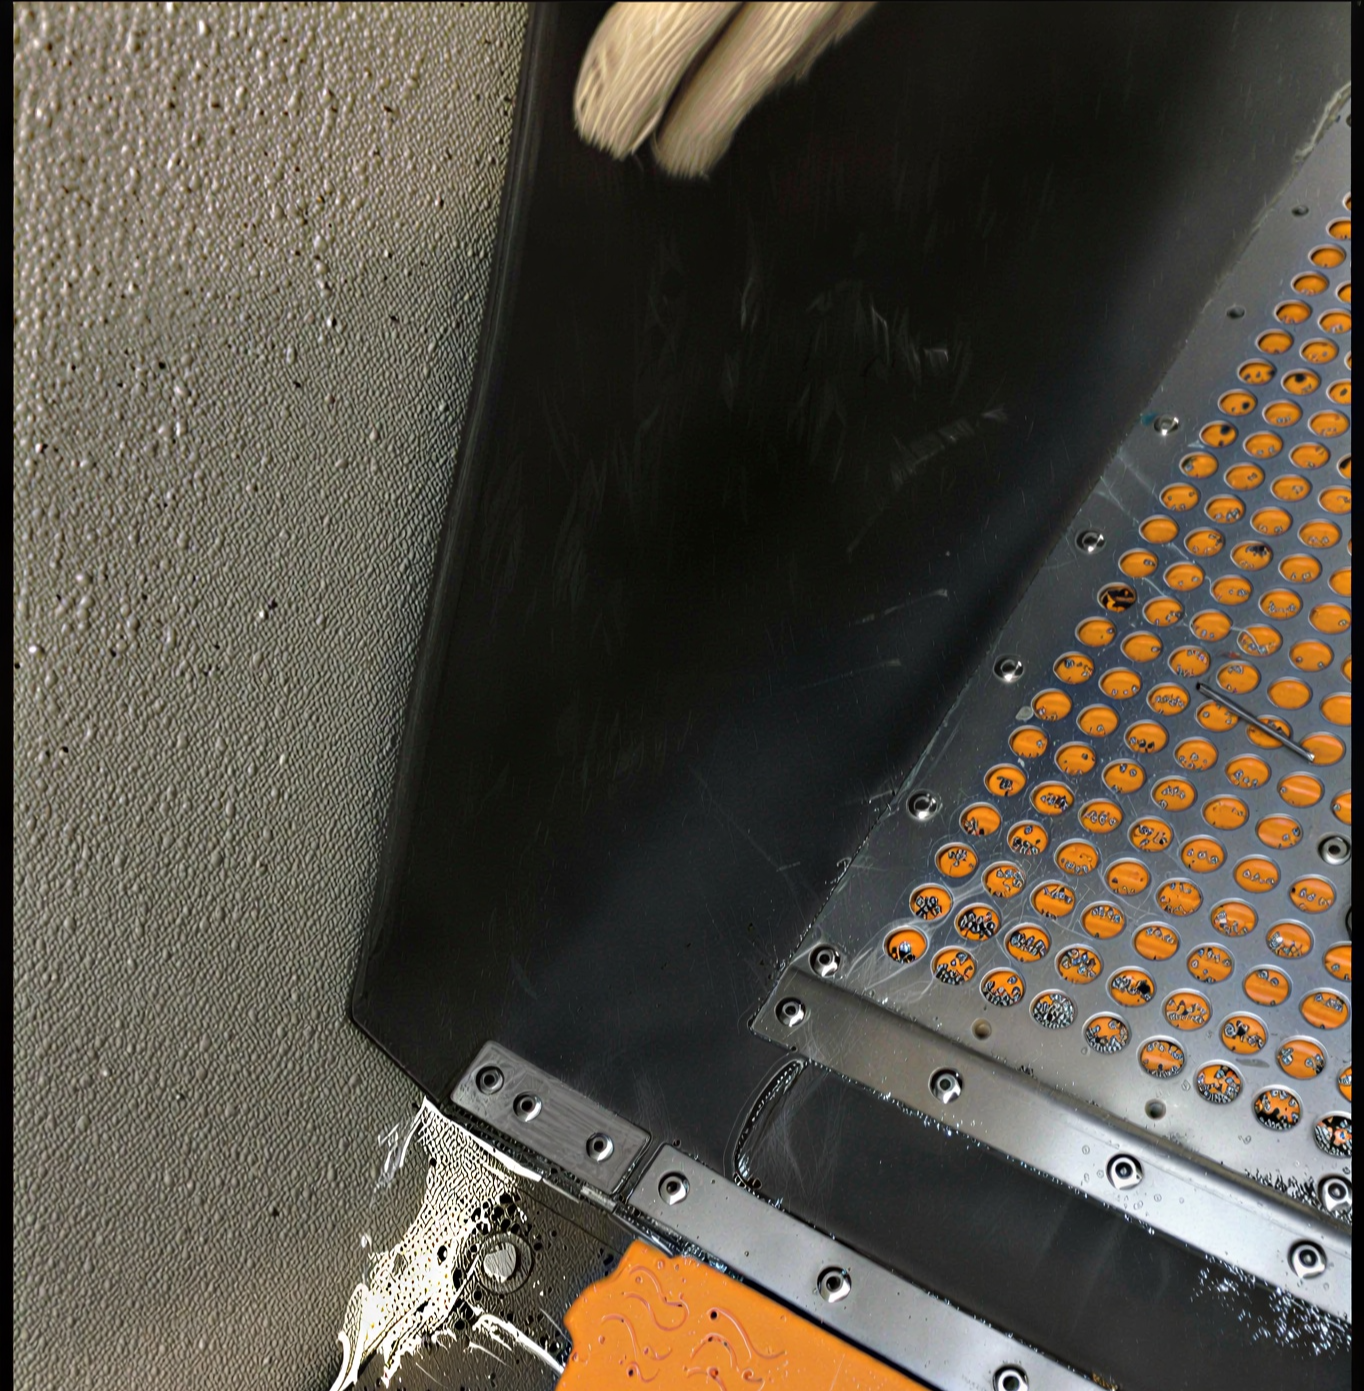
Cut and Add Metal Filler Piece
Measure and cut to size an additional section of the metal fastening strip and position it over the edge of the triangular sealing strip. Drive and rivet the extra piece to connect the edge of the triangular sealing rubber to the Z metal extrusion filler piece used to bridge the distance between the panel and the wall. Generously apply caulk at the corner intersection between the Z extrusion, the rubber and the wall, to create a good seal.
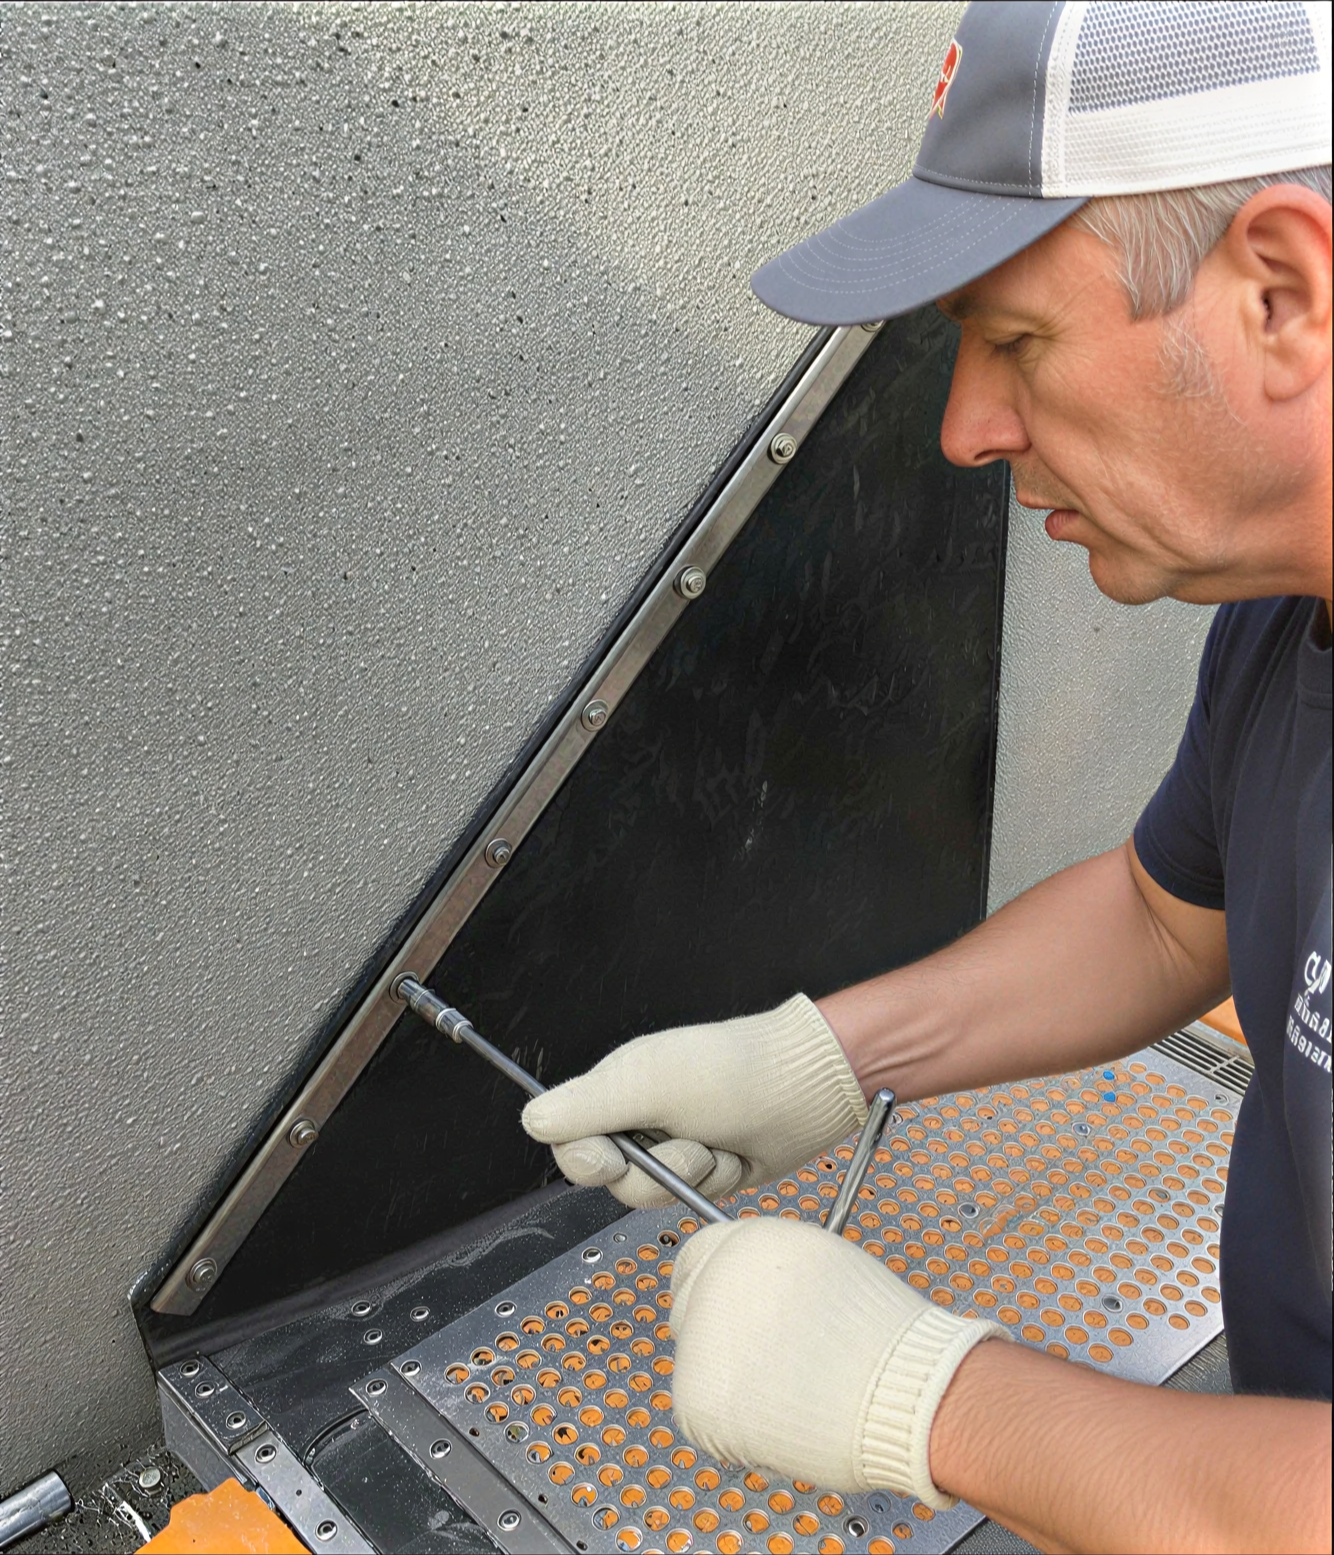
Cut and Attach Metal Finishing Strip
Place rubber triangular seals (both sides of barrier run) against the wall and align metal fastening strip section over the top edge of the rubber seal. Drill holes for M6x65 expansion bolt anchors, place anchors, and tighten down the metal fastening strip and rubber seal, forming a watertight connection..
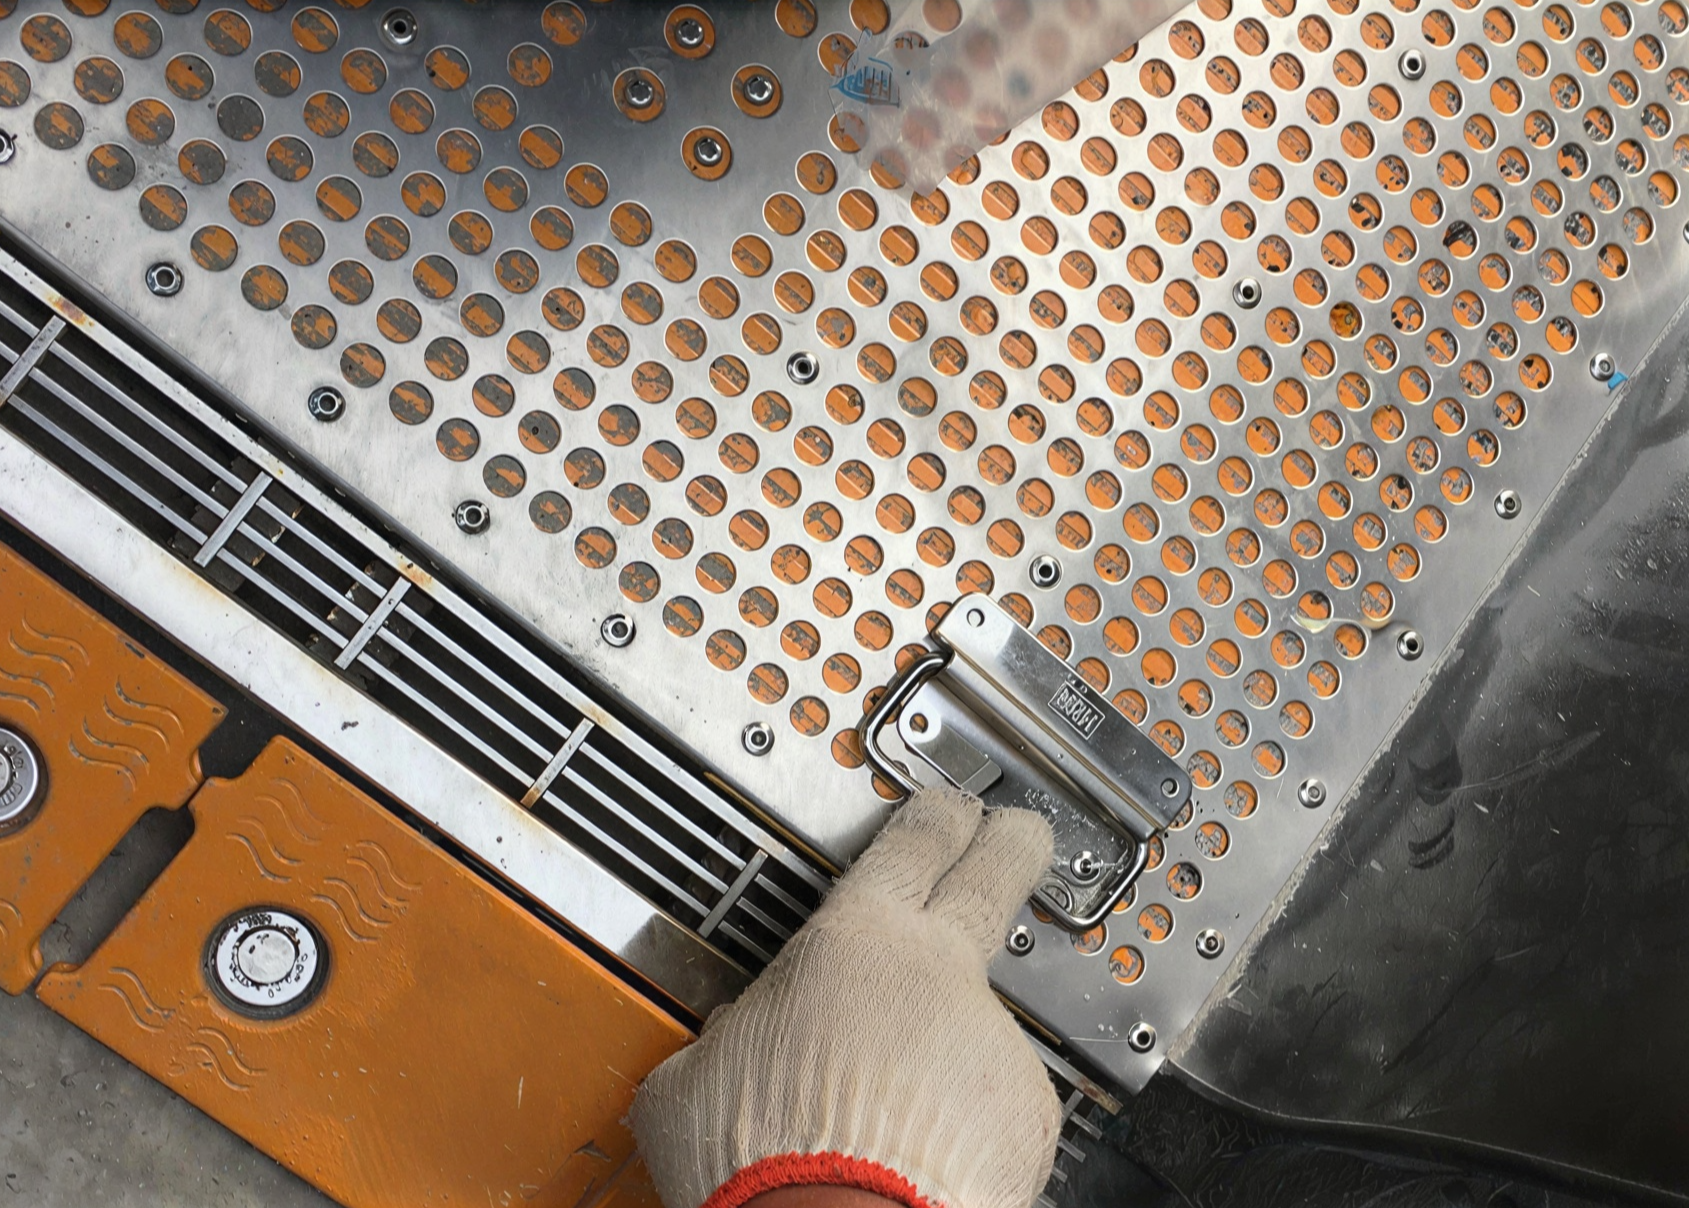
Add Auxiliary Lifting Handle
The auxiliary handle is used for opening the flood gate for maintenance and cleaning. For flood gate system with a total length of 15 ft or less an auxiliary handle should be installed on the left and right barrier panels respectively. For those with a total length of 15-30 feet, a 3rd auxiliary handle position should be added in the middle position, and for longer sections, additional handles should be installed roughly every 15 feet.
To install a handles, drill and rivet handles into position via the 4 pre-drilled holes.
Your Oyster Flood Gate Installation is Complete
Congratulations on installing your Oyster Automatic Flood Gate System, one of the most innovative self-rising flood barrier systems on the market.